HSA-HPK Install Instructions
Open the original PDF document
View PDFHSA-HPK Aperio® Power Kit
SECURITRON ASSA ABLOY
Experience a safer and more open world
Installation & Operating Instructions
Product Components
HSA-HPK
(Hard Power Kit)
- A Power Adapter
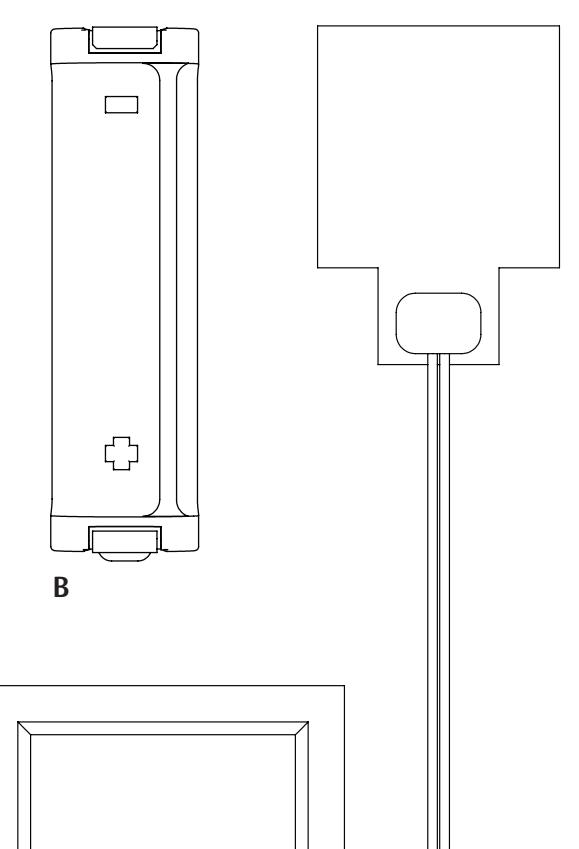
- B Jumper
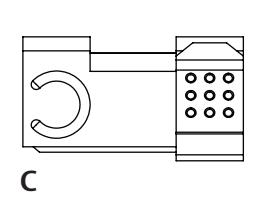
- C Battery Contact* *Included Battery Contact required for DR100 only
HSA-HE
(Heating Element)
- D Alcohol Swab
- E Heating Element
HSA-CWK
(Cold Weather Kit)
- A Power Adapter
- B Jumper
- C Battery Contact* *Included Battery Contact required for DR100 only
- D Alcohol Swab
- E Heating Element
Diagram 1 Product Components

Product Specs
| Parameter | Values |
|---|---|
| Voltage Input | 12 – 24 VDC |
| Voltage Adapter Output | 3.3 VDC |
| Voltage Heating Element Output | Matches input voltage |
| Max Operating Current Draw | Varies by product, see product specifications |
| Max Operating Current Draw — with Heatet | 120 mA at 12 VDC | 240 mA at 24 VDC |
| Storage Temperature | -40° to 185° F (-40° to 85° C) |
| Max Operating Relative Humidity | 85 +/- 5 % RH at 86° F +/- 5 % F |
|
Operating Temperature
w/HSA-HE/CWK Installed |
-31° to 150° F (-35° to 66° C) |
| Operating Temperature w/HPK only | Varies by product, see product specifications |
| Minimum Firmware Version Required* |
Aperio 3.14 and Latest Aperio
Programming Application Version |
| Max Power Wire Distance | 250ft @ 18AWG 1 A Power Supply |
Hard Power Adapter K100/KS100 Cabinet Lock Installation
- 1 REMOVE battery cover if previously installed.
- 2 REMOVE previously installed batteries (if applicable).
- 3 INSTALL AA Power Adapter into battery pocket as shown. Ensure adapter is installed in the proper orientation.
- 4 INSTALL AA Jumper into battery pocket as shown. Ensure jumper is installed in the proper orientation to allow room for cable routing.
- 5 ROUTE Power Adapter wires as shown.
- 6 SECURE battery cover to lockbody/battery bracket and mount per the product installation instructions.
- 7 CONNECT the positive (red) and negative (black) wires of the Hard Power Adapter to a 12-24 VDC power supply.

Hard Power Adapter DR100/ES100/DL100 Reader Installation
- 1 REMOVE back plate if previously installed.
- 2 REMOVE previously installed batteries (if applicable).
- 3 INSTALL AA Power Adapter into left side of battery pocket as shown. Ensure adapter is installed in the proper orientation.
4 INSTALL AA Jumper into right side of battery pocket as shown. Ensure jumper is installed in the proper orientation to allow room for cable routing.
NOTE: For DR100 only install provided Battery Contact (Item C) prior to the installation of Power Adapter and Jumper.

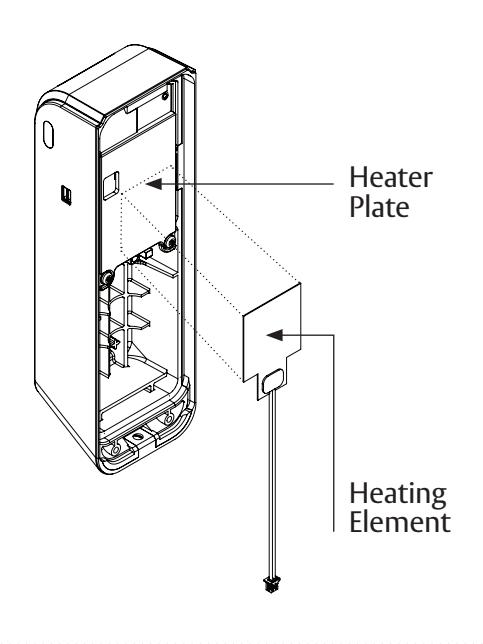
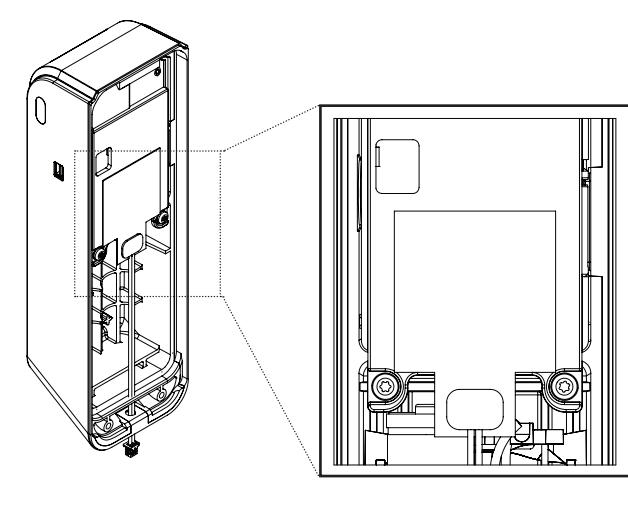
Heating Element Installation
- CLEAN surface of heater plate with provided alcohol wipe.
- APPLY heating element to plate by peeling off adhesive backing and pressing heating element firmly onto the heater plate.
- NOTE: Adhesive is permanent, ensure heater is placed inside of the pocket on the heater plate and no part of the heating element is outside of this area when installing.
Connecting the Heating Element to the Hard Power Adapter
- PLUG wire from heater wire harness into plug on AA Power Adapter as shown.
- 2 ROUTE AA Power Adapter wires and reader wire harness
- SECURE back plate to reader and mount reader per the product installation instructions.
- CONNECT the positive (red) and negative (black) wires of the Hard Power Adapter to a 12-24 VDC power supply.

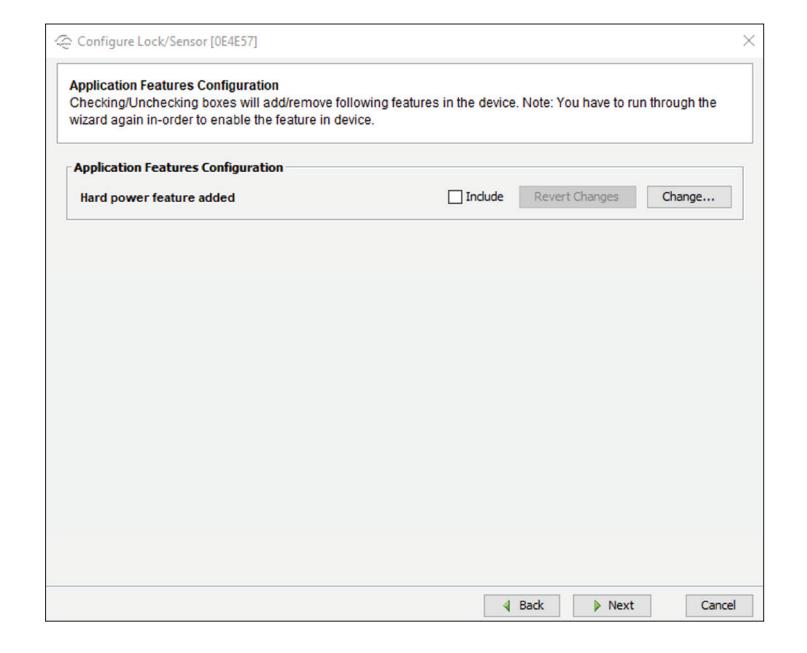
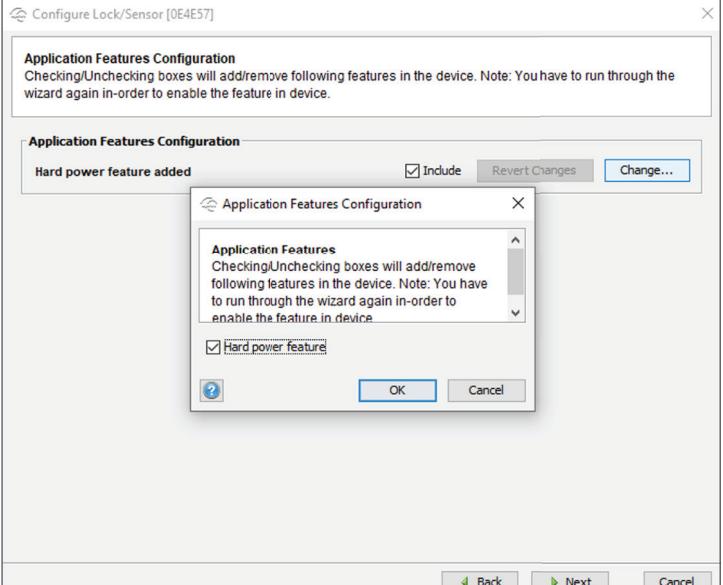
Aperio PAP Tool Changes
-
1
In order for the Aperio product to switch from batteries to the hard powered adapter, a setting needs to be changed inside the PAP tool.
- NOTE: Firmware version 3.14 or greater is needed to utilize this feature.
-
2
Applicable Note This setting is only available after import of device dependent features using the Import Application Feature Data function.
- See Aperio Program Application Help Section: Import Application Feature Data.
- 3 Enable Hard Power If the lock is equipped with hard power this setting will disable the Aperio platform's state of charge calculation and low battery warnings. Enable this setting to avoid confusion when monitoring a lock with a DC power option installed.
Warranty
For information on warranty coverage and replacement options, please visit securitron.com/warranty