select_SL71_HD_full_specs
Open the original PDF document
View PDF

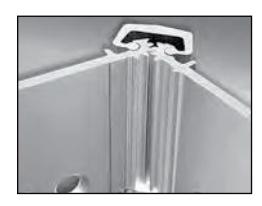
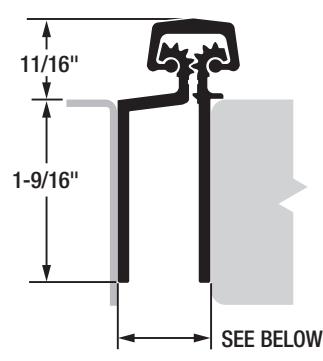
A FRAME WITHOUT A STOP ON THE HINGE MOUNTING SIDE OF THE JAMB MUST BE USED IN CONJUNCTION WITH THE SL71 FOR THE SAFETY FEATURE TO BE EFFECTIVE.

3258 Stadium Park Way Kalamazoo, MI 49009 Ph: 800-423-1174 Fax: 800-423-7107 www.select-hinges.com
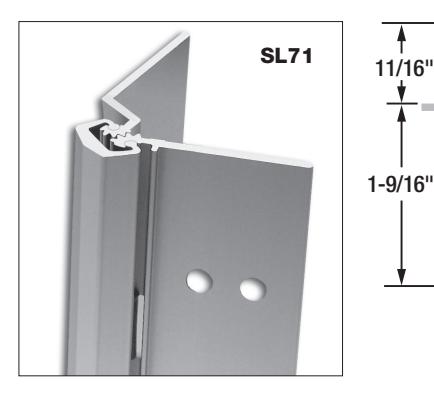
SL71 SAFETY HINGE

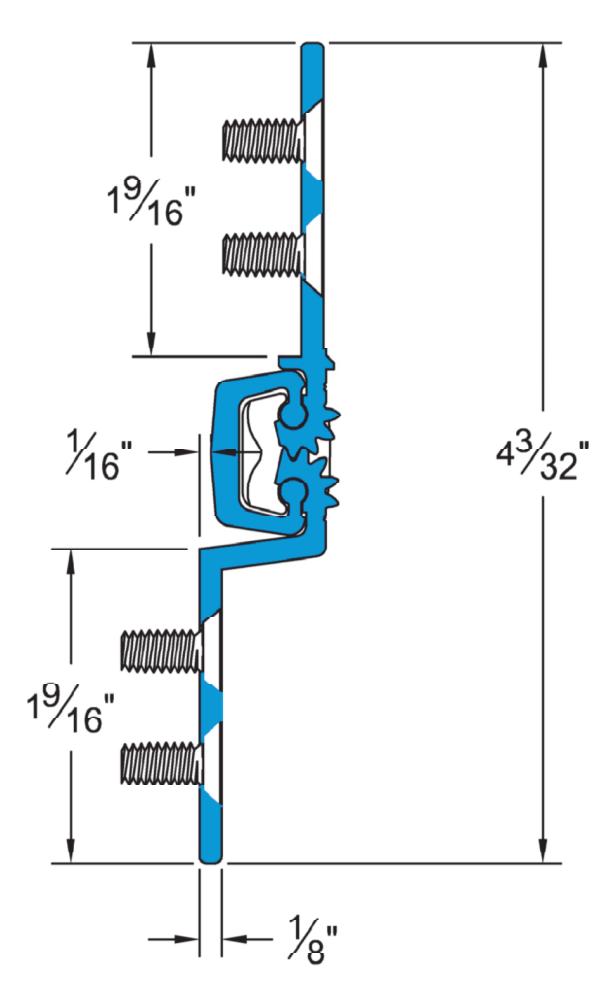
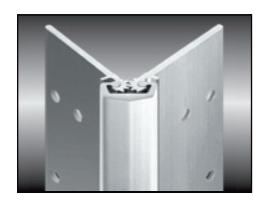
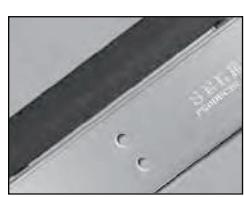
SL71 Concealed Geared Continuous Hinge

- MATERIAL: Extruded 6063 T6 aluminum alloy with self-lubricating polyester thrust bearings.
- LENGTHS: 83" and 95" lengths standard for nominal door heights. Hinges can be cut to shorter lengths. Longer hinges are not available.
- LOAD/FREQUENCY RATING: For 1-3/4" doors. 48" max. door width in 16 gauge hollow metal (min.) or 1/8" aluminum (min.).
Heavy Duty — Tested per BHMA standards. Up to 200 lb. doors (high-frequency) and up to 400 lb. doors (medium-frequency) without frame or door reinforcement; up to 600 lb. doors (low-frequency) with the use of Rivnuts in the frame and door.
- FINISHES: All SL71 hinges are stocked in Clear and Dark Bronze anodized aluminum. Custom anodized or painted finishes are available. Product painted or anodized in the field voids the SELECT hinge warranty.
- CLOSERS: Conventional overhead surface, concealed sliding arm overhead or floor closers may be used with SELECT hinges. Pivot-type floor closers (with a fixed, conflicting center pivot) must be replaced.
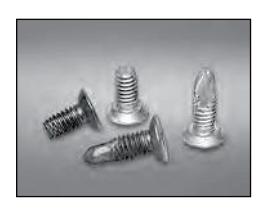
- ORDER: Specify length, finish and heavy duty (HD). Also, specify door and frame screw applications. 12-24 x 3/4" self-drilling, thread-forming 410SS Phillips undercut flathead screws are provided as a standard pack unless otherwise specified. Wood and thread-forming screws also available. Security screws optional at extra cost.
BHMA CERTIFICATION: SL71HD geared continuous hinges conform to BHMA Standard ANSI/BHMA A156.26-2006 Grade 1.
| SL71 HINGE SCREW COUNT | ||
|---|---|---|
|
HINGE LENGTH
& DUTY RATING |
DOOR
SCREWS |
FRAME
SCREWS |
| 83" HD | 19 | 19 |
| 95" HD | 21 | 21 |
SL71 Concealed Geared Continuous Hinge

SELECT ADVANTAGES
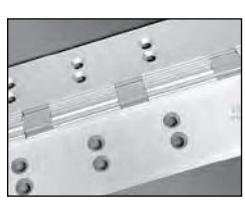
PAIR-MATCHED™ HINGE LEAVES
Manufactured together, machined together and anodized together, making SELECT hinges fit your doors better and last longer. An exclusive SELECT benefit.
LIFETIME LUBRICATION
Eliminates the need for periodic maintenance. Quiet performance. Fights gear cap wear. An exclusive SELECT benefit.
ANODIZED AFTER MACHINING
Delivers superior wear, durability and life. Inhibits corrosion. Few hinge makers follow SELECT's lead in using this superior manufacturing process.
MEETS LEED REQUIREMENTS
Made from recycled aluminum. Reduces environmental impact and qualifies for LEED points. An exclusive SELECT benefit.
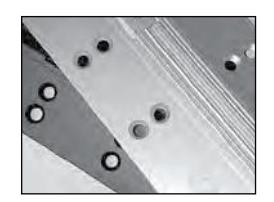
CONSISTENT TEMPLATING
Hole pattern is identical on both Standard and Heavy Duty models, so SELECT hinges line up precisely for easier and faster installation. An exclusive SELECT benefit.
COATED FASTENERS
Provide additional corrosion protection with either self-drilling, thread-forming (SDTF) or thread-forming (TF) screws. An exclusive SELECT benefit.
CUSTOM COLORS
Match any paint color on the gear cap or the entire hinge and fasteners, including our always-in-stock Bone White gear caps. Anodized colors also available.
SELECT HINGE PERFORMANCE
- A SELECT geared continuous hinge has been tested in accordance with ANSI 250.4-1994 test procedure and acceptance criteria for physical endurance for steel doors and hardware and has surpassed 25,000,000 cycles during testing by an independent laboratory. On a door cycling 400,000 times per year, a SELECT hinge will be performing for over 62 years.
- SELECT geared continuous hinges are built to handle abuse from high-traffic applications. They are applied to the surface on the edge of the frame and door. No machining or reinforcement is required.
- The revolutionary SELECT geared continuous hinge puts an end to costly and irritating hinge failure problems, the most common cause of entrance failure.
- On conventional hinges, opening and "kick-back" energy concentrate on a few inches of fastened reinforcing plate with the top hinge handling 100% of the force. Pinless SELECT hinges bond the door and frame into an integrated, sag-free unit. "Kick-back" energy dissipates along the entire length of the door and frame. (Compare this to a conventional hinge's 4-1/2" to 5" at the top of the door and frame).
- SELECT geared continuous hinges eliminate the gap between the door and frame, providing a weatherproof, rust-proof, tamper-proof barrier. When the door is closed, there are no accessible screws, bolts or pins.

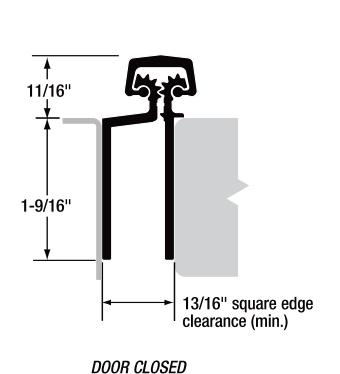
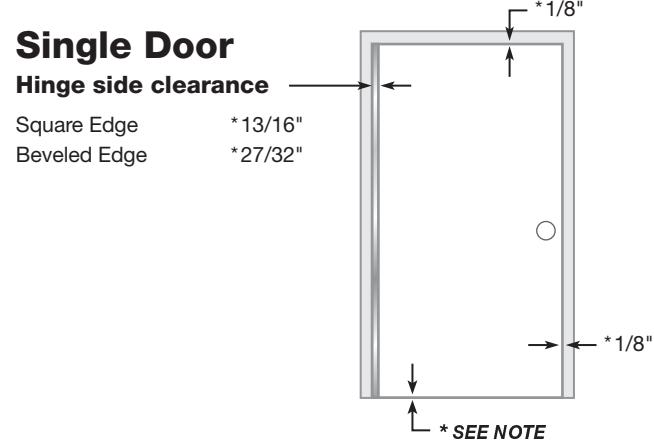
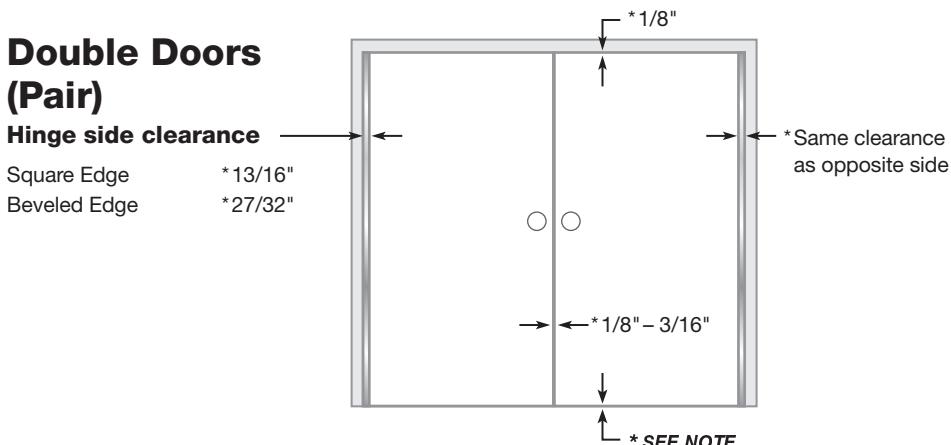
Concealed Continuous Geared Safety Hinge
Door Clearances
For Square and Beveled-Edge Doors
- : All uncut SL71 hinges are non-handed and templated. They become handed after cutting.
Important Warranty Information:
The following actions will void any warranty, expressed or implied:
- Q Failure to install the hinge according to manufacturer's specifications and requirements. (For more information, visit selecthingerequirements.com.)
- Q Use of fasteners other than those supplied with the hinge.
- Q Unauthorized field modifications, including alteration or removal of the factory-applied lubricant, altering the original finish or painting the hinge.
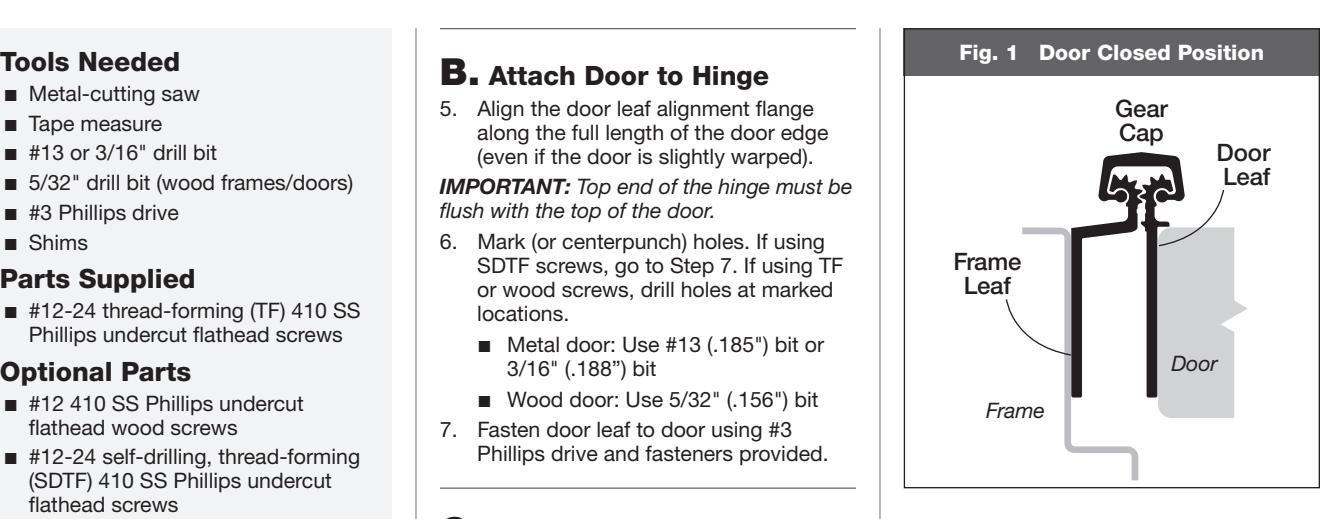
- Q Metal-cutting saw
- Q Tape measure
- Q #13 or 3/16" drill bit
- Q 5/32" drill bit (wood frames/doors)
- Q #3 Phillips drive
- Q Shims
Parts Supplied
Q #12-24 thread-forming (TF) 410 SS Phillips undercut flathead screws
Optional Parts
- Q #12 410 SS Phillips undercut flathead wood screws
- Q #12-24 self-drilling, thread-forming (SDTF) 410 SS Phillips undercut flathead screws
- Q Protective gloves are recommended
How to Cut the Hinge to Fit
- A. Keep hinge in "door closed" position (Fig. 1).
- B. Determine whether this will be a righthand or left-hand installation.
IMPORTANT: Cut only one end of hinge. Cut end will be installed at the bottom. Keep original templated six-hole pattern at top end of hinge.
C. Using a metal-cutting saw, begin the cut through the gear cap first.
NOTE: DO NOT cut through a set screw bearing.
D. Reinstall any set screw bearing that may have been cut oa.
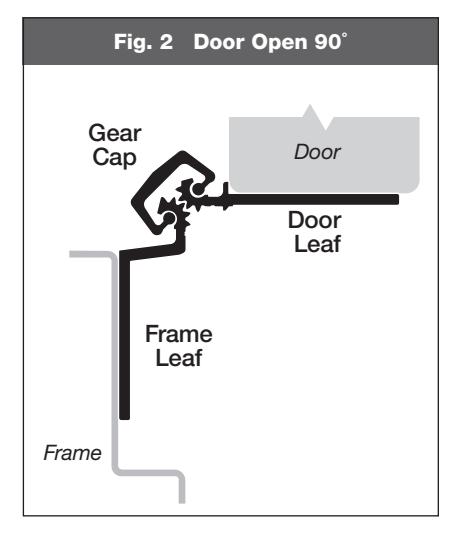
A. Prepare Frame
- 1. Shim hinge to 1/8" below the header to allow for door clearance.
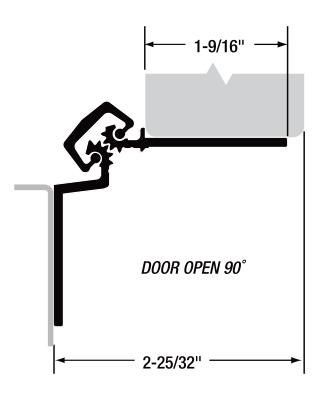
- 2. Hold hinge in "door open" position (Fig. 2), making sure frame leaf alignment is tight against frame face.
- 3. Mark (or centerpunch) hole locations.
NOTE: TF screws and wood screws require pilot holes at marked locations. SDTF screws do not require pilot holes.
-
4. If using SDTF screws, go to Step 5. If using TF or wood screws, drill holes at marked locations. DO NOT attach hinge to the frame at this time.
- Q Metal frame: Use #13 (.185") bit or 3/16" (.188") bit
- Q Wood frame: Use 5/32" (.156") bit
B. Attach Door to Hinge
5. Align the door leaf alignment flange along the full length of the door edge (even if the door is slightly warped).
IMPORTANT: Top end of the hinge must be flush with the top of the door.
-
6. Mark (or centerpunch) holes. If using SDTF screws, go to Step 7. If using TF or wood screws, drill holes at marked locations.
- Q Metal door: Use #13 (.185") bit or 3/16" (.188") bit
- Q Wood door: Use 5/32" (.156") bit
- 7. Fasten door leaf to door using #3 Phillips drive and fasteners provided.
C. Attach Door to Frame
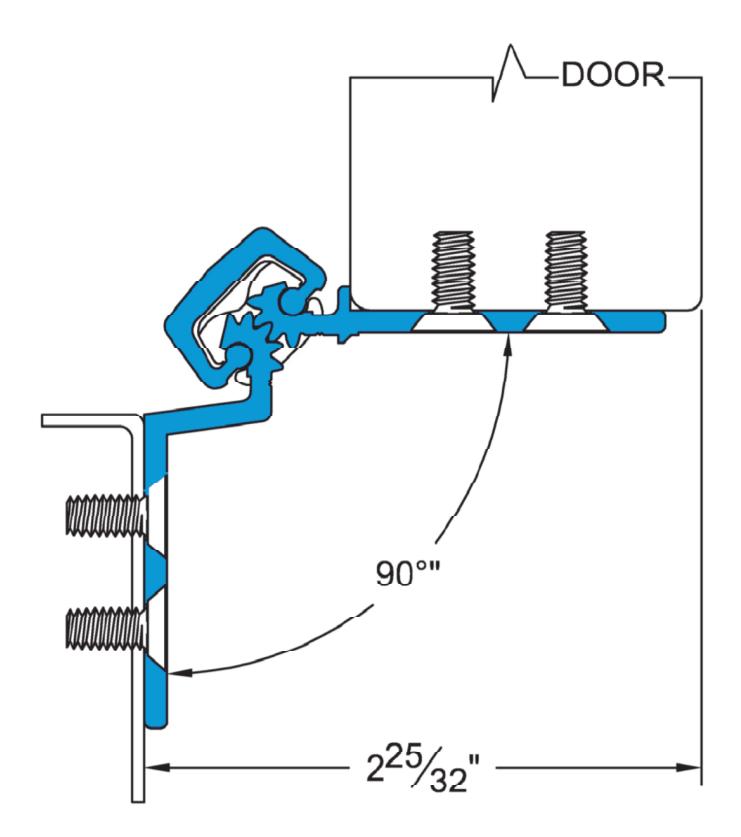
- 8. Position door at 90 degrees to the frame. Shim door to the proper height so the door aligns with the top screw holes.
- 9. Install two screws at the top of hinge. Remove shim and align remaining holes. Install screws in middle and bottom two holes.
- 10. Check door for proper swing and clearance before installing remaining screws.
Reinforcing & Rivnuts®
No hinge reinforcement is necessary except on extremely high-frequency, extremely heavy or extra-wide doors. Rivnuts are recommended for use in the frame when the door exceeds 450 lb. (max. 600 lb.).
NOTE: Only SELECT steel Rivnuts are to be used with fire-rated SELECT hinges.
Grouted/Slushed-in Frames
For ease of installation, it is recommended some sort of mudguard be installed behind the frame. Do not use self-drilling, threadforming (SDTF) screws to drill into grouted frames. If mudguards have not been used, carefully drill pilot holes through frame and remove grout for screw clearance. Do not oversize holes in frame.