gitcon-access-management-software-version-2-0-user-s-guide.pdf_638404
Open the original PDF document
View PDFGITCON™ Access Management Software Version 2.0 USER'S GUIDE

The Gitcon Access Management Software User's Guide is a publication of Kaba Mas LLC (referred to as Kaba Mas).
No part of this book may be reproduced or transmitted in any form or by any means, electronic or mechanical, including photocopying, recording, or by any information storage and retrieval system, without prior written permission from Kaba Mas.
The information contained in this publication is accurate to the best of Kaba Mas's knowledge. Specifications are subject to change without notice.
Trademarks
The following items are trademarks or registered trademarks of Kaba Mas in the United States and/or other countries.
• GITCON
Customer Service/Technical Support
Please call Kaba Mas's Technical Support phone line at (800) 950-4744 or (888) 950-4715.

Kaba Mas LLC 749 W. Short Street Lexington, KY 40508
Phone: (888) 950-4715 or (859) 253-4744
Fax: (800) 255-2655 www.kaba-mas.com
Document: PKG 605.106 Rev. E © 2008 Kaba Mas LLC
Table of Contents
| 1 | Getting Started | |
|---|---|---|
| System Components | 1–2 | |
| Lock Units | 1–2 | |
| PC and Access Management Software | 1–2 | |
| Desktop Reader and Transponders | 1–2 | |
| Pocket PC and Software | 1–2 | |
| System Definitions | 1–3 | |
| Client ApplicationPrerequisites | ||
| PC Hardware | ||
| Software | ||
| Pocket PC | ||
| Quick Start Guide | ||
| Setting Up Your Organization | ||
| _ | ||
| 2 | ||
| The Gitcon Access Management Software | ||
| Gitcon Access Management Software Layout | ||
| Setting Up the Software | ||
| Customizing Software Options | ||
| Managing Software Users | ||
| Managing Government Override Codes | ||
| Renaming a Server | ||
| Interfacing with the Pocket PC | ||
| Commissioning a Pocket PC | ||
| Creating the Pocket PC Upload File | 2–15 | |
| ActiveSyncing the Pocket PC | 2–15 | |
| 3 | Using the Gitcon Access Management Software | 3_1 |
| • | Unit Explorer View | 3–2 |
| Unit Explorer Toolbar | ||
| Building the Database Structure with Levels | ||
| Managing Lock Units | ||
| Transponder Template Explorer View | ||
| New Transponder Template Button | ||
| Managing Transponder Templates | ||
| Person Explorer View | ||
| Person Explorer Toolbar | ||
| Managing Persons and Person Groups | ||
| Assigning Transponder Templates to Persons. | ||
| Programming Transponder Cards | ||
| Auditing and Reporting | ||
| Creating and Printing Reports | ||
| Viewing Audits | ||
| Backing Up and Restoring the Database | ||
| Downloading and Installing Management Studio Express | 3–53 | |
| 4 | Operating the Lock | 4–1 |
| Overview of the Lock | ||
| Security Operating Method | ||
| LED Indicators and Display | ||
| Verifying the Lock Seal | ||
| Operating Procedure | ||
| G-2, PIN Mode | ||
| G-2, Transponder (TAG) Mode | ||
| 0-2, напоропиет (тАб) ivioue |
|
| G-152, G-154, PIN Mode | ||
|---|---|---|
| G-152, G-154, Transponder (TAG) Mode | 4–7 | |
| Government Access Codes | 4–9 | |
| Managing Super Master Codes | ||
| 5 | Programming and Auditing Locks | 5–1 |
| _ | The Pocket PC | 5–2 |
| Starting the Gitcon Software on the Pocket PC | 5–2 | |
| Connecting to the Lock Unit | 5–3 | |
| Programming the Lock | ||
| Updating the Lock | 5–7 | |
| Auditing the Lock | ||
| Setting Up the Audit Parameters. | 5–8 | |
| Taking Audits | ||
| Viewing Audit Data | ||
| Deleting Audits | ||
| Managing Manifests | ||
| Creating Email Audit Event Triggers | ||
1 Getting Started
The Gitcon Access Control System is a sophisticated, yet easy to use, system for monitoring access to doors on Sea Containers, Intermodal, Truck/Trailer, Reefer, and Dry Containers. The system's two easily identifiable parts are the lock units and the database system. The lock units are programmable, digital units that will allow certain accesses and record all activities that transpire. The database system is a SQL database that resides in an application on a server that tracks all of the lock units and their activities, in addition to the people with those accesses and their access codes and/or transponder cards.
Since the application database system contains all of the data and records, all lock, user, transponder, and reporting/auditing configuration takes place there. You can access and configure the database through the Gitcon Access Management Software. The information from this database is transferred to the lock units either by transponder cards (usually used to allow individual access) or a Pocket PC (a PPC is used to program lock units or download reports and audits from units).
This chapter is broken down in to the following sections.
- System Components
- System Definitions
- Client Application Prerequisites
- Quick Start Guide
- Managing Software Users
- Setting Up Your Organization
System Components
Now that we have laid the groundwork for the Gitcon Access Control System, let us address the parts of the system individually. The Gitcon Access Control System contains the following system components.
- Lock Units (G2 and/or G152 locks)
- PC and Access Management Software
- Desktop Reader and Transponders
- Pocket PC and Software
Lock Units
The Gitcon G2 (portable) and G152 (fixed mount) are sealable locks applied to the existing door hardware on Sea Container, Intermodal, Truck/Trailer, Reefer, and Dry Container applications. The G2 and G152 are an electro-mechanical lock and electronic seal that stores access events that can be downloaded to the Access Management Software for audit. The Access Management Software provides a method to program the unit for operation within various access control parameters
The G2 and G152 door lock units are designed to limit and control entry to a container or trailer using a numeric combination (Super Master Code or SMC) entered through the keypad or the presentation of a transponder card. The locks are designed to work in conjunction with the Gitcon Access Management Software through a handheld Pocket PC to transfer information between the desktop PC and the lock.
PC and Access Management Software
The database of lock units, persons, and transponder templates is housed on a desktop or laptop PC that runs as a server in conjunction with the Gitcon Access Management Software. This software application allows you to configure locks, manage lock users, assign access templates, and program the physical transponder cards.
Desktop Reader and Transponders
The PC Desktop Reader is used with the PC software application to program transponders. The Desktop Reader connects to the PC that is running the Access Management Software. The system administrator uses the Desktop Reader to program and manage Transponder cards for user access.
Pocket PC and Software
The Gitcon PPC software is installed on the Pocket PC and allows for programming (uploading) and auditing (downloading) of data to and from the lock. It also allows for the download of lock audit data from the lock to use for reporting purposes at the PC.
System Definitions
This section contains system definitions for the following items.
- System Administrator The system administrator sets up and installs the Gitcon Access Control System and oversees the construction and maintenance of the database. This includes administering software users, creating the database structure, configuring the lock, transponder, and lock user information, and producing and administering transponders.
- Pocket PC This is the handheld Pocket PC that is used to program (upload) and audit (download) data to and from the lock. The Pocket PC is synchronized with the PC so that the latest database information is updated to the lock, and so that the PC contains the latest lock audit information needed to run reports.
- Smart Phone Same functions as a Pocket PC. The phone must be IrDA capable and run Windows Mobile (version 5.0 or greater.)
- Unit This is the default term for the lock. The Unit is the fundamental part of the Gitcon Access Control System.
- Transponder Template This is a template of access data that can be linked or copied to a Person or Person Group.
- Transponder This is the physical access card that is programmed from a Transponder Template and issued to the Person or lock user. The system administrator programs transponders using the PC Desktop Reader. The transponder is the primary access credential when a lock is programmed as a "Sealable Lock".
- Person This is the default term for the lock user.
- Super Master Code (SMC) These are access codes that allow users access to a lock unit in lieu of a transponder card. Each lock unit can contain between 1 and 30 randomly generated SMCs. A Super Master Code is the primary access credential when a lock is programmed as a "Lockable Electronic Seal".
• Government Override Codes (GOC) – This is a code that will indicate that a government agency accessed the lock unit. These codes do not allow access, but merely indicate that a government body accessed the unit.
Client Application Prerequisites
Minimum Requirements.
•
PC Hardware:
- IBM compatible PC, capable of running Windows XP Professional, Service Pack 2 or greater.
- Minimum of 512 MB RAM
- CD-ROM drive
- Hard disc drive with at least 5 gigabytes (GB) of free disk space
- Network connection (for access to a remote RDBMS)
- Two available USB ports
- Monitor with a minimum resolution of 1024x760
Software:
- Windows 2000 Professional (Service Pack 3 or greater) or Windows XP Professional (Service Pack 2 or greater)
- Administrator access to a locally or remotely installed relational database management system (RDBMS) (Microsoft SQL Server 2005 Express Edition or Microsoft SQL Server 2005 only)
Pocket PC/Smart Phone
- Microsoft Windows Mobile 5.0 (or greater) for Pocket PC, Premium Edition
- 416Mhz processor or greater
- 64MB SDRAM memory or greater
- USB Sync cradle or cable
- HP iPaq models recommended
- Devices must be IrDA capable
Quick Start Guide
Complete this Quick Start Guide to quickly set up the Gitcon Access Control System if you are already familiar with previous versions of the Gitcon Access Control System or similar products, for example, if you have upgraded from a previous version. If you have never used the Gitcon Access Control System or a similar product, continue to Setting Up Your Organization .
Complete the following steps to quickly set up your Gitcon Access Control System.
- 1. Ensure that you have already installed Microsoft ActiveSync on your PC and your Pocket PC and that your Pocket PC communicates (Synchronizes) to your PC without any problem. Your Pocket PC must also be set with the correct date and time. (see Section 2. pg. 14)
- 2. Install the Gitcon Access Management Software, including all of the peripheral applications, using the Gitcon Access Management Software Installation CD-ROM . Refer to the Gitcon Access Management Software help screens.
- 3. Install the PC Desktop Reader and its driver.
- 4. ActiveSync the Gitcon PPC application to your Pocket PC. Refer to Commissioning a Pocket PC in this chapter for more information.
- 5. Organize the structure of your database as it pertains to the structure of your organization and the lock units in service. It is best to outline the structure on paper before creating it in the database. Refer to Setting Up Your Organization for more information.
- 6. Click the GITCON 2.0 icon on your PC desktop to run the software.
- 7. Customize the Software Settings by defining the terms that will be used for the components of your database and setting how the database's clock will be set.
- 8. Ensure that the Pocket PC/cradle and the PC Desktop Reader devices are connected to your PC.
-
9. Create your organization in the software as you have outlined it in step 3.
- a. Create database levels for the Unit database.
- b. Create and configure your lock Units.
- c. Create Transponder Templates.
- d. Create Persons (lock users) and Person Groups.
- 10. Assign Transponder Templates to Person Groups or Persons.
- 11. Program transponder cards and distribute them to your lock users.
- 12. Create the Pocket PC Commissioning File.
- 13. Create the Pocket PC Upload File.
- 14. Synchronize the Pocket PC with the PC.
Important: Ensure that the actual lock to be programmed is properly installed and initialized as per the Installation Instructions that came with the lock.
- 15. Similarly, go to the desired lock units and audit the required locks in your organization.
- 16. Bring the Pocket PC back to your Gitcon Access Control System PC station, synchronize the audit information back to the PC, and view and/or print the lock audits you just downloaded.
Setting Up Your Organization
Before you even begin the Gitcon Access Management Software, you should have a clear outline of your organization as it pertains to the locks, lock users, the different types of accesses, and the structural hierarchy of these things as well.
There should only be a single system administrator who uses the Gitcon Access Management Software to track the lock units, transponders and templates, and users. If there are no clear-cut regions and locations in your organization, it is up to the system administrator to determine how lock units will be grouped.
The system administrator should map out all of the lock units that will be in service and effectively group them into Unit Groups, Locations, and Regions as they relate to the organization. All of the lock users will also need to be identified and put into Person Groups where applicable. This will serve to facilitate the entry of the Unit and Person information into the database once it has been installed.
The following levels of structure are available for your organization in the Gitcon Access Management Software.
-
Region
-
o Location
-
Unit Group
- Unit
-
Unit Group
-
o Location
-
Person Group
- o Person
It is up to the system administrator to determine what terminology is to be used for the database levels/units. The following are default terms that can be customized in the Gitcon Access Management Software.
- Region
- Location
- Unit Group
- Unit
- Person Group
- Person
- Transponder
Refer to Setting Up the Software for more information on customizing these terms as they appear in the Gitcon Access Management Software.
Note: This User's Guide uses the default terms in relation to these various units and levels of the database.
2 About the Gitcon Access Management Software
Besides the physical locks, the Gitcon Access Management Software is the most integral part of the Gitcon Access Control System. This powerful tool allows you to maintain several databases to easily manage lock data, lock user profiles, access templates for transponder cards, and action audit data for your entire organization.
Because it is such a complex tool, this chapter will show you the basics behind the software, including getting started with the software, customizing options and adding users, and interacting with the Pocket PC. In the next chapter, you will learn how to use the software to manage your lock units, lock users, and access templates. This chapter is broken down into the following sections.
- The Gitcon Access Management Software
- Setting Up the Software
- Interfacing with the Pocket PC
The Gitcon Access Management Software
You can start the Gitcon Access Management Software on the PC by clicking the GITCON 2.0 icon on the desktop.
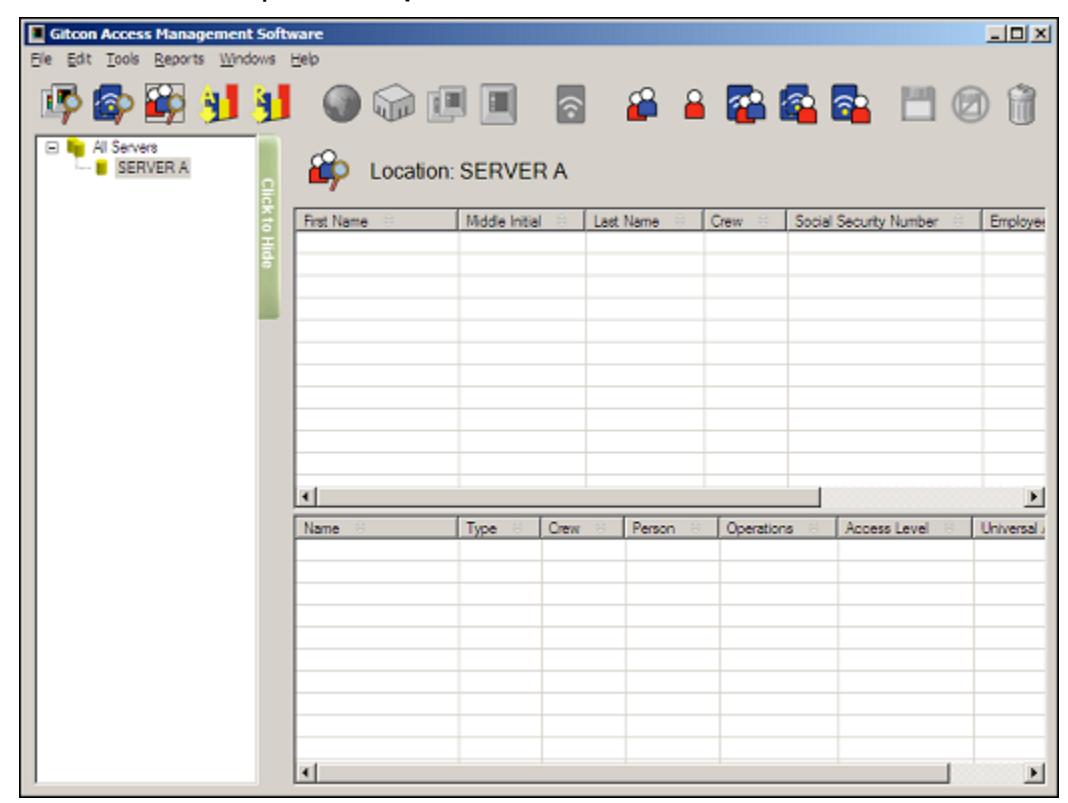
Gitcon Access Management Software Layout
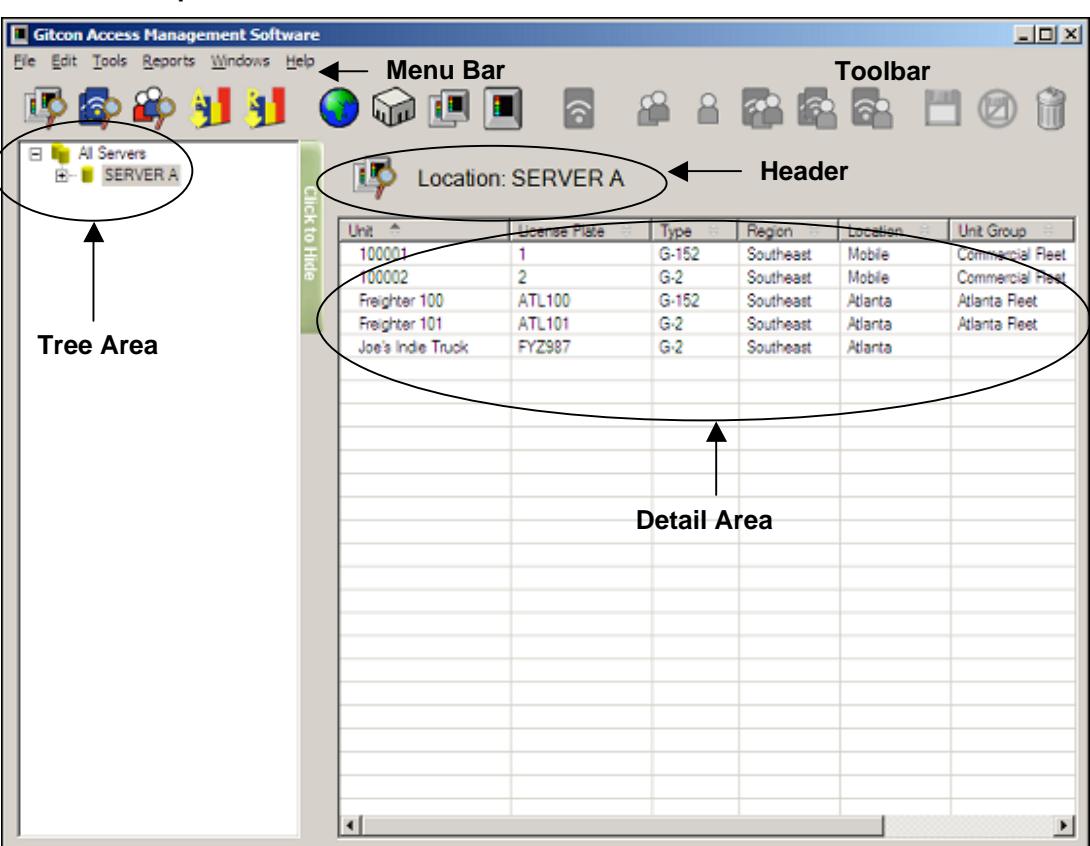
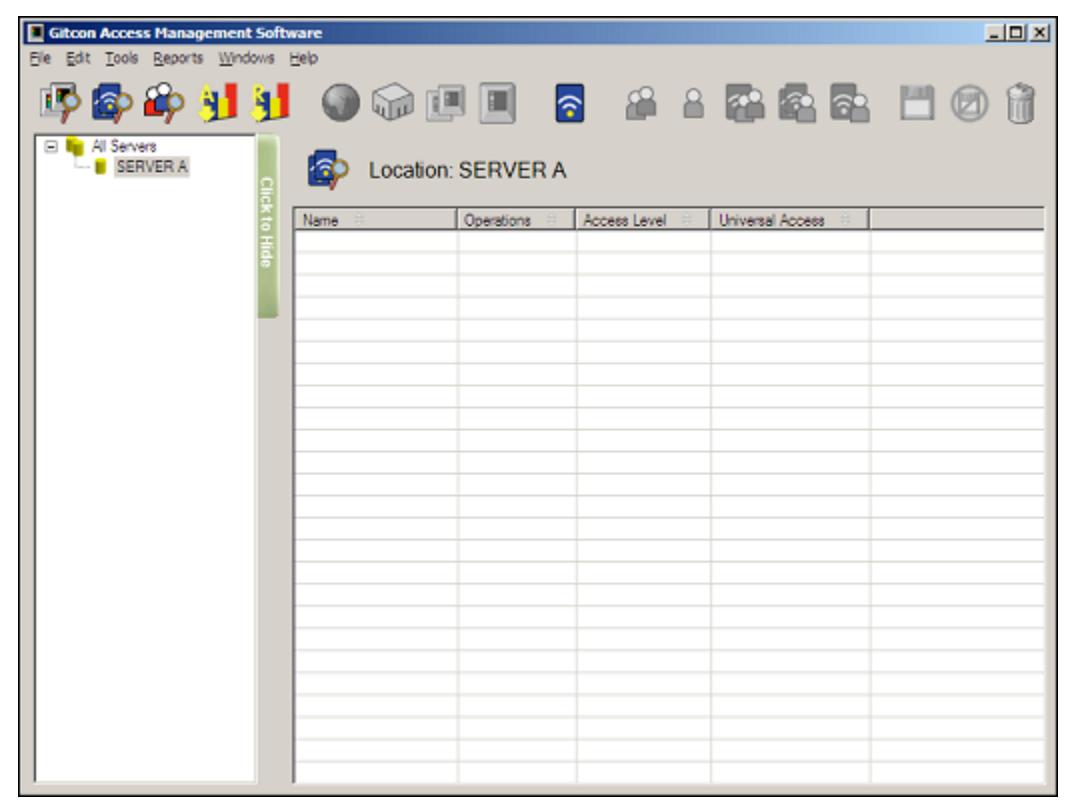
Once you have opened the Gitcon Access Management Software, the system displays the default Unit Explorer view.
The Access Management Software is essentially three databases that interact to provide you with a complete system of access management. The three databases represent the three areas of the software. They are as follows:
- The Unit database This contains all of the lock units in your organization. With each lock unit as a record in this database, these units can be structured into Unit Groups, Locations, and Regions to mimic the structure of your actual organization. This structure also allows you to easily navigate the multitude of locks that may be in service.
- The Transponder Template database This includes all of your pre-made Transponder Templates. These templates can be linked or copied to a Person or Person Group for the quick and easy application of access parameters to employees.
• The Person database – This includes all of the lock users in your organization. A Person record can have a Transponder Template linked to it, or it can have a custom Transponder Template that defines its access. The Person records can be grouped into Person Groups similar to the Unit Groups for lock units. A Person Group can consist of all drivers for a certain region, or all employees at a certain location. A Person Group can then have a Transponder Template linked or copied to it, so that all lock users in the group receive the same access on their transponder cards.
Each of these three areas has its own explorer module that allows you to view, restructure, add, copy, delete, and edit the database.
There are three views available in the Gitcon Access Management Software.
- Unit Explorer
- Transponder Template Explorer
- Person Explorer
Each view is discussed in more detail below. First, let us discuss the layout of the Gitcon Access Management Software.
- Menu Bar Contains general functions for the Access Management Software.
- Toolbar Contains specific functions for the Access Management Software.
- Tree Area Contains the database structure for the selected Explorer view.
- Header Shows the Explorer view and the part of the structure that is selected in the Tree Area.
- Detail Area Displays the record details for the selected area shown in the Header. The record types depend on the Explorer view selected – Unit, Transponder Template, or Person.
Now, let us discuss each of these areas in more detail.
Menu Bar
The topmost Menu Bar displays the available menu options.

These menus provide access to all of the functionality in the Gitcon Access Management Software. The menu bar selections and their associated functions are listed.
-
File
- o Export Exports the data in the Detail Area to a CSV file that can be imported into other applications.
- o Print Preview Provides a preview before printing.
- o Print Prints the data shown.
- o Exit Closes the Access Management Software.
-
Edit
- o Refresh Refreshes the data in the active Explorer view to reflect the most recent changes.
- o New Creates new entities in the system. The options available here depend on which Explorer view is active, as well as what is selected in the Tree Area.
- o Rename Allows you to rename the selected entity.
- o Create Pocket PC Upload File Creates the upload file that is used to transfer the new information to the units through the Pocket PC.
- o Program Physical Transponder Programs a Transponder card with the data selected in the system.
- o Save Saves the database with any changes that have been made.
- o Undo Changes Discards changes since last save.
Note: There are also Save and Undo Changes buttons located in the Toolbar. These buttons remain inactive until a change is made in the Detail Area.
o Delete – Deletes the selected entity.
• Tools
- o Settings Provides a screen to define the system settings, including the names used for data categories (Region, Location, Unit, Person, etc.). You can also manage the time and date settings from this screen.
- o Administration Leads to a sub-menu where you can add or delete system users, commission Pocket PCs, manage Government Override Codes (GOCs), or rename a server.
• Reports
- o View Audits Allows you to view the recent audits that you have performed in the system.
- o Create Report Allows you to define the parameters and the data to create a report from the system.
• Windows
- o Unit Explorer Displays the Unit Explorer view.
- o Transponder Template Explorer Displays the Transponder Template Explorer view.
- o Person Explorer Displays the Person Explorer view.
- o Delete Lists Displays deleted transponders. Contents of the Delete List are uploaded to the locks during synchronization.
- o Manage Physical Transponder Allows you to manage a Transponder card through the Desktop Reader/Enroller.
• Help
- o Gitcon Help (Users Guide) Allows you to view the Table of Contents of the online help system.
- o About Allows you to view software version and registration information.
Toolbar
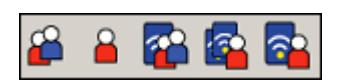
The Toolbar resides just below the Menu Bar and contains shortcut buttons that perform various functions in the Access Management Software.

You will note that some of the buttons on the toolbar are inactive at one time or another. Only the following six buttons in the Toolbar are always active.
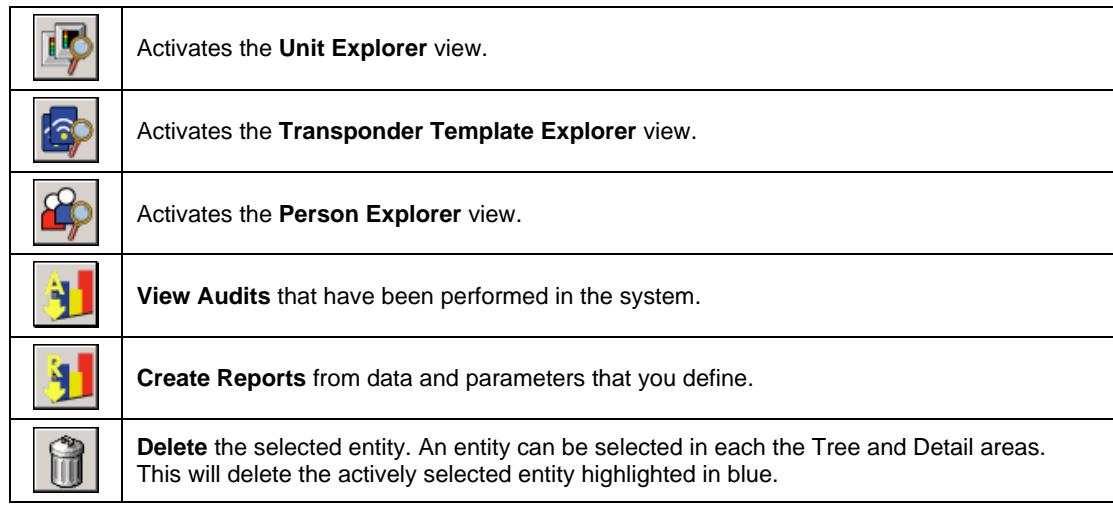
The remaining buttons in the Toolbar are only active depending upon which Explorer view of the system is active or what action has just been completed. These toolbar buttons will be explained in their respective sections of this manual.
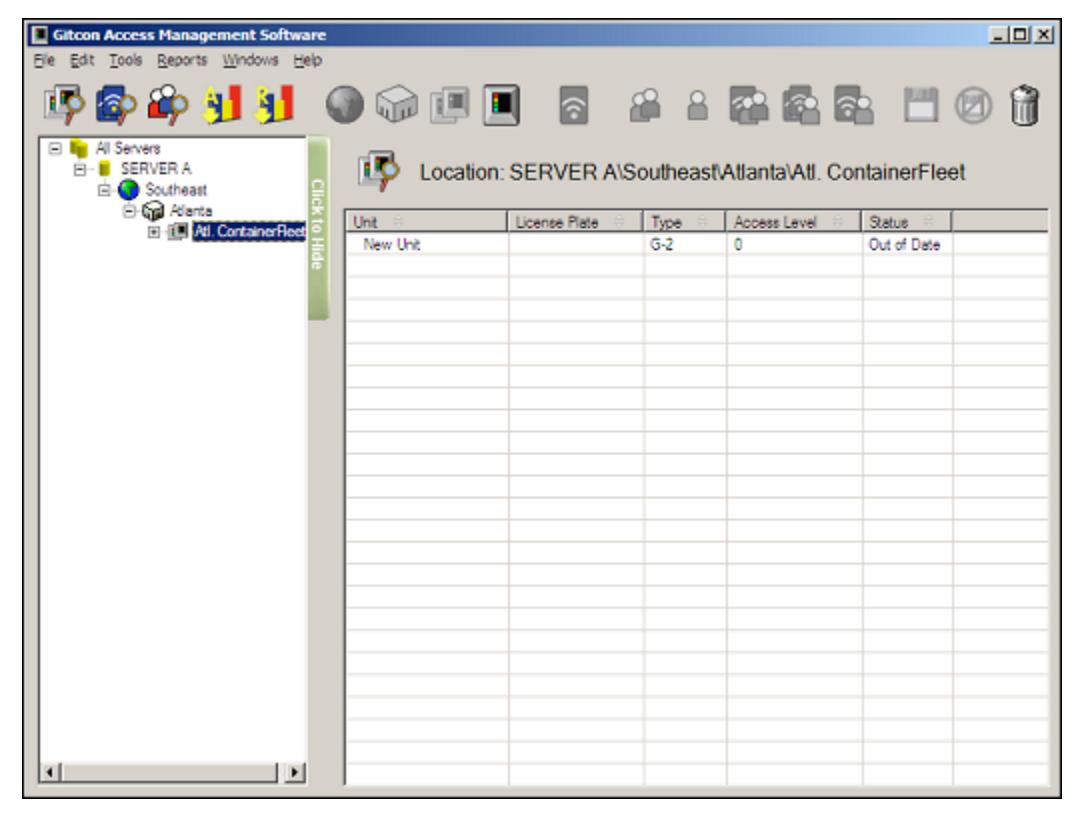
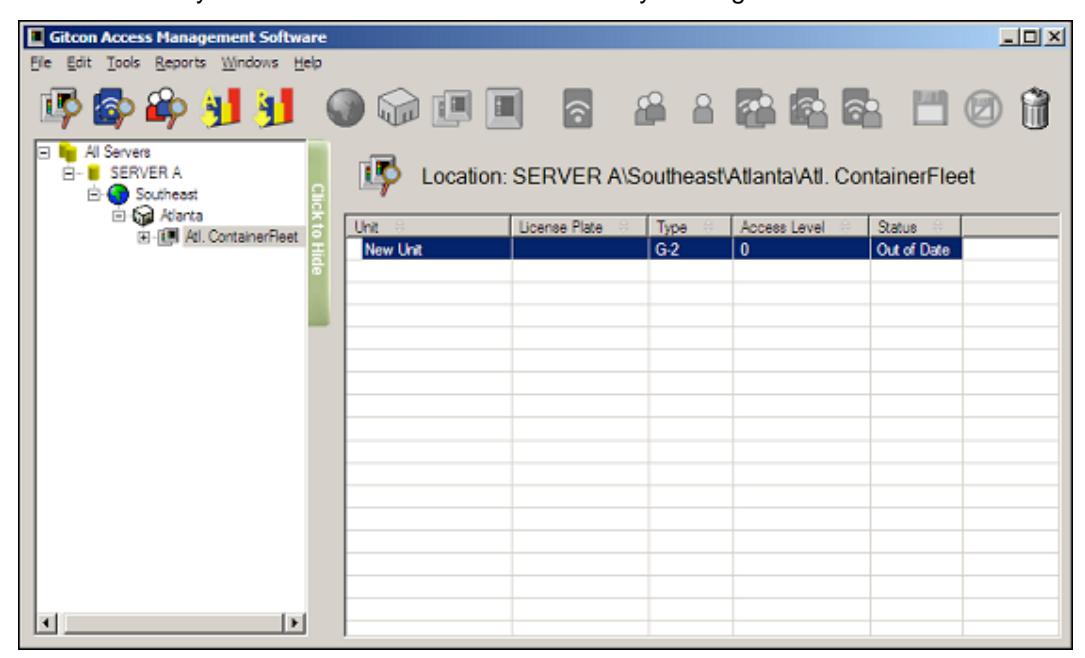
Header
The Header section simply informs the user which Explorer is active and which area is being viewed in the Detail Area. The Header area generally appears only when you are in one of the Explorer views.
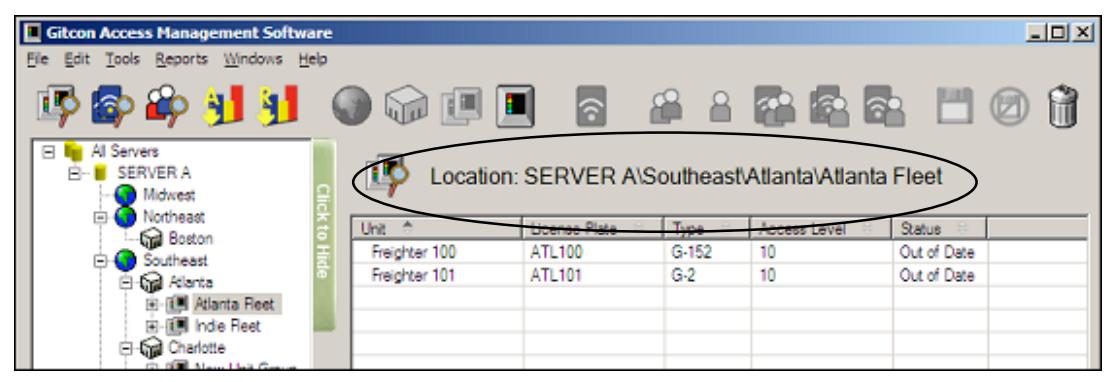
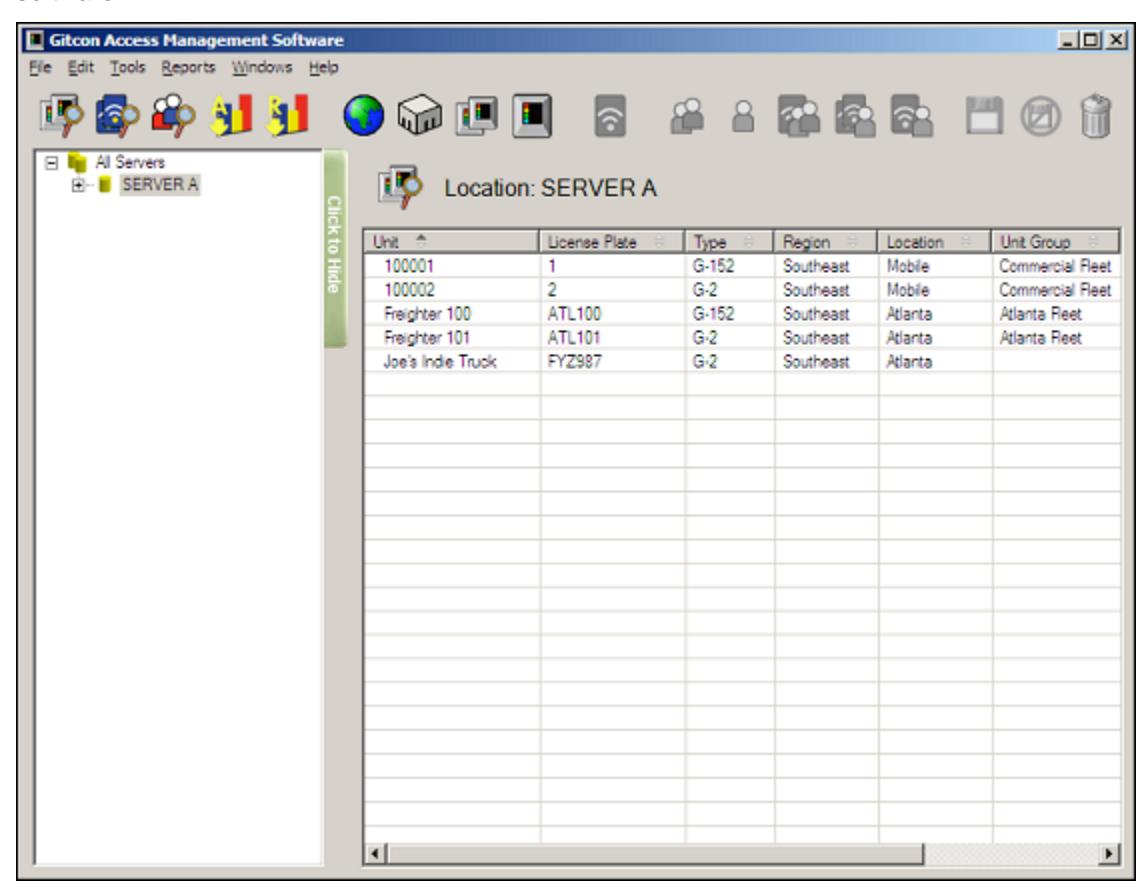
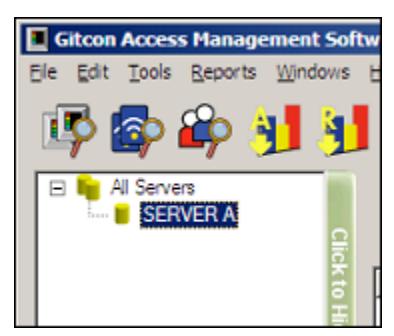
In the above image, you can see that the Unit Explorer view is active in the Atlanta Fleet Unit Group, in the Atlanta Location of the Southeast Region, on Server A .
Tree Area
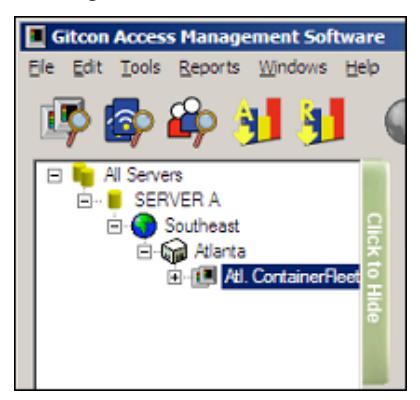
The Tree Area of the Explorer view displays a graphical tree structure representation of the data or data structure being worked on at the time.
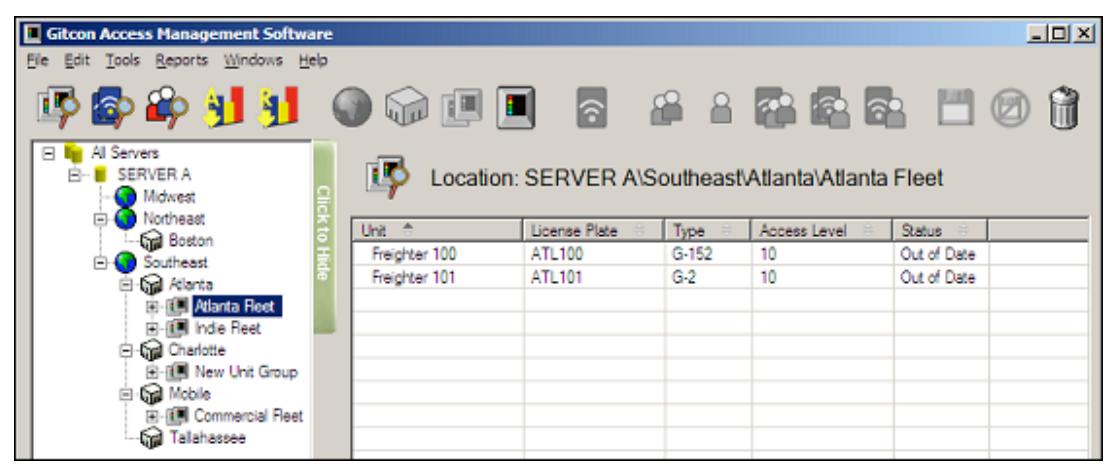
In the default Explorer view, the tree is collapsed, but you can reveal the internal structure of the tree by clicking the "plus" signs to expand the tree, as shown above. Also, you can collapse each level by clicking the "minus" sign.
Each Explorer contains a different type of database in the tree structure. These will be explained later.
Detail Area
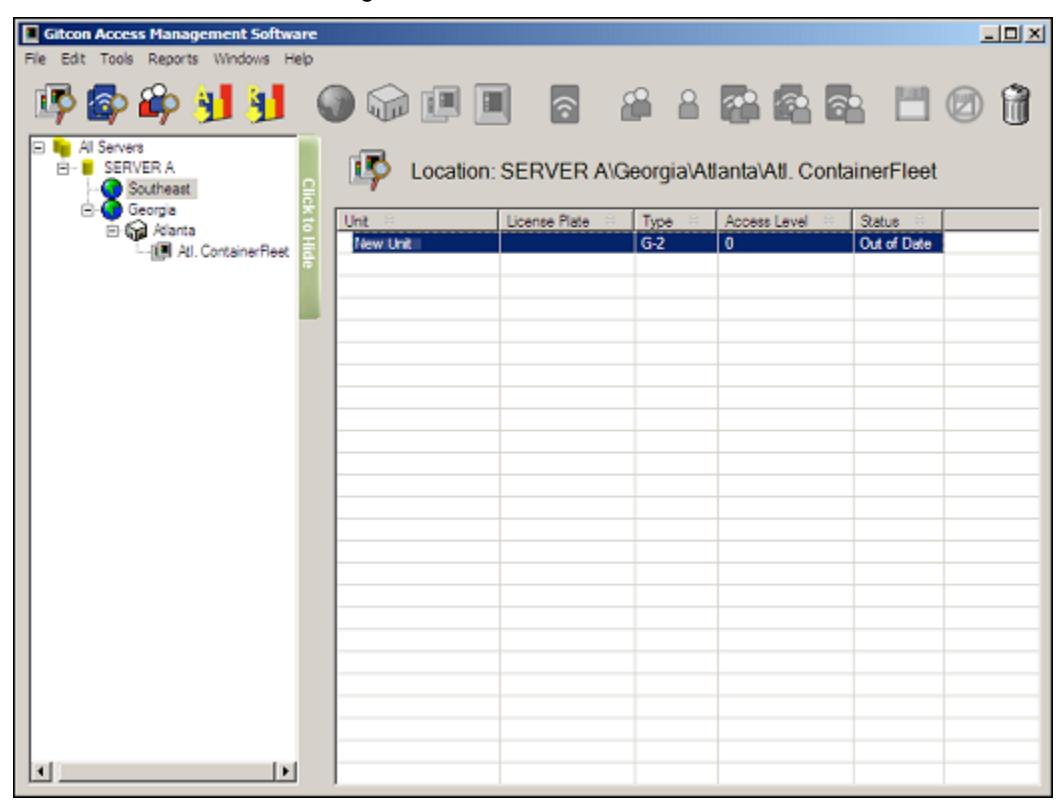
The Detail Area displays the detailed records for the area that is selected in the Tree Area. Each line in the Detail Area is one record in the system. The type of data that is visible in the Detail Area depends on which Explorer is active – Unit, Transponder Template, or Person.
The Header displays what is being shown just above the Detail Area. The Unit records located on Server A are displayed below.
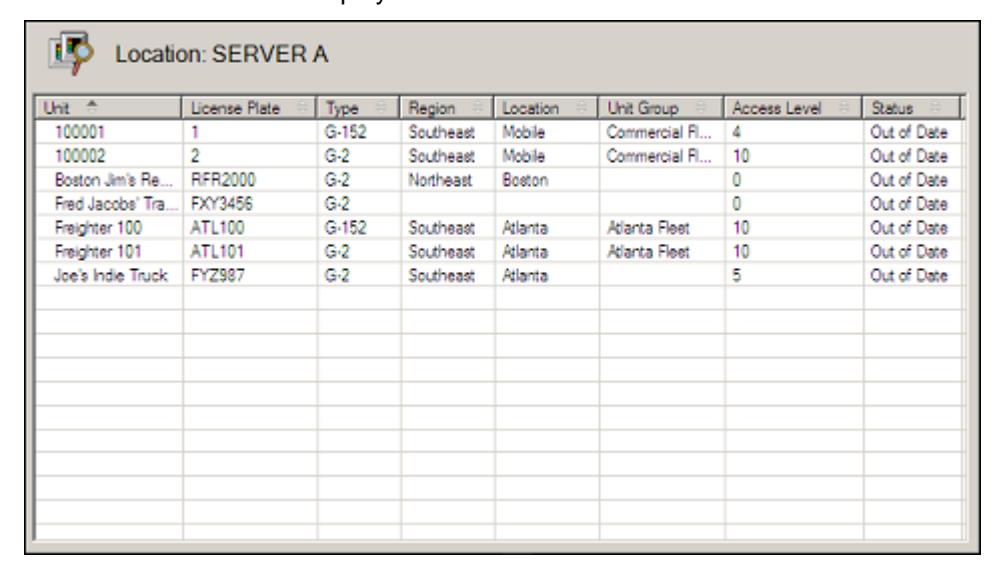
The Detail Area provides a quick overview of the Units, Persons, or Transponder Templates for a particular part of the database. Since there can be many records in this view, you can sort the data by clicking any column header. The column header can be different, depending upon which Explorer you are using, and which level you have selected in the Tree Area.
Setting Up the Software
Setting up the Gitcon Access Management Software consists of completing the following tasks.
- Customizing Software Options
- Managing Software Users
- Managing Government Override Codes
- Renaming a Server
Customizing Software Options
The Gitcon Access Management Software allows you to customize the different levels and data that are named in your database. For the purpose of this documentation, we will refer to the default terms, Unit, Unit Group, Location, Region, Transponder, Person, and Person Group.
Additional customization options include how the time settings are retrieved for the database. Complete the following steps to set the Software Customization Options.
1. Select Tools | Settings from the Menu Bar. The system will display the Software Customization Options screen.
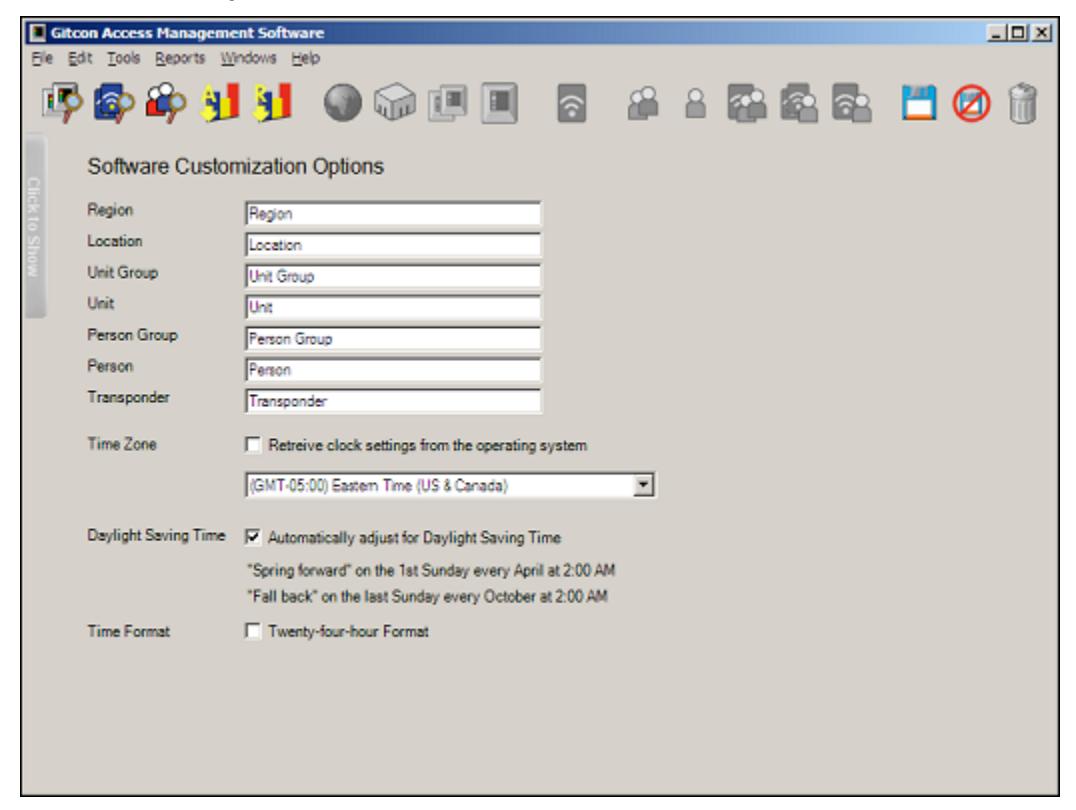
- 2. Customize the terminology you would like to use for your database in the Region , Location , Unit Group , Unit , Person Group , Person , and Transponder fields.
- 3. If you would like to manually configure clock settings, clear the Time Zone check box and select the Time Zone from the drop-down list. Otherwise, select the Time Zone check box to enable the database to retrieve clock settings from the server's operating system.
- 4. If you have manually configured the clock setting and would like the system to automatically adjust for Daylight Saving Time, select the Daylight Saving Time check box.
- 5. Select the Time Format check box to enable 24-hour clock format (i.e., 11:30 p.m. = 23:30).
- 6. If for any reason you want to discard the changes you have made before they are saved, click the Undo Changes button.

Or, select Edit | Undo Changes from the Menu Bar.
7. When you are finished, click the Save button.

Or, select Edit | Save from the Menu Bar to save your changes.
Managing Software Users
There is no logon window when you start the Gitcon Access Management Software; however, the software has built-in security through Windows Authentication. This means that the user name and password used to log in to Windows is also used to control access to the software and security levels within the Gitcon Access Management Software. See Software Install Guide for installation options.
User Types
The PC user who installs the Gitcon Access Management Software system is added to the database as the first software user with and is given the User Type Gitcon Manager . This user then has the ability to create other Gitcon Manager users as well as others with the Access Profile of Gitcon User .
Creating a New Software User
Complete the following steps to add new users to the Gitcon Access Management Software application.
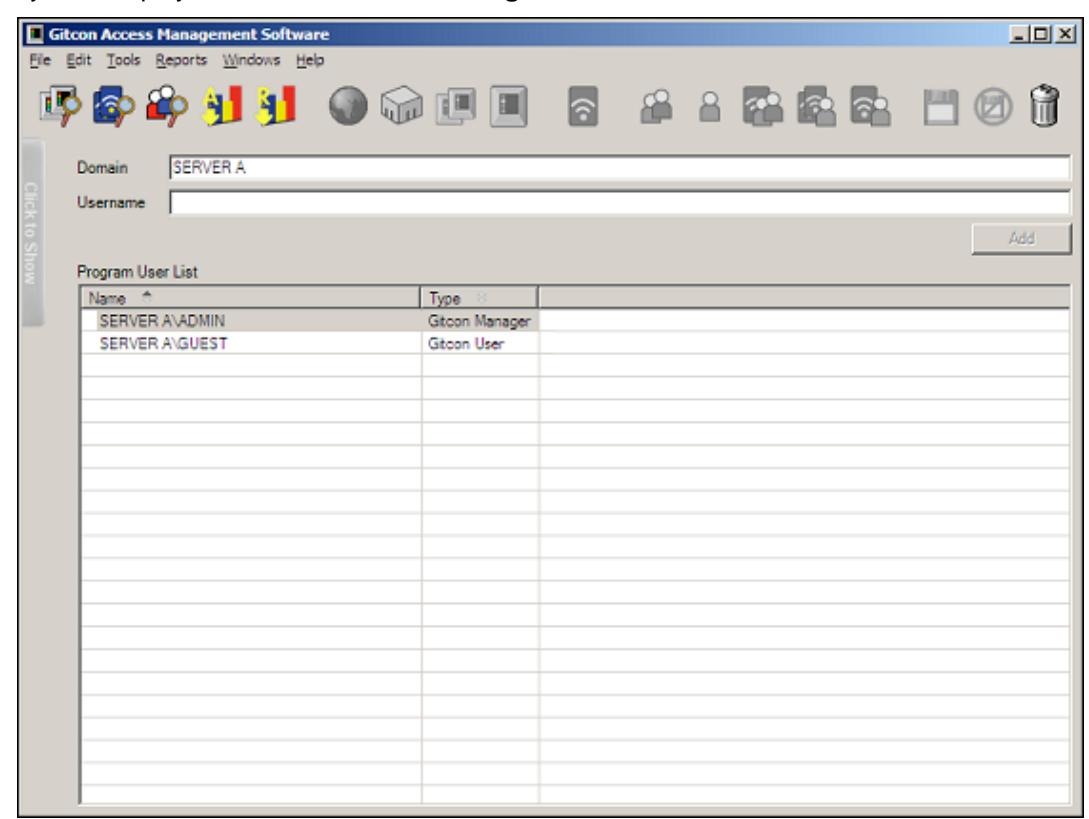
1. Select Tools | Administration | Manage Program Users from the Menu Bar. The system displays the Software User Management screen.
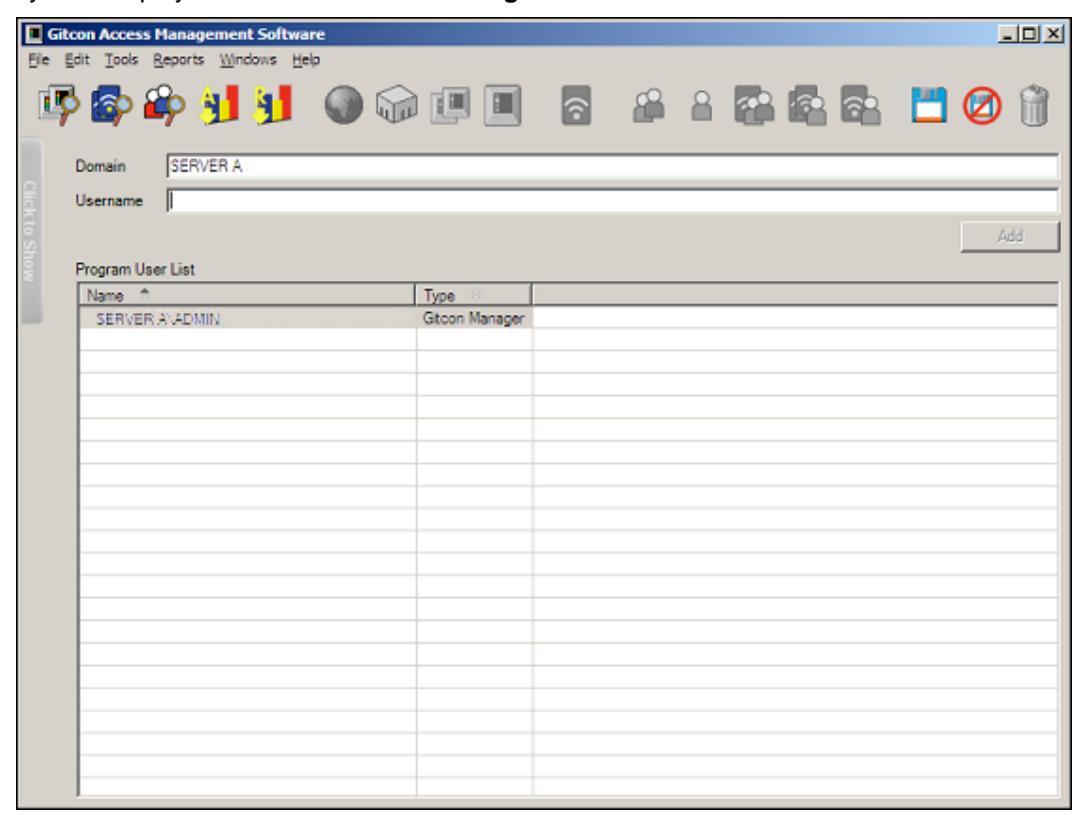
- 2. To add a new user, complete the Domain and Username fields for the new user.
- 3. Click the Add button. The system adds the new user to the Software User Management grid.
Note: If you are trying to add a user that cannot be found in a trusted domain, the system displays the following alert.
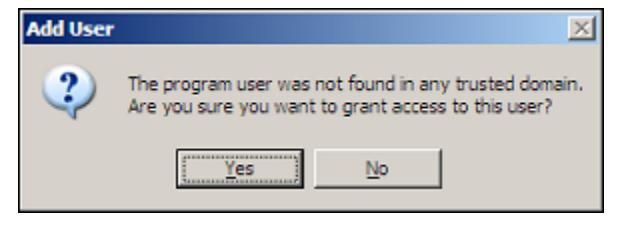
You must click Yes if you want to add the user anyway. The system will then provide you with an Activation Code that you must record for the user to enter upon logging in.
4. If, for any reason, you want to discard the changes you have made before they are saved, click the Undo Changes button.

Or, select Edit | Undo Changes from the Menu Bar.
5. When you are finished, click the Save button.

Or, select Edit | Save from the Menu Bar to save your changes.
Changing the Type of Software User
Complete the following steps to change the User Type for any Gitcon Access Management Software user.
1. Select Tools | Administration | Manage Program Users from the Menu Bar. The system displays the Software User Management screen.
2. Double-click the User's Type that you want to change to select it. The field will turn into a drop-down list.
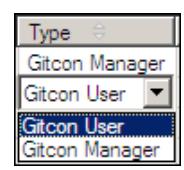
3. Select the new Type from the drop-down list.
The updated User Type will be saved automatically.
Deleting a User
Note: The user who installed the application (the original Gitcon Manager user) cannot be deleted for any reason.
Complete the following steps to delete any Gitcon Access Management Software user.
- 1. Select Tools | Administration | Manage Program Users from the Menu Bar. The system displays the Software User Management screen.
- 2. Select the User you want to delete, as shown below.
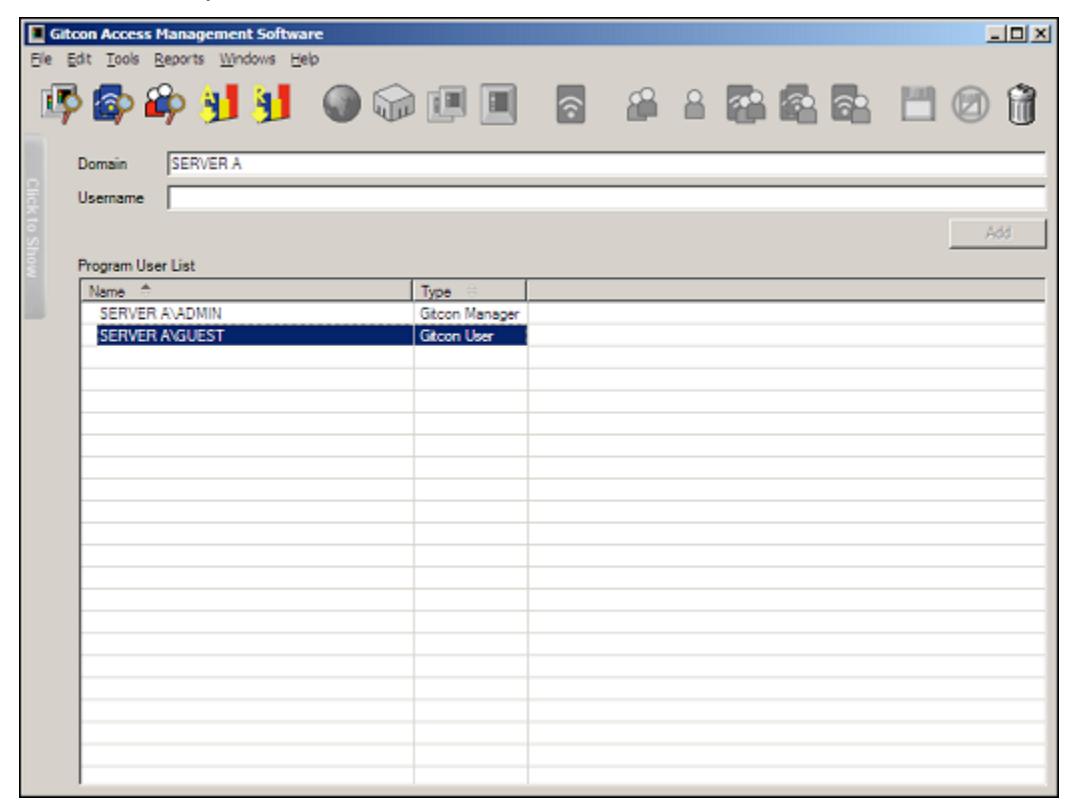
3. Click the Delete button.

Or, select Edit | Delete from the Menu Bar.
4. If for any reason you want to discard the changes you have made before they are saved, click the Undo Changes button.

Or, select Edit | Undo Changes from the Menu Bar.
5. When you are finished, click the Save button.

Or, select Edit | Save from the Menu Bar to save your changes.
Managing Government Override Codes
In order to allow access to government officials that need to audit or inspect the contents of trailers or containers, the Gitcon Access Management Software allows for the configuration of five Government Override Codes (GOCs). These codes are universal to the lock units in the database. The GOCs will work to access all units in the system except for those where the Disable Government Access Codes check box was selected during configuration of Unit Detail.
Complete the following steps to administrate the GOCs that government officials will use for access to the lock units in the database.
1. To view the GOCs that have been defined for the database, select Tools | Administration | Government Override Codes from the Menu Bar. The system displays the Government Override Code (GOC) Management screen.
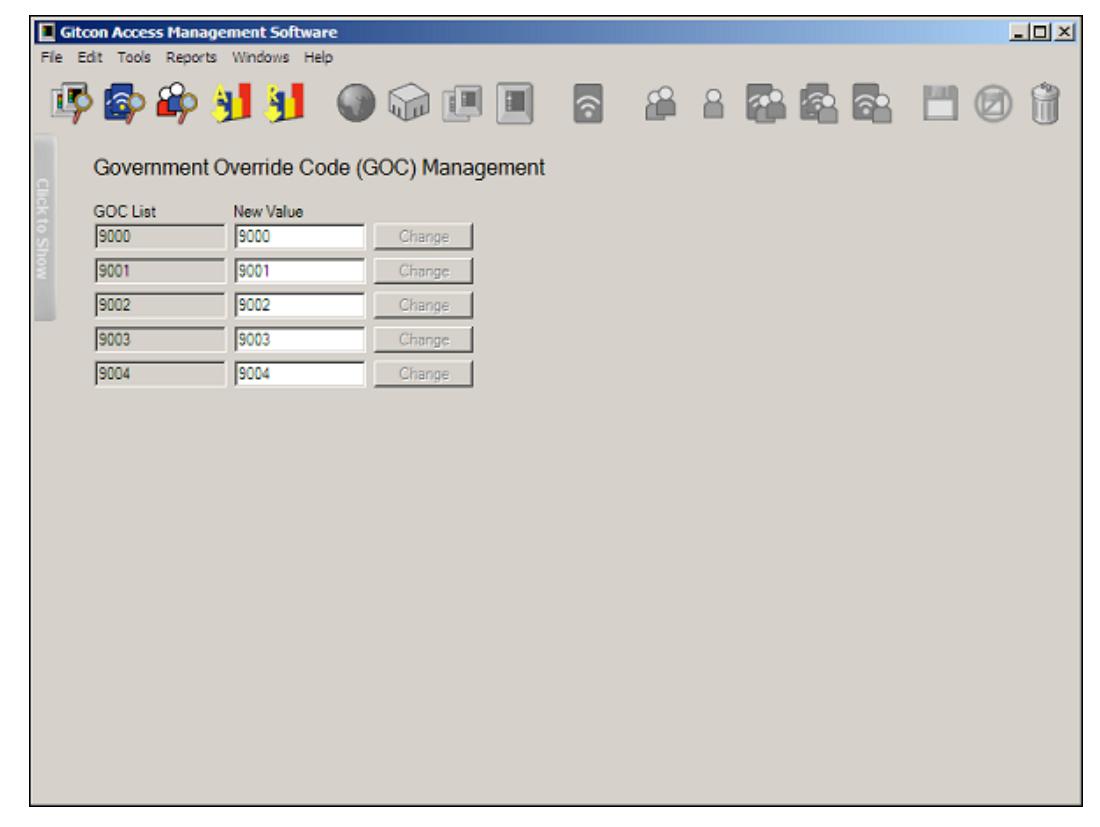
2. The system displays existing codes in each column. To edit any of the codes, type a new code in the New Value column and click the corresponding Change button. The system will display the changes made.
Note: The system displays the Change button only if you have edited its corresponding New Value field.
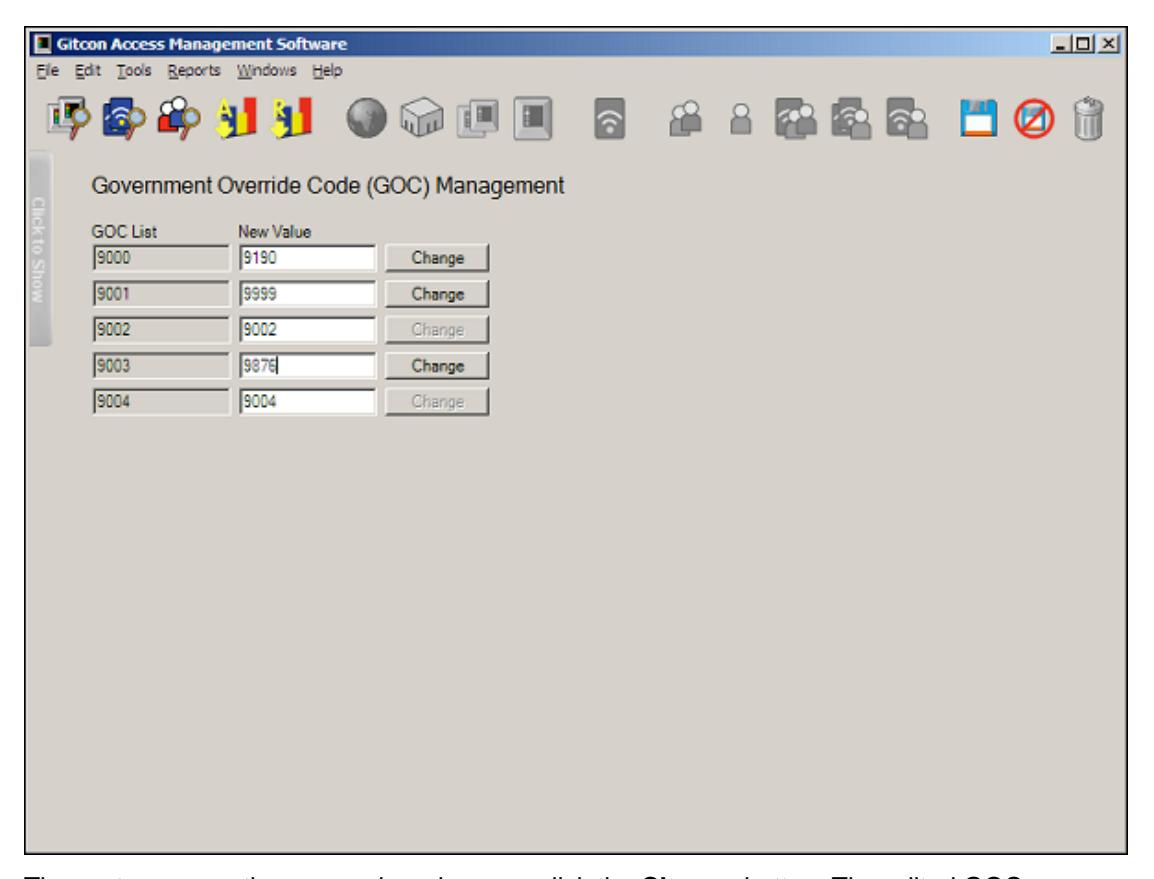
The system saves the new codes when you click the Change button. The edited GOCs become active the next time that you update the lock units with the Pocket PC.
Renaming a Server
Just as you can rename any level of the Unit, Person, or Transponder Template databases, you can rename any of the servers that make up your database. The name change will only occur in the Access Management Software's view—the server will maintain its name on the network.
Renaming a server is different than renaming a Region, Location, or Person Group. You cannot simply click the server's name in the Tree Area to edit its name. Complete the following steps to rename any of the servers in the database.
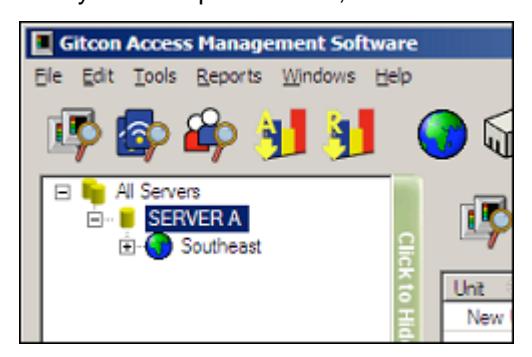
1. In any of the explorer views, select the Server whose name you want to change.
2. Next, select Tools | Administration | Rename Server from the Menu Bar. The system displays the Rename Server dialog box.
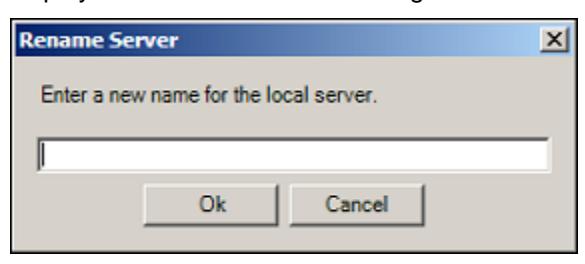
3. Type the new name for the selected server and click Ok .
The system then changes the name of the selected server.
Interfacing with the Pocket PC
The Pocket PC is an invaluable part of the Gitcon Access Control System. Without it, you would not be able to transfer the lock information that is configured in the Access Management Software's database. The following sections will teach you how to set up the Pocket PC for performing lock maintenance.
- Commissioning a Pocket PC
- Creating the Pocket PC Upload File
- ActiveSyncing the Pocket PC
Commissioning a Pocket PC
In order to update your locks with the information in the Access Management Software database, you need to first commission a Pocket PC to perform maintenance at the locks. The commissioning file will contain information pertinent to your database and will register a unique code, so that only that Pocket PC will be able to update the locks in your system.
Complete the following steps to commission a Pocket PC.
1. Select Tools | Administration | Commission a Pocket PC . The system prompts you for a password to protect the commissioning file.
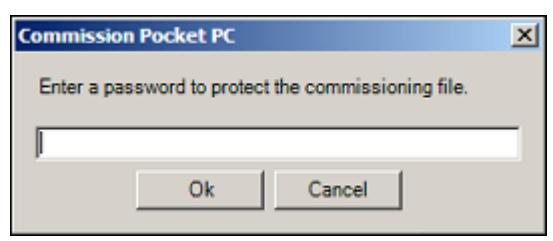
2. Type a password for the commissioning file and click OK . The system displays the following confirmation.
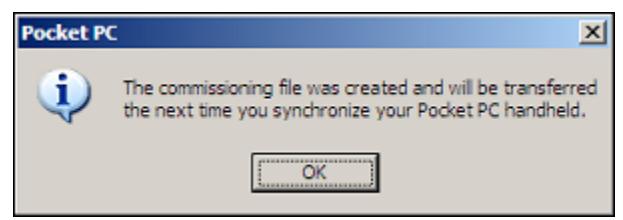
3. Click OK .
The next time you ActiveSync your Pocket PC, the upload file will be sent to the Pocket PC. In this way, the updated information is transferred to the lock upon connection through the infrared transmitter.
Creating the Pocket PC Upload File
Once you have commissioned a Pocket PC, you can use that Pocket PC to program locks and update their statuses as the database is updated. In order to update your physical lock units with the information from the Access Management Software's database, you need to create an upload file to send to your Pocket PC.
Complete the following steps to create the Pocket PC Upload file.
1. Select Edit | Create Pocket PC Upload File from the Menu Bar. The system creates the upload file containing all of the updated information from the database.
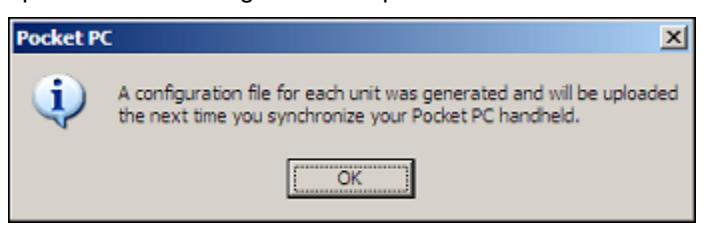
2. Click OK .
The next time you ActiveSync your Pocket PC, the commissioning file is uploaded. You will then need to access the application on the Pocket PC and enter the password to begin performing lock maintenance.
ActiveSyncing the Pocket PC
Anytime that you have made updates to the database, or want to commission a Pocket PC, you will need to place your Pocket PC on its cradle and run the Microsoft ActiveSync application. You should have versions of the ActiveSync application installed on your Pocket PC as well as the PC that contains the Gitcon Access Management Software.
ActiveSync will serve to "synchronize" corresponding data files on the Pocket PC and the PC. This means that any audits that have been taken on the Pocket PC will be uploaded to the PC, and any PC Upload files that have been created on the PC will be downloaded to the Pocket PC. The syncing process may take a while if it has been a long time since the last ActiveSync, or if there are numerous audit files and PC upload files to exchange.
Complete the following steps to ActiveSync your Pocket PC with your PC.
1. Place the Pocket PC in its cradle. The system displays the Microsoft ActiveSync window for the ActiveSync application.
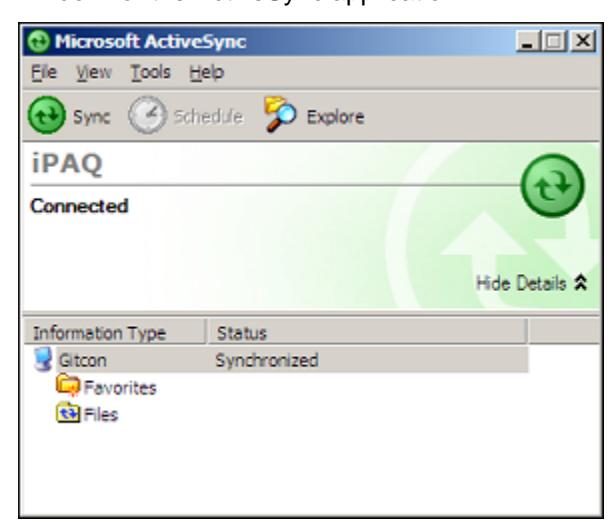
- 2. The ActiveSync application proceeds to synchronize the Pocket PC and the PC. If it does not, or if the system alerts you that there are Unresolved Items , simply click the Sync button. The system will proceed to synchronize the files on the PC with the files on the Pocket PC.
- 3. When you are finished, you can close or minimize the Microsoft ActiveSync window.
Now that the PC and the Pocket PC have been synchronized to contain the same data, you can run up-to-date reports from the audit data using the Access Management Software on the PC or upload lock configuration files to the lock units using the Pocket PC. For more information on these procedures, refer to the following sections.
- Auditing and Reporting on page 3–46.
- Connecting to the Lock Unit on page 5–3.
3 Using the Gitcon Access Management Software
The Gitcon Access Management Software is a powerful database management application. It enables you to manage the three major components involved in the G2 and G152 lock systems – Units (the physical locks), Transponders (access cards), and Persons (the lock users).
Use the software to create databases of lock Units, Person profiles, and Transponder Templates. You can assign Transponder Templates to Persons and manage the physical transponders as well, all with an easy to use graphical interface. The information that you enter using the Gitcon Access Management Software will be uploaded to the lock units via the Pocket PC. For more information on the function of the Pocket PC, refer to The Pocket PC .
You can manage each of these three databases through the three different views, or explorers. There are also detailed auditing and reporting features included in the Gitcon Access Management Software.
We will address each of the following database management features included with the Gitcon Access Management Software separately.
- Unit Explorer View The default view, used to manage the various G2 and G152 locks (units) on the various servers.
- Transponder Template Explorer View Used to define Transponder Templates. These templates will be used to define accesses for Transponders that will be linked to Persons and Person Groups alike.
- Person Explorer View Used to define and manage access for Persons and Person Groups.
- Auditing and Reporting The PC Desktop Reader can take detailed audits of transponder actions, and lock actions can be audited using the Pocket PC. These audits
are then stored on the database server and can be called upon to produce any number of reports.
• Backing Up and Restoring the Database – Back up and restore capabilities for your access control database are available through a free plug-in to the Microsoft SQL Server application.
Unit Explorer View
This view displays the physical lock units form the base of Kaba's Gitcon Access Control System. Thus, the Unit Explorer screen is the default screen you see upon accessing the software.
You can always return to the Unit Explorer view at any time by clicking the Unit Explorer button.

Or, you can select Windows | Unit Explorer from the Menu Bar.
Since we have established the Unit as the base of the Access Control System, we can now discuss higher levels of organization in your database. Units can be grouped together to comprise a level called a Unit Group. A Unit Group might represent a set of trailers/locks owned by a single carrier.
Taking it a step further, a Unit Group could be thought of as part of a particular Location within the organization. For instance, a rail yard facility might be considered a Location that is responsible for a multitude of grouped and individual lock units.
That same rail yard could be a part of a network of rail yards or other shipping facilities that comprise a larger subsection, or Region, of the corporation.
You can easily build the structure for the organization of lock units by building levels in the Tree Area of the Unit Explorer. You can add these levels using the Unit Explorer Toolbar.
The Unit Explorer view of the Gitcon Access Management Software contains the following features and capabilities.
- Unit Explorer Toolbar These buttons provide functions specific to the Unit Explorer view.
- Building the Database Structure with Levels Before you begin to enter the actual lock unit detail into your database, you should create some structure in your database to better represent the structure in your organization. The Unit Explorer enables you to group Units into Unit Groups, Locations, and Regions.
- Managing Lock Units This section assists you in creating, modifying, and deleting details for the lock units in service in your organization.
Unit Explorer Toolbar

In addition to the standard six buttons on the Toolbar of the Gitcon Access Management Software, there are additional buttons that become active whenever the Unit Explorer view is active.
The following buttons comprise the Unit Explorer Toolbar.
Building the Database Structure with Levels
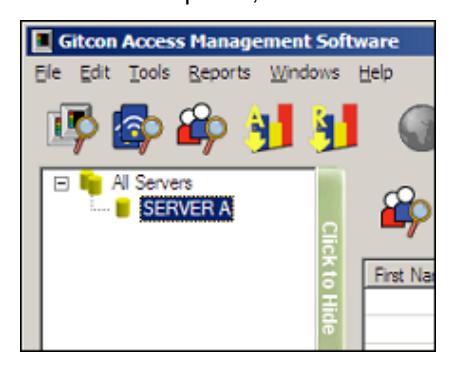
When you first start the application, the Tree Area in the Unit Explorer is a bare structure, as shown below.
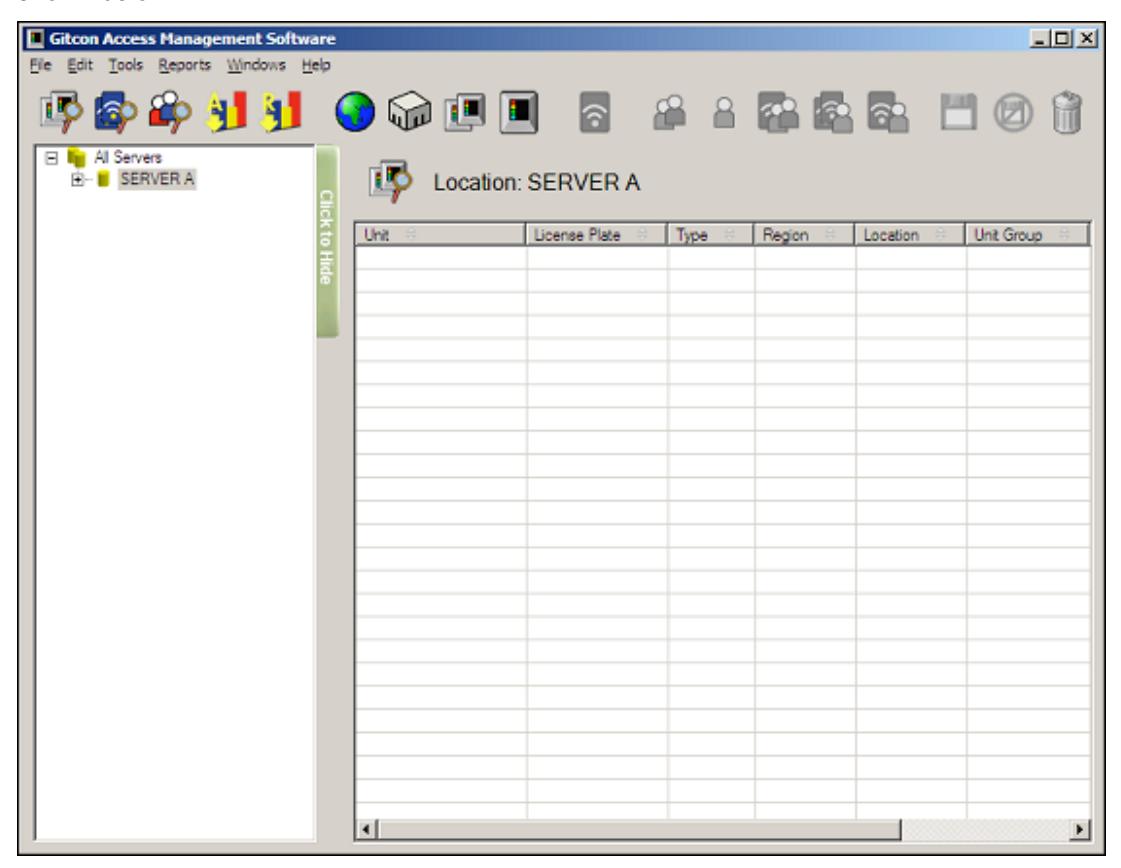
While you can start by adding a Unit directly to the Server, we will begin by building the structure from the top down with levels.
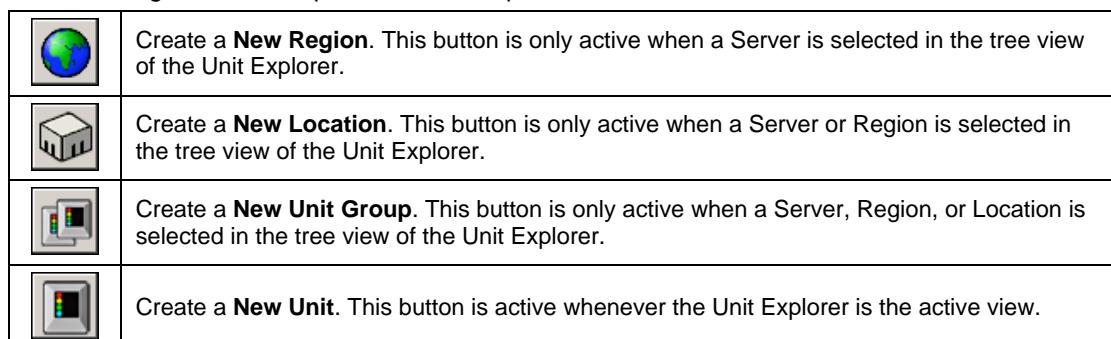
Creating a New Region
Besides the Server, the Region is the highest-level grouping that Units can have in the database. Regions can contain Locations, Unit Groups, or individual Units. Complete the following steps to create a new Region.
1. If you have not done so already, click the Unit Explorer button.

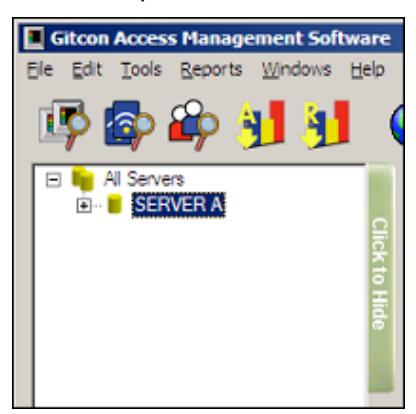
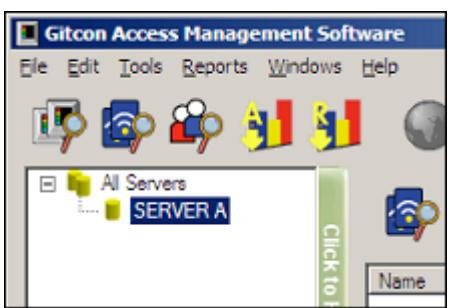
2. To add a Region to the Tree Area, you must have a Server selected in the Tree Area of the Unit Explorer, as shown below.
3. Click the New Region button.

Or, select Edit | New | Region from the Menu Bar. The system displays a new Region in the Tree Area, directly below the selected Server, as shown below.
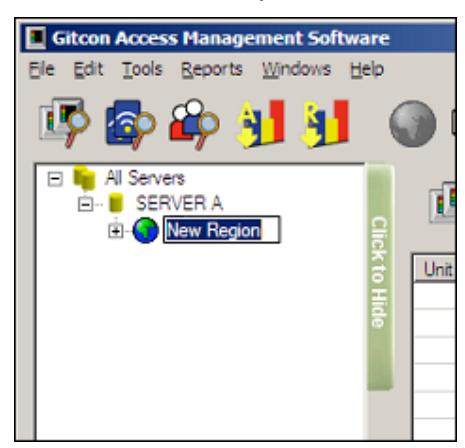
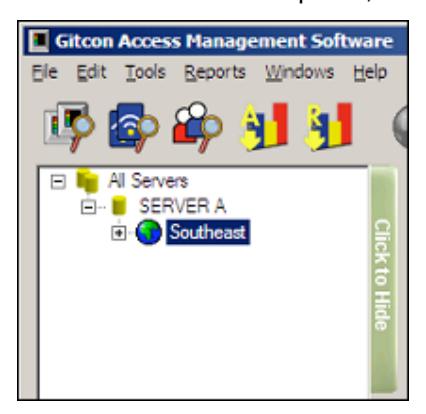
4. Type a name for the new Region and press Enter to save it.
Creating a New Location
1. If you have not done so already, click the Unit Explorer button.

2. To add a Location to the Tree Area, you must have a Server or Region selected in the Tree Area of the Unit Explorer, as shown below.
3. Click the New Location button.

Or, select Edit | New | Location from the Menu Bar. The system displays a new Location appears in the Tree Area, directly below the selected entity, as shown below.
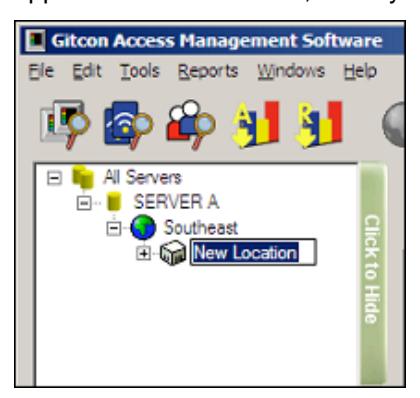
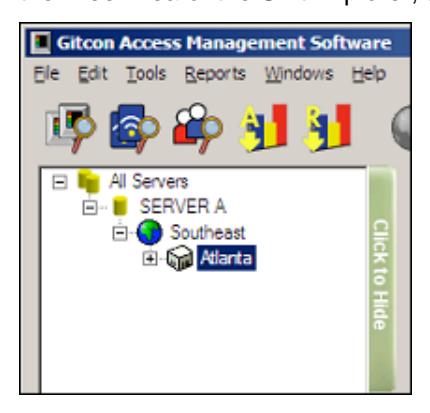
4. Type a name for the new Location and press Enter to save it.
Creating a New Unit Group
1. If you have not done so already, click the Unit Explorer button.

2. To add a Unit Group to the Tree Area, you must select a Server, Region, or Location in the Tree Area of the Unit Explorer, as shown below.
3. Click the New Unit Group button.

Or, select Edit | New | Unit Group from the Menu Bar. The system displays a new Unit Group in the Tree Area, directly below the selected entity, as shown below.
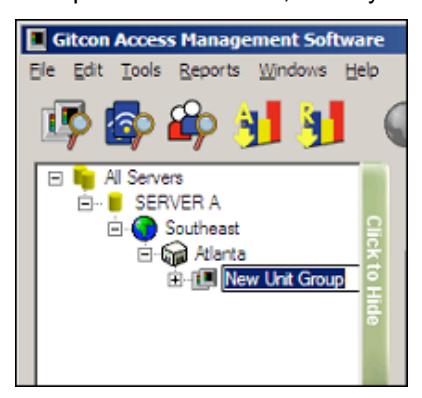
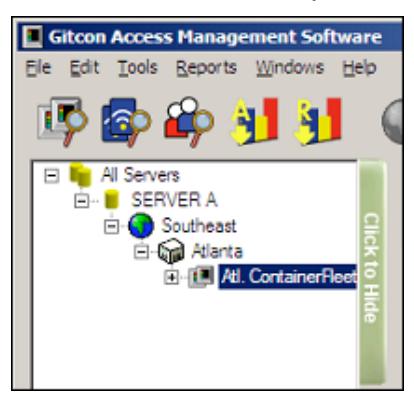
4. Type a name for the new Unit Group and press Enter to save it.
Deleting a Level from the Database
In order to delete a level from the database, the level cannot contain any Units at any sublevel. As long as the level contains no Units, you can delete a Unit Group, Location, or Region from the database with the following steps.
1. If you have not done so already, click the Unit Explorer button.

2. Select the database level you want to delete in the Tree Area by clicking it.
3. Click the Delete button.

Or, select Edit | Delete from the Menu Bar.
Managing Lock Units
Now that you have created some structure in your database of lock units, it is time to create the units themselves. The unit records can reside at any level of the database—in a Unit Group, a Location, a Region, or right on the Server. Managing the lock units using the Gitcon Access Management Software consists of the following:
- Creating a Lock Unit
- Editing Unit Detail
- Moving a Unit
- Deleting a Unit from the Database
Any changes that you make to the lock units are written into the Pocket PC Upload file and sent to the Pocket PC when you ActiveSync. They reside on the Pocket PC until you update the information at the lock.
Creating a Lock Unit
1. If you have not done so already, click the Unit Explorer button.

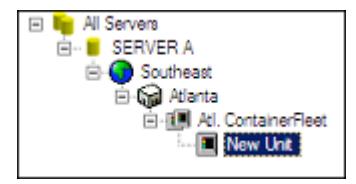
2. To add a new Unit to the database, you must select the level where you want the Unit to reside. This can be a Server, Region, Location, or Unit Group. Click the level in the Tree Area of the Unit Explorer to select it, as shown below.
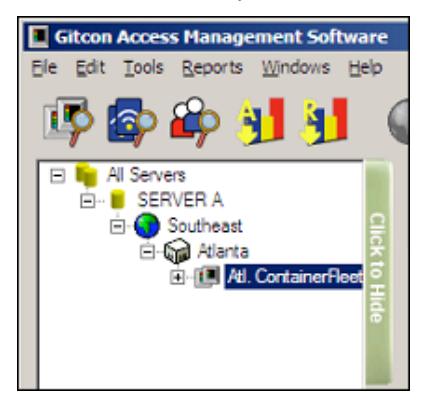
3. Click the New Unit button.

Or, select Edit | New | Unit from the Menu Bar. The system creates a new unit in the selected level.
The system then displays the Edit Unit Detail screen. Refer to the next section for information on adding the Unit's detail.
Editing Unit Detail
Complete the following steps to edit the details for any of the Units in your database.
Note: If you have just created a new Unit, begin at step 4.
1. If you have not done so already, click the Unit Explorer button.

2. Find the level in the Tree Area that contains the Unit you want to edit and click it to select it. The system will display all of the Units in that level of the Tree and all of its sublevels in the Detail Area.
3. Double-click the Unit that you want to edit to open its details. The system displays the Edit Unit Detail screen, as shown below.
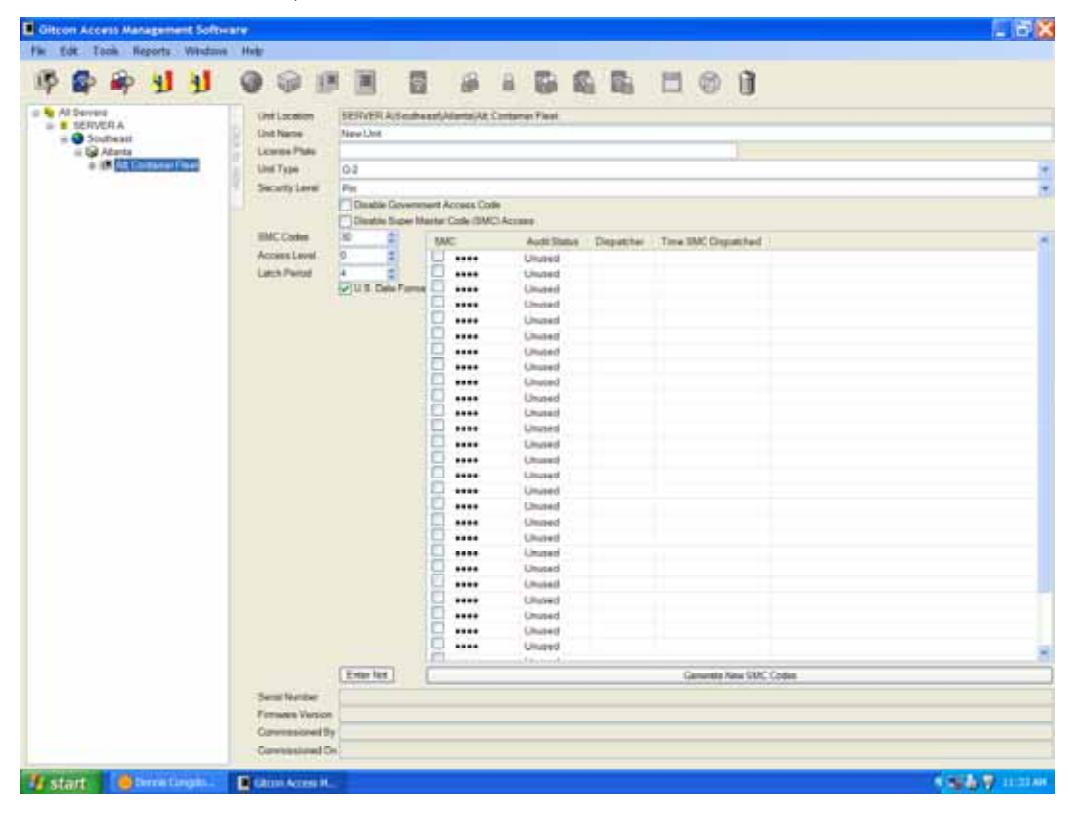
- 4. In the Unit Name field, type a name for the Unit.
- 5. In the License Plate field, type the license plate number of the Unit's corresponding trailer/container.
- 6. Select the lock type from the Unit Type drop-down list.
- 7. Select the level of security from the Security Level drop-down list.
- 8. To disable GOCs, select the Disable Government Access Code check box.
- 9. To disable SMCs, select the Disable Super Master Code (SMC) Access check box.
- 10. If SMCs are enabled, enter the number of SMC Codes that should be allowed for the Unit.
- 11. Enter the number of the Access Level for the Unit. Persons and Transponders with an Access Level below this number cannot operate this Unit.
- 12. Enter the duration in number of seconds for the Latch Period . This determines how long the lock remains unlocked when a correct code or Transponder is interfaced.
- 13. Select the U.S. Date Format check box to enable MM/DD/YYYY date format.
- 14. Type any notes for the Unit in the Notes field.
- 15. To change the SMCs for the Unit, click the Generate New SMC Codes button.
- 16. If for any reason you want to discard the changes you have made before they are saved, click the Undo Changes button.

Or, select Edit | Undo Changes from the Menu Bar.
17. When you are finished, click the Save button.

Or, select Edit | Save from the Menu Bar to save your changes.
Moving a Unit
The Gitcon Access Management Software enables you to easily move a Unit from one level of the database to another by the drag and drop method. Complete the following steps to move a Unit to different level.
1. If you have not done so already, click the Unit Explorer button.

2. Select the level of the database that contains the Unit you want to move in the Tree Area by clicking it.

3. Next, move the Unit you want by clicking and holding it in the Detail Area, dragging it over to the Tree Area, and releasing the mouse button over the desired level of the database.
The system displays the Unit in the newly selected level of the unit database.
Note: When moving a lock to a new location, make sure to update the lock file and physically reprogram the lock.
Deleting a Unit from the Database
In order to delete a level from the database, you must ensure that it does not contain any Units at any sublevel. As long as the level contains no Units, you can delete a Unit Group, Location, or Region from the database in the following steps.
1. If you have not done so already, click the Unit Explorer button.

Or, select Windows | Unit Explorer from the Menu Bar.
2. Select the database level that contains the Unit you want to delete in the Tree Area by clicking it.
3. Select the Unit you want to delete in the Detail Area by clicking it.
4. Click the Delete button.

Or, select Edit | Delete from the Menu Bar.
Transponder Template Explorer View
Now that you understand the layout and functionality of the Unit Explorer of the Gitcon Access Management Software, understanding the Transponder Template Explorer view will be a snap, as they are similar in structure. Transponder Templates provide an outline of access parameters that can be linked or copied to a particular Person or Person Group.
To access the Transponder Template Explorer view, click the Transponder Template Explorer button.

Or, select Windows | Transponder Template Explorer from the Menu Bar.
The main differences from the Unit Explorer view are:
- Instead of Units, the Transponder Template records fill the Detail Area.
- There is only one level or organization for the Templates—in the above case, SERVER A .
The Transponder Template Explorer view of the Gitcon Access Management Software contains the following features and capabilities.
- New Transponder Template Button This button allows you to create a new Transponder Template.
- Managing Transponder Templates This section assists you in creating, modifying, and deleting details for the Transponder Templates in your database.
New Transponder Template Button
Whenever you have selected a server in the Tree Area of the Transponder Template Explorer, you will notice a new button that is active on the Toolbar.

Create a New Transponder Template . This button is only active when a Server is selected in the tree view of the Transponder Template Explorer.
Managing Transponder Templates
Transponder Templates are helpful for organizations that are often issuing transponders with the same types of access. For instance, drivers on a similar shift or workers in a particular location can be allowed the same access. Once you have created a Transponder Template, you can link it to a Person or Person Group profile, so that the proper access is allowed the user(s).
Managing transponder templates using the PC version of the Gitcon Access Management Software consists of the following:
- Creating a New Transponder Template
- Editing Transponder Template Detail
- Deleting a Transponder Template
Creating a New Transponder Template
Complete the following steps to create a new transponder template.
1. If you have not done so already, click the Transponder Template Explorer button.

Or, select Windows | Transponder Template Explorer from the Menu Bar.
2. To add a new Transponder Template to the database, you must select the server where you want the Template to reside, as shown below.
3. Click the New Transponder Template button.

Or, select Edit | New | Transponder Template from the Menu Bar. The system creates a new transponder template on the selected server.
The system then displays the Edit Transponder Template Detail screen. Refer to the next section for information on adding the Transponder Template's detail.
Editing Transponder Template Detail
Complete the following steps to edit the details for any of the Transponder Templates in your database.
Note: If you have just created a new Transponder Template, begin at step 4.
1. If you have not done so already, click the Transponder Template Explorer button.

Or, select Windows | Transponder Template Explorer from the Menu Bar.
2. Find the Server in the Tree Area that contains the Transponder Template you want to edit and click it to select it. The system displays all of the Transponder Templates on that server in the Detail Area.

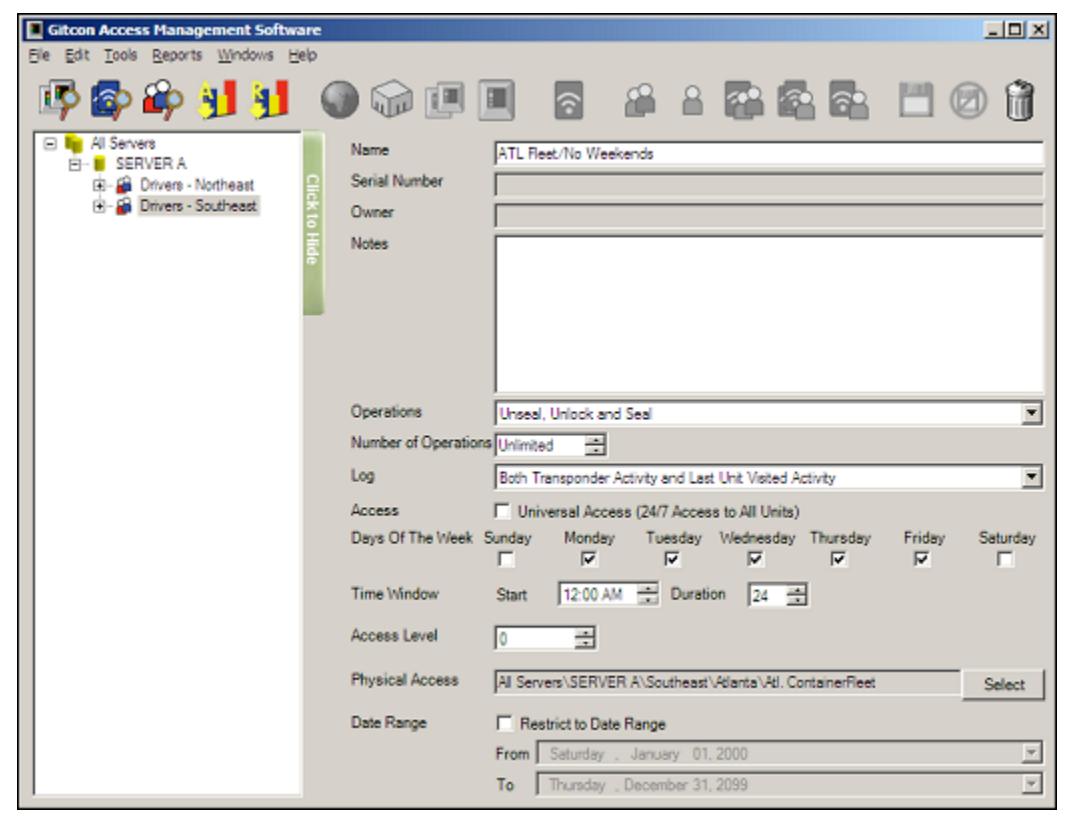
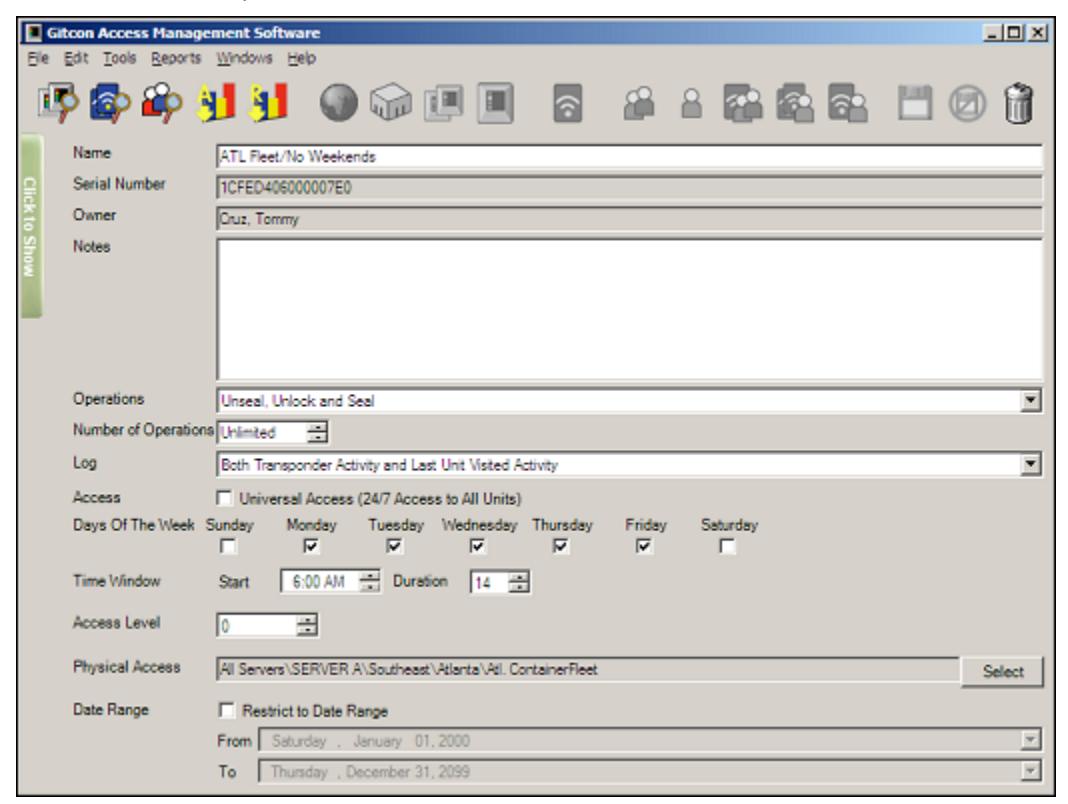
3. Double-click the Transponder Template that you want to edit to open its details. The system displays the Edit Unit Detail screen, as shown below.

- 4. In the Name field, type a name for the Transponder Template. The name should describe the access, for example, Day Shift or Weekdays Only .
- 5. In the Notes field, type any notes for the Transponder Template.
- 6. Select the Operations that the transponders with this template can perform from the drop-down list.
- 7. Enter the Number of Operations that should be allowed for a transponder programmed with this template (from 1 to 249 or Unlimited ).
- 8. Select which activities to Log , if any, from the drop-down list.
Note: If you want to audit and report the activities of transponders programmed with this template, you must log the activities that you want to audit.
- 9. Clear the Universal Access check box unless you are allowing universal access (24/7 access for all units) for the transponder template. If you are not allowing Universal Access, proceed to step 17.
- 10. Ensure that only the Days of the Week are selected where access is allowed for transponders programmed with this template.
- 11. Create a Time Window of access by selecting a Start Time from the drop-down list and entering a Duration (in hours).
- 12. Enter an Access Level code for the transponder template (0–10).
13. Next, click the Select button to select the areas where transponders programmed with the template will have Physical Access . The system displays a tree that resembles the Unit Explorer Tree Area.
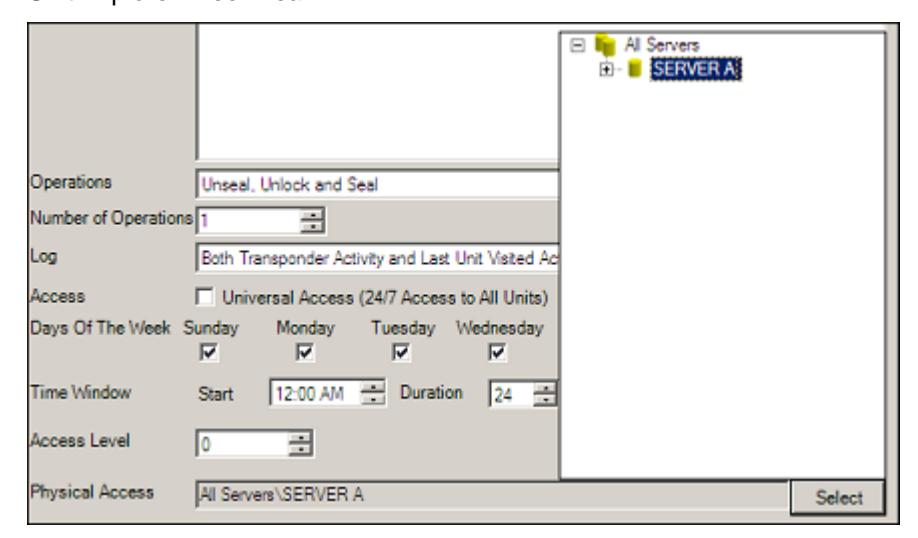
14. Expand the tree until you see the level of access you want to allow for the transponder template. Select the level of physical access that the transponder template will carry by double-clicking the Unit, Unit Group, Location, Region, or Server.
The system displays the selected level or unit in the Physical Access field.

- 15. If you want to restrict the transponder template to a Date Range , select the check box. If there is no date restriction, proceed to step 17.
- 16. Select the From and To dates to create the Date Range where access will be allowed for this transponder template.
- 17. If for any reason you want to discard the changes you have made before they are saved, click the Undo Changes button.

Or, select Edit | Undo Changes from the Menu Bar.
- 18. If you are editing a Person's custom Transponder Template and want to program a transponder card, place a transponder card on the PC Desktop Reader. Otherwise, proceed to the next step.
- 19. When you are finished, click the Save button.

Or, select Edit | Save from the Menu Bar to save your changes.
Note: If you are editing the detail for a Person's custom Transponder Template and there is a transponder card on the PC Desktop Reader when you click the Save button, the system will prompt you to select whether you would like to program the transponder. Click Yes to program the transponder card or No to exit.
Deleting a Transponder Template
In order to delete a Transponder Template, you must be sure that it is not directly linked to any Persons in the database. If you attempt to delete a linked Transponder Template, you will receive an error message and the template will not be deleted.
As long as the template contains no links, you can delete a Transponder Template from the database with the following steps.
1. If you have not done so already, click the Transponder Template Explorer button.

Or, select Windows | Transponder Template Explorer from the Menu Bar.
2. Select the server that contains the Unit you want to delete in the Tree Area by clicking it.
3. Select the Transponder Template you want to delete in the Detail Area by clicking it.
4. Click the Delete button.

Or, select Edit | Delete from the Menu Bar.
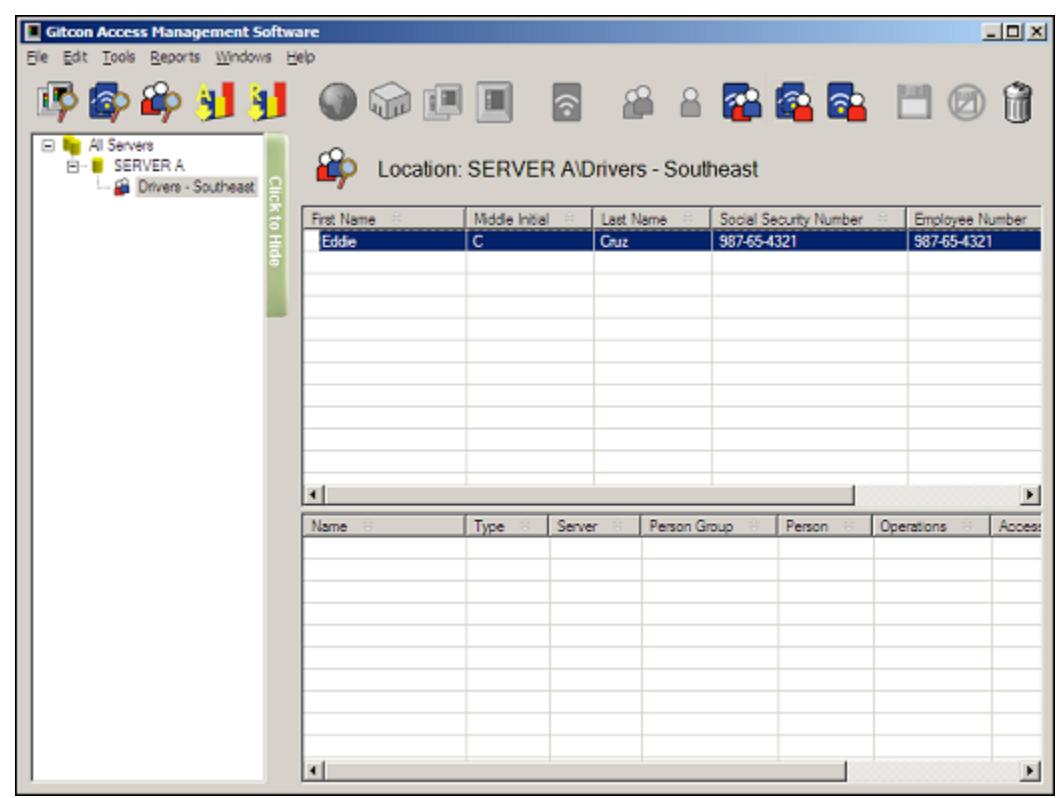
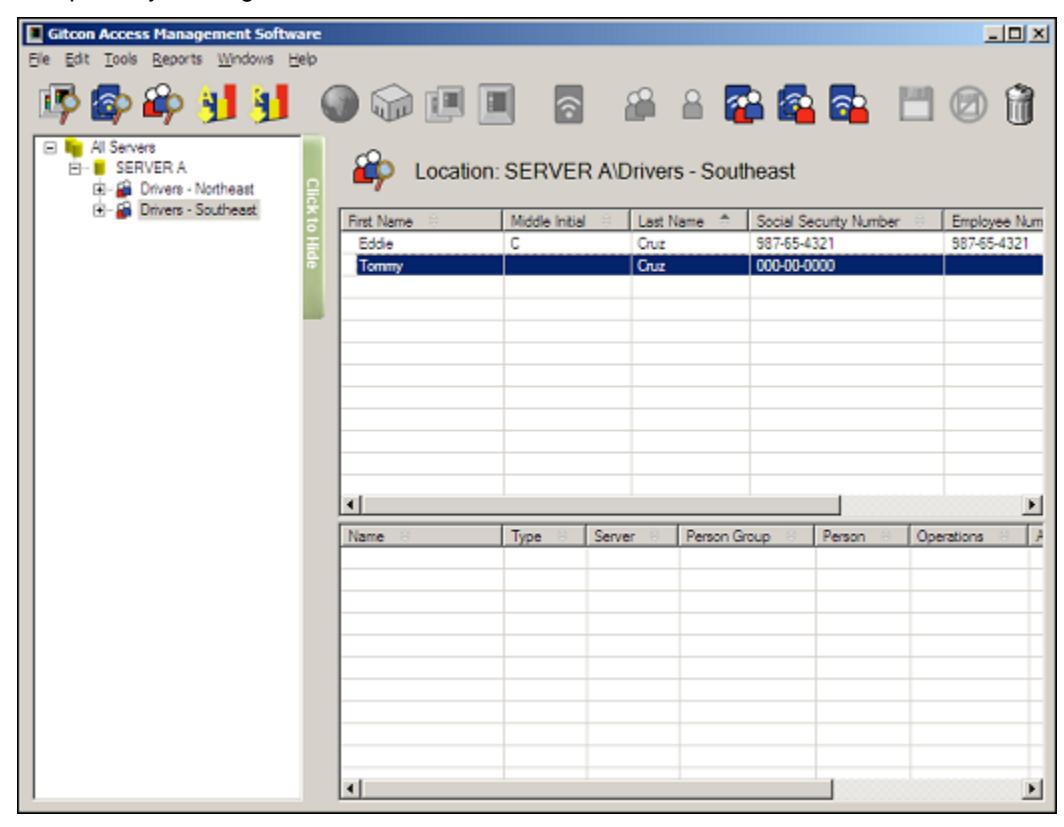
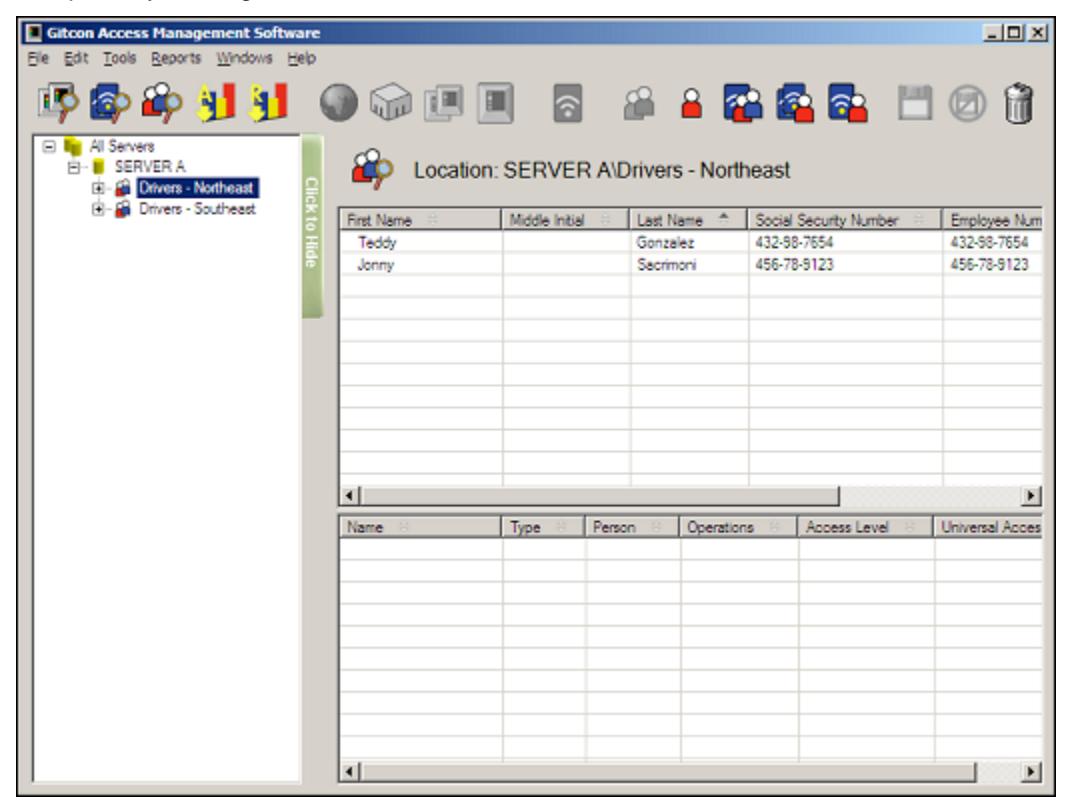
Person Explorer View
Now that you understand the layout and functionality of the Unit Explorer and the Transponder Template Explorer, understanding the Person Explorer view will be a snap, as they are similar, with a tree structure full of Person records. Unlike the Transponder Template Explorer, however, the Person Explorer allows you to group Person records together into Person Groups. This is similar to the levels that were created with the Unit Explorer.
To access the Person Explorer view, click the Person Explorer button.

Or, select Windows | Person Explorer from the Menu Bar.
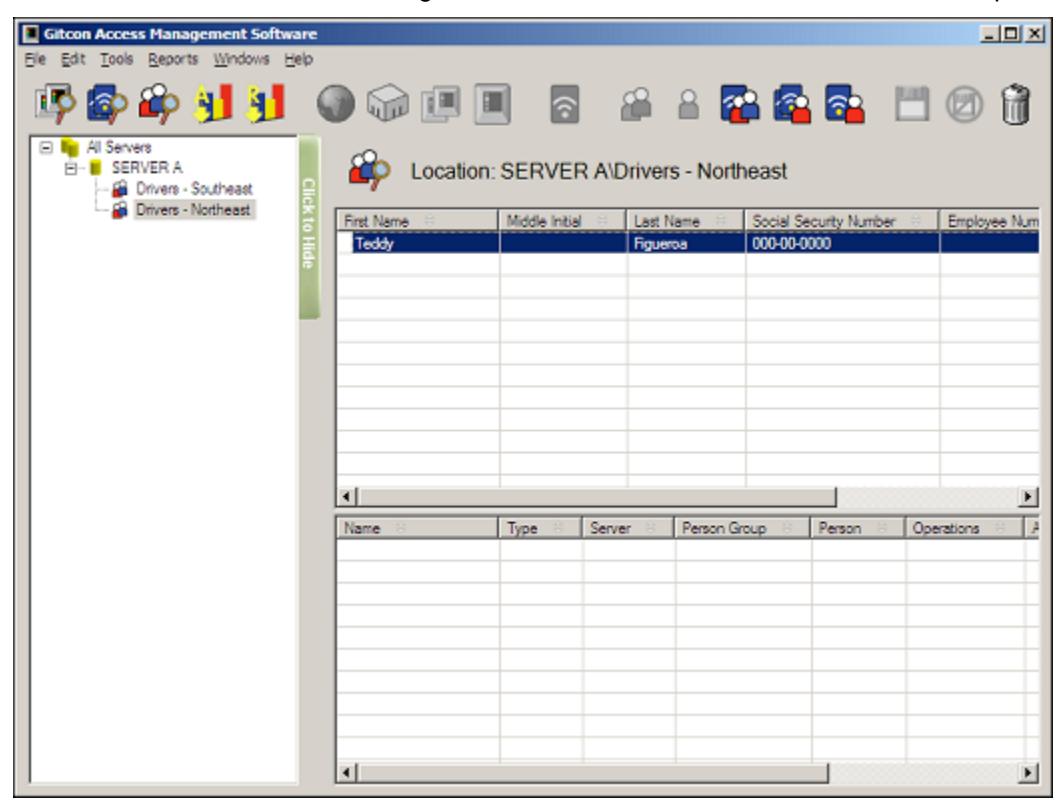
Note that there are two distinct Detail Areas in the Person Explorer view. The topmost area displays the Person records for the level selected in the Tree Area. The bottom Detail Area displays the Transponder Templates that are linked to the Persons in the topmost Detail Area. The linking of Persons with Transponders provides the powerful reporting capability in the Gitcon Access Management Software.
The Person Explorer view of the Gitcon Access Management Software contains the following features and capabilities.
- Person Explorer Toolbar These buttons provide functions specific to the Person Explorer view.
- Managing Persons and Person Groups This section will assist you in creating, modifying, and deleting details for the lock users or Persons in your organization. These users may also be organized into groups called Person Groups.
Person Explorer Toolbar
The five buttons on the Toolbar we have yet to discuss become active with the Person Explorer view. These buttons provide functions that deal with Persons and Person Groups and their links with Transponders and Transponder Templates.
The following buttons comprise the Unit Explorer Toolbar.
|
Create a New Person Group. This button is only active when a Server is selected in the
Tree Area of the Person Explorer. |
|---|
|
Create a New Person. This button is only active when a Server or Person Group is
selected in the Tree Area of the Person Explorer. |
|
Create a New Transponder Template Link. This button is active whenever the Person
Explorer is active. |
|
Create a New Transponder Template Copy. This button is active whenever the Person
Explorer is active. |
|
Create a New Custom Transponder. This button is active whenever the Person Explorer
is active. |
Managing Persons and Person Groups
The Person database allows you to create profiles for all of your lock users. The users' accesses are assigned through the transponder templates, which are discussed later. You can group Persons together into Person Groups. This is helpful if a large contingent of users is to be assigned the same access and thus the same transponder template.
Managing Persons and Person Groups using the Gitcon Access Management Software consists of the following:
- Creating a New Person Group
- Deleting a Person Group
- Creating a New Person
- Editing Person Detail
- Moving a Person
- Deleting a Person
Since the Person Group provides an extra level of organization within the Person Explorer, we will deal with that first.
Creating a New Person Group
Besides the Server level, the Person Group provides another level of organization for managing Persons in the database. Person Groups can contain any number of Persons and can be linked to a Transponder Template, which will be discussed later.
1. If you have not done so already, click the Person Explorer button.

2. To add a Person Group to the Tree Area, you must select a Server in the Tree Area of the Person Explorer, as shown below.
3. Click the New Person Group button.

Or, select Edit | New | Person Group from the Menu Bar. The system displays a new Person Group in the Tree Area, directly below the selected Server, as shown below.
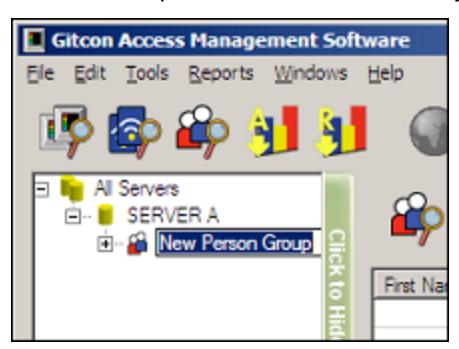
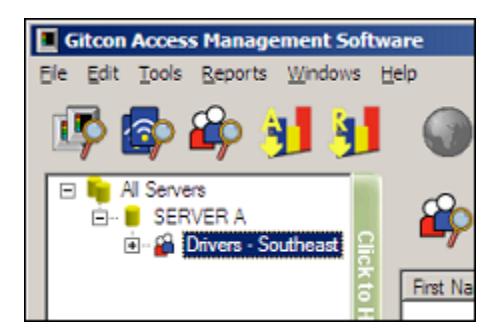
4. Type a name for the new Person Group and press Enter to save it.
Deleting a Person Group
Just as you can add a Person Group, you can delete a Person Group. Be careful, however, as all Persons in the Person Group are deleted when you delete a Person Group. If you want to keep the Person's records but delete the Person Group, you should move the Person to another Person Group before deleting.
Complete the following steps to delete a Person Group.
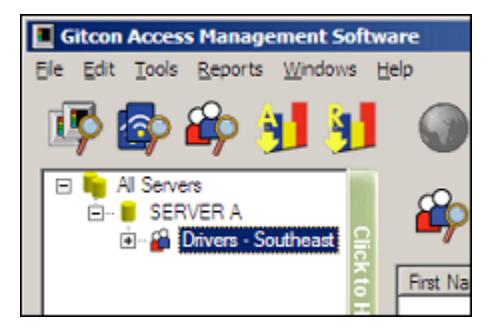
1. If you have not done so already, click the Person Explorer button.

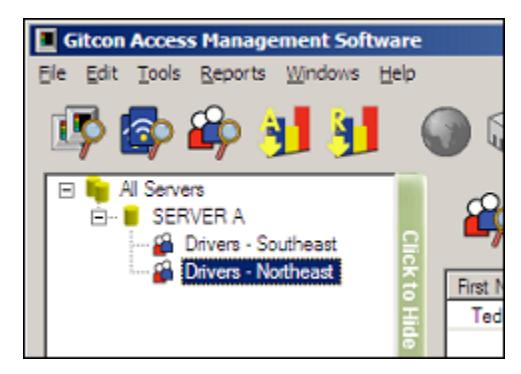
2. To delete a Person Group, you must select the Person Group you want to delete, as shown below.
3. Click the Delete button.

Or, select Edit | Delete from the Menu Bar.
The system removes the Person Group and all of the Person Records within.
Creating a New Person
You can create a Person at either the Server or the Person Group level of the Person Explorer Tree Area.
Complete the following steps to create a new Person.
1. If you have not done so already, click the Person Explorer button.

Or, select Windows | Person Explorer from the Menu Bar.
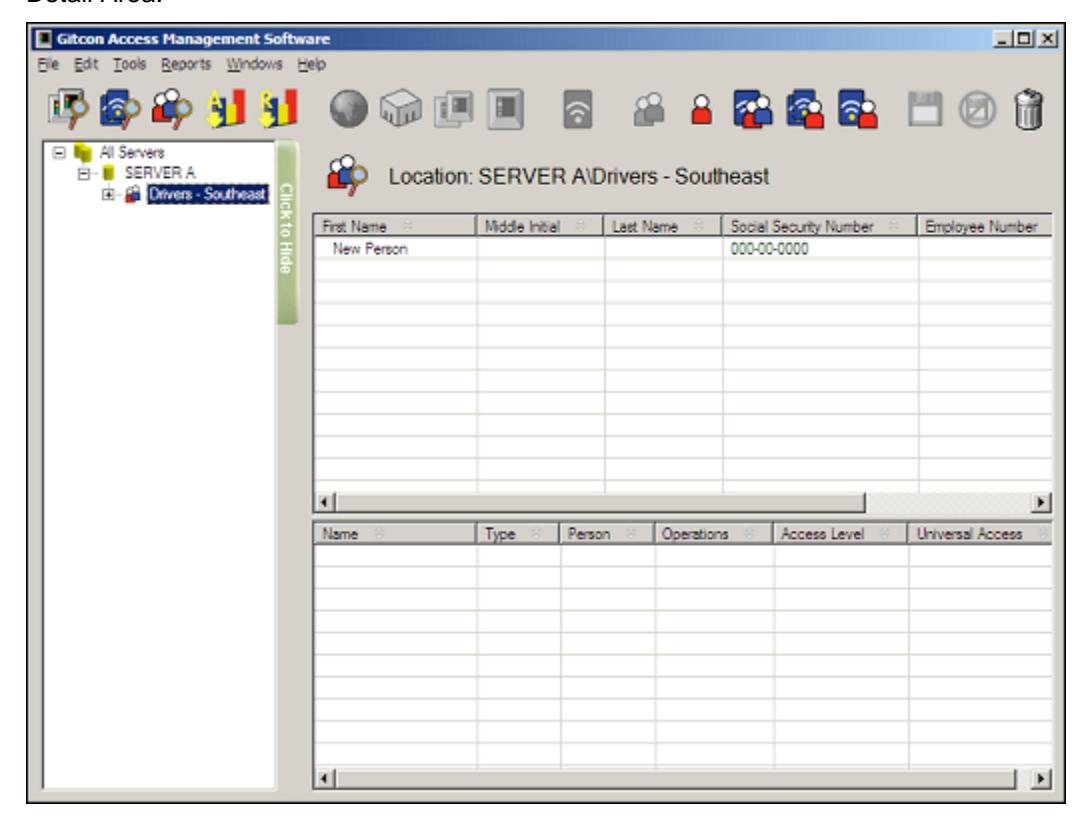
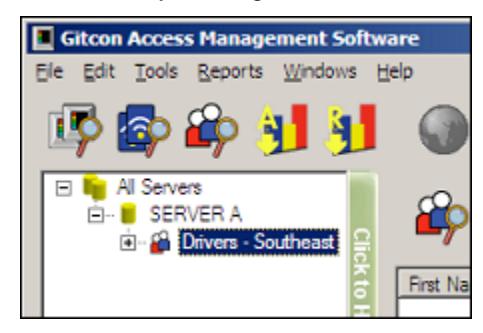
2. To add a new Person to the database, you must select the server or Person Group where you want the Person to reside, as shown below.
3. Click the New Person button.

Or, select Edit | New | Person from the Menu Bar. The system creates a new Person on the selected level of the database.
The system then displays the Edit Person Detail screen. Refer to the next section for information on adding the Person's detail.
Editing Person Detail
Complete the following steps to edit the details for any of the Persons in your database.
Note: If you have just created a new Person, begin at step 4.
1. If you have not done so already, click the Person Explorer button.

Or, select Windows | Person Explorer from the Menu Bar.
2. Find the Server or Person Group in the Tree Area that contains the Person you want to edit and click to select it. The system will display all of the Persons on that server in the Detail Area.
3. Double-click the Person that you want to edit to open the details. The system displays the Edit Person Detail screen, as shown below.
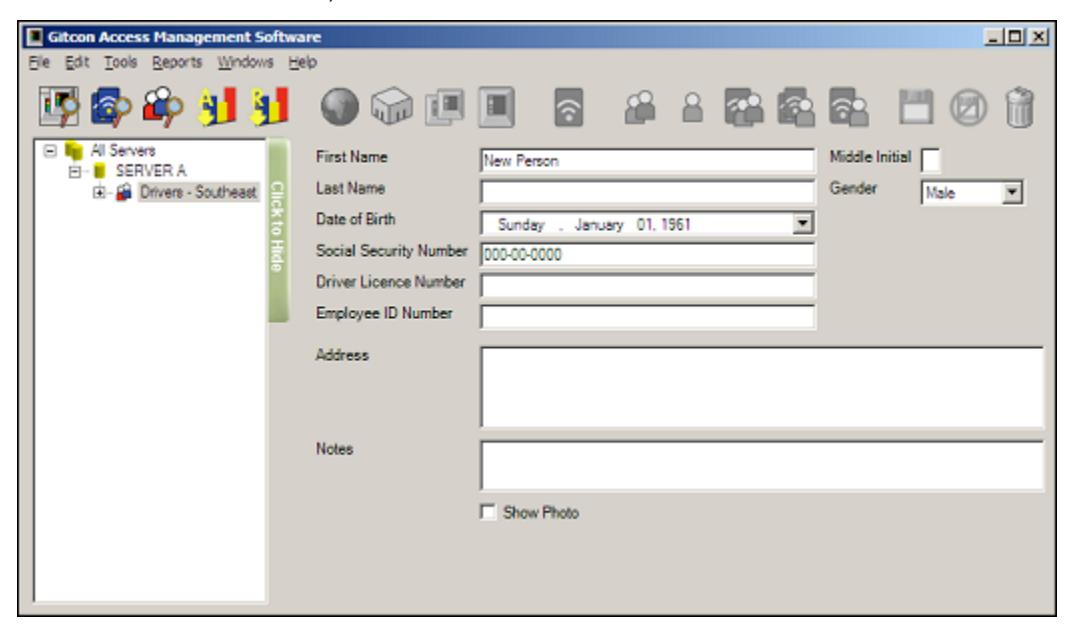
- 4. In the First Name field, type a first name for the Person.
- 5. In the Middle Initial field, type a middle initial for the Person.
- 6. In the Last Name field, type a last name for the Person.
- 7. Select a Gender for the Person from the drop-down list.
- 8. Select the Person's Date of Birth from the drop-down calendar.
- 9. In the Driver License Number field, enter the Person's driver license number.
- 10. In the Employee ID field, enter the Person's employee ID.
- 11. In the Address field, enter the Person's home or mailing address.
- 12. In the Notes field, type any notes for the Person.
- 13. If you want to attach a photo to this Person, select the Show Photo check box. If you do not want to attach a photo, proceed to step 15.
- 14. Click the Attach button to browse your server's file system for the Person's photo.
- 15. If for any reason you want to discard the changes you have made before they are saved, click the Undo Changes button.

Or, select Edit | Undo Changes from the Menu Bar.
16. When you are finished, click the Save button.

Or, select Edit | Save from the Menu Bar to save your changes.
Moving a Person
The Gitcon Access Management Software enables you to easily move a Person from one Person Group to another by the drag and drop method. Complete the following steps to move a Person to another Person Group.
1. If you have not done so already, click the Person Explorer button.

Or, select Windows | Person Explorer from the Menu Bar.
2. Select the Server or Person Group that contains the Person you want to move by clicking it in the Tree Area.
3. Next, move the Person you want by clicking and holding it in the Detail Area, dragging it over to the Tree Area, and releasing the mouse button over the desired Person Group.
The system displays the Person in the newly selected Person Group. The Person then acquires any transponder templates that you have previously linked to that new Person Group. (Also see Section 3, "Managing Transponders")
Deleting a Person
You can delete a Person from the database with the following steps.
1. If you have not done so already, click the Person Explorer button.

Or, select Windows | Person Explorer from the Menu Bar.
2. Select the server or Person Group that contains the Person you want to delete in the Tree Area by clicking it.
3. Select the Person you want to delete by clicking its row in the Detail Area.
4. Click the Delete button.

Or, select Edit | Delete from the Menu Bar. The system will delete the Person from the database.
Assigning Transponder Templates to Persons
Since you have created Persons and Transponder Templates, the only thing left to do is link them together, so that each person will receive the proper access on his or her transponder card when its is programmed and issued.
When a Transponder is programmed, it carries the access information, as well as the Person information. This helps to provide the detailed audits and reports from the lock or system.
Persons and Person Groups can be linked to several different Transponder Templates. There are three different ways that a Transponder Template can be assigned to a Person or Person Group.
- Transponder Template Linked to a Person or Person Group This allows you to keep a Template for a large number of Persons or Person Groups. So, when you want to change part of the access for all Persons or Person Groups linked to it, you can simply edit the Transponder Template.
- Transponder Template Copied to a Person or Person Group This allows you to copy a Transponder Template to a Person, yet still modify it for the Person without changing the actual Transponder Template.
- Creating a Custom Transponder for a Person or Person Group This means that you will create an individual Transponder profile for the Person or Person Group. This is generally a good idea for unique Transponder types.
No matter what assignment you make to a Transponder Template, the system displays it in the lower Detail Area of the Person Explorer. The data that is shown can be used to determine what is linked, no matter which level is selected in the Tree Area of the Person Explorer. This is explained in more detail later.
We will now discuss the procedures for each Person/Transponder linking process.
Linking a Transponder Template
Any existing Transponder Template can be linked to a Person or Person Group. Linking Transponder Templates enables you to apply a common access profile across a broad spectrum of Person profiles.
Note: You cannot modify Transponder Templates that link to Persons on the individual level. You can only modify them universally at the template level. If you want to modify the template at the individual level, you should copy the Transponder Template to the Person.
Complete the following steps to link a Transponder Template to a Server, Person Group, or Person.
1. If you have not done so already, click the Person Explorer button.

2. Select the Person Group or Person to which you want to link an existing Transponder Template by clicking it.
Note: Only the actively selected entity (in blue) is linked to the Transponder Template.
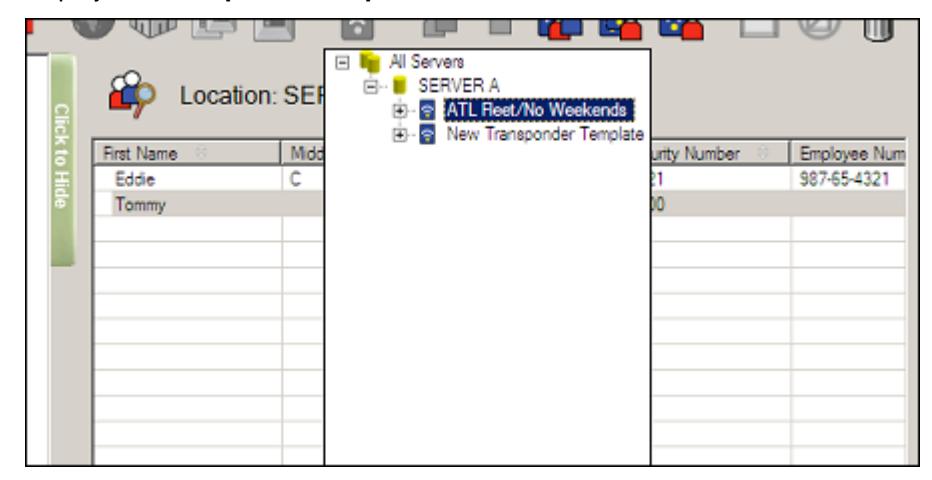
3. Click the New Template Transponder Link button.

Or, select Edit | New | Transponder Template Link from the Menu Bar. The system displays the Template Transponder tree.
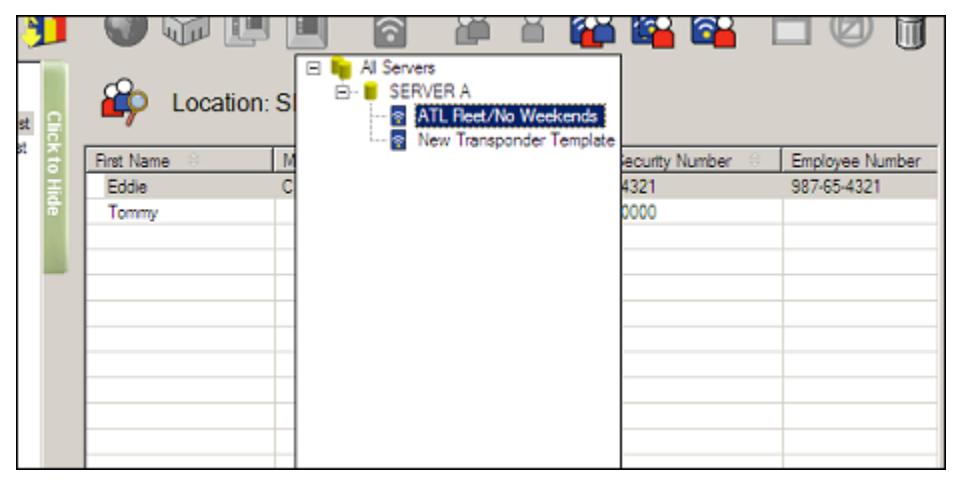
4. Double-click the Transponder Template you want to link to the selected Person or Person Group. The system then displays the unmodifiable Transponder Template, as it is linked to the selected Person or Person Group.

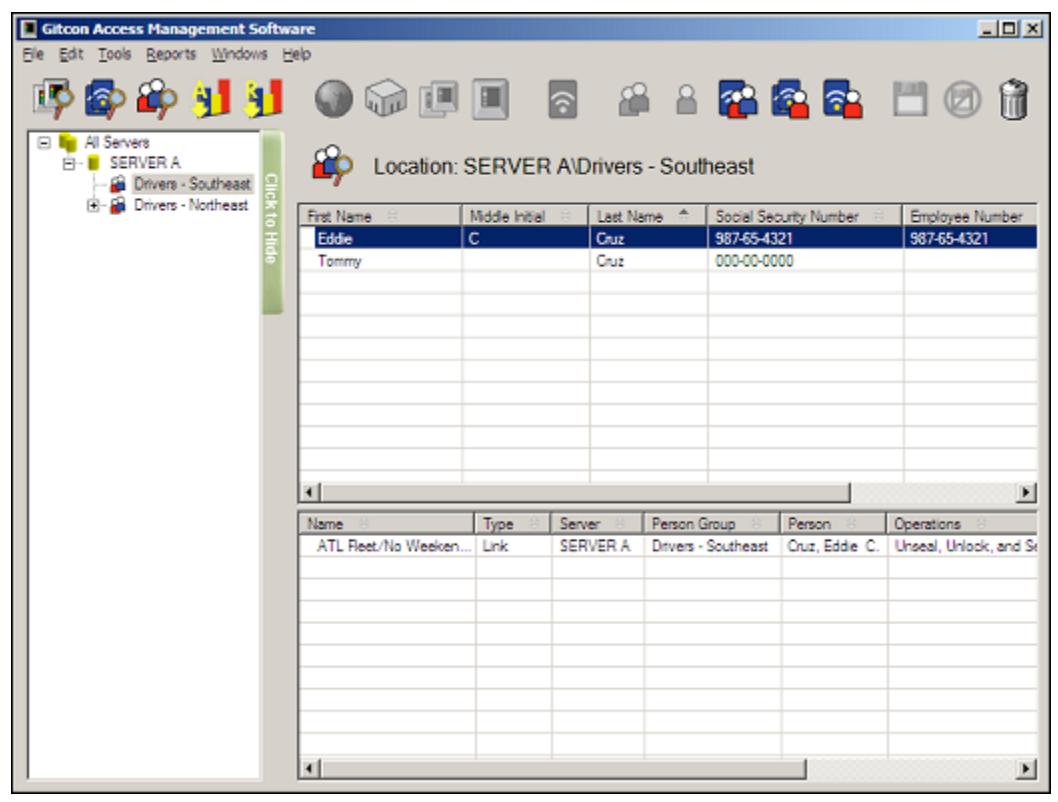
5. If you return to the Person Explorer view, the Transponder link that you just made is displayed in the lower Detail Area.
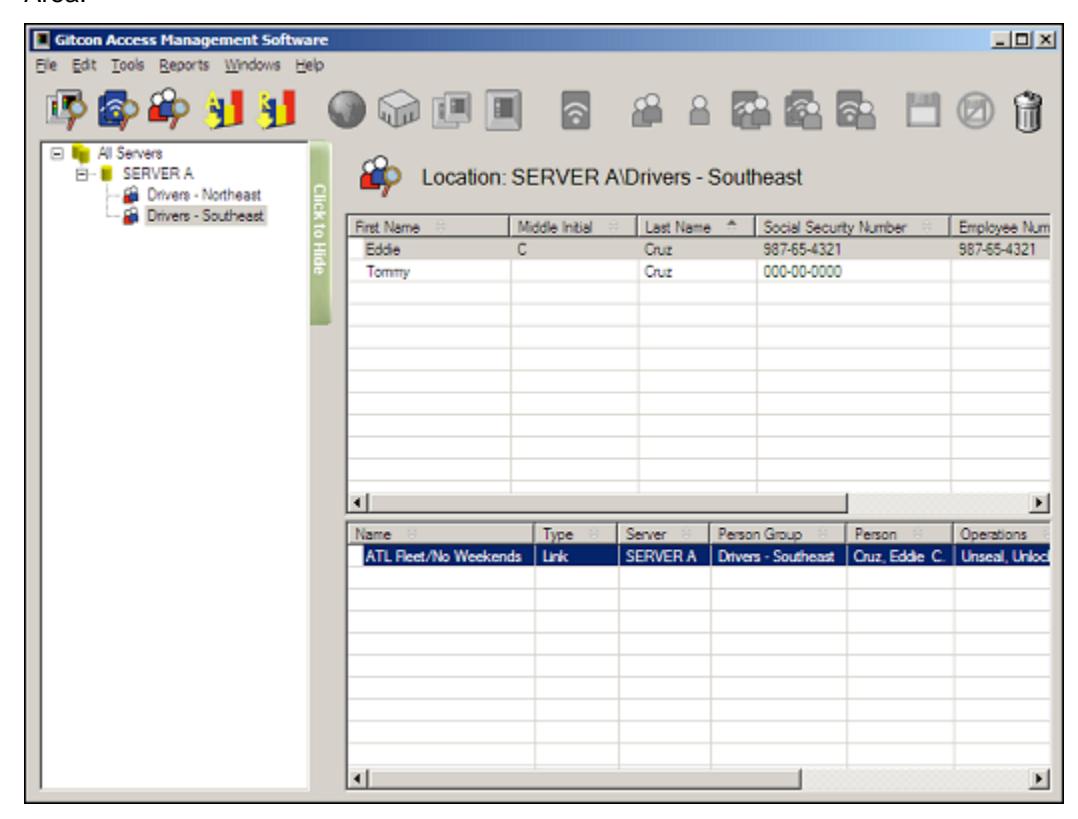
Copying a Transponder Template
Just as you can link a Transponder Template to a Person or Person Group, you can copy any existing Transponder Template to a Person or Person Group. This gives the Person all the accesses of the Transponder Template, while still allowing the settings to be modified at the individual level. Also, since you copy the Transponder Template to the Person rather than link it, when you modify the Template, the Person or Person group does not receive the modification.
Copying a Transponder Template allows you to create a customized version of an existing Template, without having to enter all of the settings.
Complete the following steps to copy a Transponder Template to a Person Group or Person.
1. If you have not done so already, click the Person Explorer button.

Or, select Windows | Person Explorer from the Menu Bar.
2. Select the Person Group or Person to which you want to copy an existing Transponder Template by clicking it.
Note: Only the actively selected entity (in blue) has the Transponder Template copied to it.
3. Click the New Transponder Template Copy button.

Or, select Edit | New | Transponder Template Copy from the Menu Bar. The system displays the Template Transponder tree.
4. Double-click the Transponder Template you want to copy to the selected Person or Person Group. The system then displays the copied Transponder Template, as it is applied to the selected Person or Person Group.
- 5. You can now modify the copied Transponder Template if you choose. The changes you make here are only applied to the selected Person or Person Group to which you copied the Transponder Template. Refer to Editing Transponder Template Detail for more information.
- 6. If for any reason you want to discard the changes you have made before they are saved, click the Undo Changes button.

Or, select Edit | Undo Changes from the Menu Bar.
7. When you are finished, click the Save button.

Or, select Edit | Save from the Menu Bar to save your changes.
8. If you return to the Person Explorer view, the system displays the copied Transponder that you just made in the lower Detail Area.
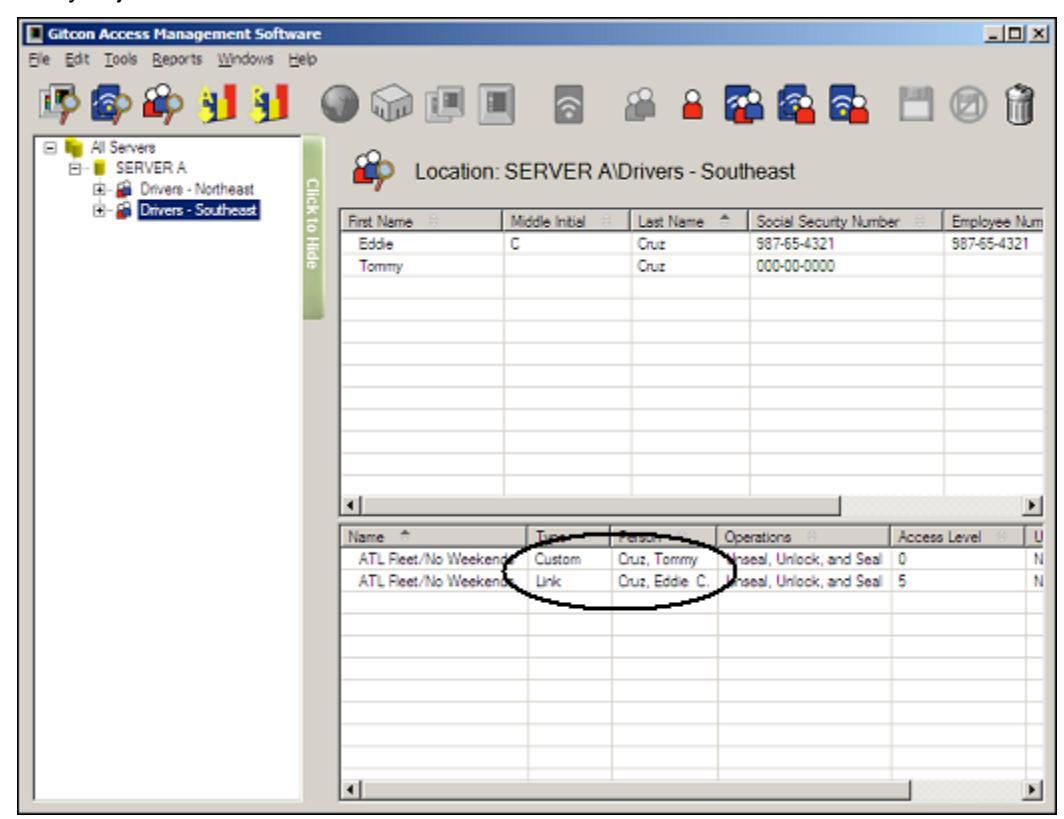
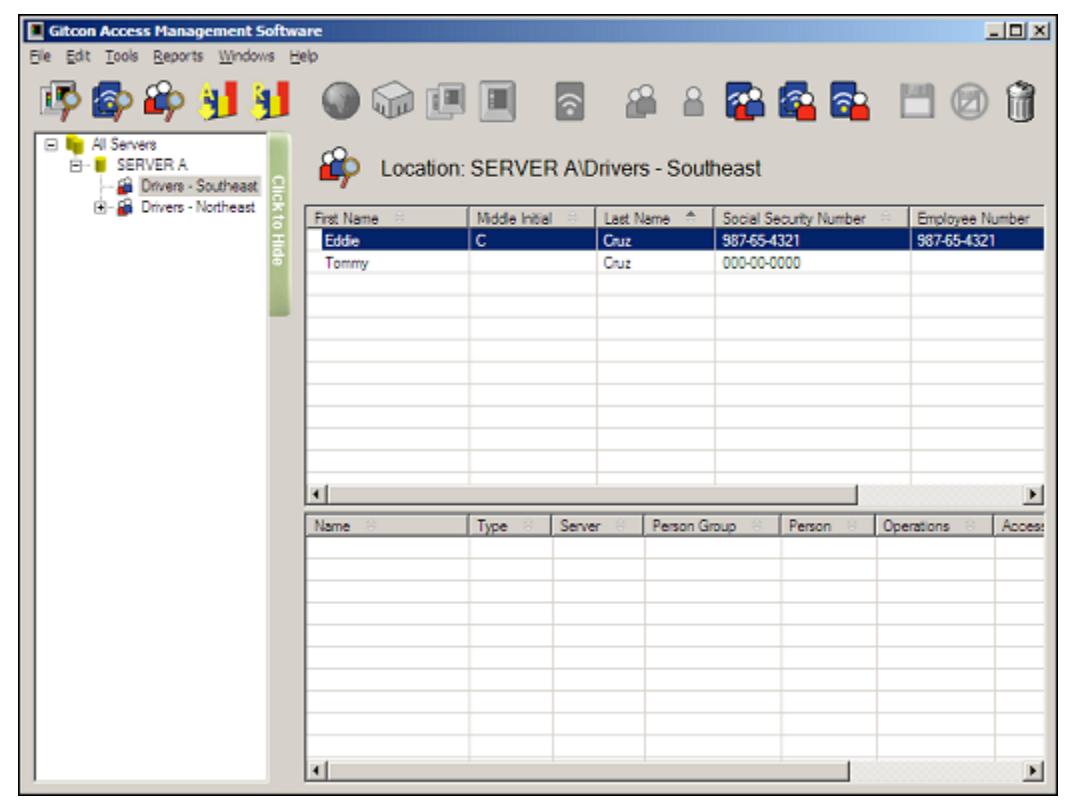
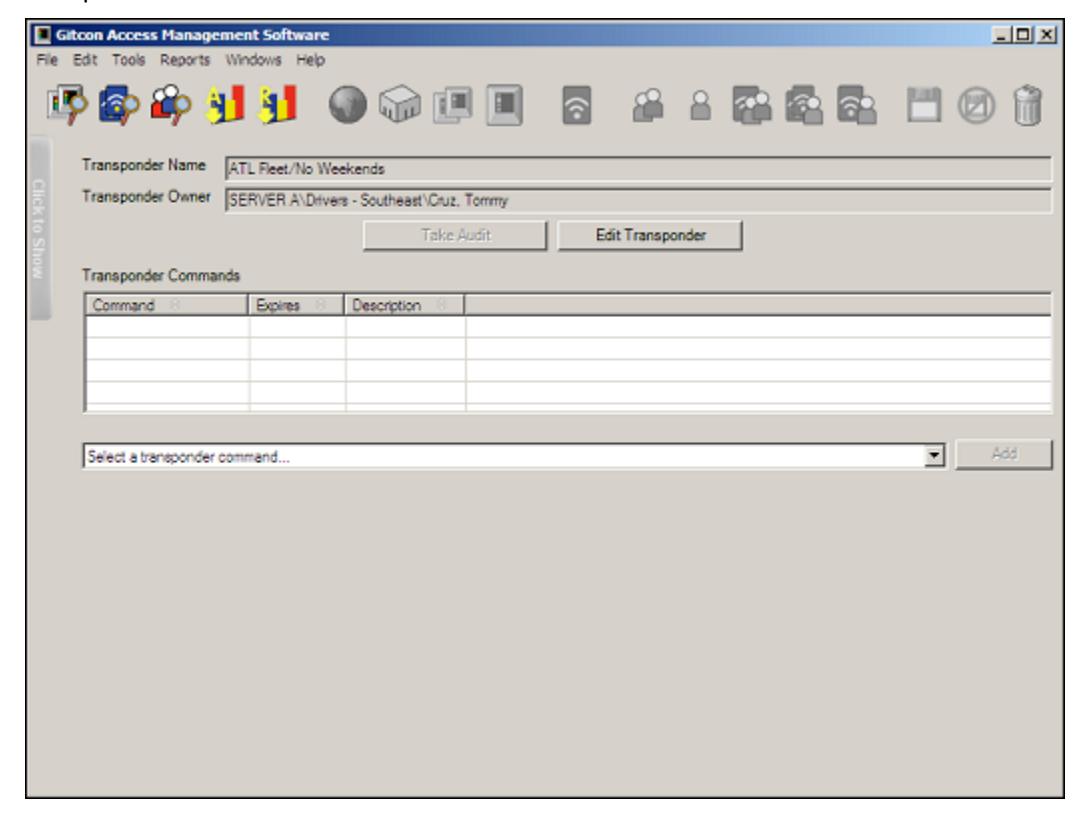
Note that since the Person Group is selected, each of the Transponder Templates are shown, and can be distinguished by their respective Type and Person fields. Even though the Transponder Template for Tommy Cruz was copied to the Person, it is of a Custom type, since it was customized to that Person.
We will now discuss creating a new custom Transponder Template for a Person or Person Group.
Creating a Custom Transponder Template
Just as you can link or copy a Transponder Template to a Person or Person Group, you can create a custom Transponder Template for any Person or Person Group. Similar to copying a Transponder Template to the Person, this allows you to customize a Transponder Template for a Person or Person Group. However, since there is no copied Template to provide a starting point, you must configure all of the new custom Transponder Template's settings from scratch.
Complete the following steps to copy a Transponder Template to a Person Group or Person.
1. If you have not done so already, click the Person Explorer button.

2. Select the Person Group or Person for which you want to create a custom Transponder Template by clicking it.
Note: Only the actively selected entity (in blue) has the Transponder Template copied to it. Since no Person is selected above, the Transponder Template is created for the Person Group.
3. Click the New Custom Transponder button.

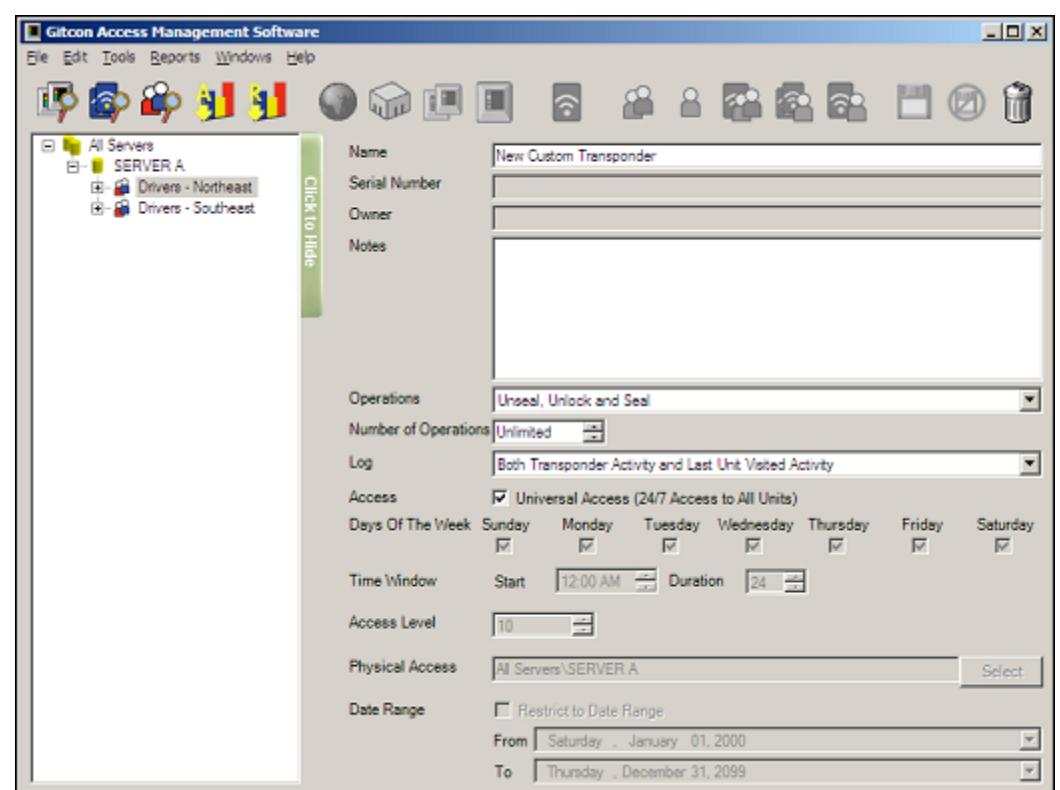
Or, select Edit | New | New Custom Transponder from the Menu Bar. The system displays the Edit Transponder Template Details screen for the newly created template.
- 4. You can now modify the new custom Transponder Template as you choose. Refer to Editing Transponder Template Detail for more information.
- 5. If for any reason you want to discard the changes you have made before they are saved, click the Undo Changes button.

Or, select Edit | Undo Changes from the Menu Bar.
6. When you are finished, click the Save button.

Or, select Edit | Save from the Menu Bar to save your changes.
7. If you return to the Person Explorer view, the system displays the new custom Transponder that you just created in the lower Detail Area.
Note that since you created the Transponder for the Person Group, there is no Person listed. That indicates that this particular Transponder Template applies to every Person in the Person Group until you delete the template.
Programming Transponder Cards
Now that you understand all of the ways to assign a Transponder Template to a Person or Person Group, you must now program the transponder cards according to those Transponder Templates. Even though a Person can have several Transponder Templates linked or created for it, the transponder card itself only carries one template and one Person's information.
Since you issue transponder cards to your lock users, you must program them from the Person Explorer area of the Gitcon Access Management Software. The programmed transponder cards then contain the user and access information that has been written from the Person and Transponder Template databases.
In order to program transponder cards for your lock unit users, you must have the Desktop Reader installed and connected on your workstation. Refer to the Gitcon Access Management Software Installation Guide for more information.
Complete the following steps to program a transponder card for a Person.
1. If you have not done so already, click the Person Explorer button.

Or, select Windows | Person Explorer from the Menu Bar.
2. The system displays the Transponder Template assignments in the lower Detail Area of the Person Explorer view. You should first locate the Person for whom you will be
programming the transponder card and select it in the upper Detail Area.
3. Then, select the Transponder Template that you want to program in the lower Detail Area.
- 4. Present a transponder card to the PC Desktop Reader. This can be a blank transponder or the lock user's current transponder card.
- 5. Select Edit | Program Physical Transponder from the Menu Bar.
Note: The system indicates that an error has occurred, and you will need to re-perform this step if you have not presented a transponder card to the Desktop Reader.
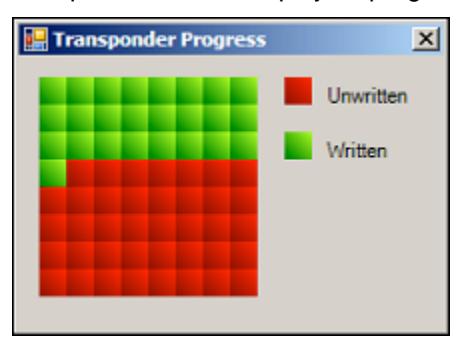
Then, while the system programs the transponder card, it displays a progress indicator.
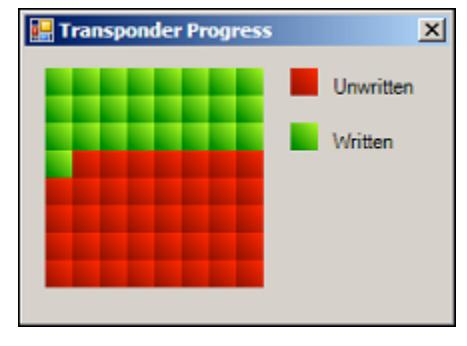
When the system has completed programming the card, it displays the following indicator.

6. Click OK to complete the process.
You can now remove the transponder card and issue it to the lock user. If you want to confirm that the transponder card has been written properly, you can view the contents of the transponder card in the system. Refer to the following section for more information.
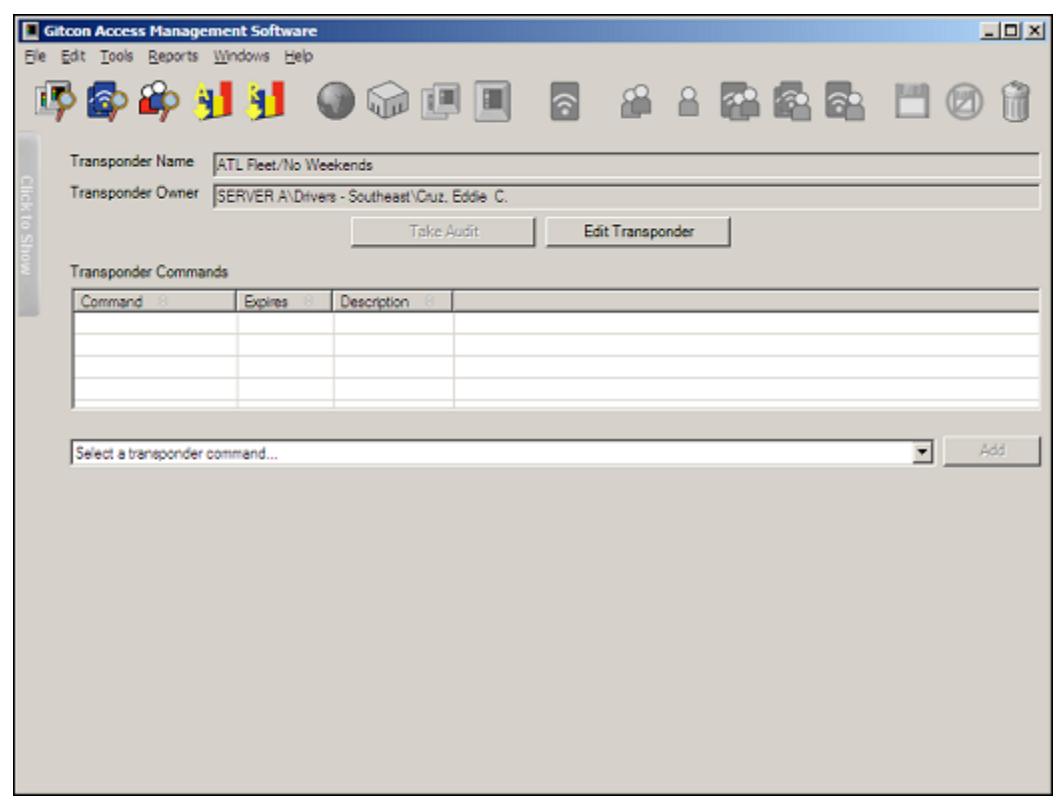
Managing Physical Transponders
Once you have programmed a transponder card, you can confirm its status by selecting the Manage Physical Transponder feature. This feature is helpful in determining the owner of misplaced or found transponders. Instead of having to adjust the Transponder Template for the Person, this area also allows you to edit certain access features for the transponder card.
To access the Manage Physical Transponder screen, complete the following steps:
- 1. Present a transponder card to the PC Desktop Reader.
- 2. Select Windows | Manage Physical Transponder from the Menu Bar.
The Manage Physical Transponder screen enables you to perform the following actions to the transponder card.
- View the transponder's attributes.
- Take an audit of the transponder card.
- Edit the transponder's access parameters (for those with custom Transponder Templates only).
- Create a transponder command that will override the transponder's access level, enable/disable Government codes, or delete a transponder for a certain window of time.
We will now discuss each of these actions in detail.
Viewing Transponder Card Attributes
Whether you would like to change a transponder card, or simply need to identify its owner and accesses, you need to access the Manage Physical Transponder screen. Complete the following steps to view a transponder's attributes.
- 1. Present a transponder card to the PC Desktop Reader.
- 2. Select Windows | Manage Physical Transponder from the Menu Bar.
Note: The system idles and waits for a transponder if you have not presented a transponder card to the Desktop Reader. The Desktop Reader turns off if you do not eventually present a transponder card.
The system displays the Person and access information that is contained on the transponder card.
From this screen, you can perform several different actions on the transponder card. This screen allows you to:
- Audit a transponder card.
- Edit the transponder card's attributes.
- Create a transponder command.
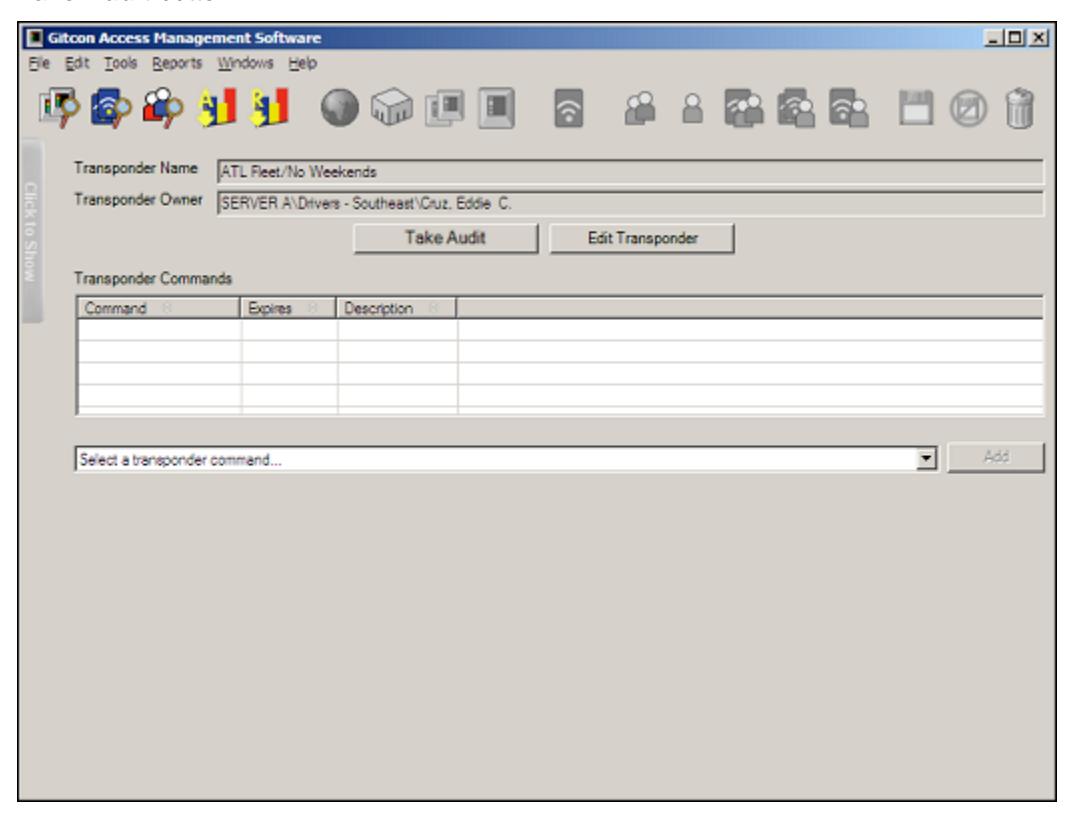
Auditing a Transponder Card
You can audit transponder cards through the Desktop Reader for all card actions, just as you can audit lock units through the Pocket PC. Complete the following steps to audit a transponder card.
Note: In order to audit a transponder card, the card must be programmed to log the transponder activity or log both the transponder activity and the last lock visited in the Transponder Template Detail. Refer to Editing Transponder Template Detail for more information.
- 1. Present a transponder card to the PC Desktop Reader.
- 2. Select Windows | Manage Physical Transponder from the Menu Bar.
Note: The system idles and waits for a transponder if you have not presented a transponder card to the Desktop Reader. The Desktop Reader turns off if you do not eventually present a transponder card.
The system displays the Person and access information that is contained on the transponder card. If the transponder has performed any actions, the system activates the Take Audit button.
3. Click the Take Audit button. The system audits the transponder card and retains the data in the database. The system also displays all of the transponder's logged activities.
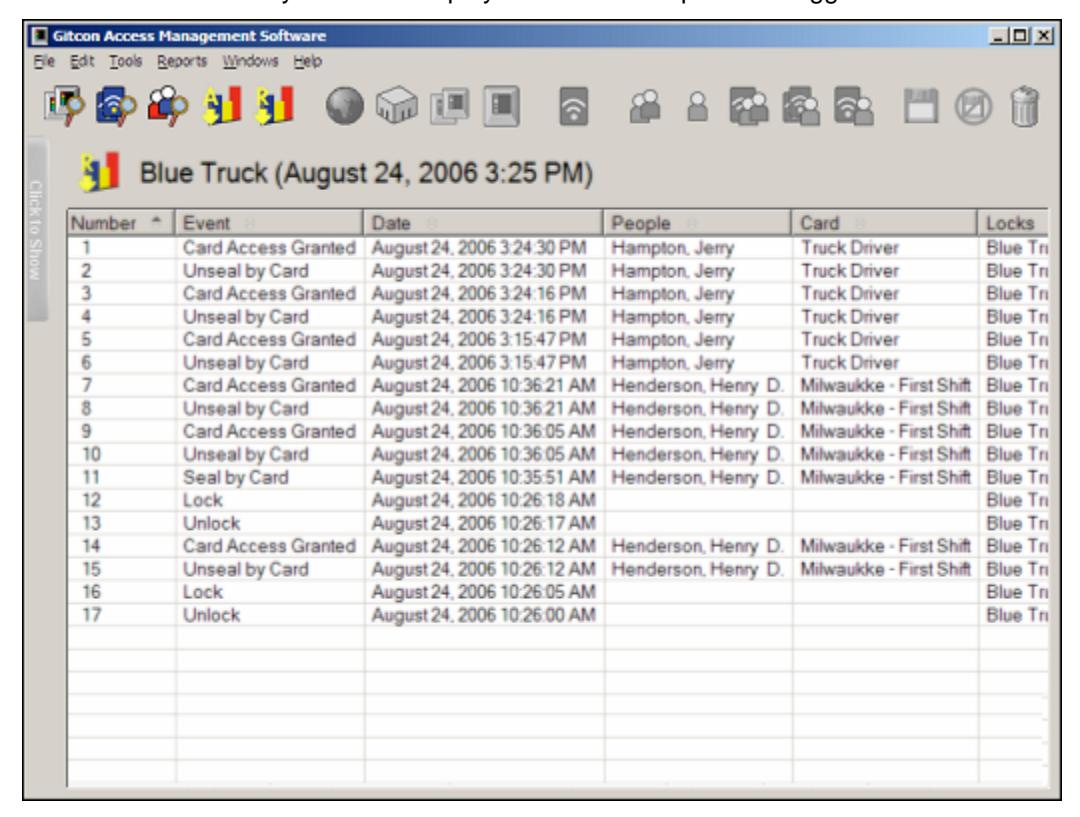
The report above shows an audit of Jerry Hampton's transponder card. The audit contains the transponder's activities and the activities of the last lock unit that the transponder visited. Henry Henderson operated the lock on the "Blue Truck" in the morning and Jerry Hampton operated the lock in the afternoon.
Once you have taken the transponder audit, the audit data is available in the Audit List of the Gitcon Access Management Software. For more information, refer to Viewing Audits .
Editing Transponder Card Attributes
Whether you would like to change a transponder card, or simply need to identify its owner and accesses, you need to access the Manage Physical Transponder screen. Complete the following steps to edit a transponder's attributes.
- 1. Present a transponder card to the PC Desktop Reader.
- 2. Select Windows | Manage Physical Transponder from the Menu Bar.
Note: The system idles and waits for a transponder if you have not presented a transponder card to the Desktop Reader. The Desktop Reader turns off if you do not eventually present a transponder card.
The system displays the Person and access information that is contained on the transponder card.
3. Click the Edit Transponder button. The system displays the Edit Transponder Detail screen for the transponder.
Note: If the Transponder is linked to a template, none of the fields in the Edit Transponder Detail screen are modifiable. If this is the case, you will need to edit the Transponder Template Detail and then re-program the transponder.
- 4. Edit any of the access attributes as you want. For more information, refer to Editing Transponder Template Detail on page 3–16.
- 5. If for any reason you want to discard the changes you have made before they are saved, click the Undo Changes button.

Or, select Edit | Undo Changes from the Menu Bar.
6. When you are finished, click the Save button.

Or, select Edit | Save from the Menu Bar to save your changes. The system displays the following dialog.

7. To re-program the transponder, click Yes . Then, while the system programs the
transponder card, it displays a progress indicator.
When the system has completed programming the card, it displays the following dialog.
8. Click OK to complete the process.
Creating a Transponder Command
Short of editing the transponder card completely, the Access Management Software allows you to change some of the access features of the transponder through the Manage Physical Transponder screen. These commands are intended to place a temporary access or disablement on a transponder card and are available from the drop-down list just below the Transponder Commands list.
The commands in this drop-down list are:
• Alter Access Level – This command allows you to place a temporary period of increased or decreased access on the transponder card. When this option is selected, the system displays two more drop-down lists from which you select the new Access Level and the expiration date for it. You can also select the database level for which the access is allowed from the tree view that is displayed.

• Enable/Disable Government Access – This command allows you to disable or enable the Government Override Codes (GOCs) for the lock. When you select this option, the system displays another drop-down list and a check box through which you choose whether to disable government access codes and then select the date that the disablement should expire. You are also able to select the database level for which the government access is enabled/disabled from the tree view that is displayed.

• Delete Transponder – This command allows you to delete a transponder card. This removes all Person and access information that has been programmed into it. You will need to select the transponder from the list that appears.
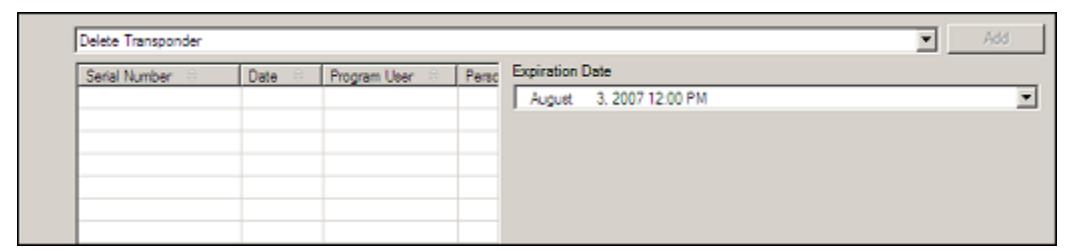
To create any of the above commands for a transponder card, you must access the Manage Physical Transponder screen. Complete the following steps to create a transponder command.
- 1. Present a transponder card to the PC Desktop Reader.
- 2. Select Windows | Manage Physical Transponder from the Menu Bar.
Note: The system idles and waits for a transponder if you have not presented a transponder card to the Desktop Reader. The Desktop Reader turns off if you do not eventually present a transponder card.
The system displays the Transponder Name and Transponder Owner from the card.
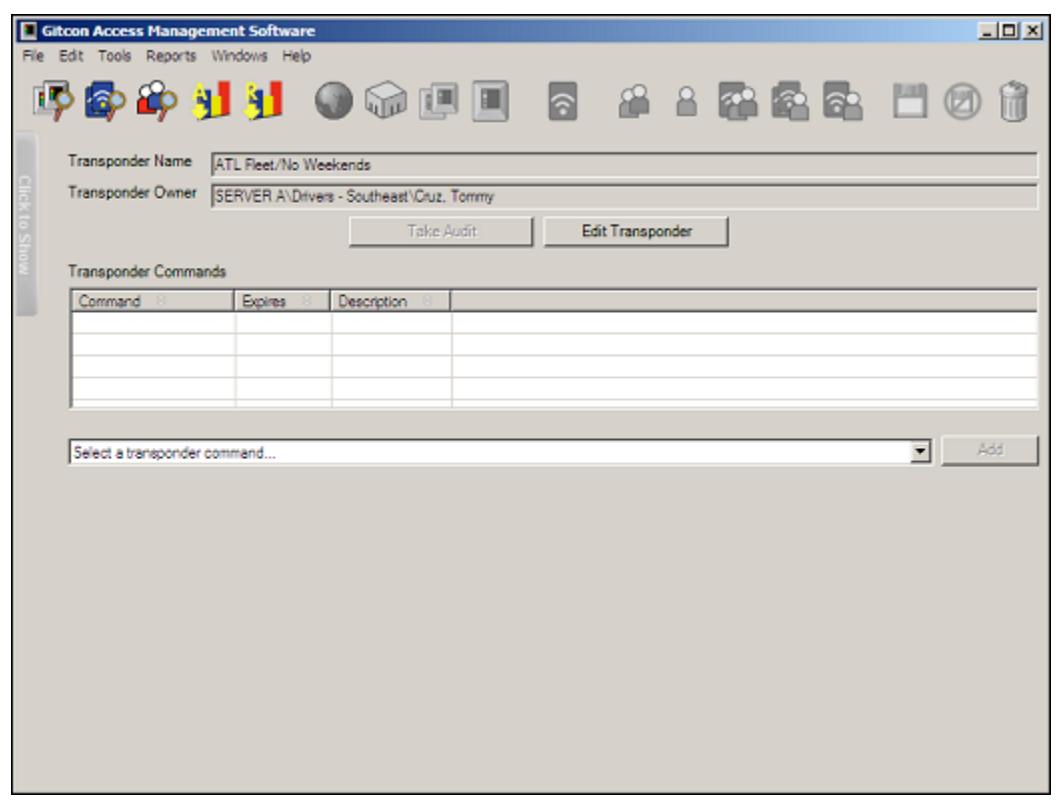
- 3. From the Select a transponder command… drop-down list, select one of the commands. If you select Delete Transponder , proceed to step 7.
- 4. From the tree view of the lock unit database that is displayed, select the database level for which the command you have selected should apply.
- 5. If you have selected Alter Access Level , enter the new access level that should take effect in the Access Level field. If you selected Enable/Disable Government Access ,
- select/clear the Disable Government Access Code check box accordingly.
- 6. From the Expiration Date field, select the date and time that the transponder command should expire.
- 7. Click the Add button. The system adds the new transponder command to the Transponder Commands list.
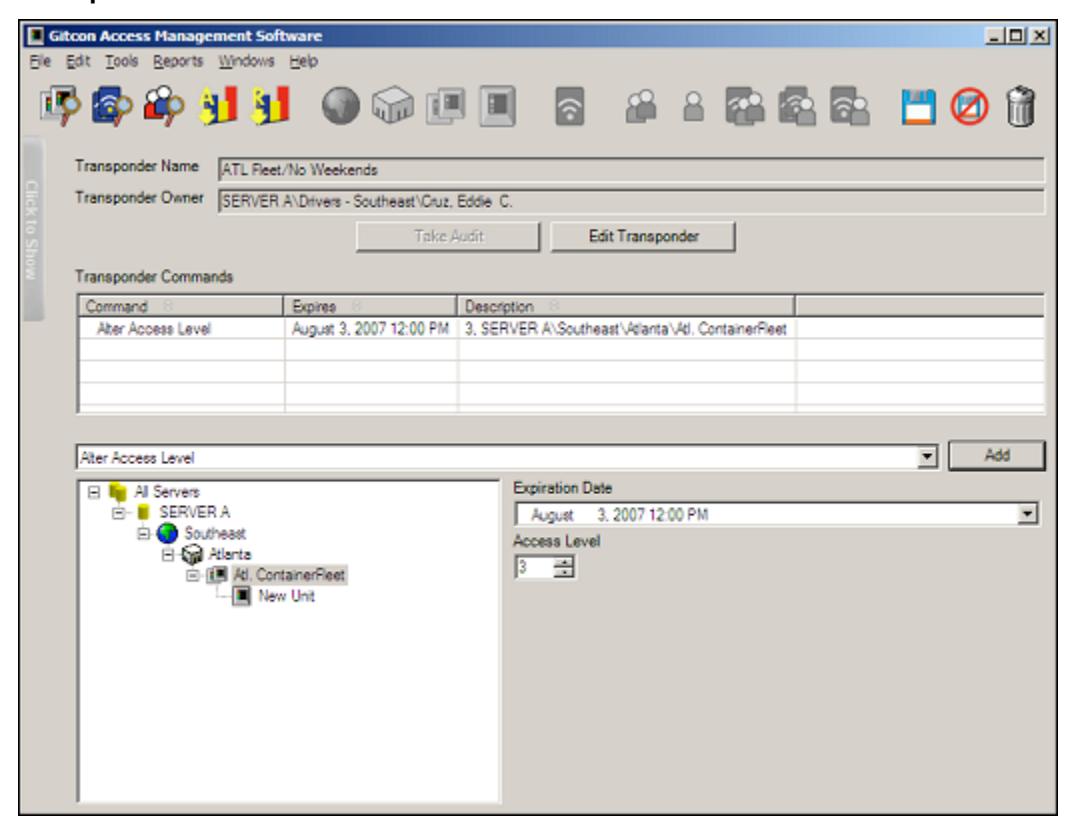
Also note that the Save and Undo Changes buttons are now active. You can continue to add commands to the transponder card before you click Save .
8. If for any reason you want to discard the changes you have made before they are saved, click the Undo Changes button.

Or, select Edit | Undo Changes from the Menu Bar.
9. When you are finished, click the Save button.

Or, select Edit | Save from the Menu Bar to save your changes.
The PC Desktop Reader writes the newly created commands to the transponder card.
Auditing and Reporting
The Gitcon Access Management Software enables detailed reporting features, including Lock Unit reports, Person reports, or database activity reports. The Unit and Person reports are taken from data that is collected, or audited, from the lock units using the Pocket PC. You can also audit data from the physical transponders. All of the audit data remains in the database
and can be called upon and filtered to create your reports. For more information on taking audits at the locks or transponders, refer to Auditing a Transponder Card and Auditing the Lock .
This section provides the following information to assist you in managing your audits and reports using the Gitcon Access Management Software.
- Creating and Printing Reports
- Viewing Audits
Creating and Printing Reports
Tracking Persons, Units, and Transponders can only provide so much utility if you have no way to report the data that is collected. Therefore, the Gitcon Access Management Software provides several different reporting formats with a seemingly endless possibility of customizations. The system offers quick and easy features, such as Auto Summary and multiple preview options, before printing to facilitate the reporting process.
Report Types
There are three main types of reports that the Access Management Software enables you to create.
- Unit A report on the activities of a Unit or group of Units for a selected date range. This report lists the date, Person, Transponder, and Details of each of the selected activities for a particular Unit or level of the Unit database.
- Person A report on the activities of a Person or Person Group for a selected date range. This report lists the date, Unit, Transponder, and Details of each of the selected activities for a particular Person or Person Group.
- Database Activity A report on the activities of the database. This report lists the program user, name, date, and details all of the selected database activities.
Creating Reports
Complete the following steps to customize, create, and print a variety of different database reports.
1. Click the Create Report button.

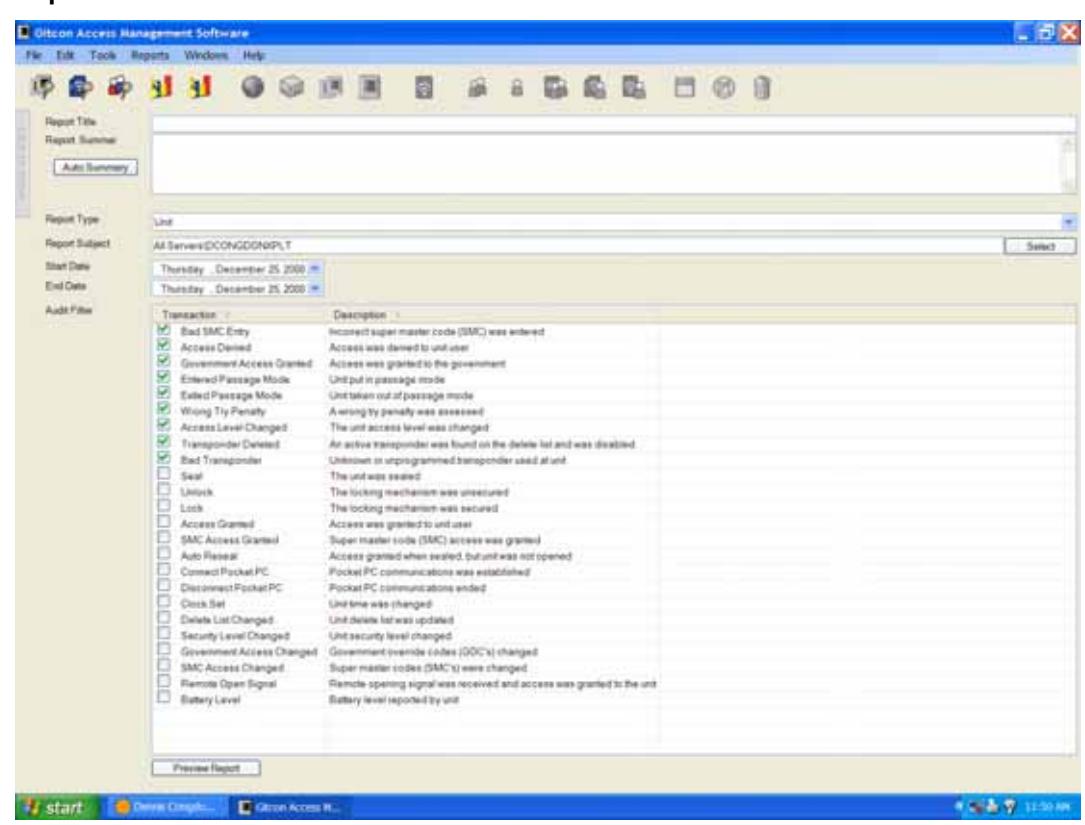
Or, select Reports | Create Report from the Menu Bar. The system displays the Create Reports screen.
- 2. In the Report Title field, type a title for the report.
- 3. In the Report Summary field, type a summary for the report. You can also click the Auto Summary button to have the system create the report summary for you.
Note: If you choose the option to auto-create the report summary, you should only click the Auto Summary button when you have finished making changes to the Create Reports screen. This ensures that the summary contains accurate information.
- 4. Select the Report Type from the drop-down list. If you choose to create a Database Activity report, proceed to step 7.
- 5. The Report Subject field determines the scope of the report. It can report on the activities for a particular level or even a single Unit/Person. Click the Select button to display a database tree. The tree contains Units or Persons, depending on which was selected in step 4.
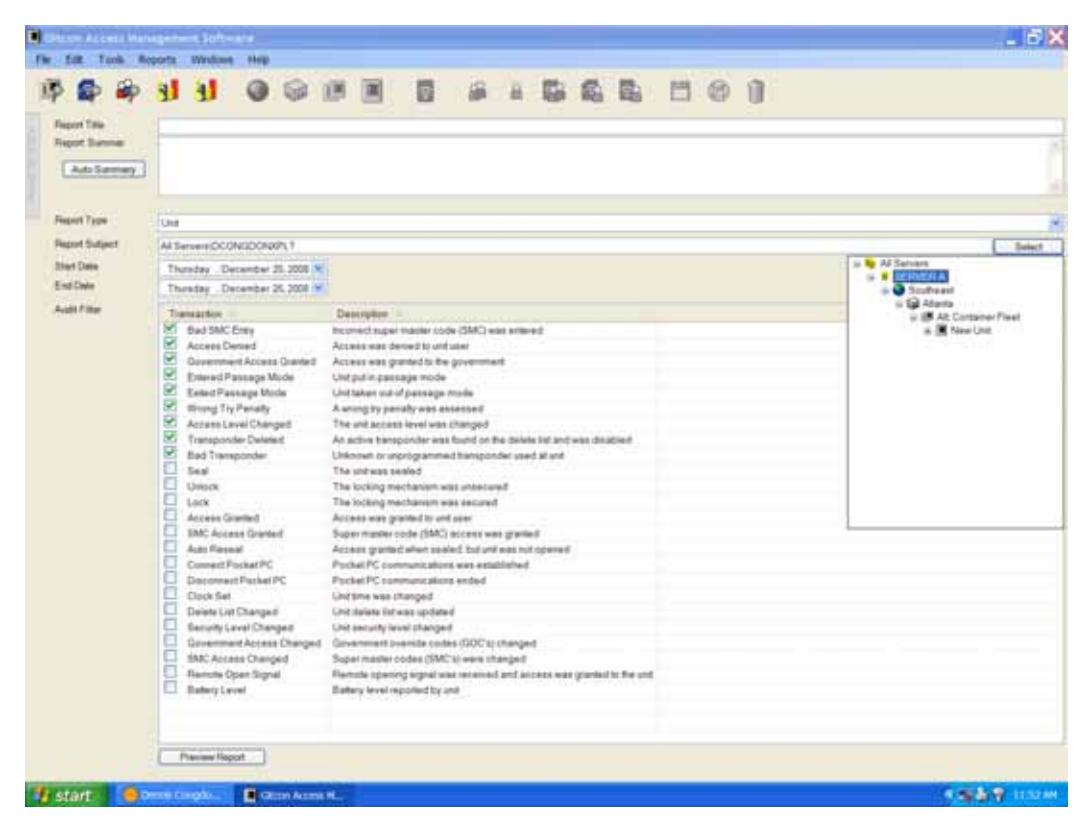
6. Click the plus signs to expand the tree and double-click the level of the tree to which you want the report to be confined. The system displays the selected range in the Report Subject field.

- 7. From the On and After This Date drop-down calendar, select a beginning date for the time range of the report.
- 8. From the On and Before This Date drop-down calendar, select an ending date for the time range of the report.
9. Select the check box for each type of activity or transaction that you want the report to display in the Audit Filter list.
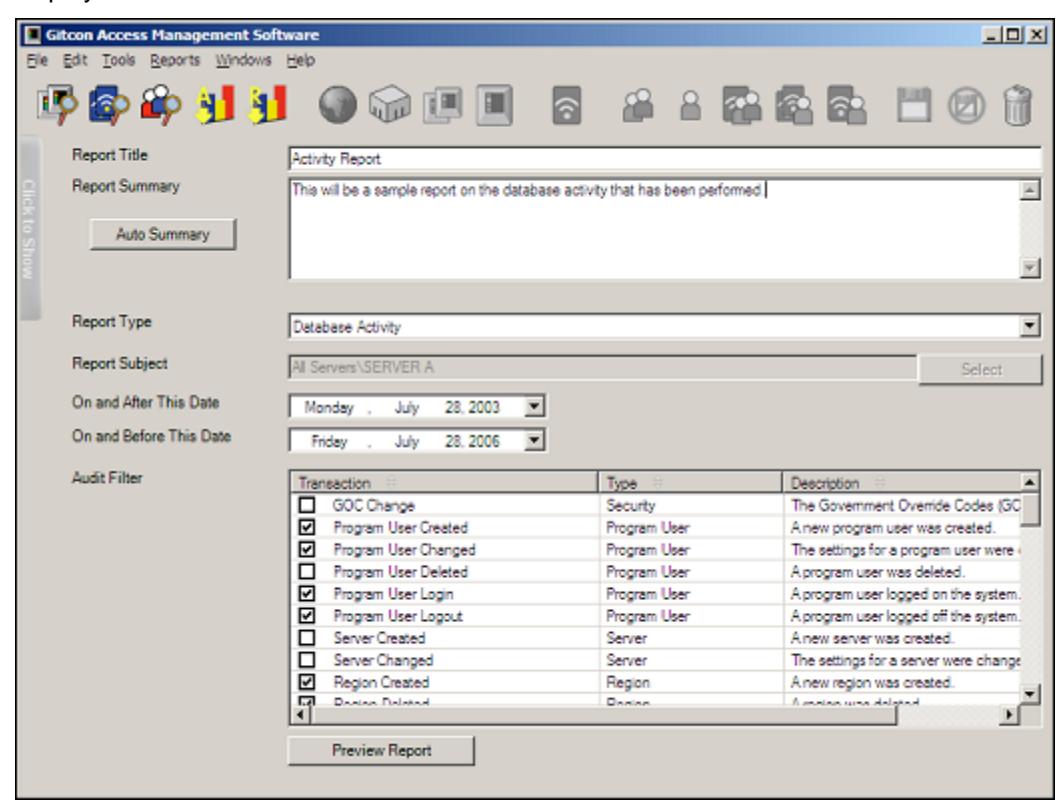
When you have selected all of the criteria for the report and clicked Auto Summary , you have completed the report configuration. You now have a couple of options of previewing the report before it is printed.
Previewing and Printing Reports
Once you have configured your report, there are a couple of options for previewing it. You can either view a soft copy preview or the print preview. If you have yet to create your report, refer to the previous section, Creating Reports . Your created report should look similar to the following.
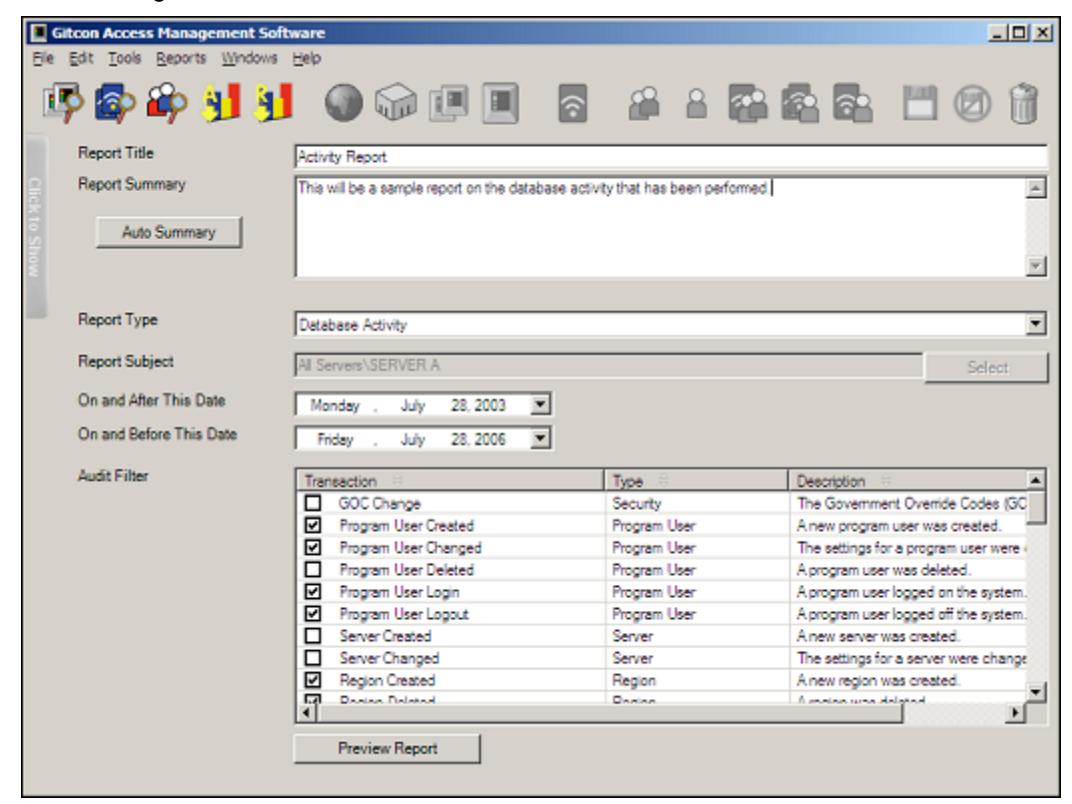
1. Once you have entered all of the parameters for your report, click the Preview Report button at the bottom of the Create Report screen. The system displays a soft copy preview of the report.
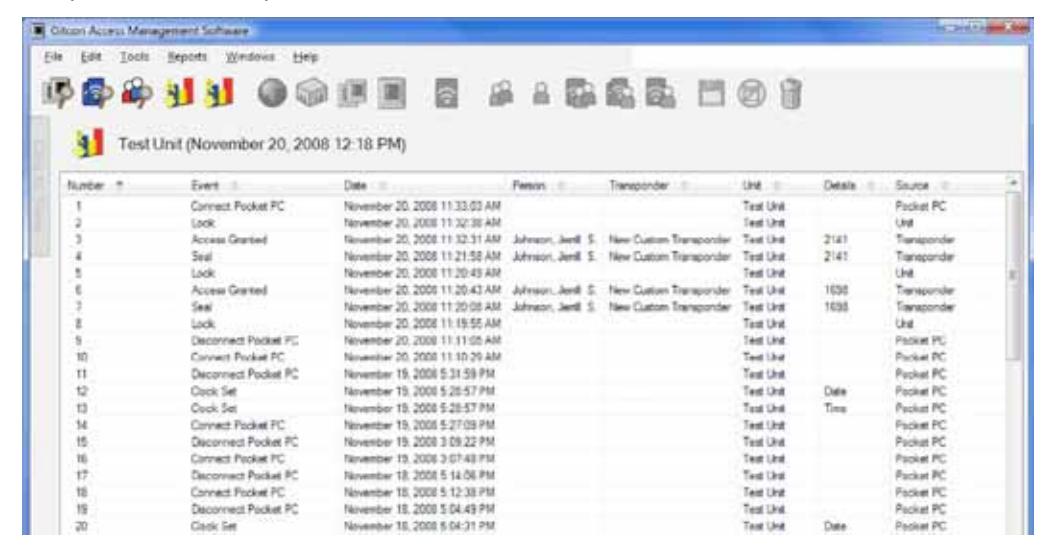
2. This preview of the report provides basic information in the report and is good for a quick scan of activity. If you need to preview the hard copy of the report before printing it, select File | Print Preview from the Menu Bar. The system displays a preview of the hard copy version of the report.
3. To print the report, select File | Print from the Menu Bar of either of the preview screens.
Viewing Audits
The Gitcon Access Management Software allows you to view the last 150 audits that have been performed by the system. These include lock unit audits taken by the Pocket PC and uploaded into the database, as well as any transponder audits taken by the PC Desktop Reader.
Complete the following steps to view an audit that has been uploaded into the database.
1. Click the View Audits button.

Or, select Reports | View Audits from the Menu Bar. The system displays the Audit List screen.
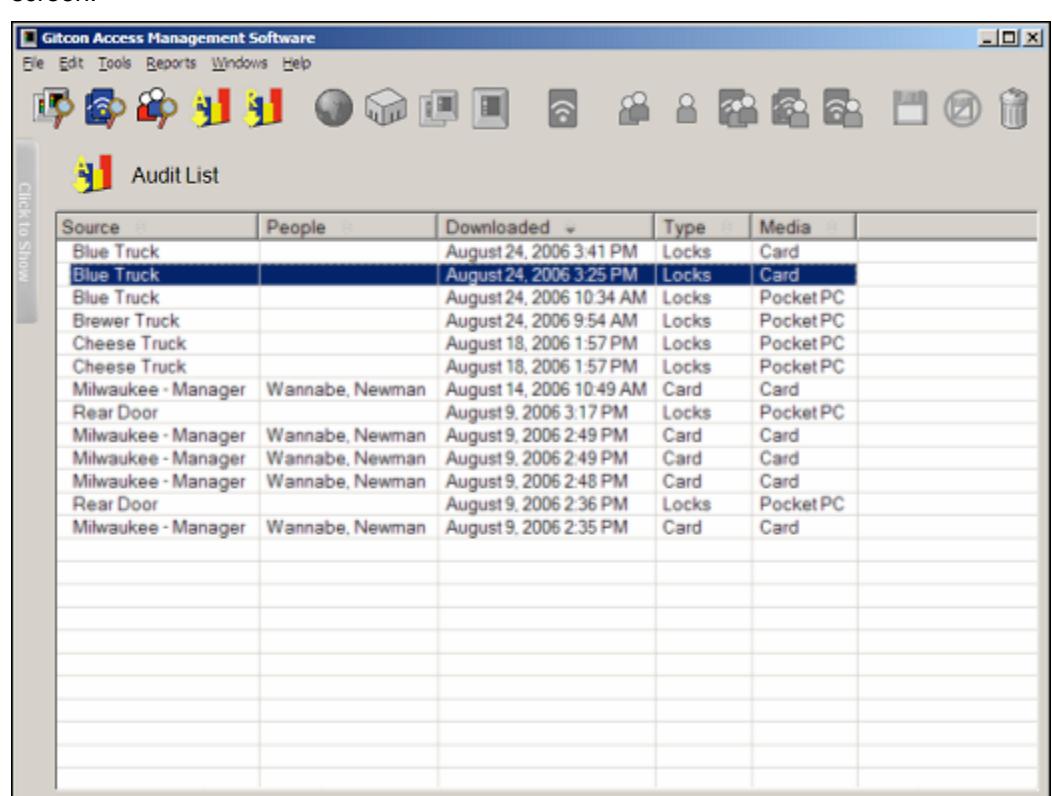
2. Double-click the row of the audit that you want to view. The system displays the detailed information contained in the audit.
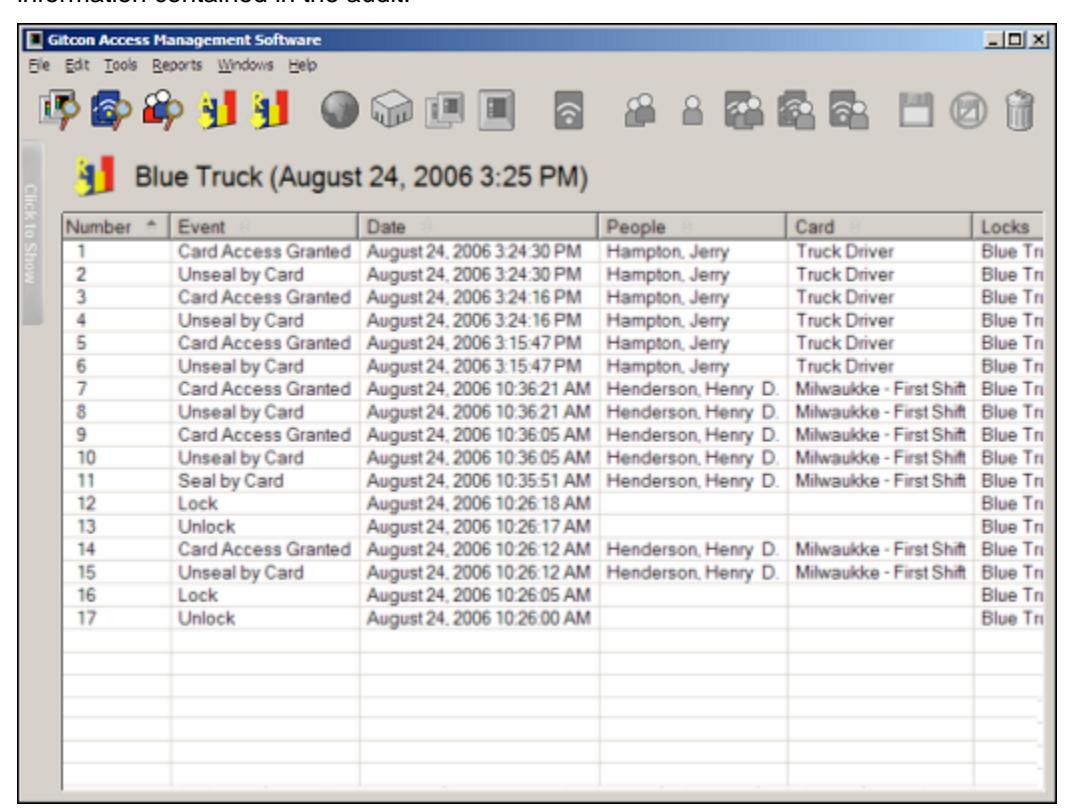
The audit contains all of the actions that were performed by the audited lock or transponder card. This audit information remains in the database for viewing or reporting. The system retains only the 150 most recent audits.
Backing Up and Restoring the Database
The Gitcon Access Management Software no longer offers backup and restore capabilities in its database interface. Microsoft offers a free application for these purposes that plugs directly into MS SQL Server and MS SQL Server Express. It is recommended that you download Microsoft SQL Server Management Studio Express to perform database backup and restore functions. This application can be downloaded from the Microsoft Downloads Web site.
Downloading and Installing Management Studio Express
Complete the following steps to download and install the MS SQL Server Management Studio Express (SSMSE) application.
1. Download SSMSE from the Microsoft Web site. http://www.microsoft.com/downloads/default.mspx
Note: From the Web site, search for SSMSE.
2. When the download has completed, run the executable file,
Using the Gitcon Access Management Software
SQLServer2005_SSMSEE.msi .
4 Operating the Lock
The G-2, G-152 and G-154 lock units are very similar in operation. Understanding how to use these locks, as well as their various security levels, will help you to better manage the access to the containers where these locks are installed.
This chapter describes how to operate the G-2 and the G-152/G-154 locks in these environments, including:
- Overview of the Lock
- Operating
- Government Access Codes
- Managing Super Master Codes
Overview of the Lock
G-2, G-152 and G-154 lock units contain the electronics and physical locking hardware of the Gitcon Access Control System. These locks are compatible with existing door hardware on Sea Container, Intermodal, Truck/Trailer, Reefer, and Dry Container applications. These locks are meant for controlling and recording the access of these type of containers. The Transponder cards and Super Master (access) Codes are used to access the locks.
Security Operating Method
There are two different types of programmed security operating methods.
- PIN Mode The Super Master (access) Codes are the primary means to access the lock.
- Transponder (TAG) Mode The Transponder cards are the primary means to access the lock.
The security operating method for each unit is set using the Gitcon Access Management Software when the unit detail is defined. For more information, refer to Editing Unit Detail .
LED Indicators
There are four (Red, Yellow, Green and Blue) LED indicators on the G-2, G-152 and G-154 electronics. These illuminate and flash in a variety of patterns to indicate operational prompts and lock status. See Operating Sequence. The Red Battery Light indicates batteries are low and should be replaced.
LED Display
The LED display on the G-2, G-152 and G-154 is a 4-digit alpha-numeric display that indicates operational prompts and lock status.
Verifying the Lock Seal
- Press and release Red button switch
- Seal number appears in the LED display area
Operating Procedure
The two programmed security operating methods have similar features with unique, userfriendly, operating sequences. The process of operating the G-2, G-152 and G-154 is also similar; however they have different mechanical features. We will now discuss each security operating method by product type.
G-2; PIN Mode
Operating Sequence
- Press and release Red button switch
- Seal number appears in the LED display area.
Note: seal number cannot open lock.
-
When
PIN
appears, press and release Red button. (This is where Super Master Codes are entered to open the lock). Upon entering the
PIN
sub-menu four (4) dashed lines
- (----) will appear on the LED screen.
- Press the RED button; this will advance the numbers from 0-9. After scrolling to the first number, release the button and the next dashed line will change to 0; begin scrolling for the second number. Repeat for third and fourth numbers.
- If a valid code has been entered the word OPEN will appear on the LED display. If code is not valid the word FAIL will appear on the LED. (If button is not pushed, " MENU " appears: see "Menu Operating Sequence")
- Plunge and lift the shackle to open lock
Note: If RED button is pressed when lock is open, LED displays "OPEN"
- Close lock
- New Seal number appears
"Menu" Operating Sequence; From an Open Lock
- Press and hold RED button until the word MENU appears.
- When MENU appears on LED, press and release RED button two times. (The Lock will now enter the MENU sub section and will scroll through the options listed below.)
Note: If the button is not pushed the lock will power down after the last option is displayed.
• Press and release RED button to enter sub-menu you desire
"Menu" Operating Sequence; From a Sealed Lock
- Press and release the RED button. Unit will begin scrolling thru UNLK , SEAL and then MENU
- When MENU appears on the LED press and release the RED button three times to enter the MENU . (The Lock will now enter the MENU subsection and will scroll through the options listed below.)
Note: If the button is not pushed the lock will power down after the last option is displayed.
• Press and release RED button to enter sub menu you desire.
"Menu" Options and Definition
Note: A lock cannot be programmed when in a sealed state; this includes setting the clock, or placing the lock in passage mode.
- PPC: This is used to make programming changes or audit the lock with the Pocket PC. The Lock will begin alternately flashing the BLUE light and the RED Battery light indicating it is ready to connect to the Pocket PC.
- PASS: Used to put the unit into, or take out of, Passage Mode (The lock is always unsecured and acts only as a latch when in Passage Mode.) Any valid Transponder card can be used to perform this operation and will be shown in the software audit trail.
- TAG: To open the lock using a transponder. Green Light Flashes, Present Transponder "Open" Lock.
- TIME: The LED will display the Seal Number, Time and Date of the last time the unit was sealed.
- LKID: This is the lock identification as programmed into the unit. It displays what had been programmed in the software as the license plate information.
- VERS: Indicates what firmware version the lock is using.
- LOCK: Assures the lock and electronics are synchronized.
G-2; Transponder (TAG) Mode
Operating Sequence; "Open" when Lock is "Sealed"
- Press and release Red button switch
- Seal number appears in the LED display area.
- Green LED Light Flashes
- Present Transponder Card
- Open appears on LED display
- Plunge and lift the shackle to open lock
Operating Sequence; "Open" when Lock is "Not Sealed"
- Press and release Red button switch
- Press & Release Red Button again with "UNLK" prompt appears on the LED display
- Green LED Light Flashes
- Present Transponder Card
- Open appears on LED display
- Plunge and lift the shackle to open lock
Operating Sequence; To "Seal" the Lock
- Close Lock
- Press and release Red button switch
- LED display will scroll thru UNLK , and then SEAL
- Press & Release Red Button again when "SEAL" prompt appears on the LED display
- Green LED Light Flashes
- Present Transponder Card
- New "Seal Number" appears on the LED display
"Menu" Operating Sequence; "Sealed" or "Open" Lock
- Press and hold RED button switch until the LED display scrolls to the word "MENU".
- Release RED button switch when "MENU" appears on the LED display. Now press and release the RED button two times (press and release, press and release) to enter the "MENU". (The Lock will now enter the "MENU" sub section and will scroll through the options listed below.
Note: If the button is not pushed the lock will power down after the last option is displayed.
• Press and release RED button to enter sub-menu you desire.
"Menu" Operating Sequence; "Locked" and "Not Sealed"
- Press and release the RED button. Unit will begin scrolling thru UNLK, SEAL and then MENU
- When MENU appears on the LED press and release the RED button three times to enter the MENU (The Lock will now enter the MENU sub section and will scroll through the options listed below)
Note: If the button is not pushed the lock will power down after the last option is displayed
• Press and release RED button to enter sub-menu you desire.
"Menu" Options and Definition:
Note: A lock cannot be programmed when in a sealed state; this includes setting the clock, or placing the lock in passage mode.
- PPC: This is used to make programming changes or audit the lock with the Pocket PC. The Lock will begin alternately flashing the BLUE light and the RED Battery light indicating it is ready to connect to the Pocket PC.
- PASS: Used to put the unit into, or take out of, Passage Mode (The lock is always unsecured and acts only as a latch when in Passage Mode.) Any valid Transponder card can be used to perform this operation and will be shown in the software audit trail.
- PIN: (This is where Super Master Codes are entered to open the lock). Upon entering the PIN sub menu four (4) dashed lines (----) will appear on the LED screen. Press the RED button; this will advance the numbers from 0-9. After scrolling to the first number, release the button and the next dashed line will change to 0; begin scrolling for the second number. Repeat for third and fourth numbers. If a valid code has been entered the word OPEN will appear on the LED display. If code is not valid the word FAIL will appear on the LED.
- TIME: The LED will display the Seal Number , Time and Date of the last time the unit was sealed.
- LKID: This is the lock identification as programmed into the unit. It displays what had been programmed in the software as the license plate information.
- VERS: Indicates what firmware version the lock is using
- LOCK: Assures the lock and electronics are synchronized.
G-152 & G-154; PIN Mode
Operating Sequence
- Press and release Red button switch
- Seal number appears in the LED display area.
Note: seal number cannot open lock.
-
When
PIN
appears, press and release Red button. (This is where Super Master Codes are entered to open the lock). Upon entering the
PIN
sub-menu four (4) dashed lines
- (----) will appear on the LED screen.
- Press the RED button; this will advance the numbers from 0-9. After scrolling to the first number, release the button and the next dashed line will change to 0; begin scrolling for the second number. Repeat for third and fourth numbers.
- If a valid code has been entered the word OPEN will appear on the LED display. If code is not valid the word FAIL will appear on the LED. (If button is not pushed, "MENU" appears: see "Menu Operating Sequence")
- Turn the dial on the lock body to the left to release handle.
- Lift handle from the lock body
Note: If RED button is pressed when lock is open, LED displays "OPEN."
- Close the lock by returning and latching the handle to the lock body.
- New Seal number appears
"Menu" Operating Sequence; "Sealed" or "Open" Lock
- Press and hold RED button switch until the LED display scrolls to the word "MENU" .
- Release RED button switch when "MENU" appears on the LED display. Now press and release the RED button two times (press and release, press and release) to enter the "MENU" . (The Lock will now enter the "MENU" sub section and will scroll through the options listed below.)
Note: If the button is not pushed the lock will power down after the last option is displayed.
• Press and release RED button to enter sub menu you desire.
"Menu" Options and Definition
Note: A lock cannot be programmed when in a sealed state; this includes setting the clock, or placing the lock in passage mode.
- PPC: This is used to make programming changes or audit the lock with the Pocket PC. The Lock will begin alternately flashing the BLUE light and the RED Battery light indicating it is ready to connect to the Pocket PC.
- PASS: Used to put the unit into, or take out of, Passage Mode (The lock is always unsecured and acts only as a latch when in Passage Mode.) Any valid Transponder card can be used to perform this operation and will be shown in the software audit trail.
- TAG: To open the lock using a transponder. Green Light Flashes , Present Transponder "Open" Lock
- TIME: The LED will display the Seal Number , Time and Date of the last time the unit was sealed.
- LKID: This is the lock identification as programmed into the unit. It displays what had been programmed in the software as the license plate information.
- VERS: Indicates what firmware version the lock is using
G-152 & G-154; Transponder (TAG) Mode
Operating Sequence; "Open" when Lock is "Sealed"
- Press and release Red button switch
- Seal number appears in the LED display area.
- Green LED Light Flashes
- Present Transponder Card
- Open appears on LED display
- Turn the dial on the lock body to the left to release handle.
- Lift handle from the lock body
Operating Sequence; "Open" when Lock is "Not Sealed"
- Press and release Red button switch
- Press & Release Red Button again with "UNLK" prompt appears on the LED display
- Green LED Light Flashes
- Present Transponder Card
- Open appears on LED display
- Turn the dial on the lock body to the left to release handle.
- Lift handle from the lock body
Operating Sequence; To "Seal" the Lock
- Close the lock by returning and latching the handle to the lock body
- Press and release Red button switch
- LED display will scroll thru UNLK , and then SEAL
- Press & Release Red Button again when "SEAL" prompt appears on the LED display
- Green LED Light Flashes
- Present Transponder Card
- New "Seal Number" appears on the LED display
"Menu" Operating Sequence; "Sealed" or "Open" Lock
- Press and hold RED button switch until the LED display scrolls to the word "MENU" .
- Release RED button switch when "MENU" appears on the LED display. Now press and release the RED button two times (press and release, press and release) to enter the "MENU". (The Lock will now enter the "MENU" sub section and will scroll through the options listed below.)
Note: If the button is not pushed the lock will power down after the last option is displayed.
• Press and release RED button to enter the sub menu you desire.
"Menu" Operating Sequence; "Locked" and "Not Sealed"
- Press and release the RED button. Unit will begin scrolling thru UNLK , SEAL and then MENU
- When MENU appears on the LED display press and release the RED button three times to enter the MENU . (The Lock will now enter the MENU sub section and will scroll through the options listed below.)
Note: If the button is not pushed the lock will power down after the last option is displayed.
• Press and release RED button to enter the sub-menu you desire.
"Menu" Options and Definition
Note: A lock cannot be programmed when in a sealed state; this includes setting the clock, or placing the lock in passage mode.
- PPC: This is used to make programming changes or audit the lock with the Pocket PC. The Lock will begin alternately flashing the BLUE light and the RED Battery light indicating it is ready to connect to the Pocket PC.
- PASS: Used to put the unit into, or take out of, Passage Mode. (The lock is always unsecured and acts only as a latch when in Passage Mode.) Any valid Transponder card can be used to perform this operation and will be shown in the software audit trail.
- PIN: (This is where Super Master Codes are entered to open the lock). Upon entering the PIN sub menu four (4) dashed lines (----) will appear on the LED screen. Press the RED button; this will advance the numbers from 0-9. After scrolling to the first number, release the button and the next dashed line will change to 0; begin scrolling for the second number. Repeat for third and fourth numbers. If a valid code has been entered the word OPEN will appear on the LED display. If code is not valid the word FAIL will appear on the LED.
- TIME: The LED will display the Seal Number , Time and Date of the last time the unit was sealed.
- LKID: This is the lock identification as programmed into the unit. It displays what had been programmed in the software as the license plate information.
- VERS: Indicates what firmware version the lock is using
Government Access Codes
The use of a Government Access Code indicates a government authority requested and was granted access to the lock. This code only is used for identification; it does not grant access to the lock.
The procedure for entering a government access code is the same for G-2 and G-152. The operating sequence is unique to the Security Method of the lock.
Transponder Mode
- Press and release Red button switch
- Seal number appears in the LED display area.
- When PIN appears, press and release Red button. (This is where Government Access Codes and Super Master Codes are entered to open the lock). Upon entering the PIN sub-menu four (4) dashed lines (----) will appear on the LED screen.
- Enter the Government Access Code first. Press the RED button; this will advance the numbers from 0-9. After scrolling to the first number, release the button and the next dashed line will change to 0; begin scrolling for the second number. Repeat for third and fourth numbers.
Operating the Lock
- Enter Super Master Code
- If a valid code has been entered the word OPEN will appear on the LED display.
- The BLUE LED light will illuminate when the lock seal is verified.
- The BLUE LED light will no longer illuminate once a new seal number is generated.
PIN Mode
- Follow the "MENU" operating sequence required to enter the sub menu.
- When PIN appears, press and release Red button. (This is where Government Access Codes and Super Master Codes are entered to open the lock). Upon entering the PIN sub menu four (4) dashed lines (----) will appear on the LED screen.
- Enter the Government Access Code first. Press the RED button; this will advance the numbers from 0-9. After scrolling to the first number, release the button and the next dashed line will change to 0; begin scrolling for the second number. Repeat for third and fourth numbers.
- Green LED Light Flashes
- Present Transponder Card
- Open appears on LED display
- The BLUE LED light will illuminate when the lock seal is verified
- The BLUE LED light will no longer illuminate once a new seal number is generated
Managing Super Master Codes
The Super Master Codes (SMC's) are the primary means to access the unit when it is programmed as a Lockable Electronic Seal. Locks programmed as a Sealable Lock have the option of using Super Master Codes. These randomly generated codes can only be used once by an operator. The Super Master Codes for each unit was set using the Gitcon Access Management Software when the unit detail was defined. For more information, refer to Editing Unit Detail.
Dispatching a Super Master Code
- Open the Unit Detail screen for the desired lock unit
- Click on the check box in the SMC column
- Click on the Save icon
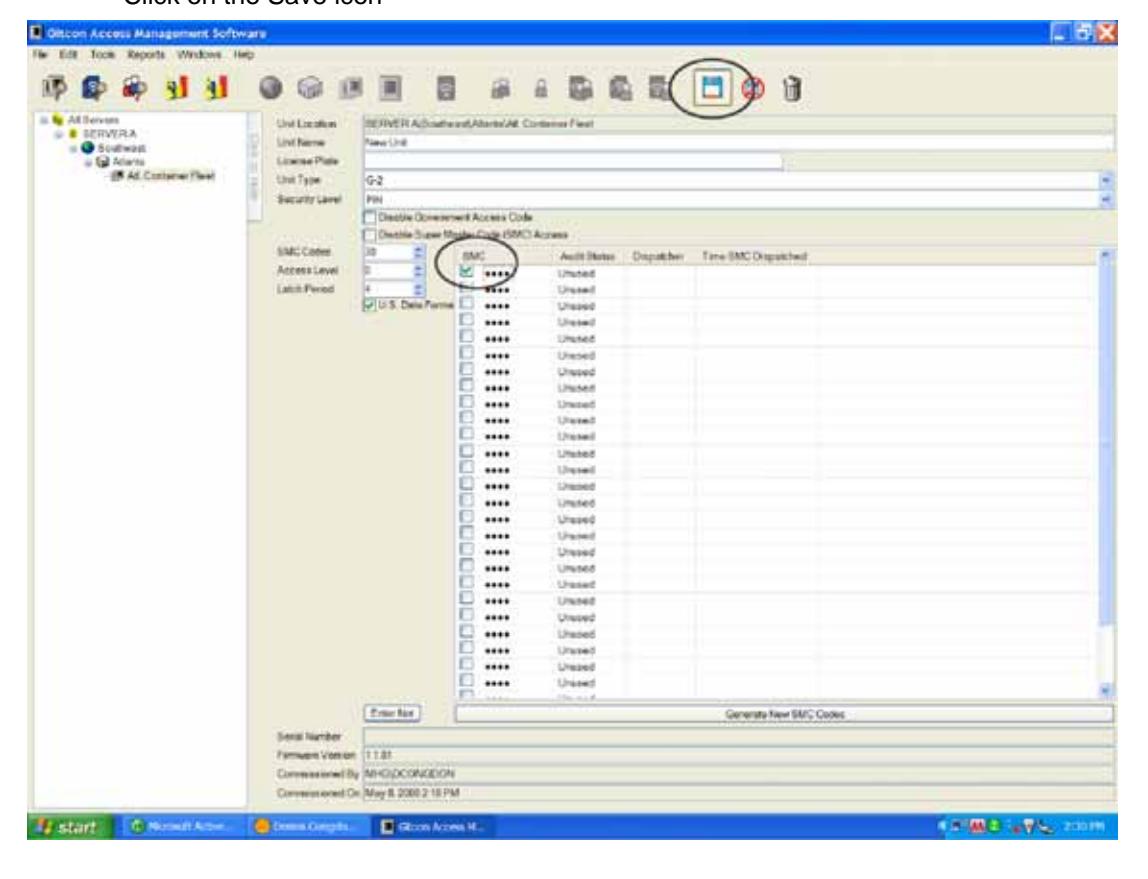
- The Super Master Code is displayed and who dispatched the code. The Date and Time the code was dispatched is also displayed
- The Super Master Code can now be given to the operator to open the lock unit.
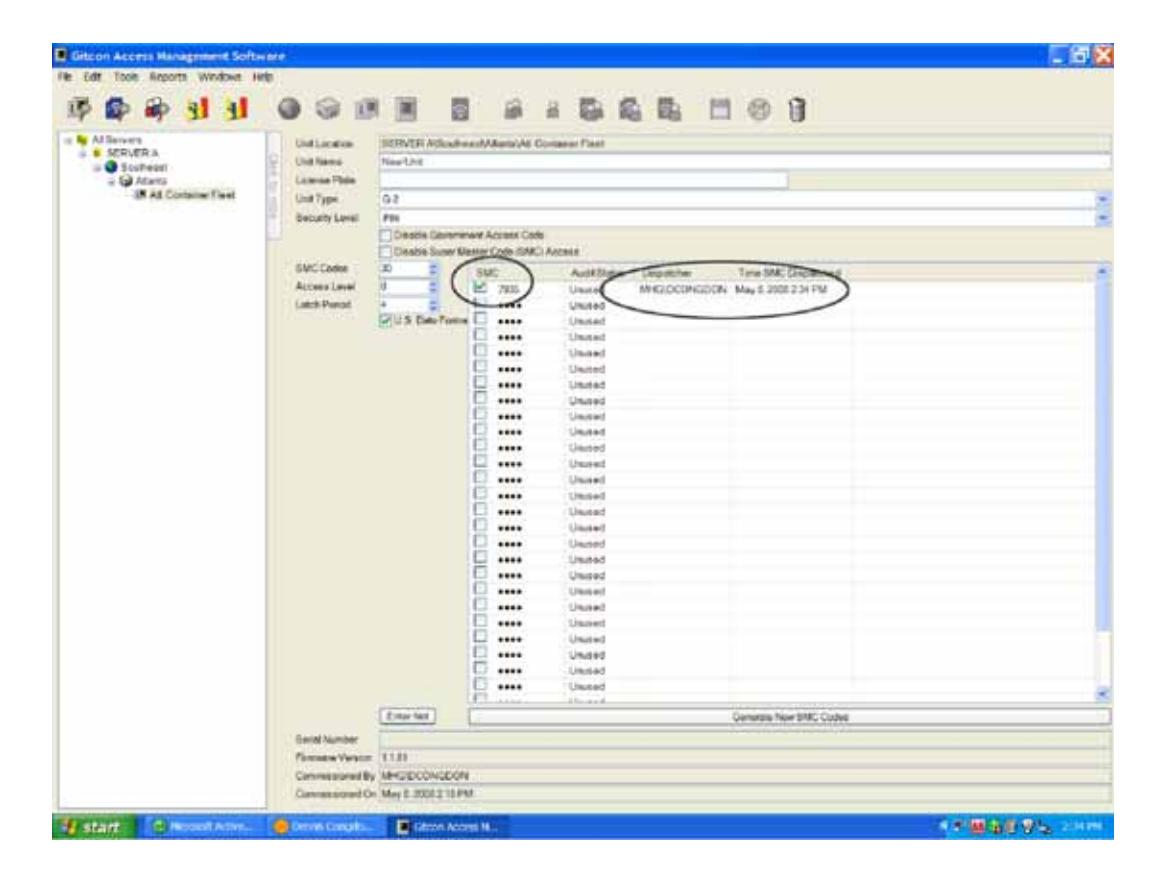
• An audit of the lock unit will update the audit status column of the Unit Detail screen. The Date and Time the Super Master Code was used by the operator to open the lock is displayed.
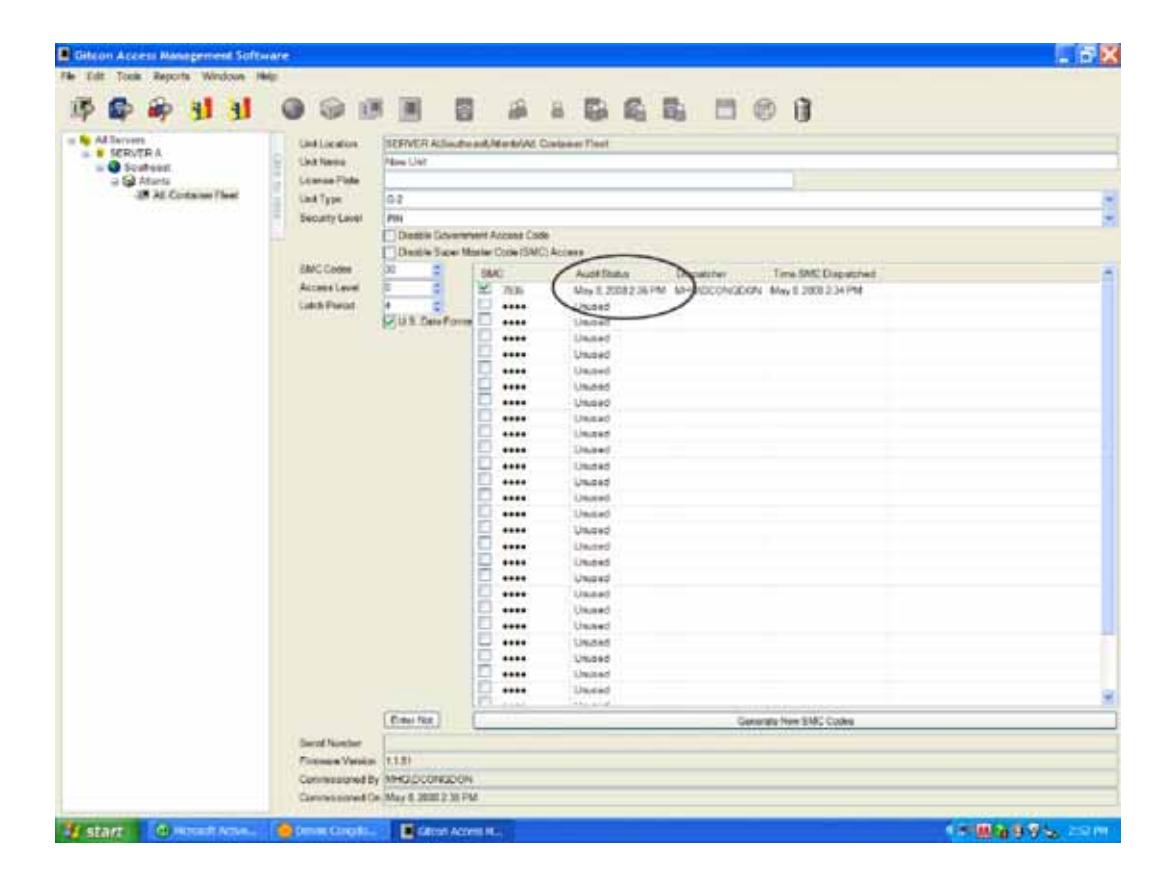
Generating New Super Master Codes
- Open the Unit Detail screen for the desired lock unit
- Click on "Generate New SMC Codes"
- Click on the Save icon
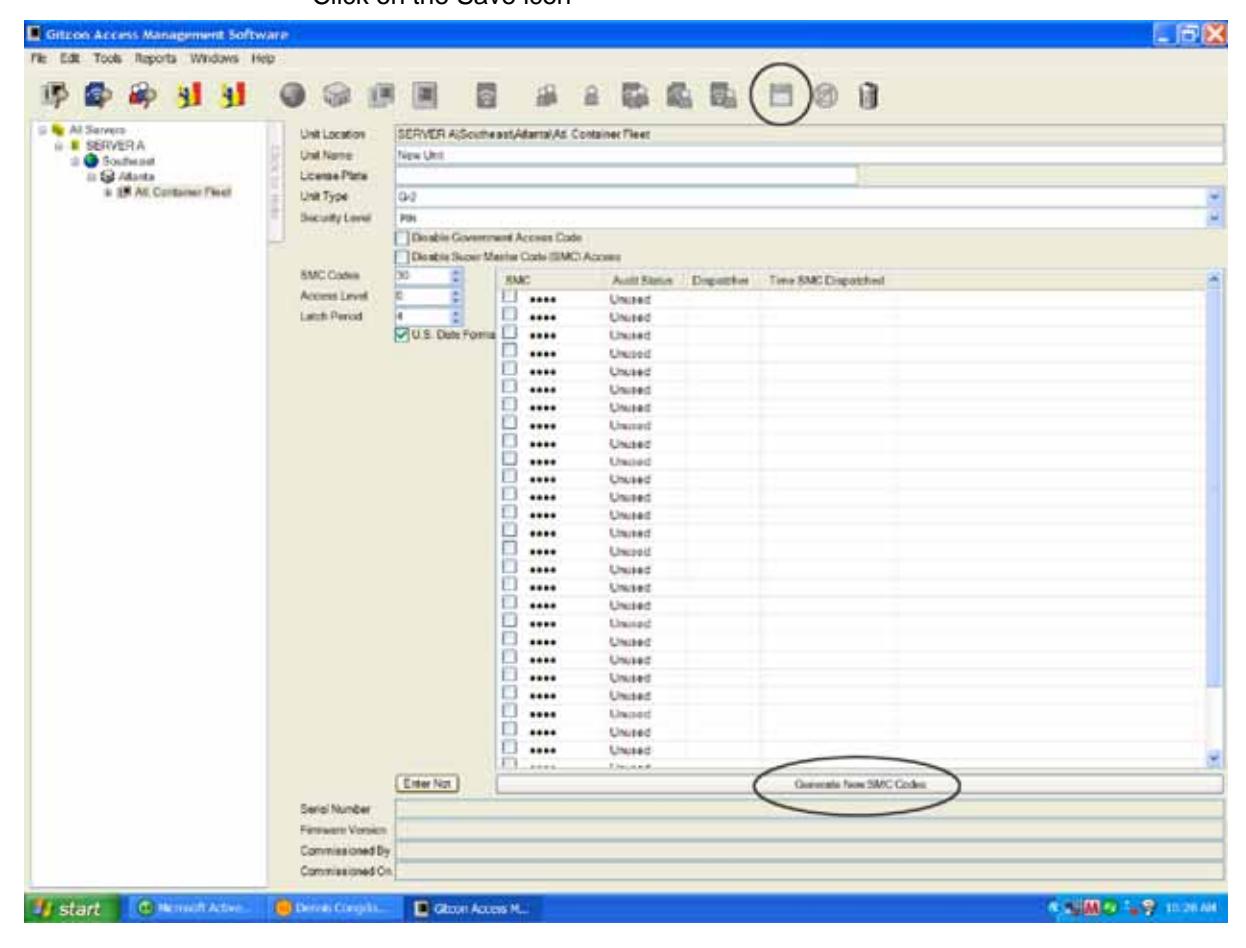
- Click on the Unit Explorer icon
- Right click on the Unit to be updated in the Detail Area
- Click on "Create Pocket PC Update File"
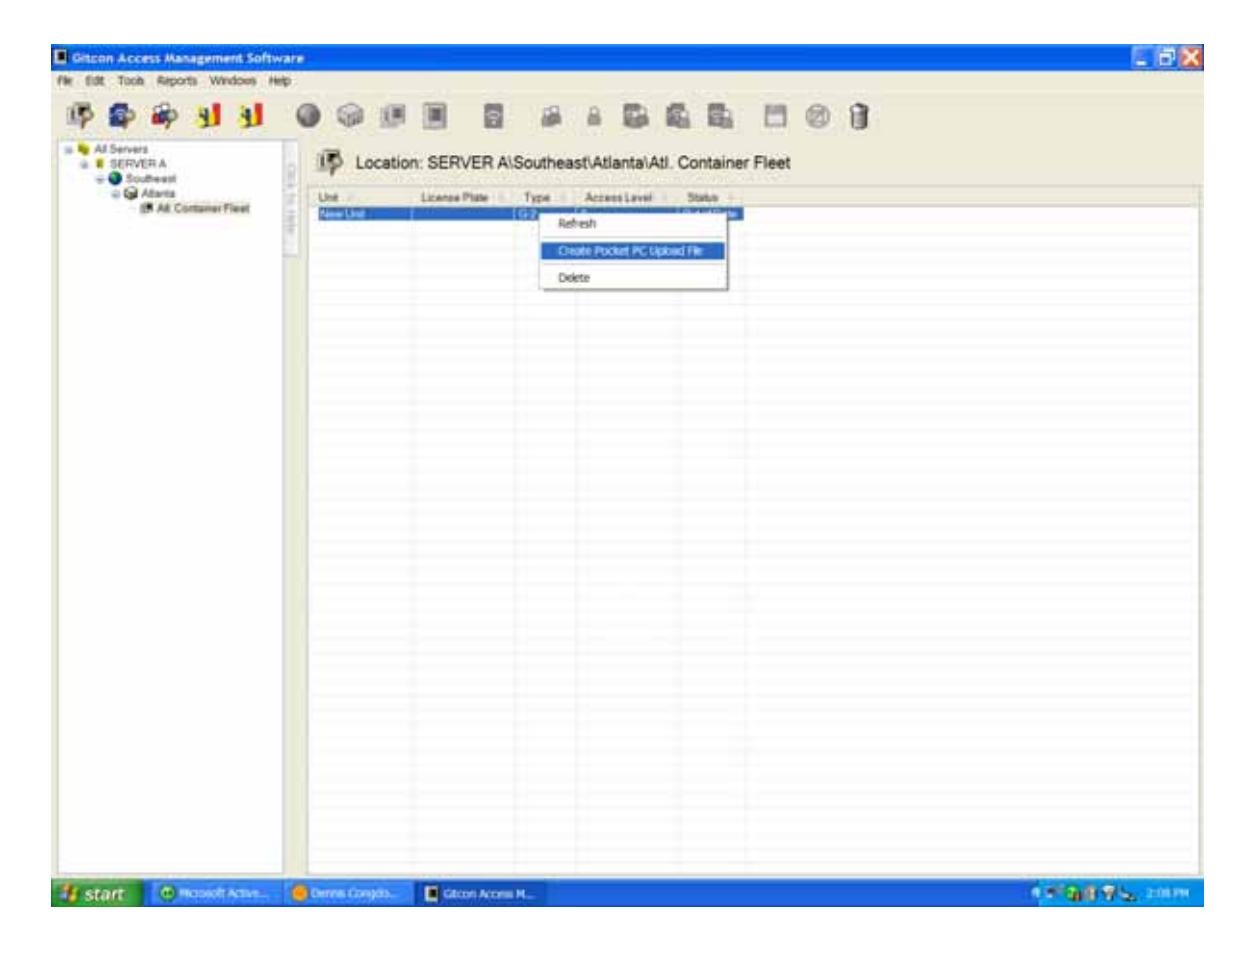
• A new file for the lock unit has been generated and will be transferred the next time you synchronize your Pocket PC. For more information, refer to Programming the Lock.
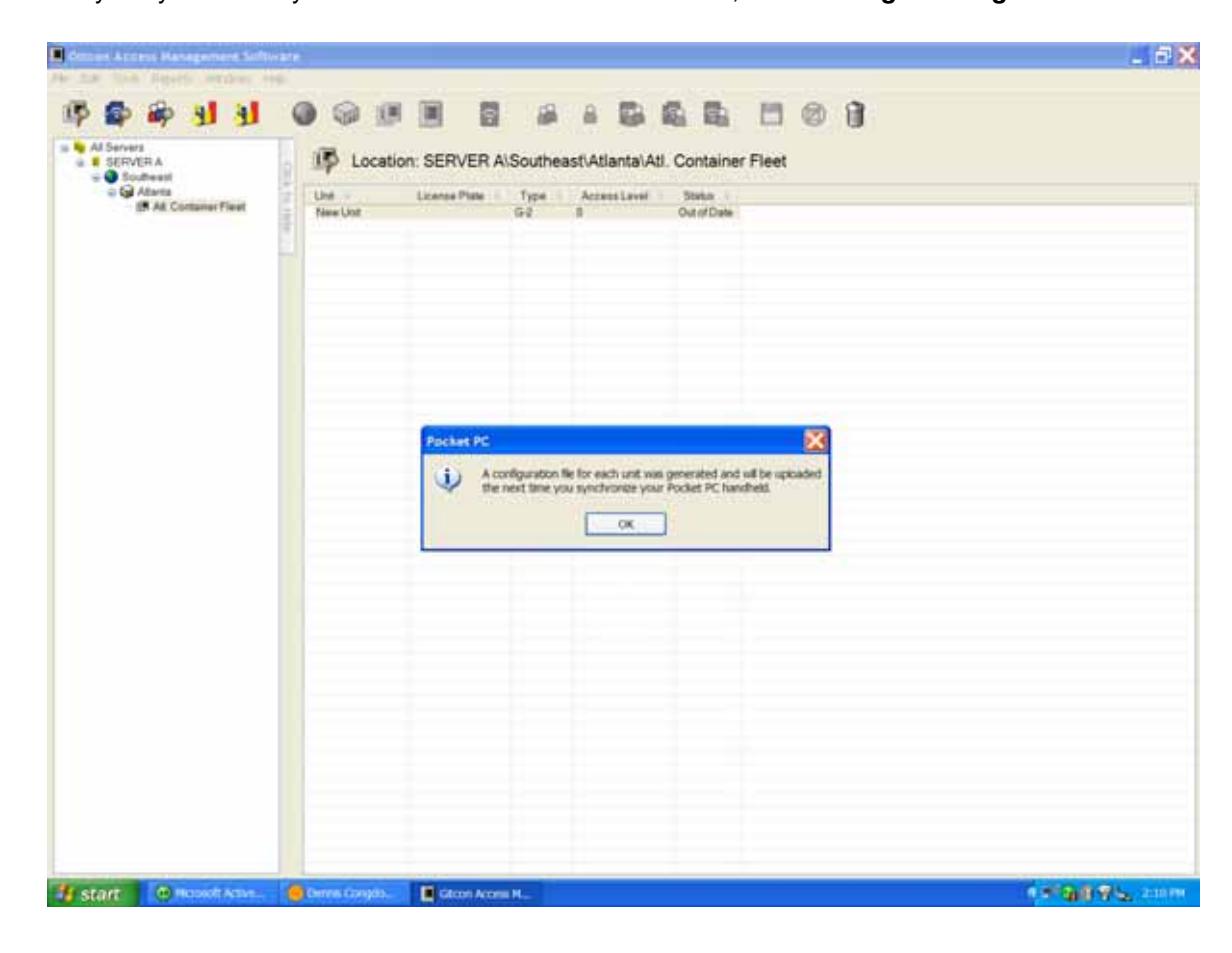
5 Programming and Auditing Locks
The Pocket PC or Smart Phone is used to transfer (upload) data to and receive (download) data from the locks for the purpose of programming and auditing the locks. The items explained in this chapter include the following:
- The Pocket PC / Smart Phone
- Programming the Lock
- Auditing the Lock
- Managing Manifests
The Pocket PC
The Pocket PC has its own version of the Gitcon Access Management Software. Instead of serving as a database, its main function is to receive and transmit upload files between the PC version of the database and the lock units. This is how physical Gitcon locks receive the functional information that is created in the database.
This data should be updated at the lock as often as it is changed on the PC database. In addition to the PC upload files, the Pocket PC is the instrument for collecting the detailed audit files from the locks and transmitting them to the PC version of the Gitcon Access Management Software. The PC version of the database then uses this audit data to produce a number of detailed reports to track user and lock activities in your organization.
The Pocket PC is a small handheld computer running Microsoft Windows Mobile that is capable of running Gitcon PPC, the Pocket PC version of the Access Management Software. The Pocket PC communicates with the PC version of the database through its cradle and the Microsoft ActiveSync program. This program exchanges the PC upload files from the PC and audit files from the Pocket PC as needed. The Pocket PC receives the audit files from and transfers upload files to the locks through a required infrared port. The infrared receiver and transmitter on the Pocket PC, when aligned with those of the lock, transfers data from the Pocket PC to the lock (program) or from the lock to the Pocket PC (audit).
We will now discuss the functions of the Pocket PC in the Gitcon Access Control System.
Starting the Gitcon Software on the Pocket PC
Complete the following steps to begin the Gitcon Access Management Software for the Pocket PC.
1. Turn on the Pocket PC and select Programs . Locate the Gitcon icon and double-click it to open the Gitcon PPC application.
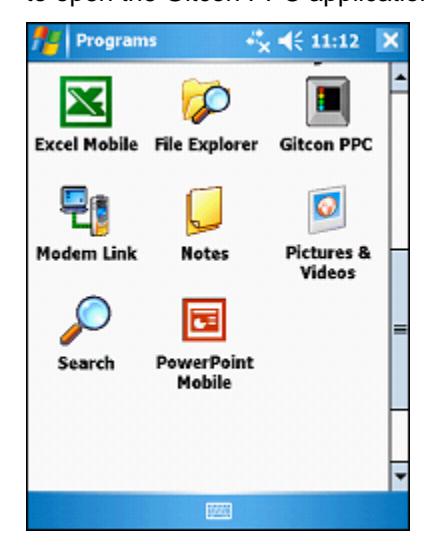
The system displays the password prompt.
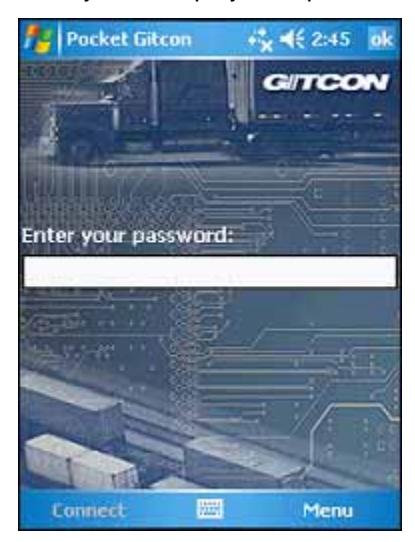
2. Enter your password and tap Connect .
Once you have entered a valid a password, you can now connect the Pocket PC to a lock unit through the infrared transmitter or enter a command selected from the Menu .
Connecting to the Lock Unit
Before you can perform any maintenance (PC upload or audit download) at the lock unit with the Pocket PC, you must first connect to the lock unit through the infrared signal. This confirms that a clear path of communication exists for the data traveling in either direction between the lock unit and the Pocket PC.
Even if you will not be performing any maintenance at the lock, connecting to the lock unit with the Pocket PC is a quick way to identify and gain important information about the status of the lock.
Complete the following steps to connect the Pocket PC to a lock unit.
Note: The lock unit must be unsealed and in PPC mode. The lock flashes red and blue LEDs.
1. Turn on the Pocket PC and start the Gitcon Access Management Software for the Pocket PC. For more information, refer to Starting the Gitcon Software on the Pocket PC . The system displays a "waiting" message.
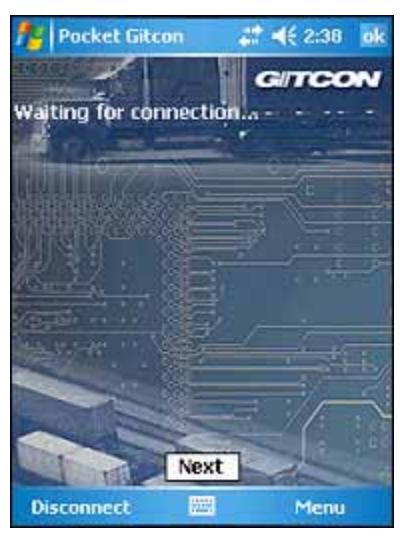
2. Point the Pocket PC's infrared transmitter at the lock unit's infrared transmitter at a distance of about six inches.
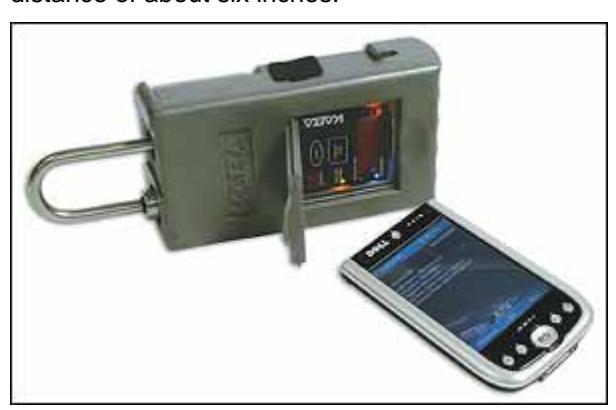
After a few seconds, the Pocket PC should indicate that it has connected with the lock.
3. If the lock has been programmed, the Pocket PC will display the lock's general configuration information, including its Name, Unit Group, Location, Region, Server, and License Plate.
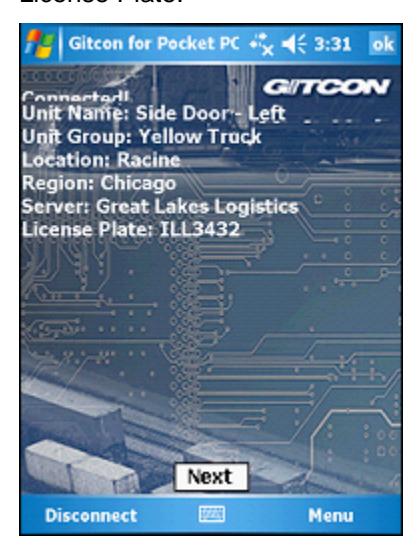
Tap Next to view the physical statistics for the lock unit.
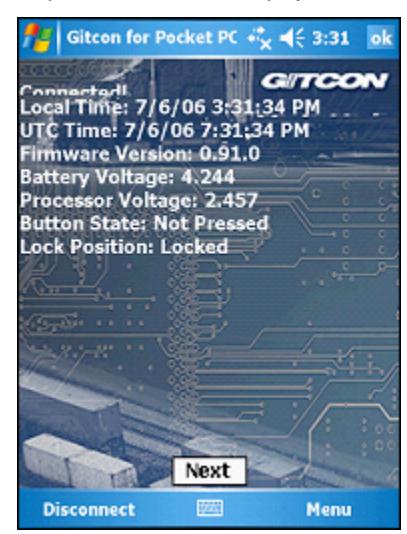
The Pocket PC displays the following information for the lock unit.
- Local Time
- UTC Time
- Firmware Version
- Battery Voltage
- Processor Voltage
- Button State
- Lock Position
Programming the Lock
Once you have started the Gitcon Access Management Software for the Pocket PC and have created the PC Upload File in the PC version of the Access Management Software, programming a lock unit is easy. This section assumes that you are already familiar with the following:
- Commissioning a Pocket PC on page 2–14.
- Creating the Pocket PC Upload File on page 2–15.
- ActiveSyncing the Pocket PC on page 2–15.
Note: The lock unit must be unsealed and in PPC mode. The lock flashes red and blue LEDs.
Complete the following steps to program a lock unit from the Pocket PC upload file that is located on the Pocket PC.
1. After you have logged into the Pocket PC Access Management Application, simply point the Pocket PC's infrared sensor at the lock unit's infrared sensor to connect with the lock. After a few seconds, the Pocket PC should indicate that it has connected with the lock.
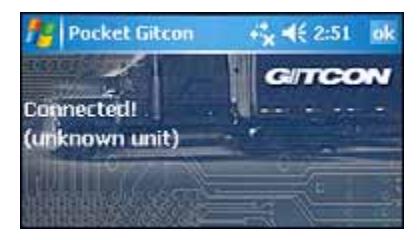
Note: If the lock unit has not been programmed, the Pocket PC displays (unknown unit) next to the connection message.
2. Select Menu | Units | Change ID to program the lock unit from the Pocket PC Upload File.
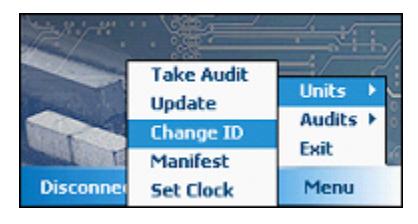
The system displays a replica of the tree area from the Unit Explorer view of the Access Management Software.
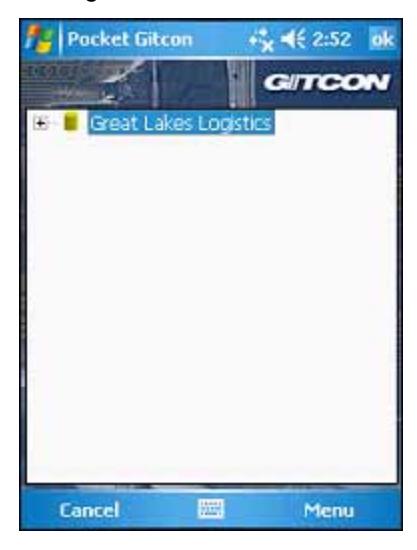
3. Expand the tree until you find and select the unit whose configuration file you want to use to program the lock unit. Tap the unit's name in the tree and select Send File from the menu that the Pocket PC displays.
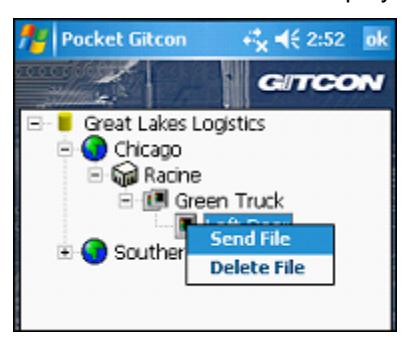
The Pocket PC then transfers the Unit Detail information that was defined on the PC from the Pocket PC to the lock unit. Now, whenever you connect to the lock unit through the Pocket PC's infrared transmitter, the Pocket PC displays the lock data, similar to the following:
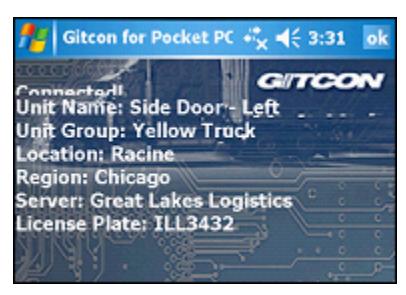
Updating the Lock
Updating a lock unit is very similar to programming the lock with one exception. The lock has already been identified, so you will not need to select the Unit from the tree view. You should update a lock unit as often as information for the lock is updated on the PC.
Complete the following steps to update the lock from the Pocket PC Upload File generated by the PC.
- 1. After you have logged into the Pocket PC Access Management Application, point the Pocket PC's infrared sensor at the lock unit's infrared sensor to connect with the lock you want to update.
- 2. While still connected to the lock, select Menu | Units | Update to update the lock unit from the Pocket PC Upload File.
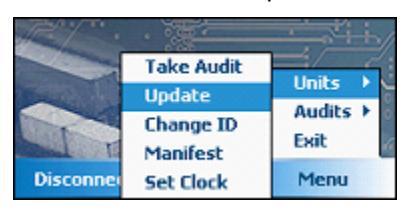
The system updates the lock unit with the updated data from the Pocket PC Upload File.
Auditing the Lock
Auditing the lock is similar to programming the lock; however, instead of uploading a file to the lock, the Pocket PC downloads all of the user and access activities that have occurred at the lock. The action data that are collected are uploaded to the PC, where you can use the audit data to produce meaningful reports for user and lock access management.
The following sections describe collecting audit data from a lock unit.
- Setting Up the Audit Parameters
- Taking Audits
- Viewing Audit Data
- Deleting Audits
Setting Up the Audit Parameters
You must first set up the audit parameters. The data that are audited from the lock can be limited by one of a number of different criteria. The following options are available for limiting the audit data that are downloaded to the Pocket PC.
- All Audits The Pocket PC displays all of the audits and they are downloaded to the Pocket PC.
- Limit by Number You can select a finite number of audits to view. When you make this selection, the Pocket PC displays a field that allows you to enter the number of audits to view.
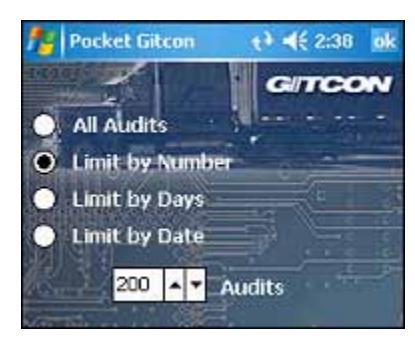
• Limit by Days – You can select finite number of days. The Pocket PC displays all audits from the selected period. When you make this selection, the Pocket PC displays a field that allows you to enter the number of days to audit.
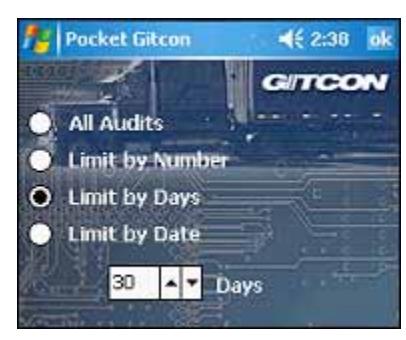
• Limit by Date – You can select a date. The Pocket PC displays all audits from the selected date to the present. When you make this selection, the Pocket PC displays a field that allows you to select the start date for the audit from a drop-down calendar.
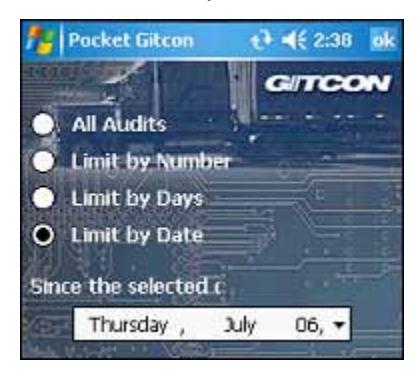
Complete the following steps to audit and download the lock activity data to the Pocket PC.
- 1. After you have logged into the Pocket PC Access Management Application, point the Pocket PC's infrared sensor at the lock unit's infrared sensor to connect to the lock unit.
- 2. While connected to the lock, select Menu | Audits | Setup to open the audit parameter selection screen.
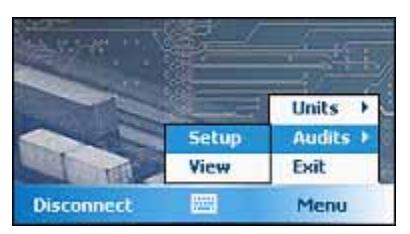
The system displays the audit parameter selection screen.
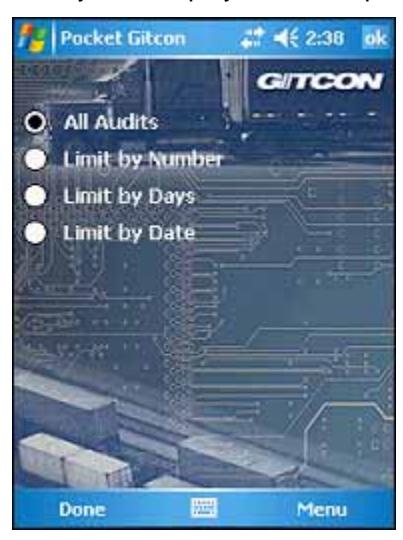
- 3. Select the parameter by which you want to limit the audits that are returned.
- 4. Enter the value that corresponds to the parameter that you have selected (number of audits, days, or a date).
- 5. When you are finished, tap Done .
The system then uses the selected parameter for any audits that are downloaded to the Pocket PC.
Taking Audits
Now that you understand how to set the parameter for the audits and view the audit data on the Pocket PC, you are ready to download the audit data to the Pocket PC for upload to the PC version of the Access Management Software.
Complete the following steps to download the audit data to the Pocket PC.
- 1. After you have logged into the Pocket PC Access Management Application, point the Pocket PC's infrared sensor at a lock unit's infrared sensor to connect to the lock unit.
- 2. While connected to the lock, select Menu | Units | Take Audit to download the audit data for the selected parameter and lock unit.
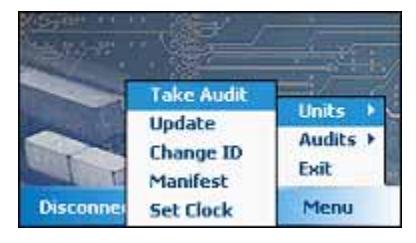
The Pocket PC displays the progress indicator while the audit data are downloaded.
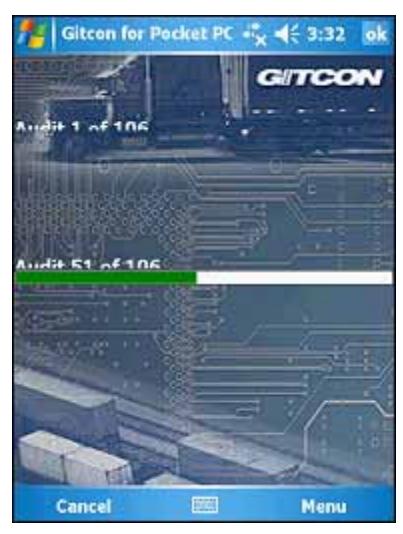
3. When the Pocket PC has completed the download of audit data from the lock unit, it displays the following message to indicate success.
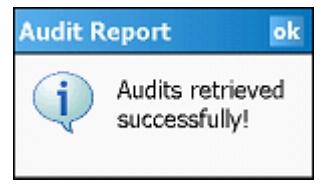
4. Tap OK to exit.
The audit data now resides on the Pocket PC, and will be transferred to the PC during the next ActiveSync session. The audit remains on the Pocket PC and can be viewed or deleted.
Viewing Audit Data
Now that you understand how to take audits for a lock unit, you can also view the audit data on the Pocket PC. The View option allows users to see any of the audits on the Pocket PC.
Complete the following steps to view an audit on the Pocket PC.
1. Select Menu | Audits | View to view the list of audits contained on the Pocket PC.

The system displays the audit list screen. This screen lists all of the audits that currently reside on the Pocket PC. You can resize the columns by tapping and dragging the lines in the header row.
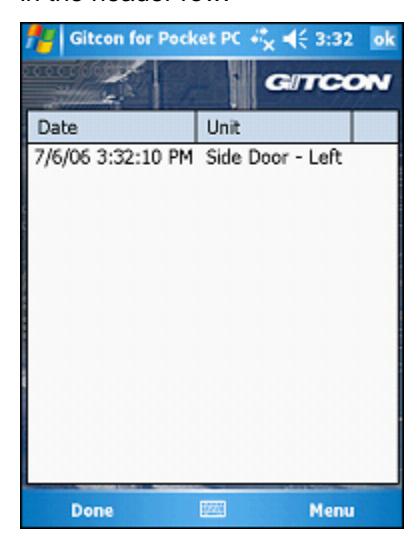
2. Tap the name of the audit you want to view and select Open from the list that appears.
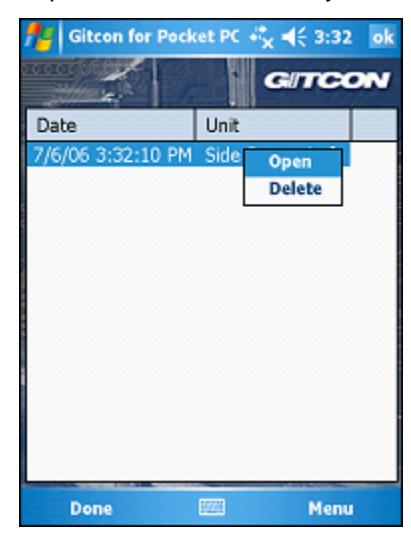
3. The Pocket PC displays all of the actions that are contained in the selected audit.
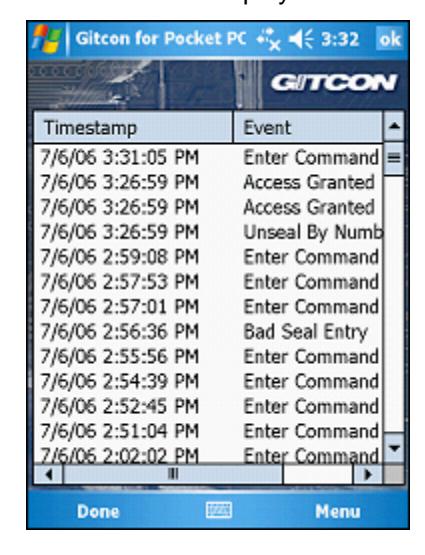
4. When you are finished, click OK to exit.
Deleting Audits
Complete the following steps to delete an audit from the Pocket PC.
Note: You should not delete an audit until it has been uploaded to the PC through ActiveSync.
1. Select Menu | Audits | View to view the list of audits contained on the Pocket PC.
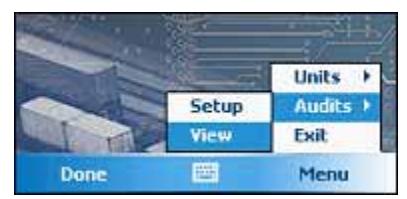
The system displays the audit list screen. This screen lists all of the audits that currently reside on the Pocket PC. You can resize the columns by tapping and dragging the lines in the header row.
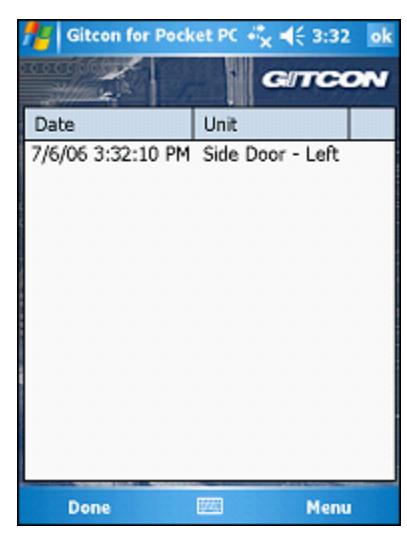
2. Tap the name of the audit you want to view and select Delete from the list that appears.
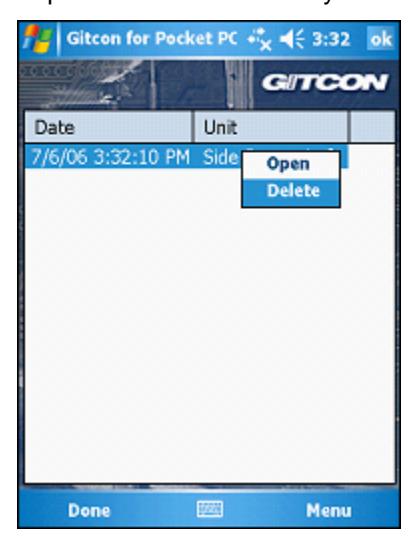
Managing Manifests
The G2 and G152 lock units can also contain manifests for the contents of the containers. Users can create a manifest for a lock unit, as well as view and edit existing manifests using the Pocket PC.
The manifest records that are contained in the lock unit only carry the following pieces of information.
- Name The name of the manifest. This is usually the type of freight that is being carried.
- Quantity The quantity of specified freight being carried in the container.
- ID The manifest ID. Each manifest should have a unique number in your organization.
- Description A more detailed description of the freight. This can include what the measure of quantity is (such as each, pack, and case).
The following sections describe managing manifests on a lock unit.
- Adding a Manifest
- Viewing or Editing a Manifest
- Deleting a Manifest
Adding a Manifest
Complete the following steps to add a manifest to the lock unit, using the Pocket PC.
- 3. After you have logged into the Pocket PC Access Management Application, point the Pocket PC's infrared sensor at a lock unit's infrared sensor to connect to lock.
- 4. While connected to the lock, select Menu | Units | Manifest to view the list of audits contained on the Pocket PC.
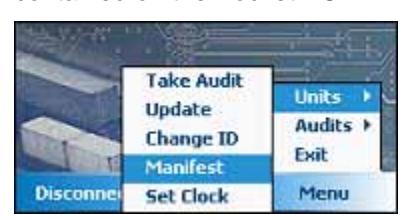
The Pocket PC displays the Manifest List. You can resize the columns by tapping and dragging on the lines in the list header.
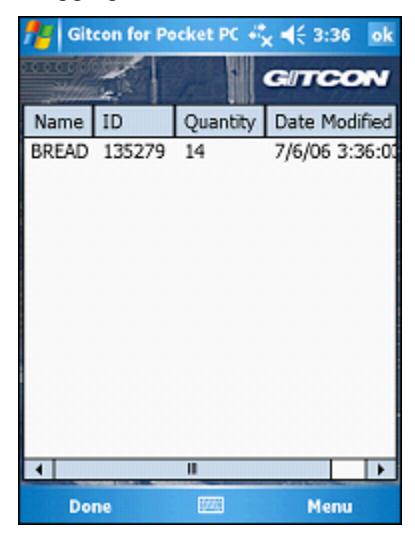
5. Tap the Manifest List and select Add from the list that appears.
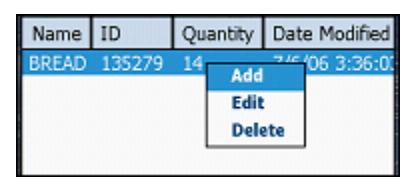
The system displays the Manifest Detail screen for the newly created manifest.
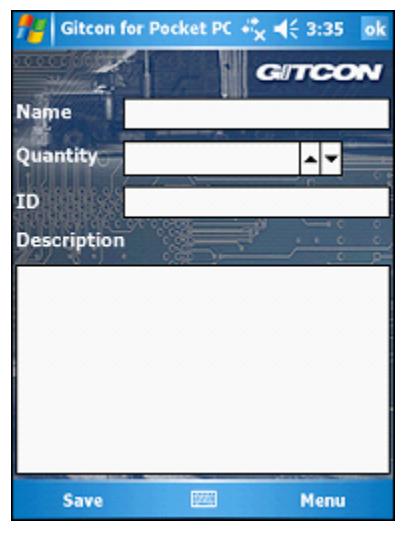
6. Enter the Name , Quantity , ID , or Description fields in the Manifest Detail screen as needed. When you are finished, click OK to save the new manifest.
Viewing or Editing a Manifest
Complete the following steps to view a manifest on the Pocket PC.
7. After you have logged into the Pocket PC Access Management Application, point the Pocket PC's infrared sensor at a lock unit's infrared sensor to connect to the lock.
8. While connected to the lock, select Menu | Units | Manifest to view the list of audits contained on the Pocket PC.
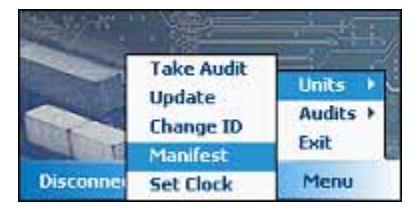
The Pocket PC displays the Manifest List. You can resize the columns by tapping and dragging on the lines in the list header.
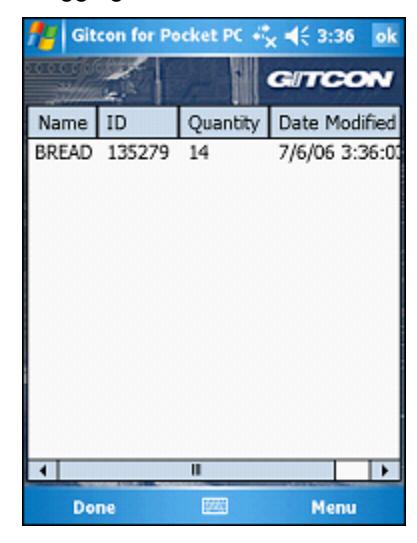
9. If you want to edit a manifest, tap the row of the manifest you want to edit and select Edit from the list that appears.
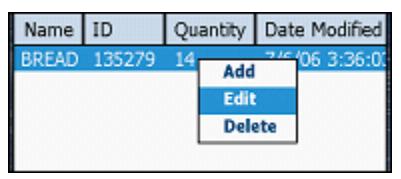
The system displays the Manifest Detail screen.
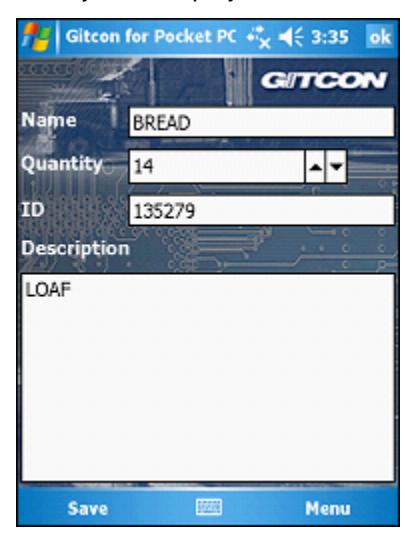
10. Edit the Name , Quantity , ID , or Description fields in the Manifest Detail screen as needed. When you are finished, click OK to save.
Deleting a Manifest
Complete the following steps to delete a manifest from the lock unit.
- 11. After you have logged into the Pocket PC Access Management Application, point the Pocket PC's infrared sensor at a lock unit's infrared sensor to connect to the lock.
- 12. While connected to the lock unit, select Menu | Units | Manifest to view the list of audits contained on the Pocket PC.
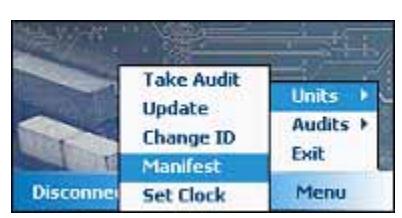
The Pocket PC displays the Manifest List. You can resize the columns by tapping and dragging on the lines in the list header.
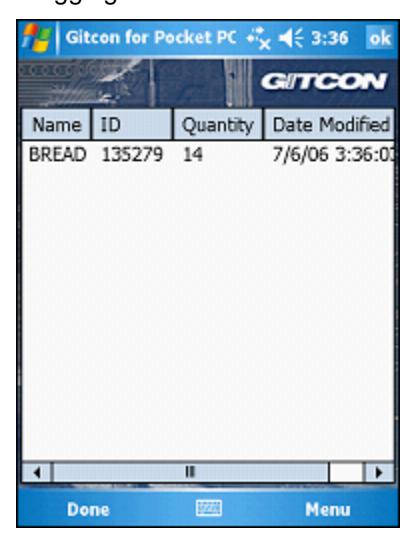
13. Tap the row of the manifest you want to delete and select Delete from the list that appears.
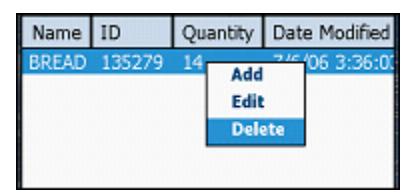
The system will then delete the selected manifest from the lock unit.
Creating Email Audit Event Triggers
The DXT-22 Post Office allows the Gitcon Access Management Software administrator the option to initiate email triggers for the following event audits.
- 1. Transponder (TAG) access denied
- 2. Deleted transponder (TAG) presented
- 3. Wrong PIN code entered
- 4. Passage mode was entered
- 5. Access was granted in conjunction with Government Access Code
- 6. DXT-22 Post Office off line
This option is a Microsoft Windows event. Creating an email trigger requires a stored procedure to run within the Gitcon database. (Contact Factory) An example procedure to generate an email trigger can be found at the following Microsoft link:
http://www.vistax64.com/tutorials/67961-event-viewer-email-notification.html
Document Number 605.106 Rev. E – 1/09

Kaba Mas LLC 749 W. Short Street, Lexington, KY 40508 USA Phone: (859) 253-4744 FAX:(859) 255-2655 Customer Service: (800) 650-4744 www.kaba-mas.com