gitcon-access-management-software-version-2-0-installation-guide-client-server.pdf_638400
Open the original PDF document
View PDFGITCON™ Access Management Software Version 2.0 INSTALLATION GUIDE CLIENT/SERVER

The Gitcon Access Management Software Installation Guide is a publication of Kaba Mas LLC (hereinafter Kaba Mas).
No part of this book may be reproduced or transmitted in any form or by any means, electronic or mechanical, including photocopying, recording, or by any information storage and retrieval system, without prior written permission from Kaba Mas.
The information contained in this publication is accurate to the best of Kaba Mas's knowledge. Specifications are subject to change without notice.
Trademarks
The following items are trademarks or registered trademarks of Kaba Mas in the United States and/or other countries.
• GITCON
Customer Service/Technical Support
Please call Kaba Mas's Technical Support phone line at (800) 950-4744 or (888) 950-4715.

Kaba Mas LLC 749 W. Short Street Lexington, KY 40508 Phone: (888) 950-4715 or (859) 253-4744
Fax: (800) 255-2655 www.kaba-mas.com
Document: PKG 613.019 Rev. A © 2008-2009 Kaba Mas LLC
Table of Contents
|
1
Installing the Gitcon Access Management Software 1–1 The Gitcon Access Control System 1–2 |
|
|---|---|
|
Database Installation Options
1–2 |
|
| Installing the Gitcon Access Management Software1–3 | |
| Installing ActiveSync1–11 | |
| Installing the PC Desktop Reader1–12 | |
|
Registering the Gitcon Access Management Software
1–15 |
1 Installing the Gitcon Access Management Software
The Gitcon Access Management Software is only one part of the Gitcon Access Control System. Several applications must interact in order to provide you with the full functionality of the lock unit, user and transponder databases, the client administration tool, and the Pocket PC maintenance software.
The Gitcon Access Control System
There are several different software applications at work in the Gitcon Access Control System. The Gitcon Access Management Software Installation CD-ROM contains the following applications:
- Gitcon Access Management Software This is the database administration software through which you configure your lock units and users.
- Gitcon PPC This is the Pocket PC software that allows you to perform maintenance at the lock units with upload files that have been synchronized (with Microsoft ActiveSync) from the PC version of the Gitcon Access Management Software.
- MS SQL Server or MS SQL Server Express These database applications contain the lock unit, person, and transponder configuration information. You access the MS SQL database through the Gitcon Access Management Software, which provides an easy-touse graphical interface.
- MS .NET Framework 2.0 This application allows a single PC to act as a database server to enable client PCs to connect to it or to enable the PC to act as a complete client/server system.
- Crystal Reports for .NET Framework This application plugs into the Gitcon Access Management Software to allow you to produce detailed reports from the lock audit data, as well as database actions.
The Installation CD guides you through installing all of these applications.
Note: The Microsoft ActiveSync application is also recommended to synchronize the Pocket PC with the PC. This application should be included with your Pocket PC's starter kit.
Database Installation Options
The Gitcon Access Management System offers three different installation options for the MS SQL database:
- Client Only This option installs only the client version of MS SQL and the Gitcon Access Management Software on the local PC. You will use these client applications to access the MS SQL database on an external server.
- Database Only This option installs MS SQL Server Express on the local PC and creates the database to be accessed by other client PCs.
- Complete Installation This option installs MS SQL Server Express and the Gitcon Access Management Software on your Local PC to act as a complete client-server system on a single PC.
Selecting one of these options is the first decision that you must make when installing the Access Management System. If you want to install and administrate the Access Management System on a single workstation, a complete installation is recommended.
Installing the Gitcon Access Management Software
Complete the following steps to install the Gitcon Access Management Software on your PC.
- 1. Insert the Gitcon Access Management Software Installation CD-ROM into your PC's CD-ROM drive.
- 2. If the DemoShield program does not automatically run, select Start | Run… from your PC Desktop.
- 3. Enter D:/ and click OK .
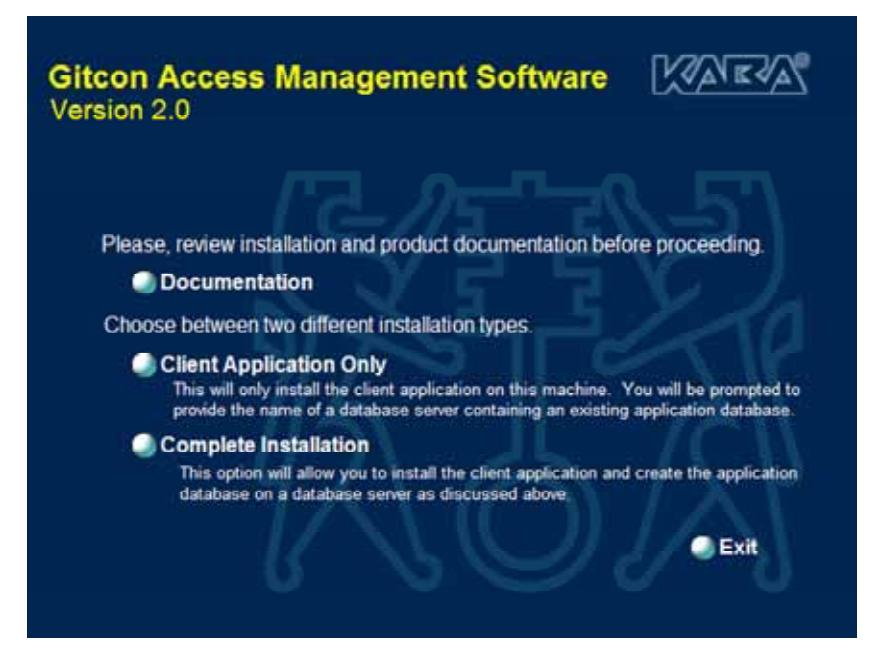
- 4. The DemoShield program displays the installation CD's splash screen. Click on "Documentation."
- Install Adobe Reader if required.
- Review Documentation before proceeding. Then click on "Back" button.
- Select the type of installation you would like to perform.

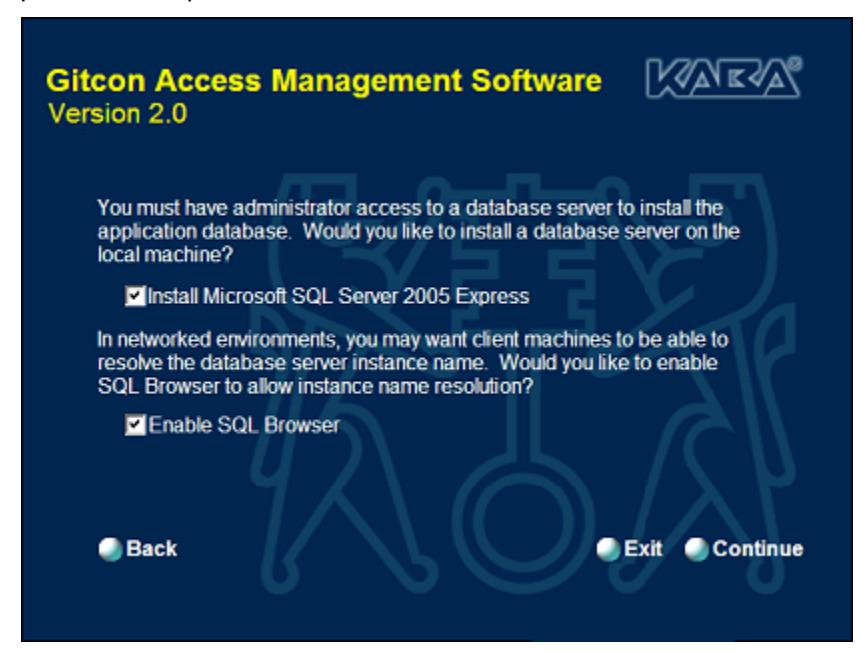
5. If you select Complete Installation , the system displays the following screen. Otherwise, proceed to step 6.
-
6. Complete the following steps:
- a. Select the first check box if you want to Install Microsoft SQL Server 2005 Express to create a database server on the local PC.
Note: This is recommended for the Complete Installation.
- b. Select the second check box if you would like to Enable SQL Browser to allow instance name resolution for client machines.
- c. When you are ready to proceed, click Continue . The system displays the End User License Agreement summaries for each of the component applications that you are installing. If you have any of the component applications already installed on your PC, the installer will not overwrite them.
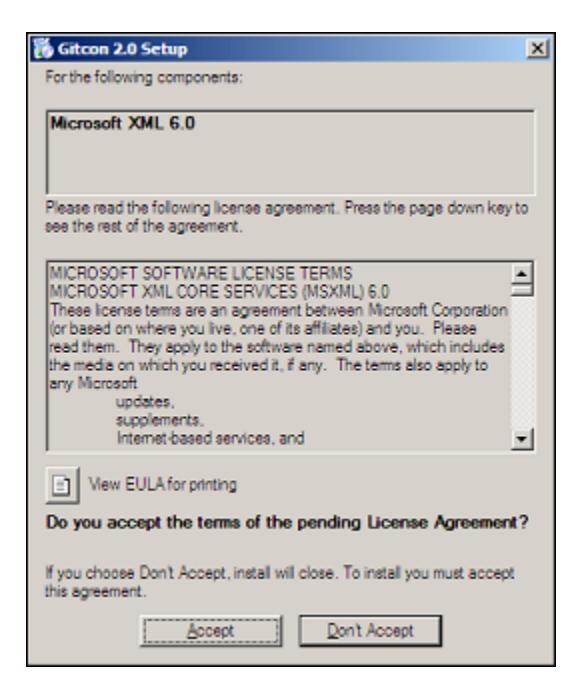
7. Read each of the End User License Agreement summaries and click Accept .
The system writes temporary files to your hard disk and installs the peripheral applications. When this process is complete, the system displays the Gitcon 2.0 Setup Wizard.

8. Click Next . The system displays the Gitcon 2.0 License Agreement.
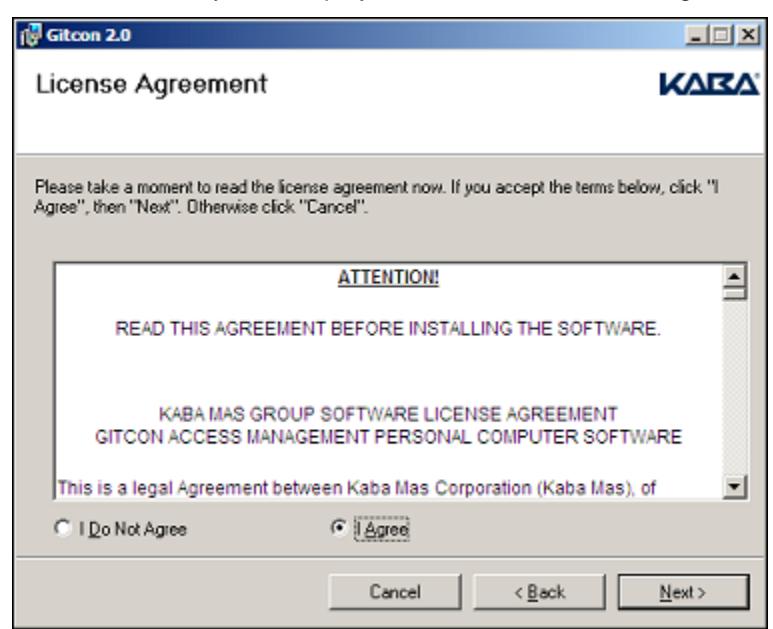
9. Select the I Agree option and click Next . The system displays the Installation Folder and Permissions settings.
-
10. Complete the following steps:
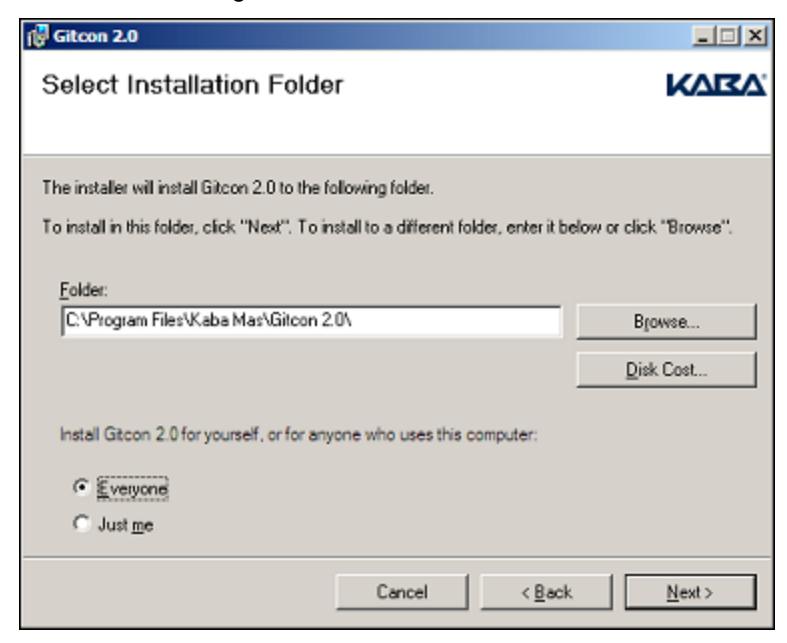
- a. Click Browse… to select an installation destination other than the default.
- b. Click the Disk Cost… button to view the available disk space on the PC and the disk space needed for installation of the application.
- c. Select whether you want to allow Everyone or Just Me to access the Gitcon Access Management Software on the PC. If you select Just Me , only the Windows user currently logged into the PC will be able to use the Gitcon application.
d. Click Next . The system displays the Installation Confirmation screen.
11. The system displays the Kaba Configuration Wizard. Click "Close." Click on the "Gitcon Access Management Software" screen icon.

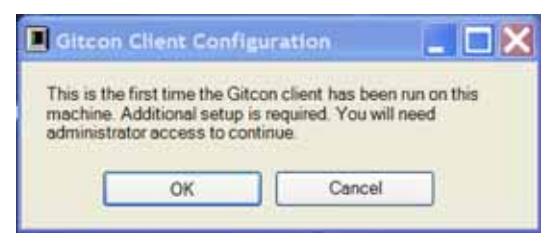
• Click "OK."
-
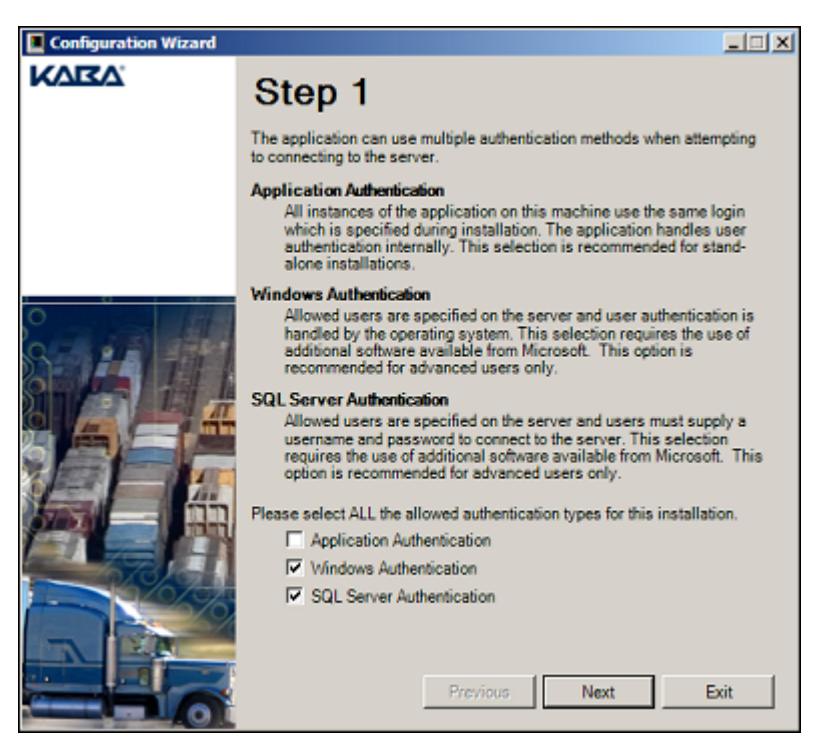
12. Select the Authentication methods you want to employ for the SQL database. You can select up to three options:
- Application Authentication All instances of the application on this machine use the same login information, which is specified during installation. The application handles user authentication internally. This selection is recommended for standalone installations.
- Windows Authentication Users with permission are specified on the server, and users must supply a username and password to connect to the server. This option is recommended for advanced users only.
- SQL Server Authentication Authorized users are specified on the server, and users must supply a username and password to connect to the server. This option is recommended for advanced users only.
13. Click Next . The system displays the Server Configuration settings.

14. Select the Server Name and Server Type from the drop-down list of available selections on the local PC and click Next . The system displays the Database Name settings.
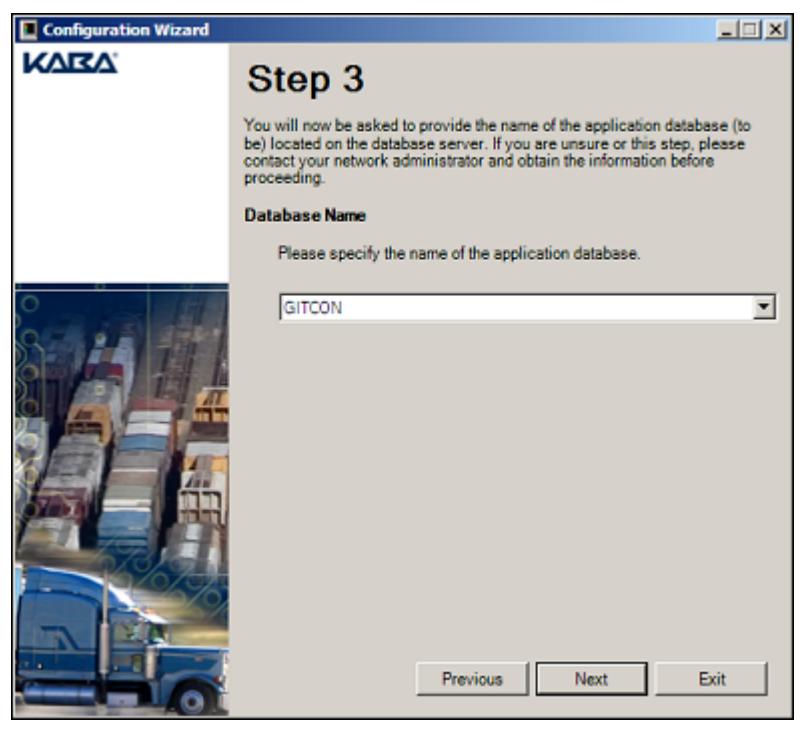
15. Select a database from the drop-down list of available databases on the local PC and click Next . If you selected Application Authentication in step 11, the system displays the Application Login settings. Otherwise, proceed to step 18.

- 16. Type a login ID in the Application Login field.
- 17. Type a password in the Password and Confirm Password fields. Note: the password must be at least six characters long and contain three of the following: capital letters, lower case letters, numbers and special characters.
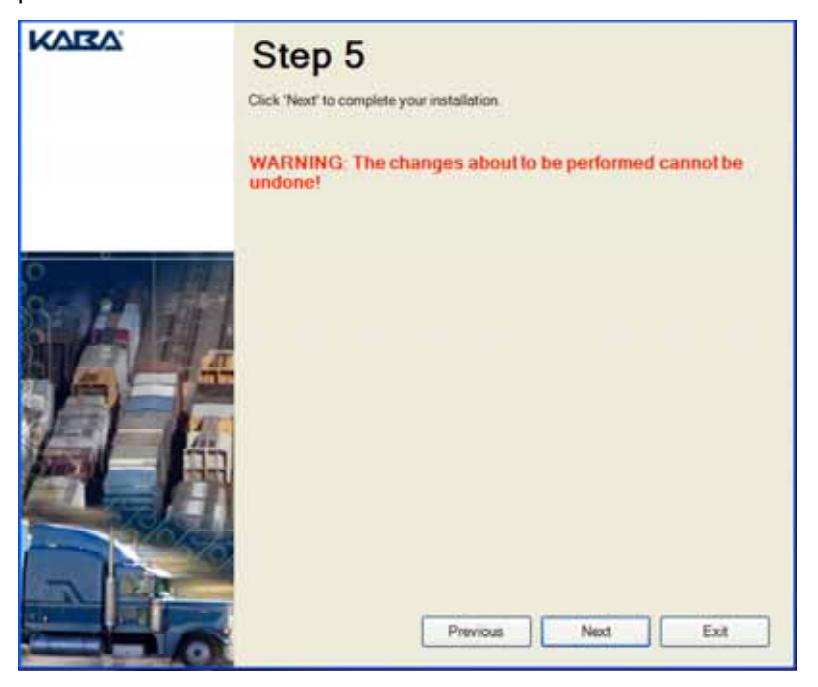
- 18. Click Next . The system displays a warning indicating that the changes about to be performed cannot be undone.
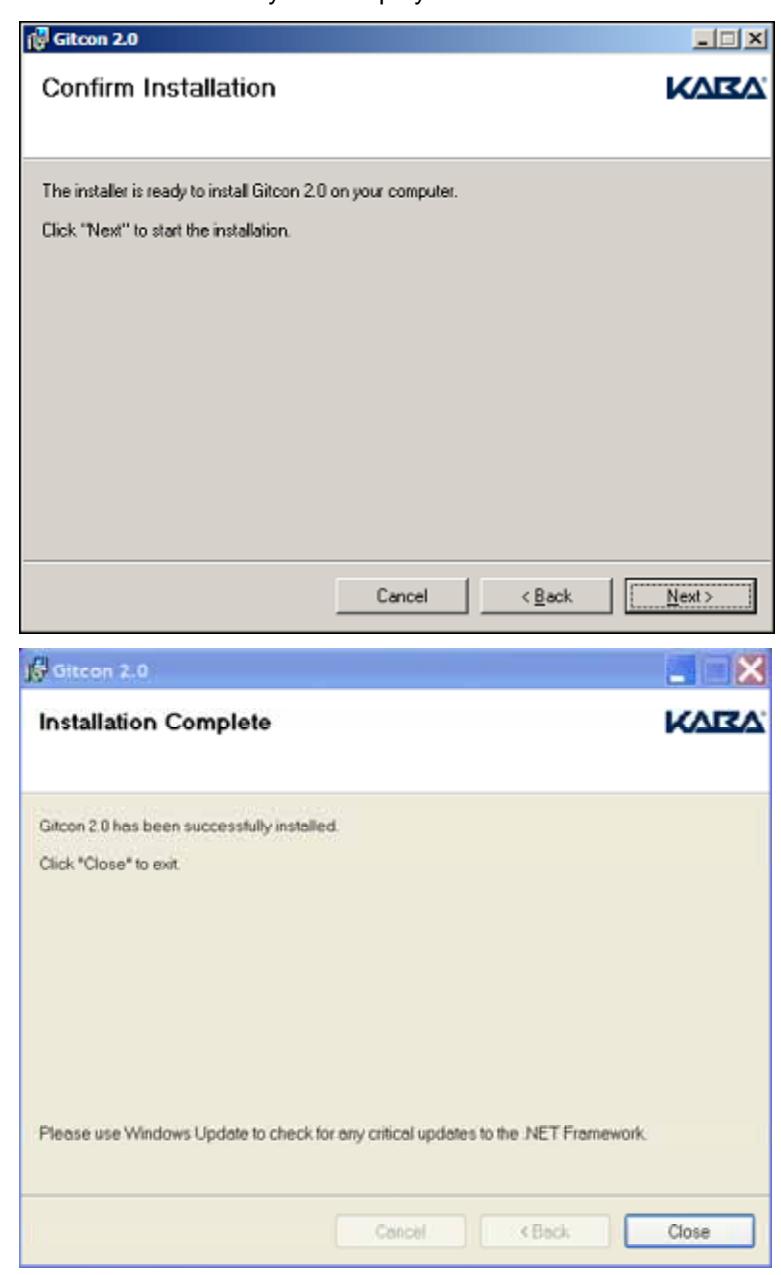
19. Click Next . The system displays a final installation confirmation.
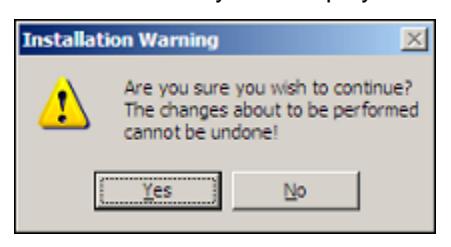
20. Click Yes to proceed with the installation. The system installs the Gitcon Access Management Software.
When it is finished, the system displays the following confirmation:

21. Click OK . The system displays the following screen:

22. Click Finish .
Installing ActiveSync
Ensure that you have already installed Microsoft ActiveSync on your PC and your Pocket PC and that your Pocket PC communicates (Synchronizes) to your PC without any problem. Your Pocket PC must also be set with the correct date and time.
Refer to the ActiveSync application's accompanying documentation for instructions on installing ActiveSync on your PC and Pocket PC.
Note: Once you have installed and started the ActiveSync application, you should select Tools | Options… from the menu bar. Next, ensure that the Files checkbox is selected. This will ensure that the ActiveSync application synchronizes data from the Gitcon Access Management Software to the PPC.
Installing the PC Desktop Reader
The PC Desktop Reader is a required peripheral of the Gitcon Access Control System. You use it to program the transponder cards issued to lock users. The PC Desktop Reader is a USB Device that requires the download and installation of a specific driver to work properly.
Complete the following steps to install the PC Desktop Reader.
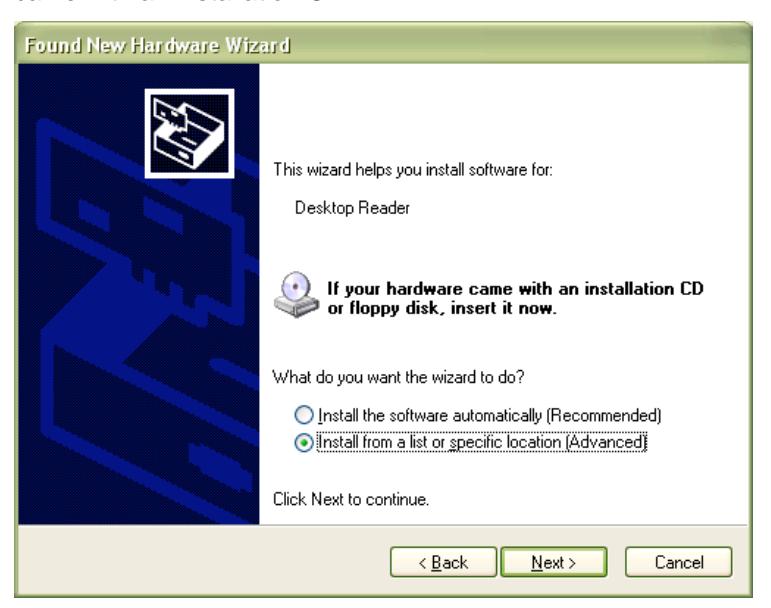
1. Attach the PC Desktop Reader to your PC's USB port using the USB cable. Your system should recognize that new hardware has been attached and it displays the Found New Hardware Wizard.
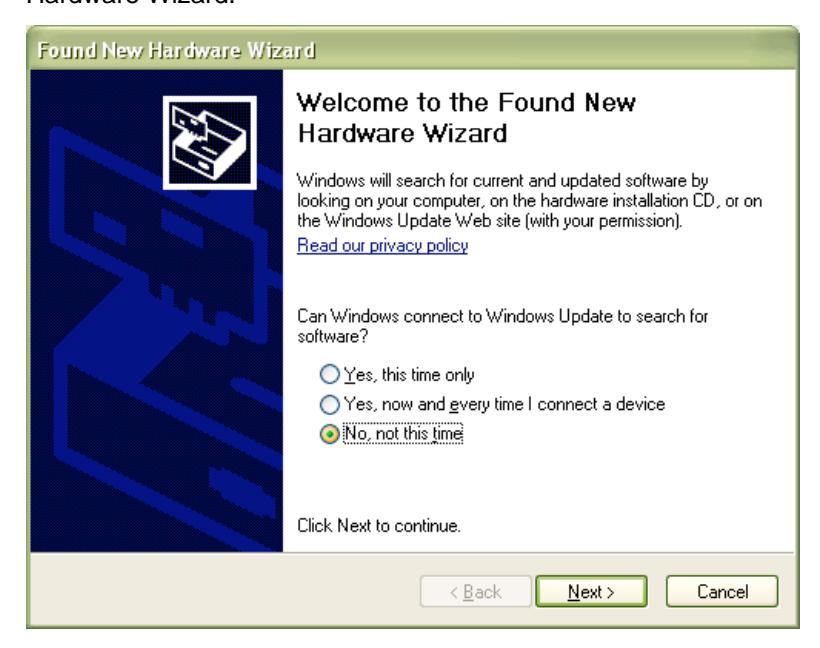
2. Select the third option, No, not this time , to manually search for the PC Desktop Reader's driver and click Next . The system prompts you to select whether the software came with an installation CD.
3. Select the second option, Install from a list or specific location , and click Next . The system will prompt you to specify the location of the driver.
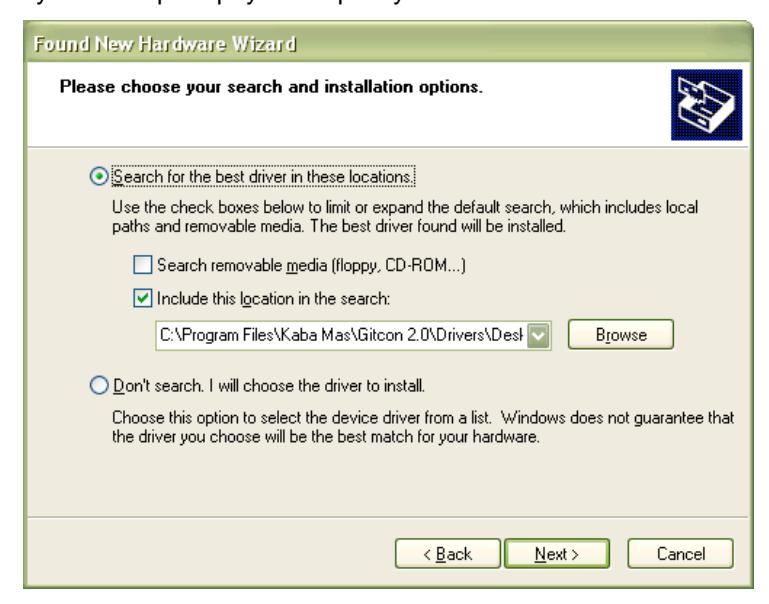
4. Browse to the Drivers\Desktop Reader folder under the installation folder. This folder is located under C:\Program Files\Kaba Mas\Gitcon 2.0 by default. Click Next . The system will install the serial converter.
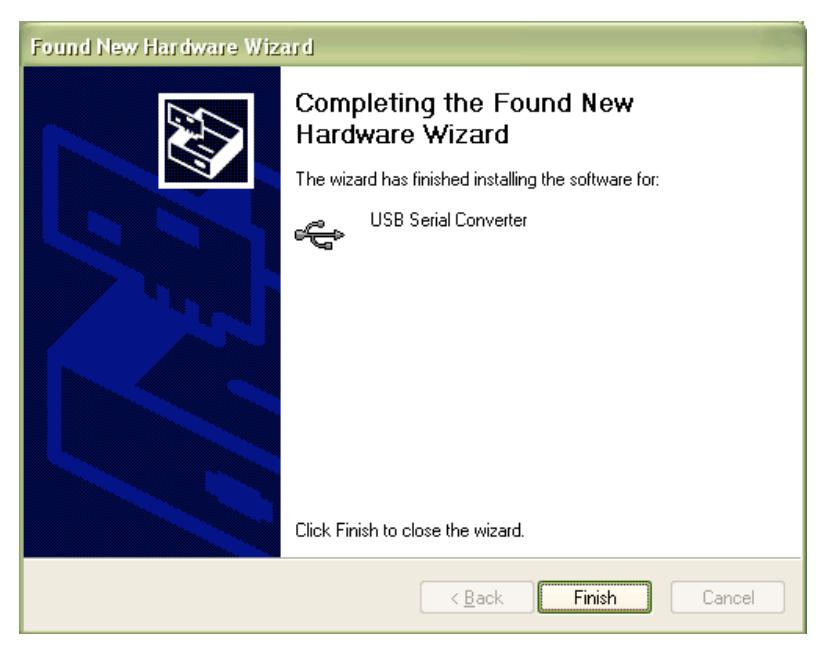
5. Click Finish . The system will then detect additional hardware. Repeat steps 1 through 4. The system will then install the serial port driver.
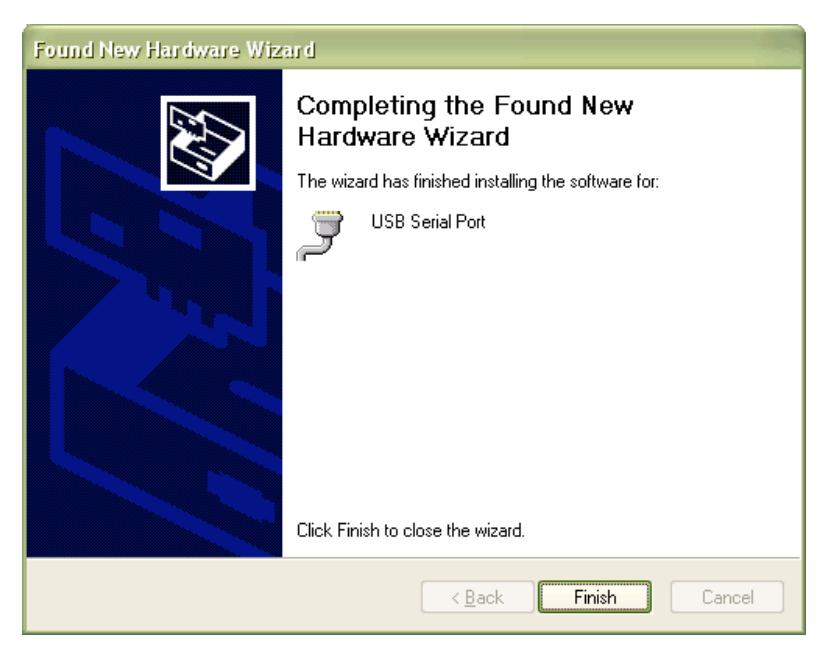
6. Click Finish .
Your PC Desktop Reader is now installed and ready to use. You can use it to manage the transponder cards issued to your lock users, etc.
Registering the Gitcon Access Management Software
Once you have installed the Gitcon Access Management Software and PC Desktop Reader, you can now register your copy of the Access Management Software.
Complete the following steps to register the Gitcon Access Management Software on your PC.
Note: You must have the PC Desktop Reader installed and connected to the PC in order to register the Gitcon Access Management Software.
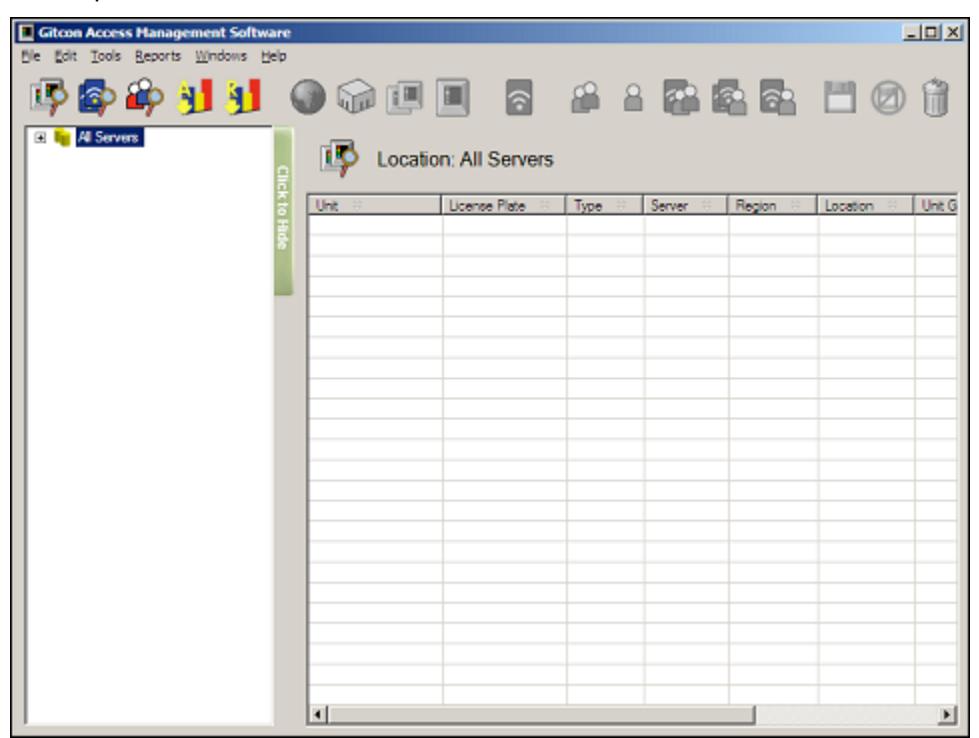
1. Start the Gitcon Access Management Software by selecting Start | Programs | Kaba Mas | Gitcon 2.0 | Gitcon 2.0 from your PC's desktop. The system displays the default Unit Explorer screen.
2. Select Windows | Manage Physical Transponder from the Menu Bar. The system displays the Waiting for Transponder message.
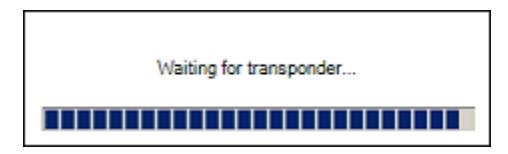
3. Present the Registration Transponder that accompanied your copy of the Gitcon Access Management System to the PC Desktop Reader. The system will display a confirmation message indicating that the software has been properly registered.
After the system has been registered, any client connecting to the database will not be allowed to connect. A prompt to register the client will appear each time the Gitcon Access Management Software is started. To register the client, present the same Registration Transponder to the PC Desktop Reader during startup or before clearing the Waiting for Transponder message.
Document Number 613.019 Rev. A – 1/09

Kaba Mas LLC 749 W. Short Street, Lexington, KY 40508 USA Phone: (859) 253-4744 FAX:(859) 255-2655 Customer Service: (800) 650-4744 www.kaba-mas.com