e-Elite Install
Open the original PDF document
View PDF

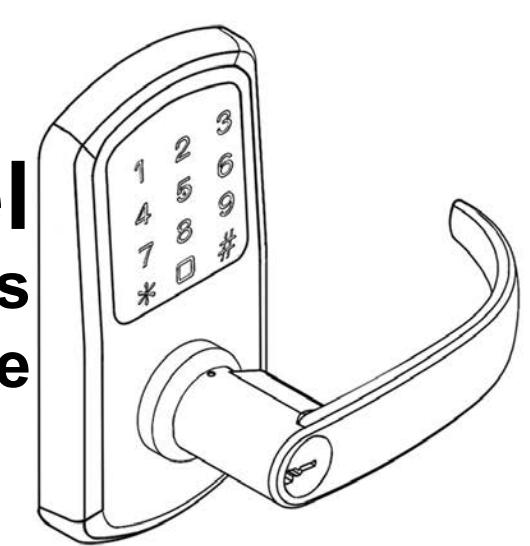
TownSteel e-Elite Touch Keypad Series Installation Guide
| Table of Contents | |
|---|---|
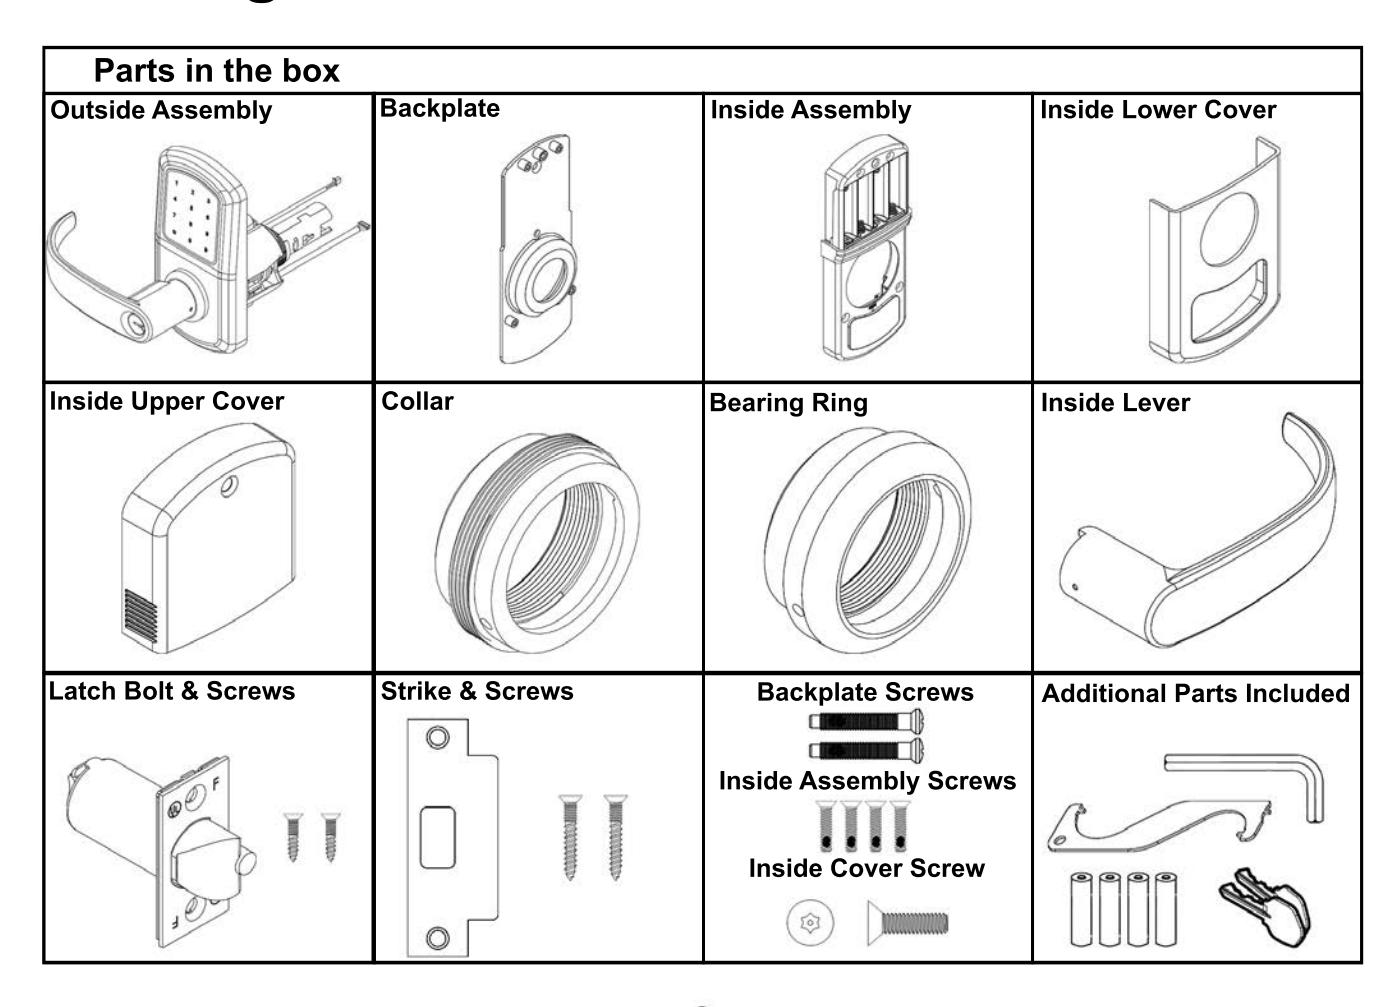
| Package Content | 2 |
| Getting Started | 3 |
| Door Preparation | 4 |
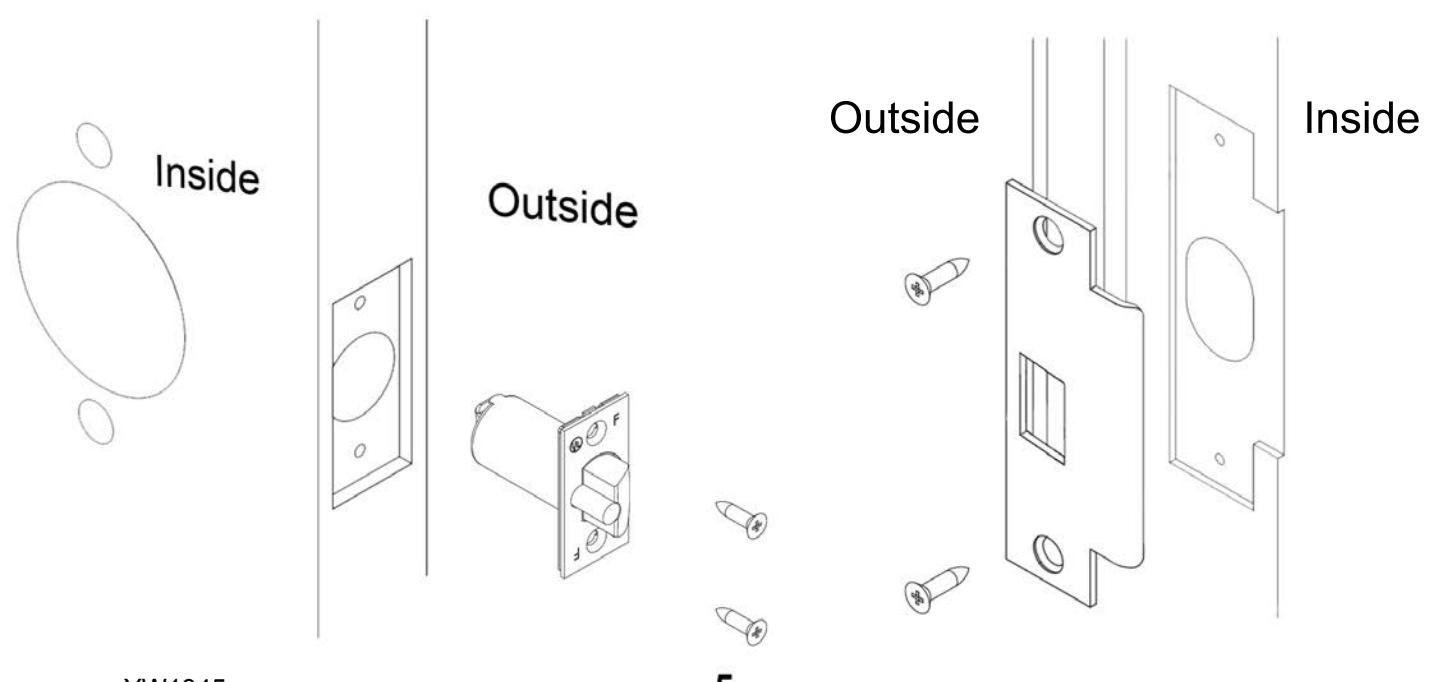
| Step 1 - Latch Bolt & Strike | 5 |
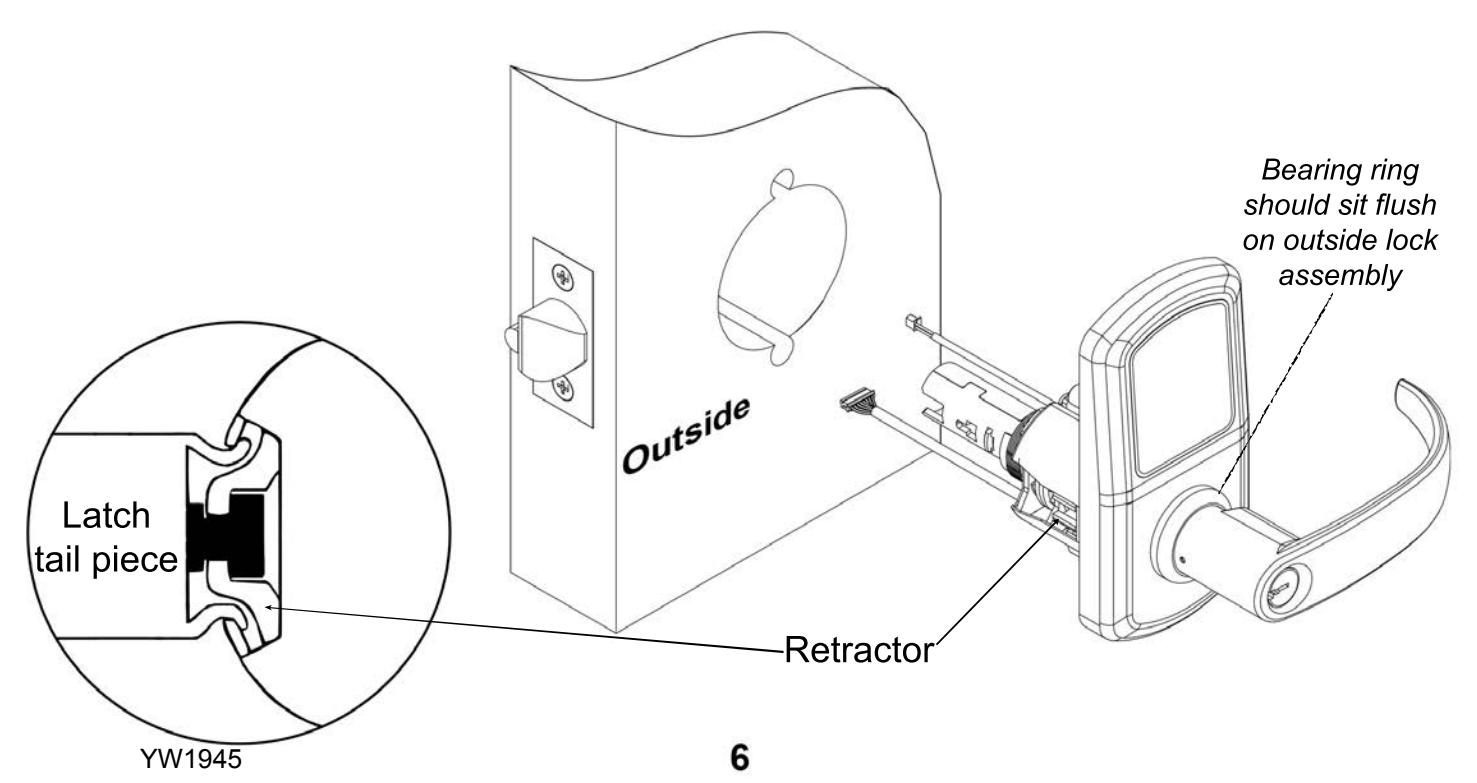
| Step 2 - Installing Outside Assembly | 6 |
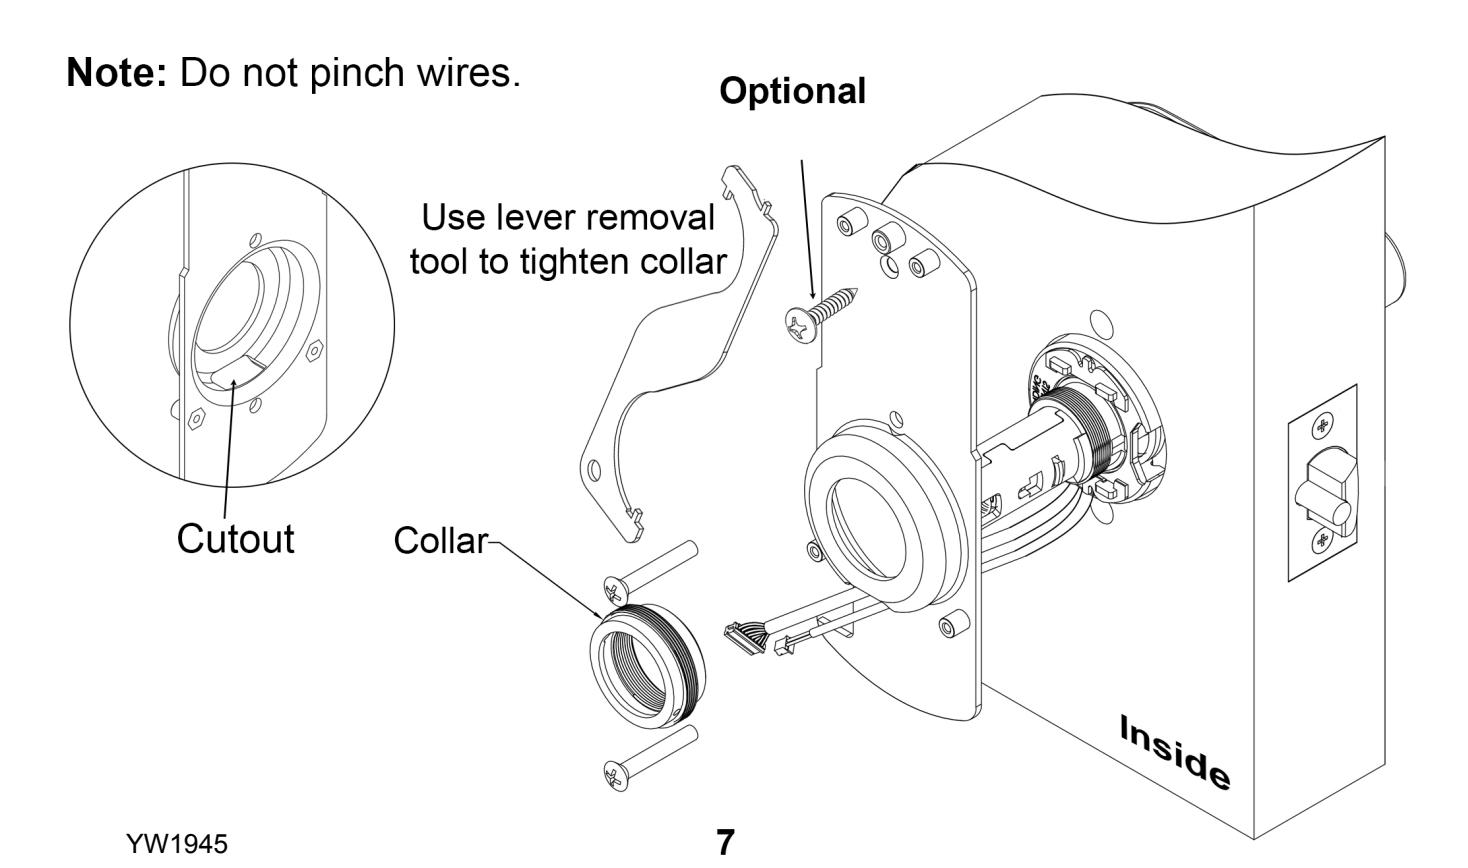
| Step 3 - Installing Backplate | 7 |
|
Step 4 - Connecting Wires
Wires |
8 |
| Step 5 - Installing Inside Assembly | 9 |
| Step 6 - Installing Covers | 10 |
| Step 7 - Installing Inside Lever | 11 |
| Addendum | 12 |
| Exploded View | 13 |
Troubleshoot 14

Getting Started

Tools needed for lock installation
Phillips Screw Driver (Not included)

Lever Removal Tool
Torx Wrench

Do not use a power drill for installation of lock - it can damage the lock.
Handing Information
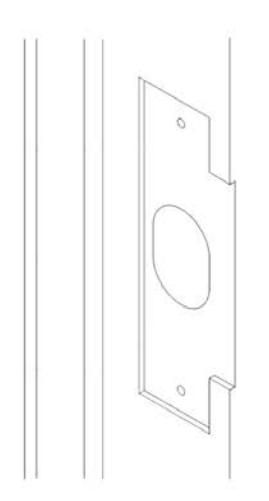
Door Preparation

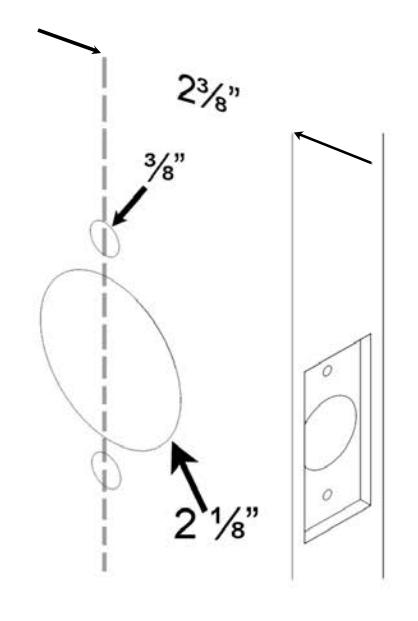
Prepare door and jamb per template provided. The backset is the dimension from the edge of the door to the centerline of the lock.
Important:
Door stop is where the door will stop when normally operated. The stop includes any gasket, smoke seal, or bumpers. bumpers. The position of strikes are to be measured taking this into account.

Install the latch bolt and secure with 2 screws. Install strike and secure with 2 screws.
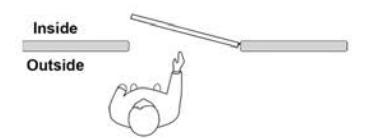
Note : A right hand (RH) lock will be depicted in the following guide - for left hand (LH) install opposite. During installation keep the door open. Do not use power tools for assembly or you can potentially damage the door.

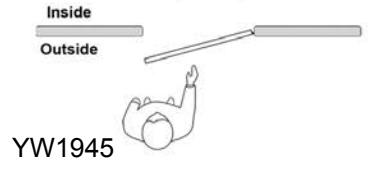
Install the outside lock assembly in the cutout. Guide the wire harnesses through the cutout. Line up the retractor on the lock body with the latch tail piece. Tighten the latch screws.
Note: Do not pull or pinch the wire harnesses.

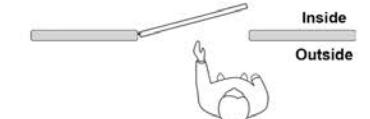
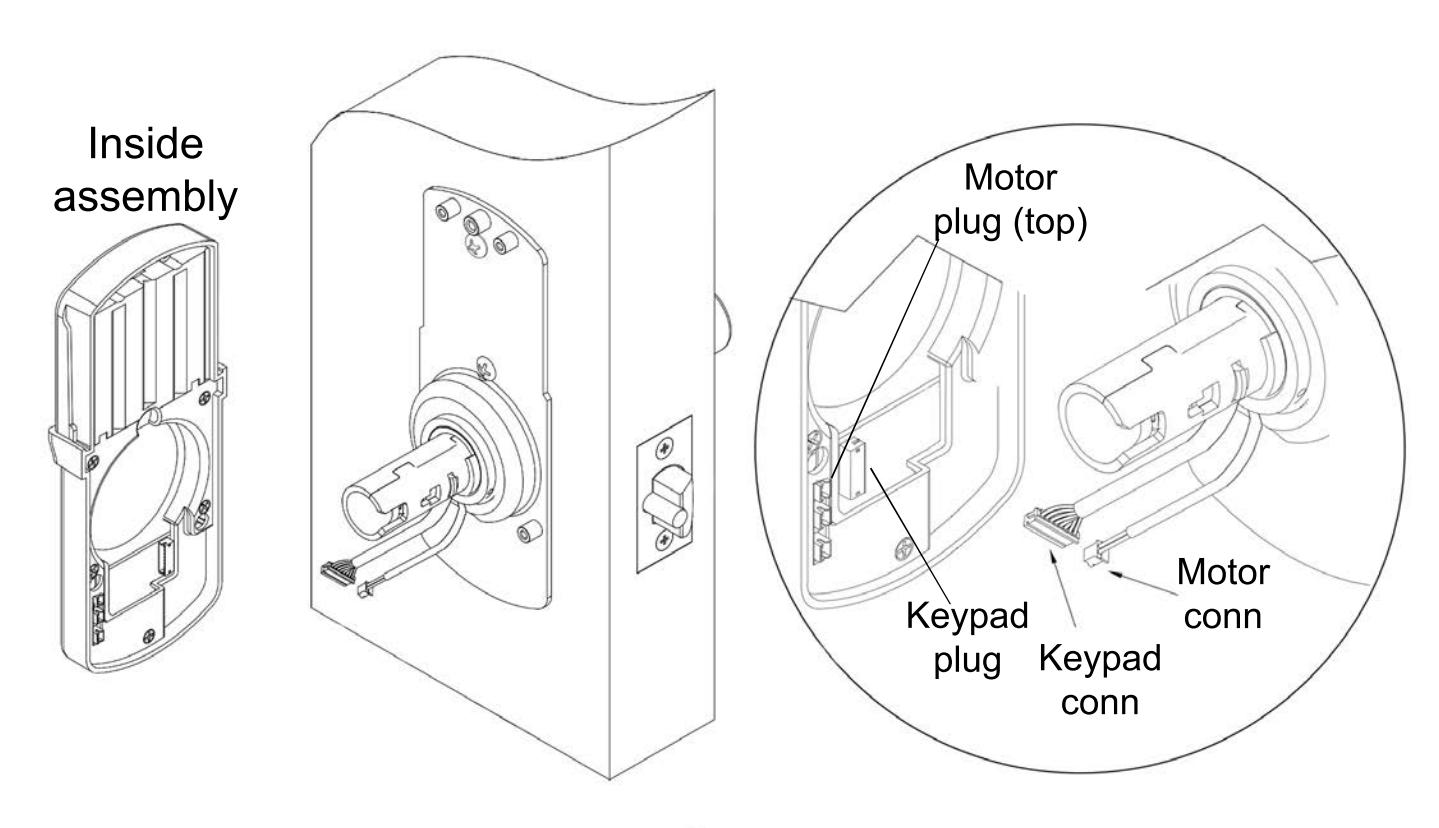
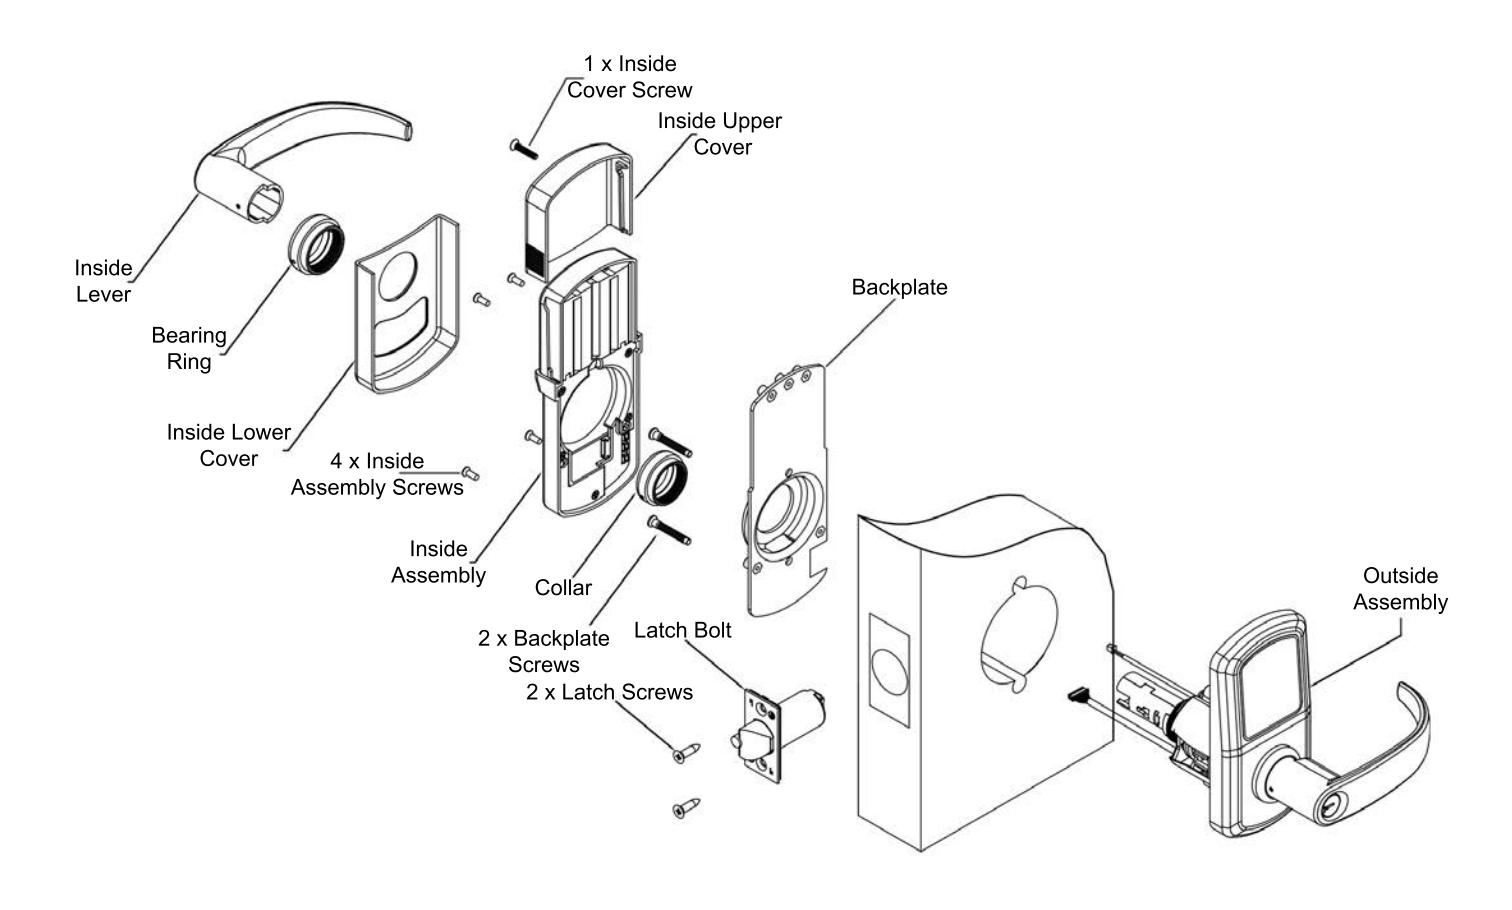
Install the backplate on the inside. Make sure to route the wire harnesses through the cutout shown. Secure the backplate with the 2 backplate screws and the collar.

Plug in the wire harnesses where indicated on the inside assembly.
YW1945

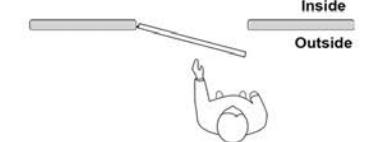
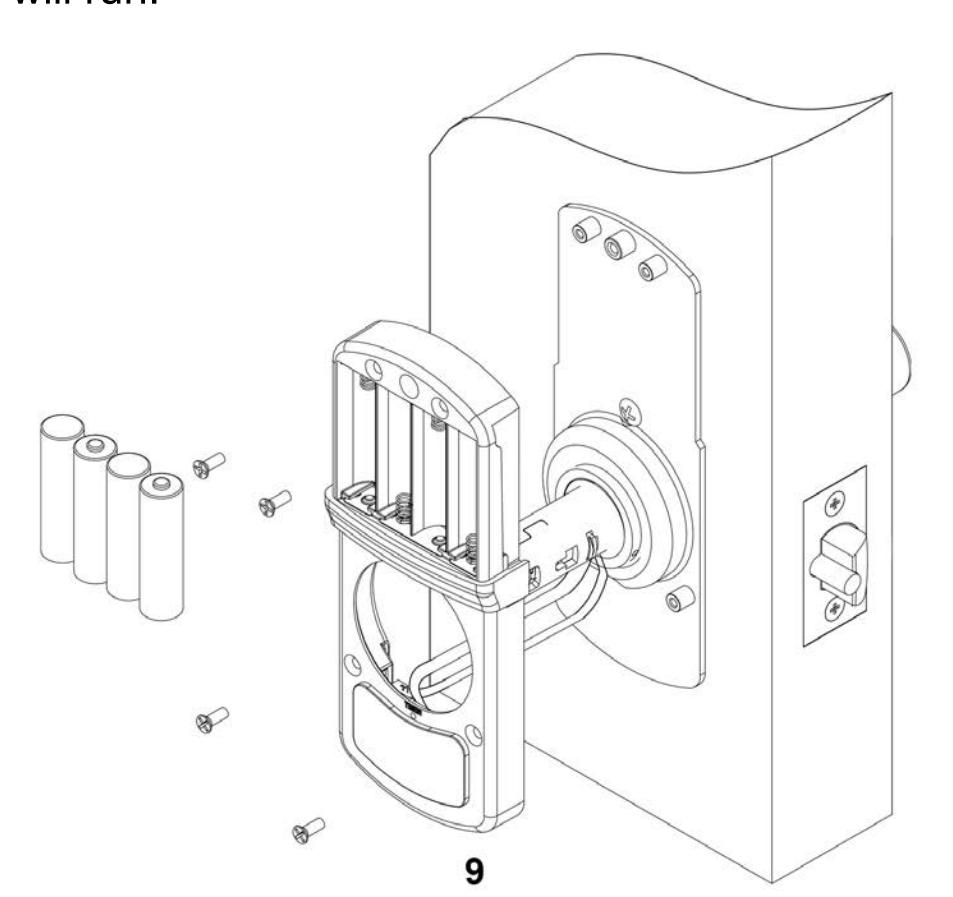
Install inside assembly with 4 screws. Do not pinch wires. Install the 4 AA alkaline batteries provided. The keypad will light up green and the motor will run.

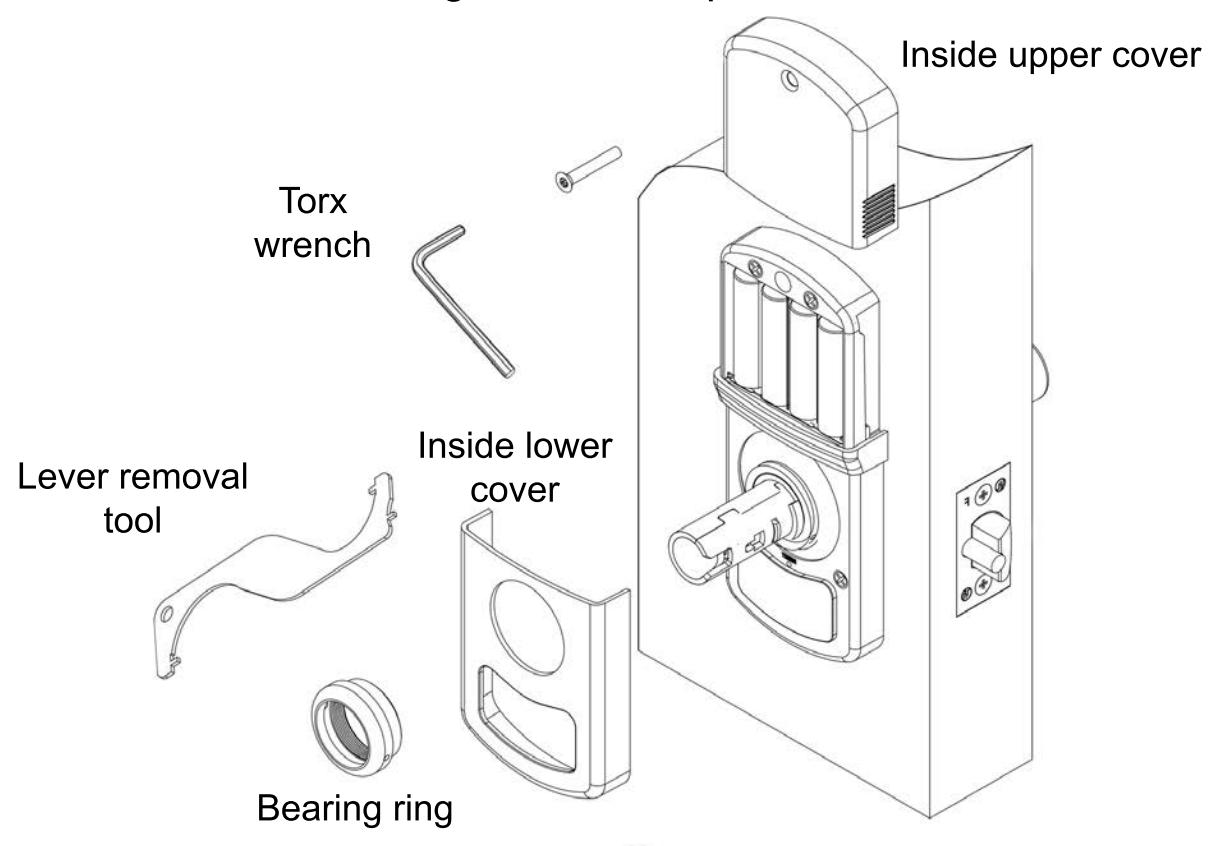
Install inside lower cover first. Tighten the bearing ring to hold cover in place. Install the inside upper cover - slide down from top - secure with screw using the wrench provided.
YW1945 10
YW1945

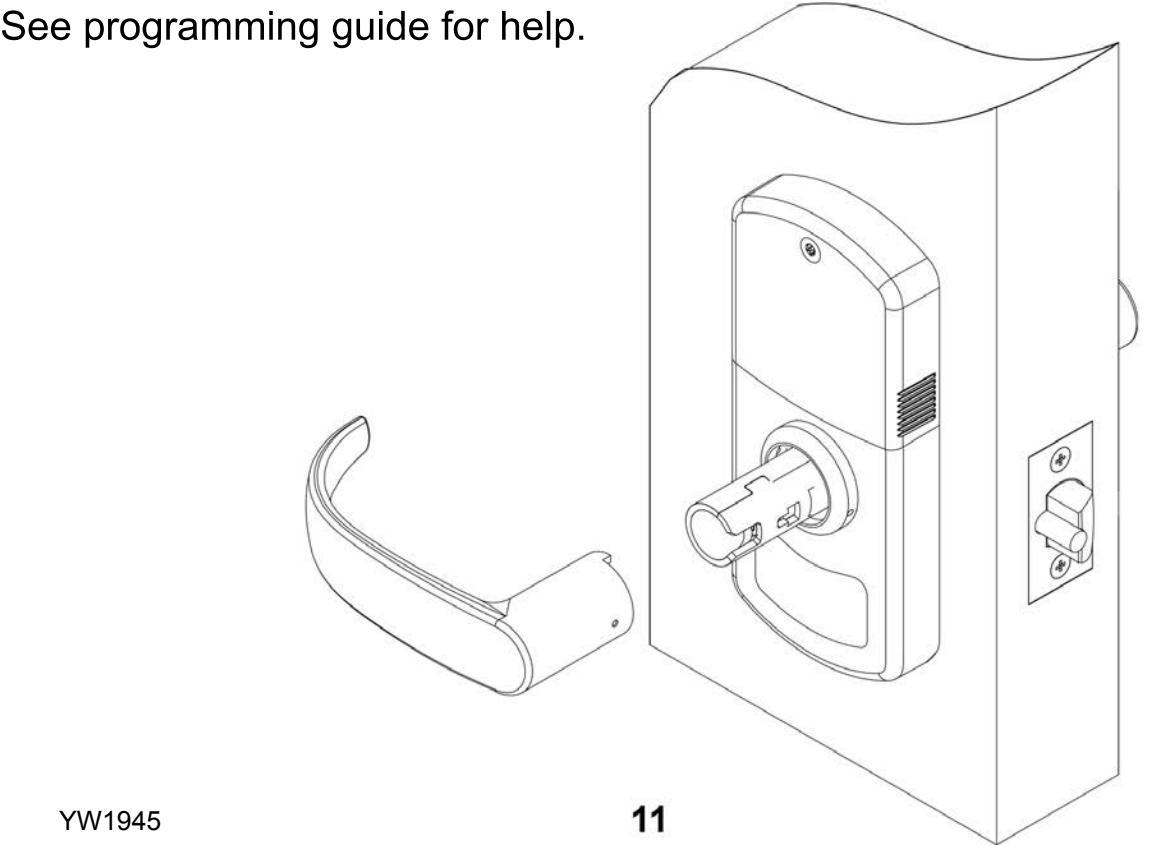
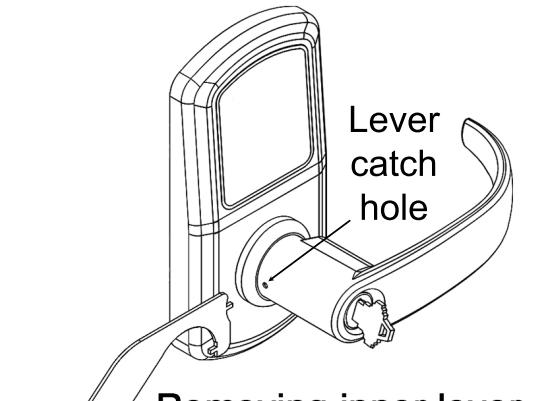
Install the inside lever - ensure the lever is seated and is locked in place. Lever catch is on the side of lever and it should snap into place.
Note: Check lock for correct operation before closing the door.
Addendum

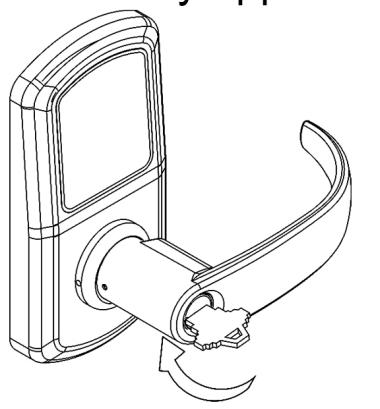
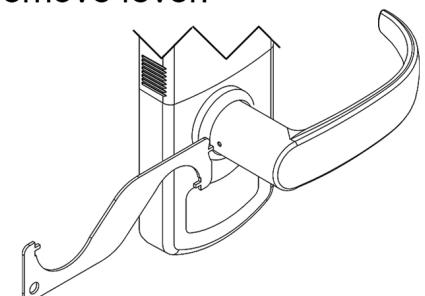
3. Remove lever.
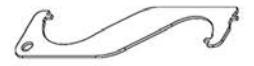
2. Insert lever removal tool into the lever catch hole and push back the lever catch.


| Problem | Cause | Solution |
|---|---|---|
| Keypad does not light up. | Batteries are dead. |
Replace batteries by removing
back cover. |
|
Keypad is locked out due to
amount of incorrect codes |
Wait 60 seconds and try again. | |
|
Not fully plugged in wires or
pinched wires. |
Check wire connection. | |
| Issues retracting latch |
Latch tail piece did not fully
engage lock body retractor. |
See Step 2. |
|
Keypad lights up but motor
does not respond. |
Motor wire is not fully plugged
in or has been pinched. |
Undo the back cover and
inside assembly. Inspect the motor wire. |
|
Motor wire was plugged into
the wrong plug. |
See Step 4. |

VISIT WWW.TOWNSTEEL.COM FOR
17901 RAILROAD STREET CITY OF INDUSTRY, CA 91748
TOLL FREE: 877-858-0888
TEL: 626-965-8917