


Installation Instructions

Trim Wing Pull (P8 Series) and Flat Plate (F1 Series)
For Wood and Metal Doors
ED8000 Exit Device

This product can expose you to lead which is known to the state of California to cause cancer and birth defects or other reproductive harm. For more information go to www.P65warnings.ca.gov.
Trim Wing Pull (P8 Series) and Flat Plate (F1 Series)
ED8000 Exit Device
Installation Instructions

| TOC | Table of Contents | |
|---|---|---|
| 1 | How to Determine Hand of Door 2 | |
| 2 | Door Preparation 2 | |
| a | Mark Centerline 2 | |
| b | Spot and Drill Template Holes 3 | |
| 3 | Installation 3 | |
| a | Install Trim (No ANSI Prep) 3 | |
| b | Install Trim (ANSI Prep) 4 | |
| IMPORTANT |
- Failure to follow these intructions could affect operation of this product and void warranty.
- Exit devices must be securely fastened to properly reinforced doors with fasteners which will not loosen or pull out. Add reinforcement when necessary.
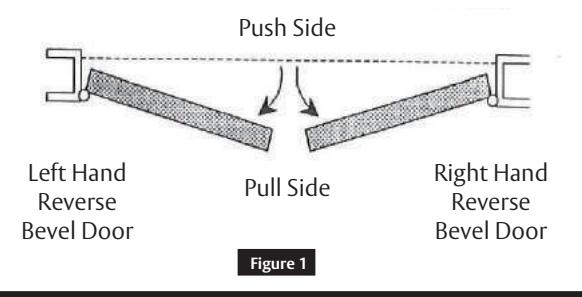
1 How to Determine Hand of Door
2 Door Preparation
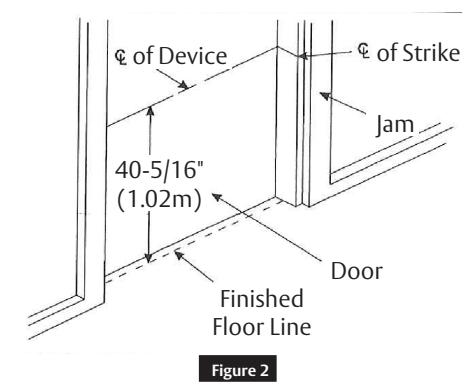
a Mark Centerline
Establish centerline of device by drawing line across door and stop. The line must be 4-5/16" (1.02 m) above the finished floor unless doors have been pre-prepped. (Figure 2)
FM161 08/19
Trim Wing Pull (P8 Series) and Flat Plate (F1 Series)
ED8000 Exit Device
Installation Instructions

2 Door Preparation (cont.)
b Spot and Drill Template Holes
IMPORTANT
When installed with removable mullion, see instruction sheet packed with mullion.
If door is not prepped with a 2-3/4" (70 mm) backset cylindrical lock cut-out, use the Template furnished. Spot and drill mounting holes for device, latch assembly, and trim (if furnished).
If door has ANSI/BHMA A156.115 cylindrical lock cut-out:
- a. Extend horizontal and vertical lines of the cut-out. (Figure 3)
- b. If the frame has a 5/8" (16 mm) stop, align centerlines on template with centerlines on the door. Spot, drill, and tap mounting holes for device, latch assembly, trim (if furnished), and strike (if applicable).
- c. If the frame has a 1/2" (13 mm) stop, align centerlines on template with centerlines on door and spot mounting holes for device and trim (if furnished). Then move template up against the stop to mark strike holes (if applicable). Note the special shim which must be mounted behind the strike. Drill and tap all required holes. Figure 3
3 Installation
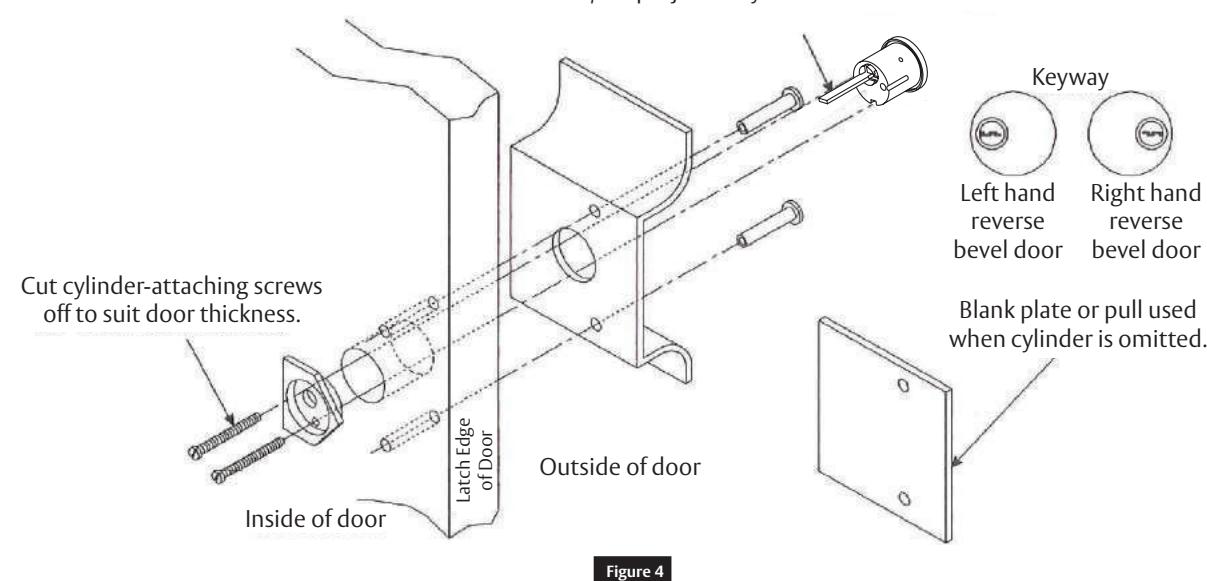
a Install Trim (No ANSI Prep)
IMPORTANT
Refer to template packed with trim before proceeding with step 3 a or step 3b.
Mount cylinder horizontally as shown below. Cut tailpiece so that 3/16" projects beyond inside face of door.
Trim Wing Pull (P8 Series) and Flat Plate (F1 Series)
ED8000 Exit Device
Installation Instructions

3 Installation (cont.)
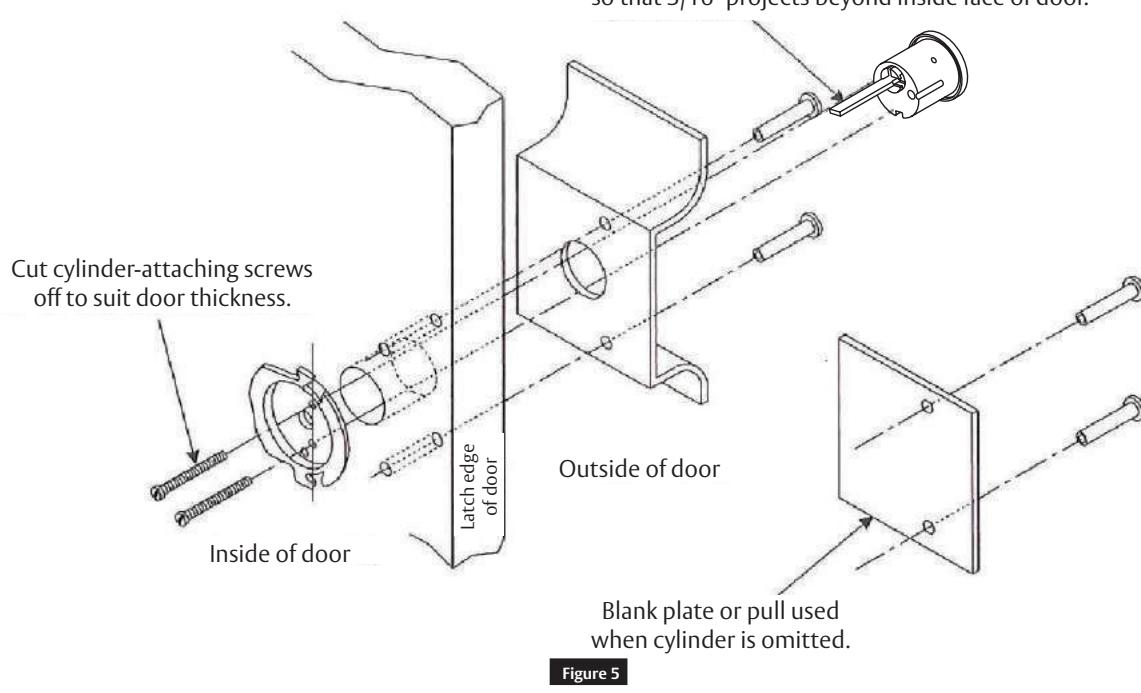
b Install Trim (ANSI Prep)
IMPORTANT
Refer to template packed with trim before proceeding with step 3 a or step 3b.
Mounting cylinder horizontally as shown below. Cut tailpiece so that 3/16" projects beyond inside face of door.
Corbin Russwin, Inc. 225 Episcopal Road Berlin, CT 06037 USA Phone: 800-543-3558 Fax: 800-447-6714 www.corbinrusswin.com
ASSA ABLOY is the global leader in door opening solutions, dedicated to satisfying end-users needs for security, safety, and convenience