


TH9M10 and TH9M55
Heavy Duty Thumbpiece Trim For use with ED5600 Series Mortise Exit Device
Metal, Wood or Composite Doors
*Shown for LHR Door


WARNING
This product can expose you to lead which is known to the state of California to cause cancer and birth defects or other reproductive harm. For more information go to www.P65warnings.ca.gov.
TH9M10 and TH9M55 Heavy Duty Thumbpiece Trim
For ED5600 Series Mortise Exit Device
Installation Instructions

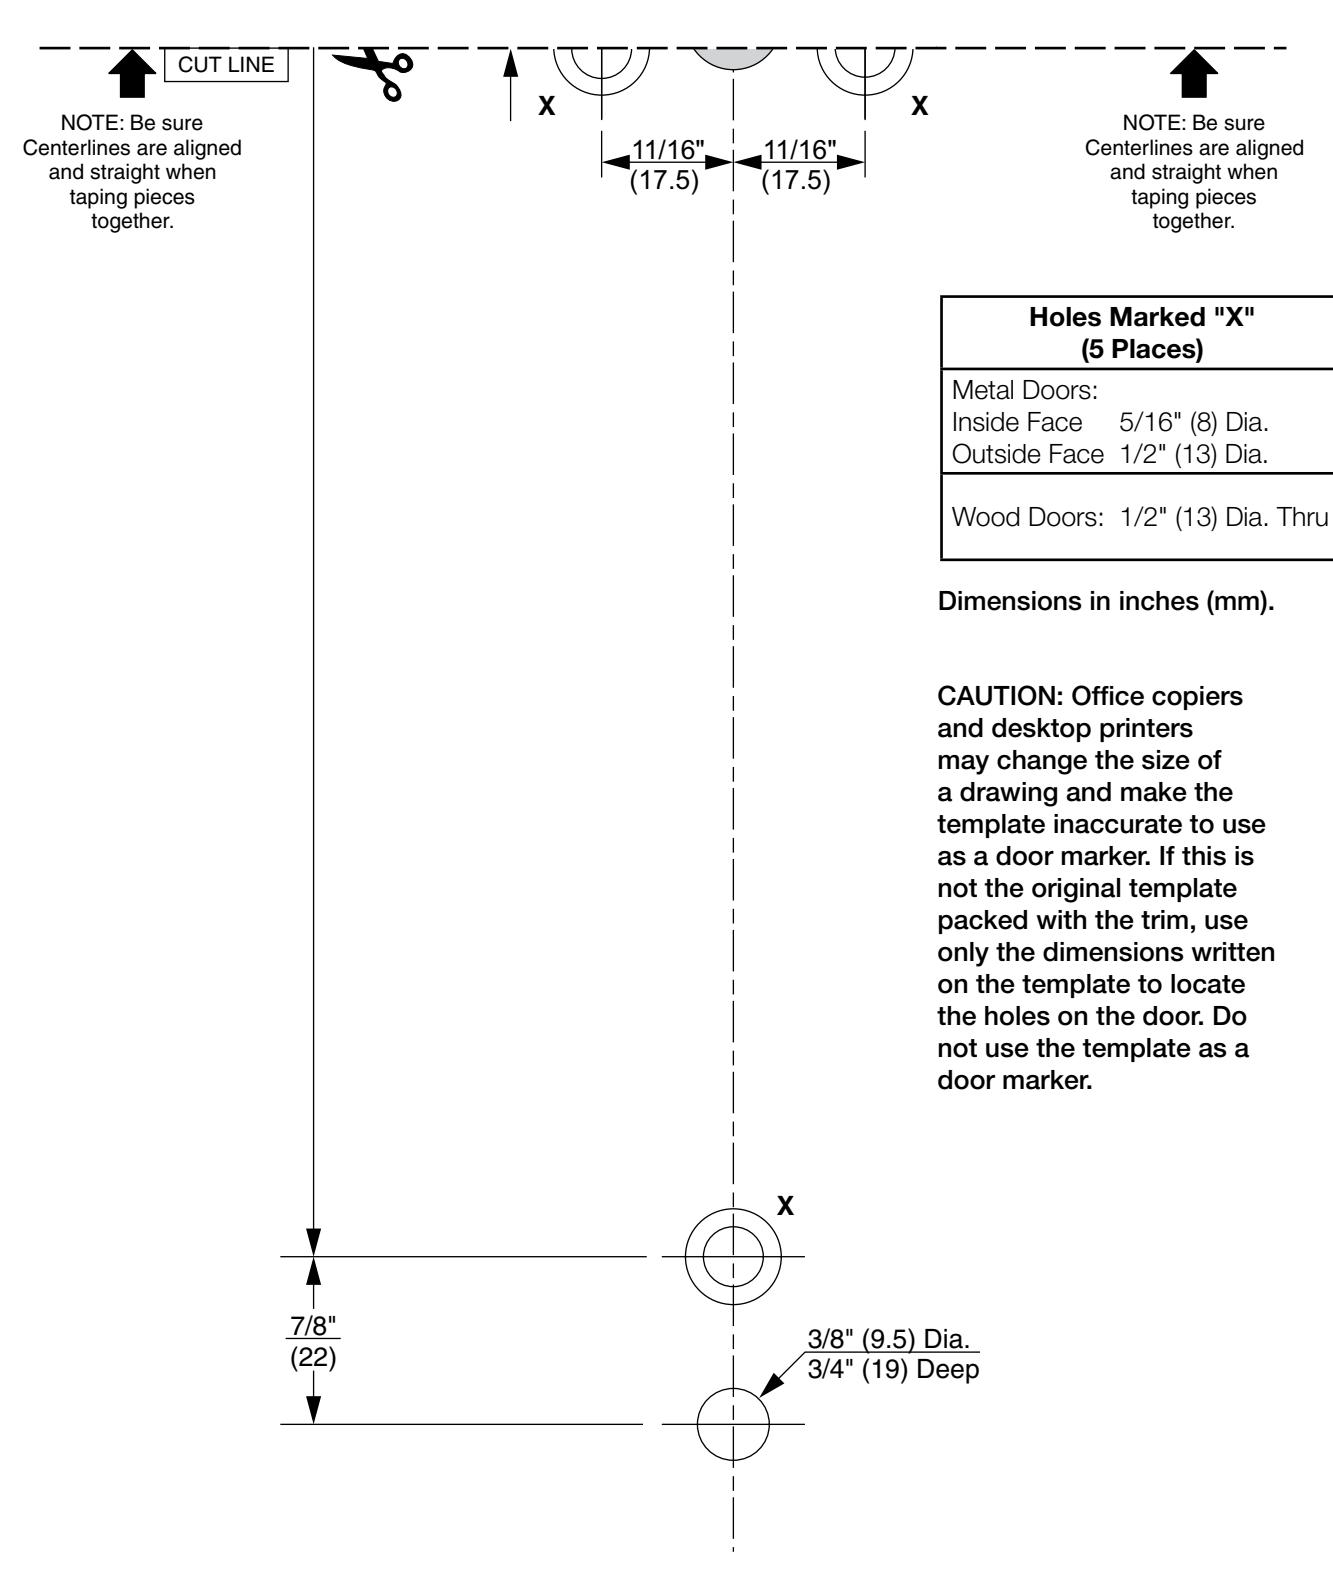
1 Template Top CAUTION: Office copiers and desktop printers may change the size of a drawing and make the template inaccurate to use as a door marker. If this is not the original template packed with the trim, use only the dimensions written on the template to locate the holes on the door. Do not use the template as a door marker. Dimensions in inches (mm). DOOR OUTSIDE FACE Holes Marked "X" (5 Places) Metal Doors: Inside Face 5/16" (8) Dia. Outside Face 1/2" (13) Dia. Wood Doors: 1/2" (13) Dia. Thru 11/16" (17.5) 11/16" (17.5) 3-5/8" (92) 3-5/8" (92) 2" (51) 9-15/16" (252) 1-3/8" (35) Deep Cutout CL HORIZONTAL REFERENCE (DEVICE AND TRIM) TAPE LINE Pair arrows with "template bottom" arrows and tape along Tape Line to assemble complete door marker. Pair arrows with "template bottom" arrows and tape along Tape Line to assemble complete door marker. 3/4" (19) 1/8" (3) 3/4" (19) Radius Typical X X TH9M55 ONLY 2-1/16" (52) TH9M55 ONLY 1-1/2" (38) Dia. 1-3/8" (35) Deep CL VERTICAL REFERENCE (TRIM)
TH9M10 and TH9M55 Heavy Duty Thumbpiece Trim
For ED5000 Series Mortise Exit Device
Installation Instructions

2
Template Bottom
TH9M10 and TH9M55 Heavy Duty Thumbpiece Trim
For ED5600 Series Mortise Exit Device
Installation Instructions

3 Installation
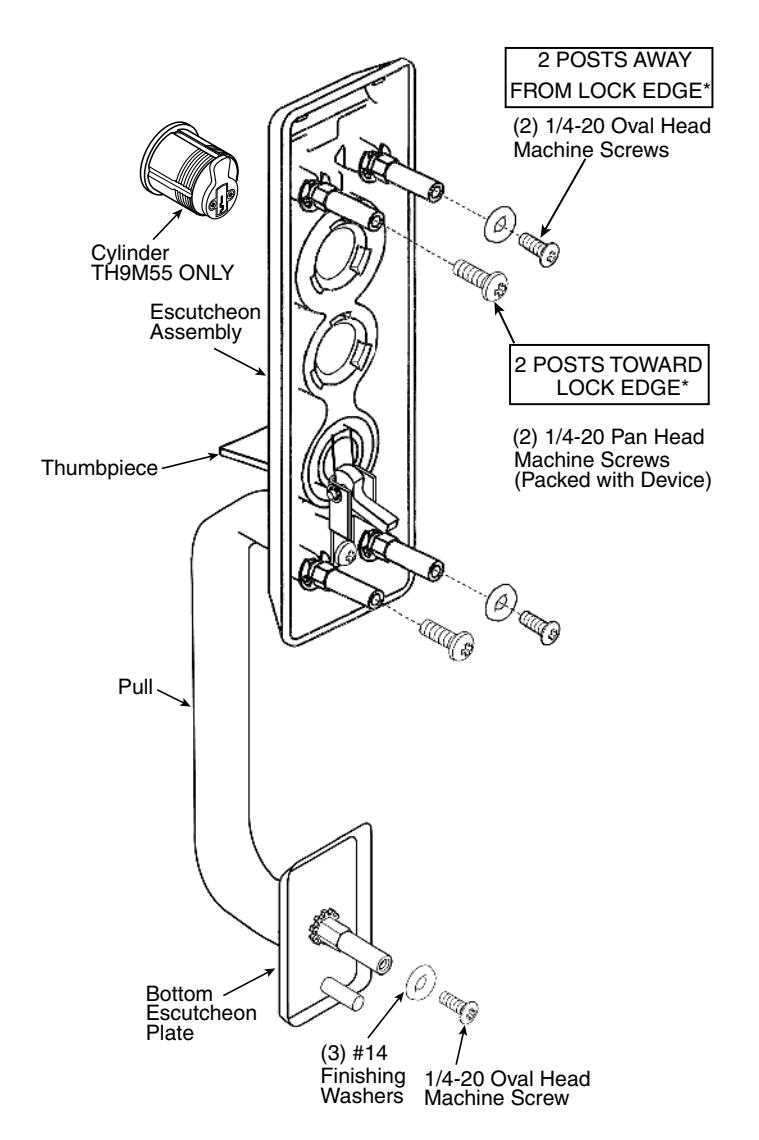
- 1. Check box contents. (Figure 1)
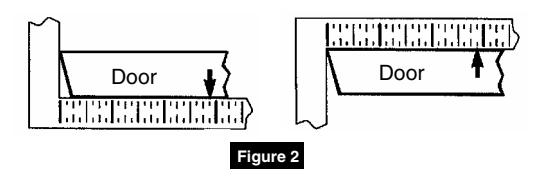
- 2. After marking door inside face for device location (Device Instructions), transfer "Vertical Reference Centerline" from inside to outside door face. (Figure 2)
- 3. Transfer "Horizontal Reference Centerline" from inside to outside door face.
- 4. Align trim template and tape to outside door face. (Pages 2 and 3)
- 5. Spot holes and prepare door for trim.
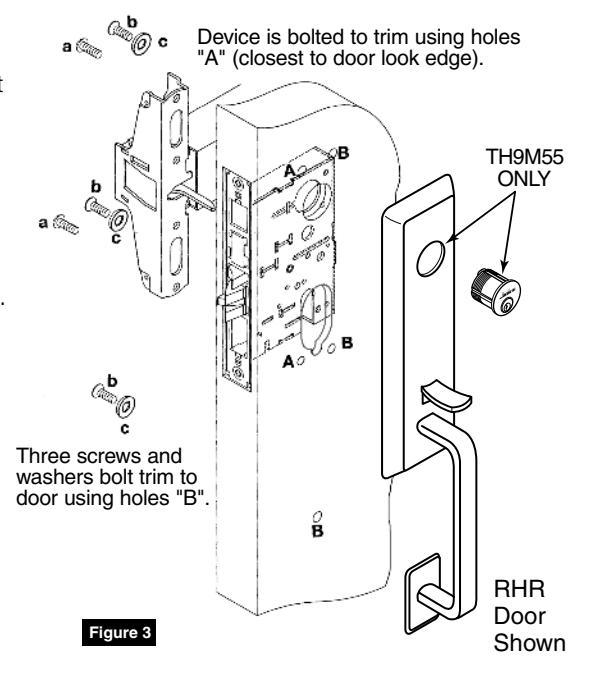
- 6. Mount trim to door through holes "B". Fasten, finger tight only, with three (3) screws and washers seating on door, as shown. (Figure 3)
7. FOR TH9M55 ONLY:
Thread cylinder into mortise lock until seated within escutcheon recess with keyway positioned vertically and with plug in lower cylinder as shown. (Figure 3) Tighten cylinder locking screw through mortise lock front.
8. Continue as shown in device instructions.
Corbin Russwin 225 Episcopal Road Berlin, CT 06037 Phone: 800-543-3658 Fax: 800-447-6714 corbinrusswin.com