Installation Instructions
ED4200S Series Security Deadbolt Rim Exit Devices
FM530 (06/13)

ASSA ABLOY
In U.S.: Corbin Russwin, Inc. 225 Episcopal Road Berlin, CT 06037 USA www.corbinrusswin.com
In Canada: ASSA ABLOY Door Security Solutions Canada 160 Four Valley Drive Vaughan, Ontario, Canada L4K4T9 www.assaabloy.ca
Technical Product Support: Phone: 888-607-5703
Maintenance
- Periodically remove covers and coat mechanisms with a silicone base lubricant. This is particularly required in corrosive environments for proper product function.
- Check mounting fasteners periodically. Retighten if found loose. Apply screw locking compound (available at automotive part stores) or change part fasteners if screws continue to back out.
General Information

ASSA ABLOY
Shim Kit Option
697F358 Black Finish
Kit consists of (2) Latch Head Shims (Device Cover seats on shim) and (2) End Cap Shims (End Cap seats on shim).
Each shim is 1/8" (3.2mm) thick. More than two shim thicknesses 1/4" (6.4mm), require longer device mounting screws (not included).
1/4-20 Sex Nut Option
Recommended for wood composite or unreinforced metal doors.
| Device | Quantity | Size |
| No Trim | 6 | 1/4-20 |
| With Trim | 2 | |
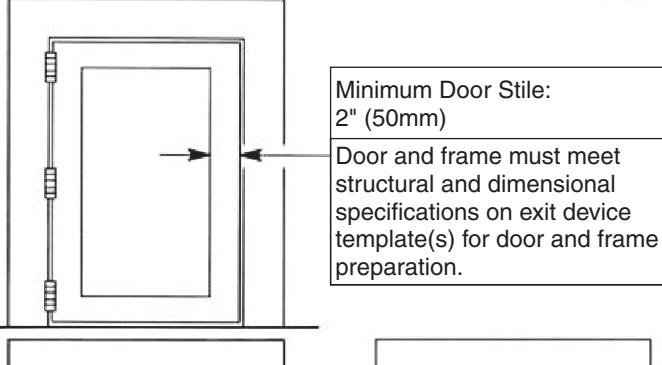
Check Before Starting
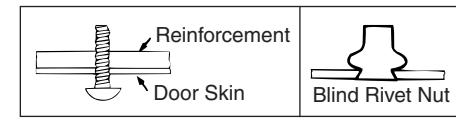
Unreinforced Doors or Frames
Doors and Frames with walls having a structural thickness (metal skin plus reinforcement or solid hardwood) to engage less than (3) full screw threads are considered unreinforced.
Unreinforced Doors: Use SNB (sex nuts and bolts).
Unreinforced Frames: Use Blind Rivet Nuts.
Recommended fasteners for unreinforced openings are not necessarily supplied by Corbin Russwin.
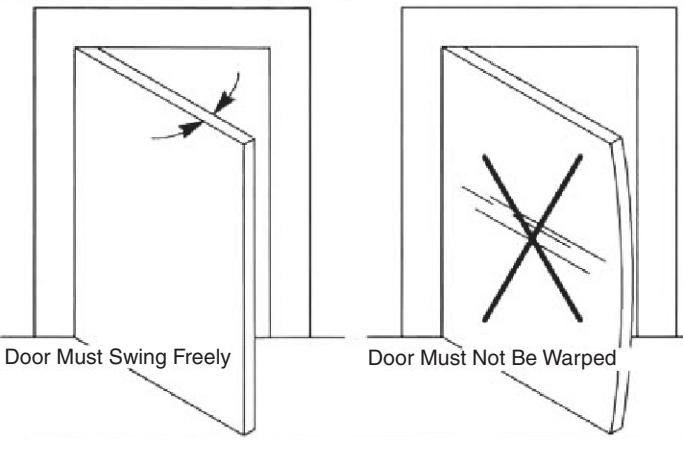
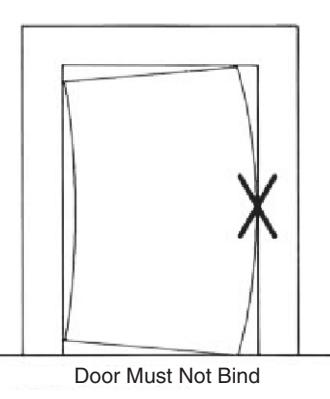
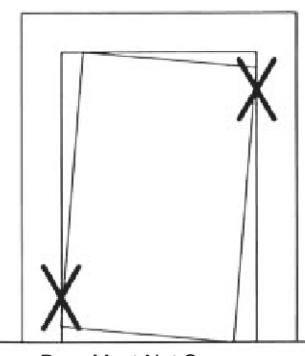
Door Must Not Sag
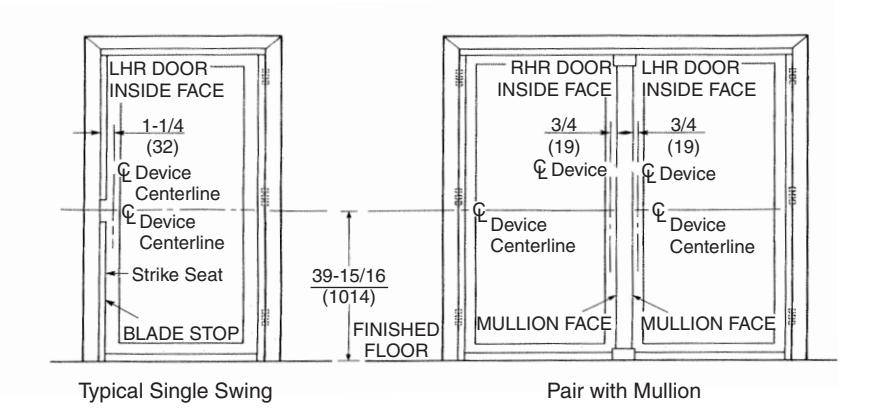
1. Mark Door

Locate and Mark Horizontal and Vertical Reference Centerlines as shown.
Note: For other openings see step 2, Item A3.
ASSA ABLOY
2. Prepare Door & Frame
-
A. Determine opening requirements.
- 1. Aluminum Single Openings: Stop must be notched to clear strike. Cutout is 3-1/8" (79) long, centered on Device centerline.
- 2. Pairs with Mullions***: Cut off and discard strike portion of Installation Template.
- 3. Other Openings: Door stile should exceed 2" (51) by height of frame stop or 1/2 the width of the mullion.
- B. Seat template on door and jamb face (if pertinent).
- C. Align template with horizontal and vertical device centerline on door. Tape template in place.
- D. Locate and tape Trim template on door. (See instructions packed with trim.)
- E. Spot and prepare holes.
Device: (4) 1/4-20 Machine Screws*, or (4) 3/8" (9.5) Dia Sex Nuts and Bolts. Strike**: (2) 10-24 Machine Screws.
Note: (*)Reinforced doors only. (**)Plus template cutouts, if not factory prepared. (***)Strike machined into the mullion. Position device carefully.
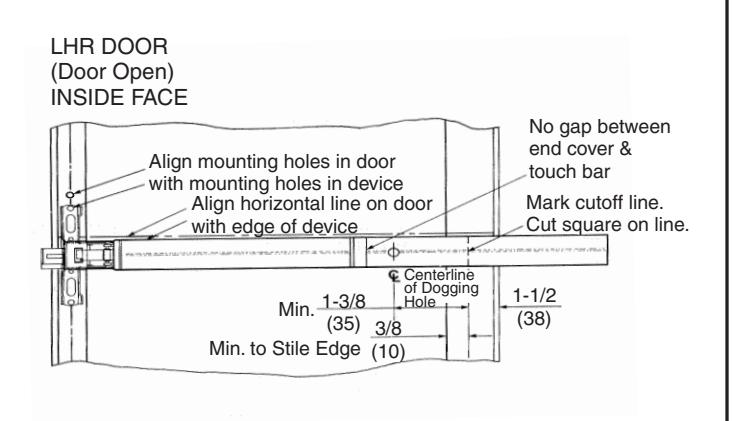
3. Size Device
Device must be field cut to size unless standard opening and device are 36" (0.91m) or 48" (1.22m).
4. Clear Raised Door Molding
Device must seat flush on door surface or on shims that keep it parallel to door face.
(1) Shim Kit #650F89-8 per 1/4" (6mm) of raised molding
(1) Shim Kit #650F89-8 required for each 1/4" (6mm) of device lift needed. Longer device mounting screws needed when more than (2) shim kits are used. See Shim Kits Option on page 2.
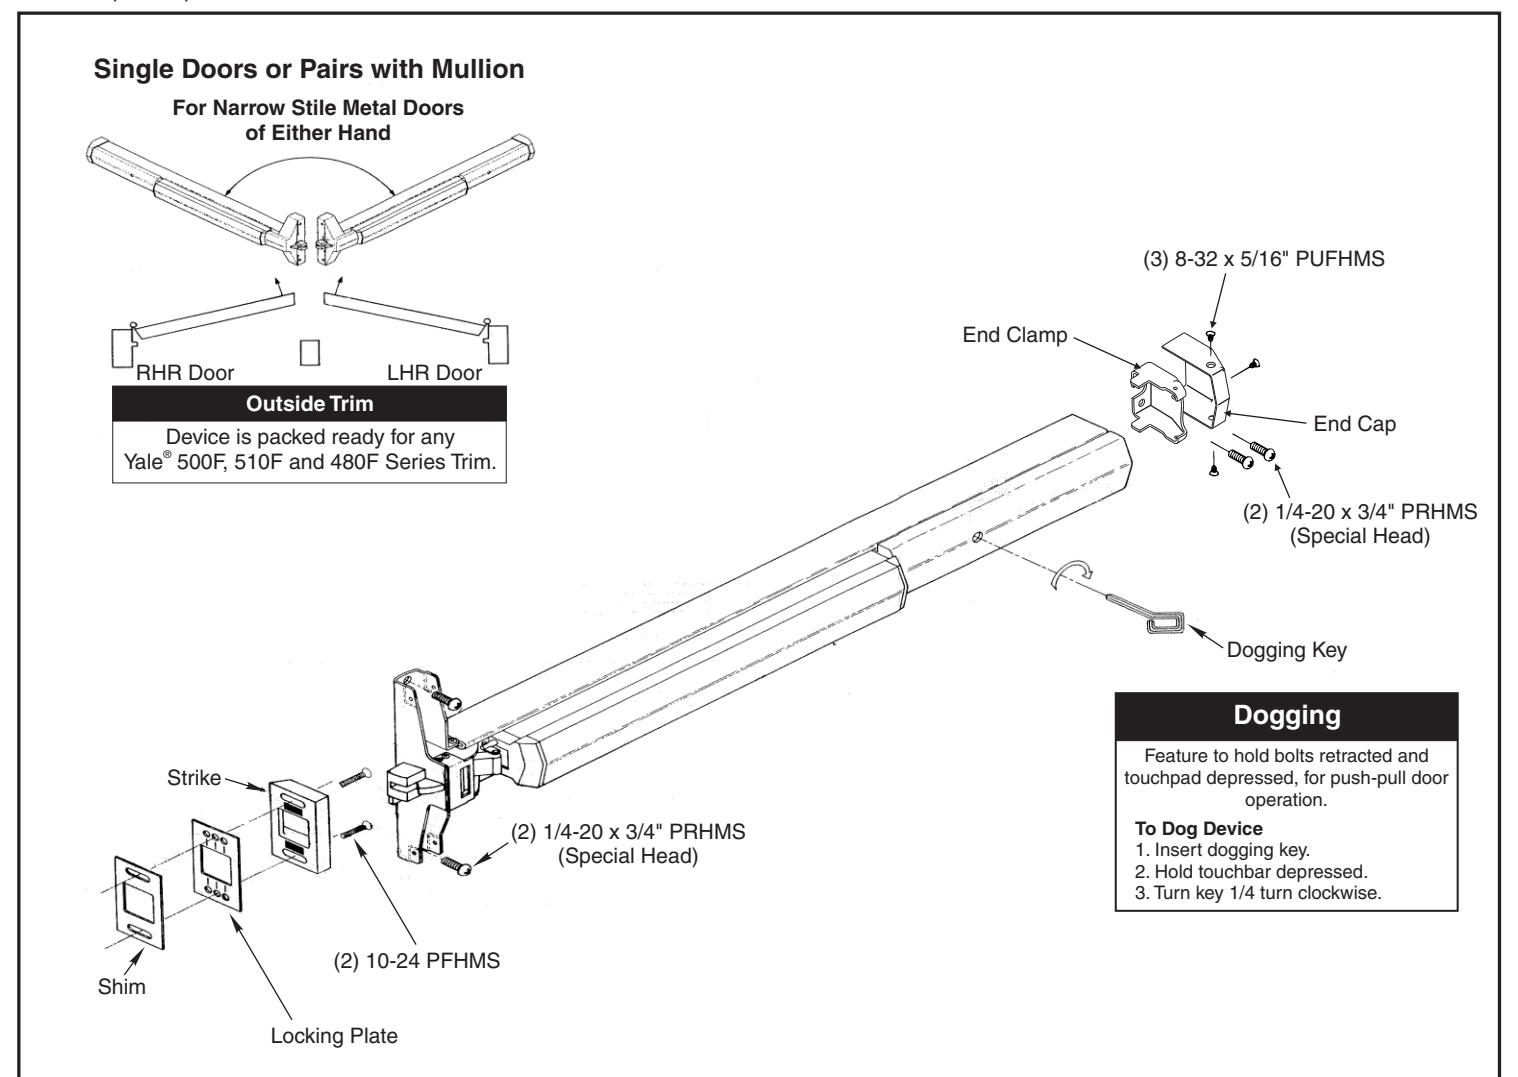
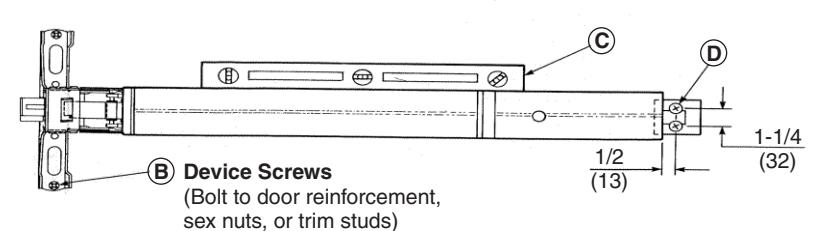
5. Install Device

- A. Mount trim (follow instructions packed with trim).
- B. Seat bar in place (projecting C-Cam boss must penetrate into door hole). Fasten device head (2 PRHMS or SNB).
- C. Set bar level. Locate end clamp holes.
- D. Prepare end clamp mounting holes. Mount end clamp. (2 PRHMS or SNB).
-
E. Check bolt retraction.
- Depress touchbar (bolts must retract). Release touchbar (bolts must extend).
- Actuate trim (bolts mush retract). Release trim actuator (bolts must extend).
- Depress touchbar, turn dogging key clockwise (bar must remain depressed, bolts must remain retracted). Turn dogging key counterclockwise (bar and bolts must return to extended position).
- F. Tighten all mounting screws.
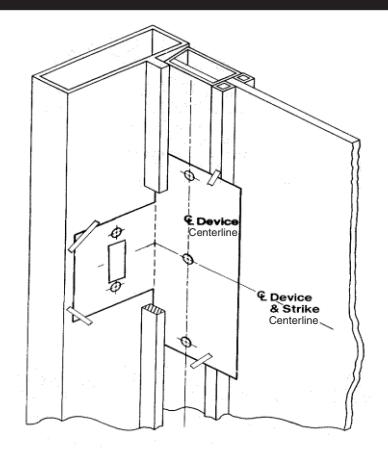
6. Install Strike
Detail A Shims, as needed Strike with Locking Plate
- A. Position strike projection (strike + locking plate + shims, if needed). See Detail A.
- B. Position strike depth. See Detail B.
- C. Fasten strike securely (2 PFHMS).
-
D. Check bolt engagement.
- 1. Bolt should retract to clear the strike,
when actuated by bar, trim, or dogging action. Bolt should consistently reengage the strike, when actuators are released and the door shuts.
2. Door should remain latched and not rattle when pushed, pulled, or shaken in/out.
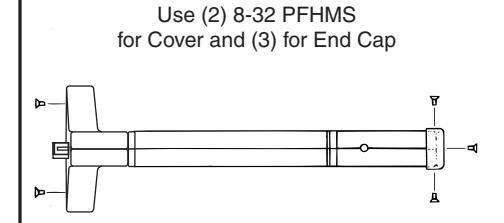
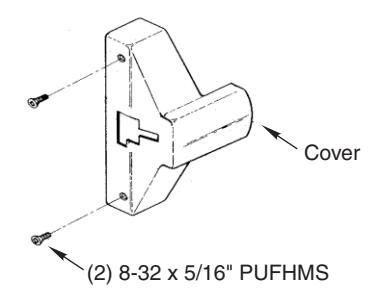
7. Install Cover & End Cap