


Installation Instructions
HP3000 Series Tubular Lock With Push/Pull Paddle Trim
FM 333 10/18

In U.S.: In Canada: Phone: 800-543-3658 Phone: 800-461-3007
Corbin Russwin, Inc. ASSA ABLOY Door Security Solutions Canada 225 Episcopal Road 160 Four Valley Drive Berlin, CT 06037 USA Vaughan, Ontario, Canada L4K 4T9
Technical Product Support: Phone: 888-607-5703
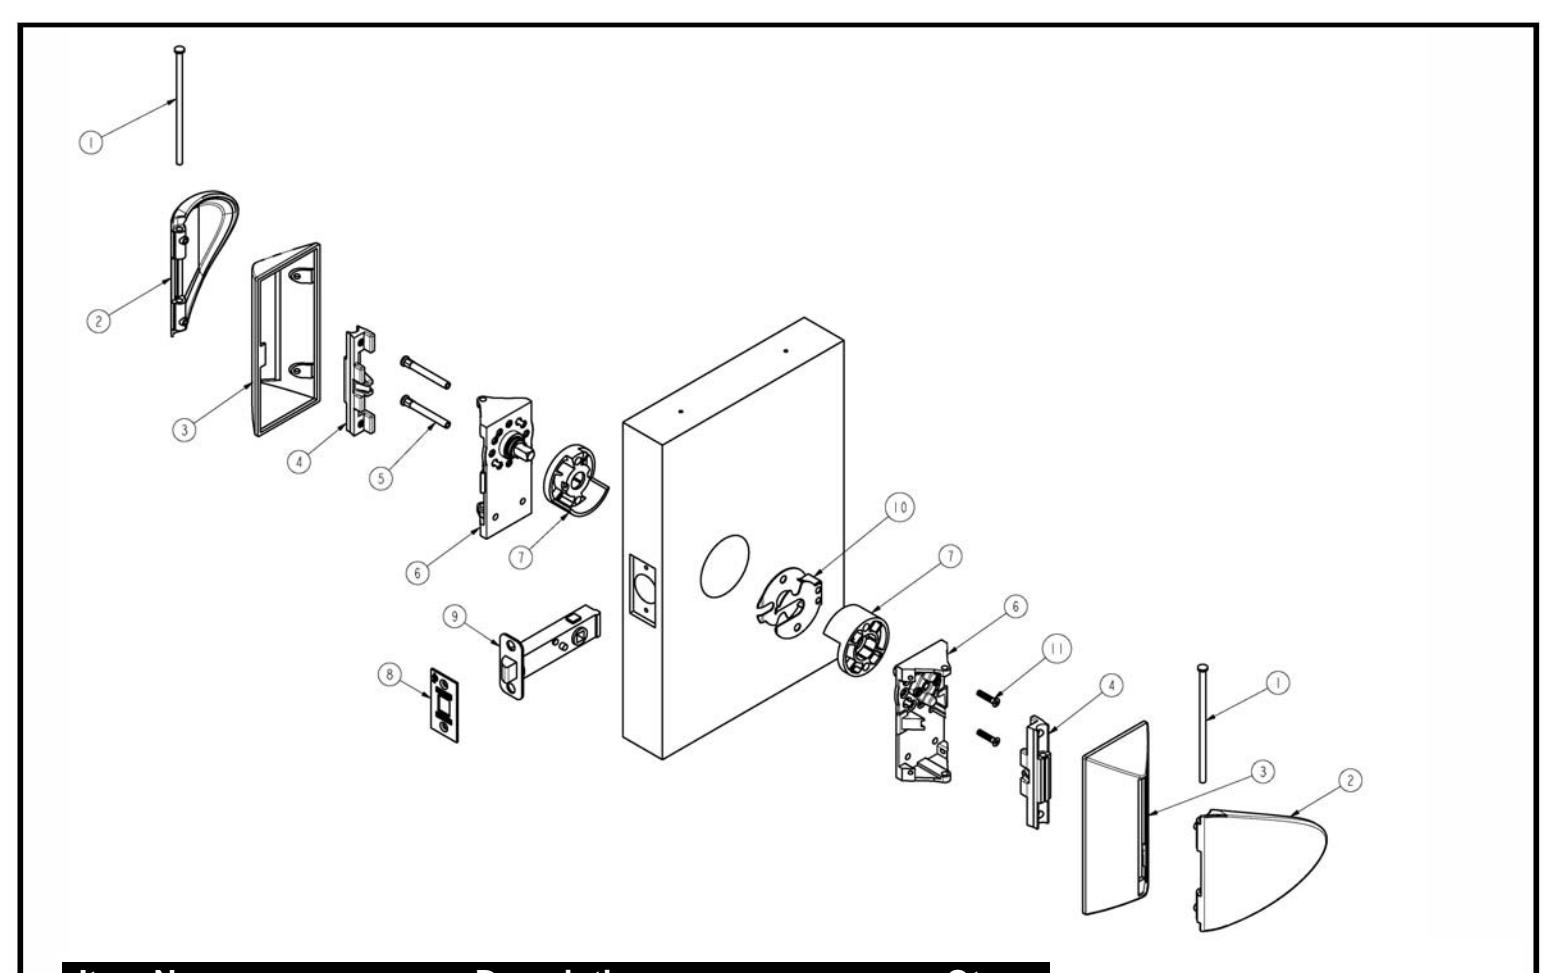
| Item No. | Description | Qty. |
|---|---|---|
| 1 | Axle, Paddle Trim | 2 |
| 2 | Paddle (Plain) | 2 |
| 3 | Cover, Passage Paddle Trim | 2 |
| 4 | Actuator, Paddle Insert Cam | 2 |
| 5 | Post, Mounting | 2 |
| 6 | Chassis, Paddle Trim | 2 |
| 7 | Spacer, Alignment | 2 |
| 8 | Front, Latch | 1 |
| 9 | Latch | 1 |
| 10 | Plate, Insert | 1 |
| 11 | Screw, Chassis Mounting, #8-32x5/8 SEMS | 2 |
| ** | Screw, Cover Mounting, #8-32x5/16 OH | 4 |
| ** | Screw, Actuator Mtg, #8-32x5/16 | 4 |
| ** | Screw, Alignment, #8-32x1/2 PH (self tap) | 4 |
| ** | Screw, Alignment, #8-32x9/16 PH | 4 |
| ** Parts are not shown in diagram above | ||
| Tools Required | |
|---|---|
| #2 Phillips Screwdriver | |
| Drill | |
| 7/64 Drill Bit (wood door) | |
| #8-32 Tap (metal door) | |
| #18 (.136) Tap Drill | |

This product can expose you to lead which is known to the state of California to cause cancer and birth defects or other reproductive harm. For more information go to www.P65warnings.ca.gov.
08/2018
STEP 1: Latch Installation
- Position plate insert in 2-1/8" bore
- Insert latch through 1" bore
- For privacy function make sure threaded piece on latch is towards the inside of the door
- Snap latch into plate insert
- Install (2) #8 combination screws to secure latch
- Do not fully tighten

STEP 2: Determine Orientation of Trim
- Remove the chassis which is packed with the paddle and cover
- Passage trim can be mounted vertically or horizontally
- Privacy trim can only be mounted vertically
- Position chassis and verify the spindle engages into the latch hubs
- Cams on chassis must be oriented as shown (vertical orientation for vertical mounting and horizontal orientation for horizontal mounting)

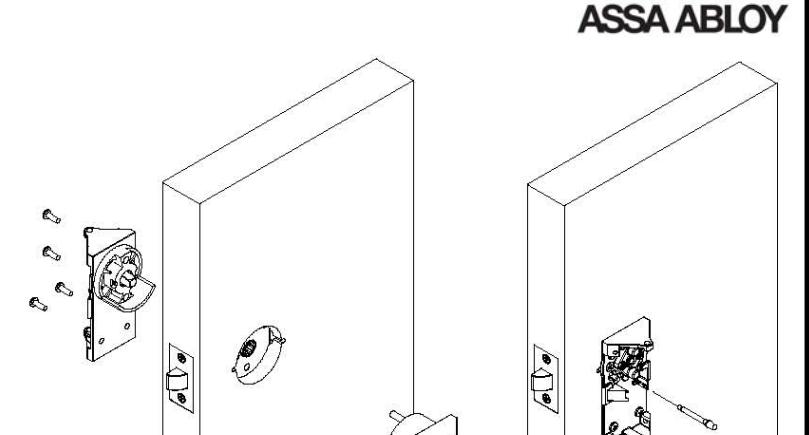
STEP 3: Chassis Installation
- Install an alignment spacer on to each chassis (one oriented up, one oriented down to match plate insert in bore)
- Insert (2) mounting posts through the chassis on the outside of the door
- Install (2) #8-32x5/8 machine screws with integrated lock washer through the chassis on the inside of the door to secure
- Make sure the chassis' are square to the door and fully tighten screws
- Fully tighten latch screws
-
Install surface mounted screws to secure alignment
- For wood doors: 7/64" pilot hole
- For metal doors: drill and tap for #8-32 screw
- Check operation by turning cams by hand. If binding occurs loosen chassis mounting screws and retighten
- For privacy function install push button on inside of door
STEP 4: Determine Orientation of Paddle
-
The paddle has three potential orientations:
- VERTICAL
- HORIZONTAL UP
- HORIZONTAL DOWN
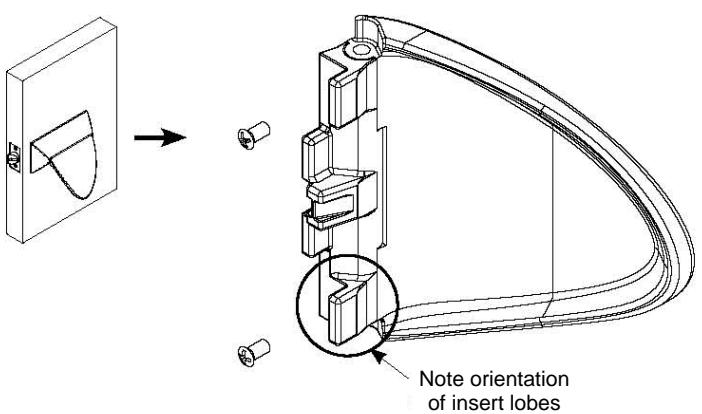
- The insert is attached to the paddle using (2) #8-32 x 5/16" Machine Screws (VC-3 Coated)
- If trim is mounted VERTICAL and the end of the paddle will point towards the HINGE, attach the insert to the paddle in the orientation shown:
-
If trim is mounted HORIZONTAL and the end of the
- paddle will point UP, attach the insert to the paddle in the orientation shown (same as vertical): If trim is mounted HORIZONTAL and the end of the paddle will point DOWN, attach the insert to the paddle in the orientation shown:
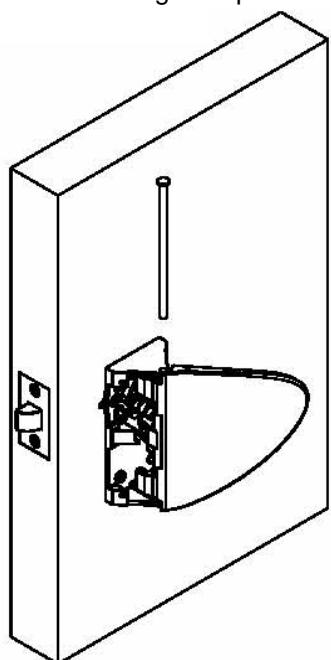
STEP 5: Installation of Paddles
Attach paddle to the chassis in the desired orientation by inserting the axle through the pivot hole
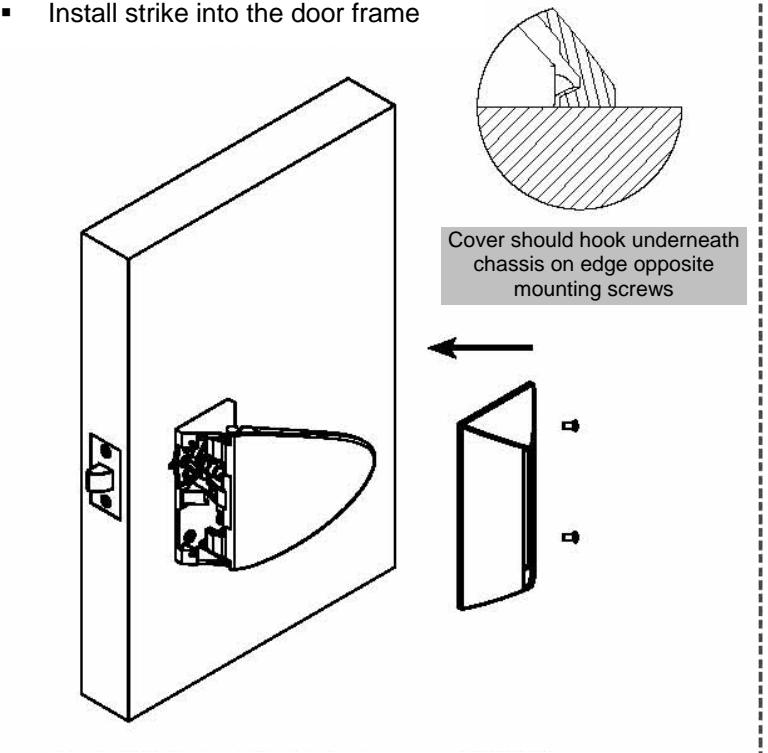
STEP 6: Installation of Covers
- Slide cover over paddle
- Press cover against door surface
- Slide back until mounting holes align with those in chassis
- Install #8-32 x 5/16" cover screws

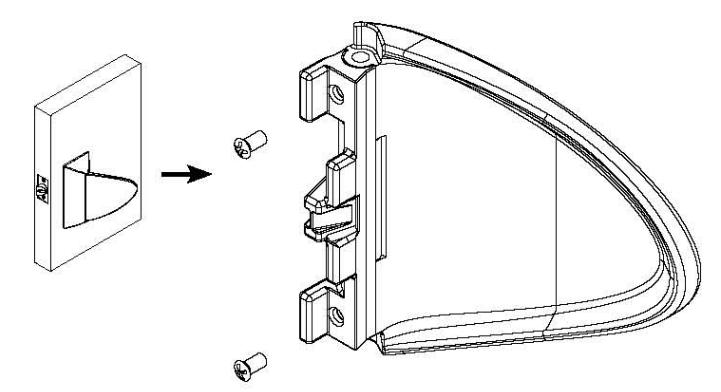
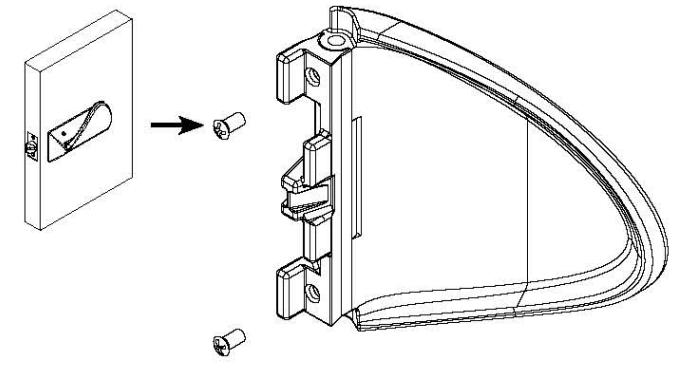
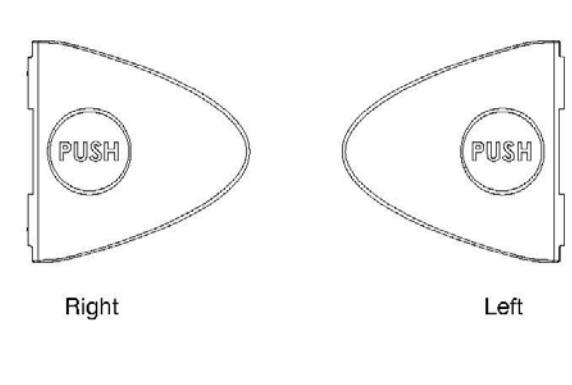
Optional Paddle Marker Installation
Install markers before mounting paddles to door
- Secure "PUSH" marker on the push side of the door using screw supplied.
- Secure "PULL" marker on the pull side of the door using screw supplied.

Markers can be installed in any of the four available paddle orientations:

ASSA ABLOY is the global leader in door opening solutions, dedicated to satisfying end-user needs for security, safety, and convenience