


← Corbin
Installation Instructions

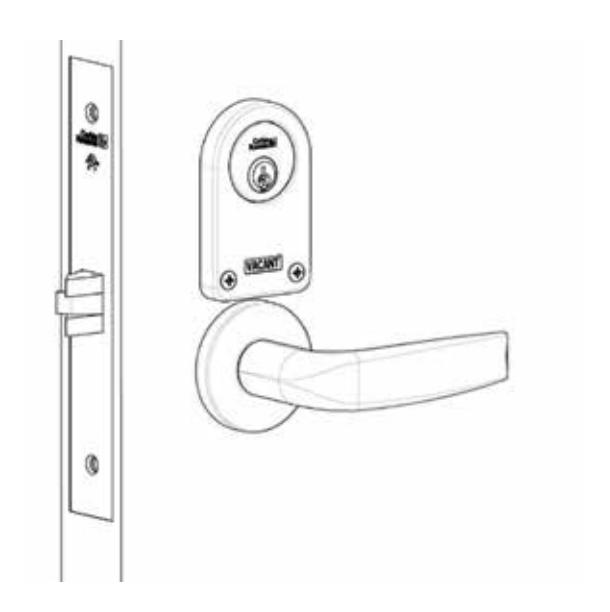
Occupancy Indicators
with cylinder
Mortise Lockset

This product can expose you to lead which is known to the state of California to cause cancer and birth defects or other reproductive harm. For more information go to www.P65warnings.ca.gov.

1 Prep Door
- 1. Using door marker FM298, mark holes. (Figure 1)
- 2. Drill two .125" diameter holes where marked, through inside door surface. (Figure 2)

2 Install Lock and Indicator
- 1. Install lock.
- 2. Screw indicator onto door. (Figure 3)
NOTE: When installing, make sure lock is unlocked, deadbolt is retracted and indicator shows green window (unsecure / vacant). (Figure 4)
NOTE: For doors 2-1/2" or over, use chart to cut indicator spindle. (Figure 5)

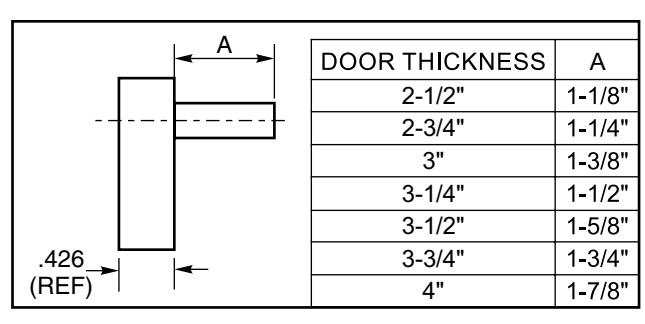
Figure 5
Corbin Russwin 225 Episcopal Road Berlin, CT 06037 Phone: 800-543-3658 Fax: 800-447-6714 corbinrusswin.com