


Muséo Designer Trim
Mortise Lock

This product can expose you to lead which is known to the state of California to cause cancer and birth defects or other reproductive harm. For more information go to www.P65warnings.ca.gov.
or in part without the express written permission of ASSA ABLOY Access and Egress Hardware Group, Inc. is prohibited.
Mortise Lock
Installation Instructions

| TOC | Table of Contents | |
|---|---|---|
| 1 | Door Preparation3 | |
| 2 | Lock Handing4 | |
| 3 | Full Working Trim5 | |
| a | Sectional5 | |
| b |
R & L Escutcheon
7 |
|
| 4 | Half Working Trim9 | |
| a | Sectional9 | |
| b |
R & L Escutcheon
11 |
|
| 5 | Full Dummy Trim 12 | |
| a | Sectional 12 | |
| b |
R & L Escutcheon
13 |
|
| 6 | Half Dummy Trim 14 | |
| a | Sectional 14 | |
| b |
R & L Escutcheon
15 |
|
| 7 | Secondary Trim Attachment 16 |
Mortise Lock
Installation Instructions

1 Door Preparation
| Full Working Trim | Template |
|---|---|
| Lock-Body Prep | T31046 |
| Sectional (No additional prep beyond) | T31046 |
| R&L Escutcheon | T31047 |
| Half Working Trim | Template |
| Lock-Body Prep | T31162 |
| Sectional (No additional prep beyond) | T31162 |
| R&L Escutcheon | T31164 |
| Full Dummy Trim | Template |
| Sectional | T31163 |
| R&L Escutcheon | T30651 |
| Half Dummy Trim | Template |
| Sectional | T31163 |
| R&L Escutcheon | T30652 |
All working trim must fi rst be prepared for the lock-body, then for the trim.
All templates can be found at www.CorbinRusswin.com
whole or in part without the express written permission of ASSA ABLOY Access and Egress Hardware Group, Inc. is prohibited.

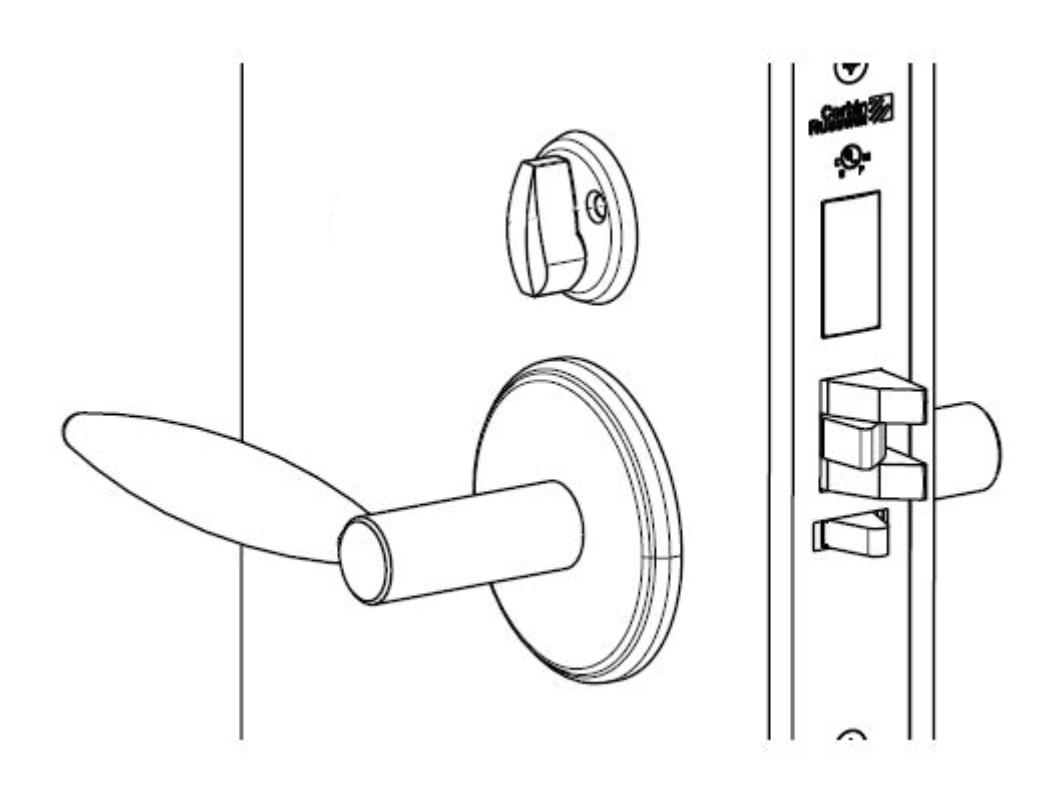
2 Mortise Lock Handing Instructions
Lock handing is critical to ensure lock functions properly.
Step 1) Move the RED locking screw to the side of the lock-body being locked. (Figure 1)
Step 2) Push in latch, then depress catch plate with a screw driver. (Figure 1)
Step 3) Pull latch out of lock-body and turn latch over. (Figure 2)

Step 4) Push in latch while holding screw driver behind latch tail. Lock-in can occur if latch is not properly installed. (Figure 3)
NOTE: Push in latch until cach plate is no longer depressed. (Figure 4)
Step 5) Rotate lock front to match bevel of the door as shown. (Figure 5)


3 Full Working Sectional Trim Installation
a Sectional
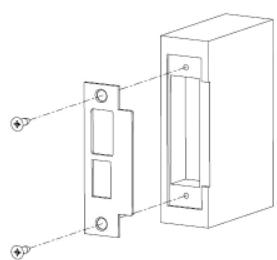
Step 1) Intall strike with shorter (3/4") mounting screws.
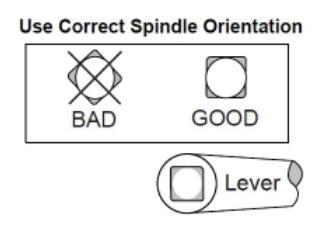
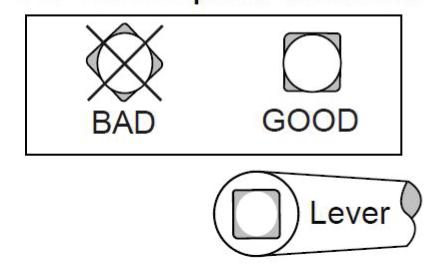
Step 3) Thread adapter plate hub into lever and fully tighten.

Step 4) Align adapter plate hub with square hole in lever, keeping hub as tight as possible.
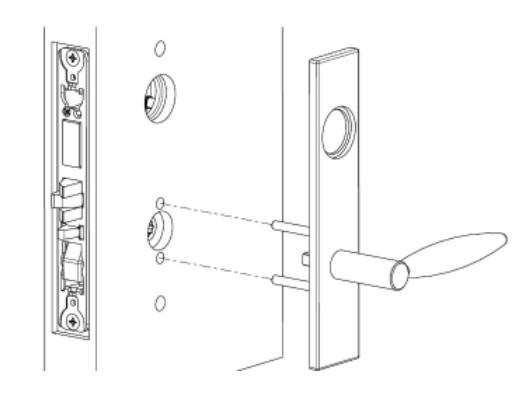
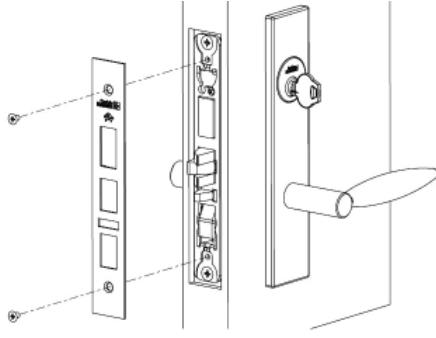
Step 2) Insert mortise lock into door and hand
tighten longer (1") mounting screws.

Step 5) Install outside trim assembly. Step 6) Install inside adapter plate.


3 Full Working Sectional Trim Installation
a Sectional, continued
Step 7) Install inside spindle and rose. Step 8) Install inside lever with set screw.

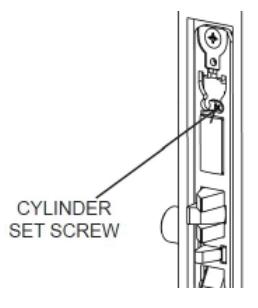
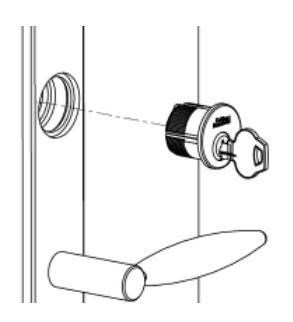
Step 9) Install cylinder and secure with set screw.

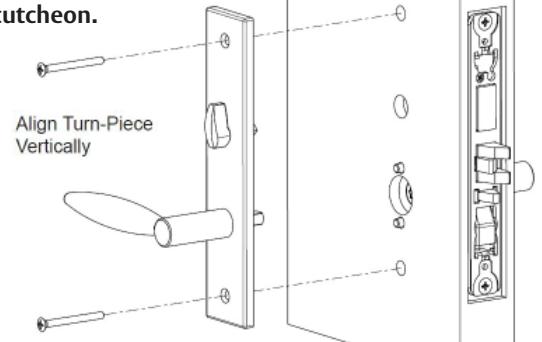
Step 10) Place the turn-piece in the door to mark the mounting holes. Drill two .110" (BIT #35) holes where marked.

6
3 Full Working Sectional Trim Installation
a Sectional, continued
Step 11) Mount turn-piece. Step 12) Install outside front.

3 Full Working Escutcheon Trim Installation
b R & L Escutcheon
Step 1) Intall strike with shorter (3/4") mounting screws.


NOTE: Repeat step 3 & 4 for inside escutcheon
Step 2) Insert mortise lock into door and hand tighten longer (1") mounting screws.

Step 3) Thread hub into lever and fully tighten. Step 4) Align hub with square hole in lever, keeping hub as tight as possible.

Mortise Lock
Installation Instructions

3 Full Working Escutcheon Trim Installation
b R & L Escutcheon, continued
Step 5) Install outside trim assembly.

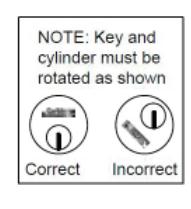
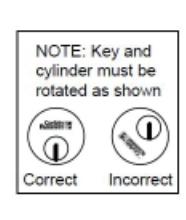
Step 7) Install cylinder.
After installing cylinder fully, tighten lock mounting screws.
Step 8) Install outside front..
FM601 03/20

4 Half Working Sectional Trim Installation
a Sectional
Step 1) Intall strike with shorter (3/4") mounting screws.

Step 3) Install inside adapter plate. Step 4) Install spindle and rose.

Step 2) Insert mortise lock into door and hand tighten longer (1") mounting screws.


Step 5) Install inside lever with set screw.


4 Half Working Sectional Trim Installation
a Sectional, Continued
Step 6) Install cylinder and securew with set screw.

After installing cylinder fully, tighten lock mounting screws.

Step 7) Place the turn-piece in the door to mark the mounting holes. Drill two .110" (BIT #35) holes where marked.


Step 8) Mount turn-piece. Step 9) Install outside front..


4 Half Working Escutcheon Trim Installation
b R & L Escutcheon
Step 1) Intall strike with shorter (3/4") mounting screws.

Step 2) Insert mortise lock into door and hand tighten longer (1") mounting screws..


Step 3) Thread hub into lever and fully tighten. Step 4) Align hub with square hole in lever, keeping hub as tight as possible.

Step 5) Install inside escutcheon.


4 Half Working Escutcheon Trim Installation
b R & L Escutcheon, continued
Step 6) Install cylinder and secure with set screw. After installing cylinder fully, tighten lock mounting screws.

Step 7) Install outside front.

5 Full Dummy Sectional Trim Installation
a Sectional
Step 1) Install outside adapter plate. Step 2) Install inside adapter plate.


5 Full Dummy Sectional Trim Installation
a Sectional, continued
Step 3) Install rose onto both adapter plates.

Step 4) Install both levers with set screw.

5 Full Dummy Escutcheon Trim Installation
b R & L Escutcheon
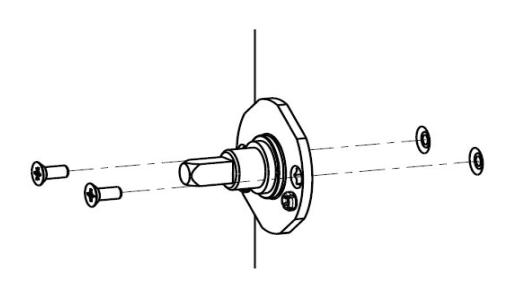
Step 1) Insert spindle into hub and rotate lever clockwise until tight.
Step 2) Push spindle into lever.

NOTE: Repeat steps 1 and 2 for inside escutcheon.
For installation assistance contact Corbin Russwin

5 Full Dummy Escutcheon Trim Installation
b R & L Escutcheon, continued

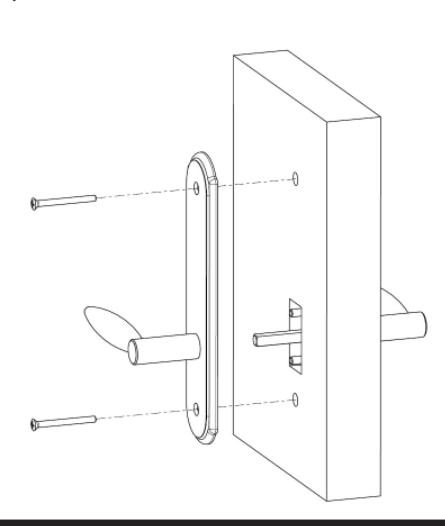
Step 3) Install outside escutcheon Step 4) Install inside escutcheon
6 Half Dummy Sectional Trim Installation
a Sectional
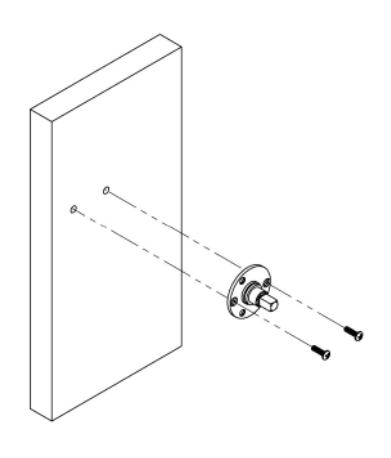
Step 1) Install outside adapter plate. Step 2) Install inside adapter plate.

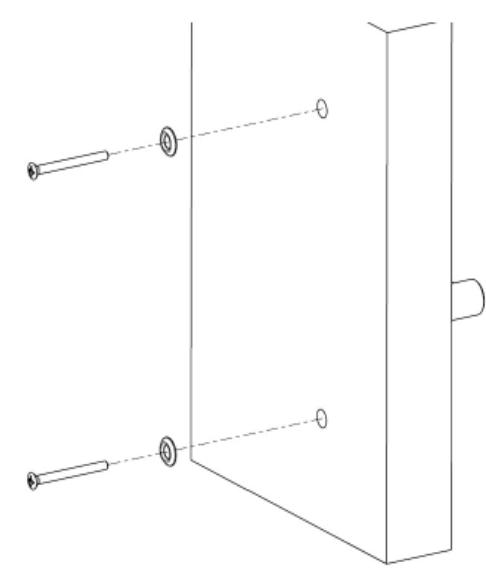
Step 3) Install rose onto adapter plate. Align studs on rose with busings in adapter plate.

Copyright © 2013, 2018, 2020, ASSA ABLOY Access and Egress Hardware Group, Inc. All rights reserved. Reproduction in whole or in part without the express written permission of ASSA ABLOY Access and Egress Hardware Group, Inc. is prohibited.
Mortise Lock
Installation Instructions

6 Half Dummy Sectional Trim Installation
a Sectional, continued
Step 5) Install lever with set screw.

6 Half Dummy Escutcheon Trim Installation
b R & L Escutcheon
Step 1) Hold outside escutcheon on door. Step2) Install mounting screws and washers.


15

7 Secondary Trim Installatoin
a Emergency Key Plate
Step 1) Mark emergency key mounting holes and drill two .110" (BIT #35) holes where marked.

Step 2) Mount emergency key plate.

Corbin Russwin, Inc. 225 Episcopal Road Berlin, CT 06037 USA Phone: 800-543-3558 Fax: 800-447-6714 www.corbinrusswin.com