


← Corbin
Notes:
- 1. This template is an addition to the device template. Locate centerlines using horizontal and vertical references on device template.
- 2. Dimensions are in inches (mm).
- 3. LHR door shown. (RHR opposite)
- 4. For door reinforcement see template T30800.
- 5. Prepare mounting holes when installing trim.
- 6. Provide adequate internal support to prevent door deformation after trim is bolted to the device.
- 7. Dimensions given about a centerline are symmetrical.
- 8. Unspecified radius 1/8 maximum.
- 9. Concealed Door Position Switch p/n:820F609 (IN100), 783F619 (all others) is included with this product. Use and installation location to be specified by others. See installation instructions for details.
Note: Lever design prefix does not affect door prep.

RESPONSIBILITY
DOOR AND FRAME MANUFACTURERS ARE RESPONSIBLE FOR PROVIDING ADEQUATE CONSTRUCTION OR REINFORCEMENTS FOR PROPER INSTALLATION OF HARDWARE SHOWN. ALL ARCHITECTURAL BUILDERS HARDWARE MUST BE INSTALLED ON PROPERLY REINFORCED DOORS AND FRAMES, REGARDLESS OF TYPE, MATERIAL, OR METHOD OF CONSTRUCTION.
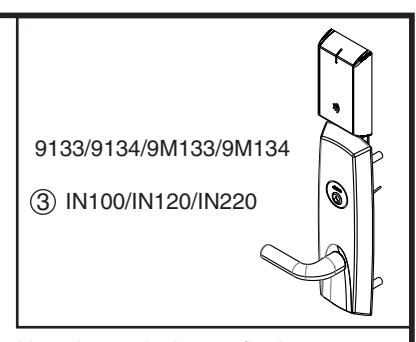
IN100, IN120, IN220 9133, 9134, 9M133 & 9M134 Series Trim
ED5000 Series SecureBolt™, Rim and Mortise Exit Devices Metal Door Preparation
®
ASSA ABLOY
www.corbinrusswin.com
T31236-3 11-20 DATE SUPERSEDES DO NOT SCALE DRAWING TEMPLATE NUMBER T31236-2
Experience a safer and more open world