


Installation Instructions

Dogging Indicator (AUX188)
FE6600 and MP6600 Series


This product can expose you to lead which is known to the state of California to cause cancer and birth defects or other reproductive harm. For more information go to www.P65warnings.ca.gov.
Dogging Indicator (AUX188)
FE6600 and MP6600 Series
Installation Instructions

| TOC | Table of Contents | ||
|---|---|---|---|
| 1 | Dogging Indicator Installation 3 | ||
| a | Latch Door 3 | ||
| b | Place Template 3 | ||
| c | Drill Holes 3 | ||
| d | Countersink Holes 3 | ||
| e | Install Indicator 4 | ||
| f | Check for Proper Operation 4 |
Dogging Indicator (AUX188)
FE6600 and MP6600 Series
Installation Instructions

1 Dogging Indicator
a Latch Door
Ensure door is latched and all bolts are projected.
b Place Template
Place plastic field template on pin in top rod through oval cut-out in door. ( Figure 1)


c Drill Holes
Using a #7 drill bit, drill two (2) holes completely through door, making sure drill remains square to face of door. ( Figure 2 )

Figure 2
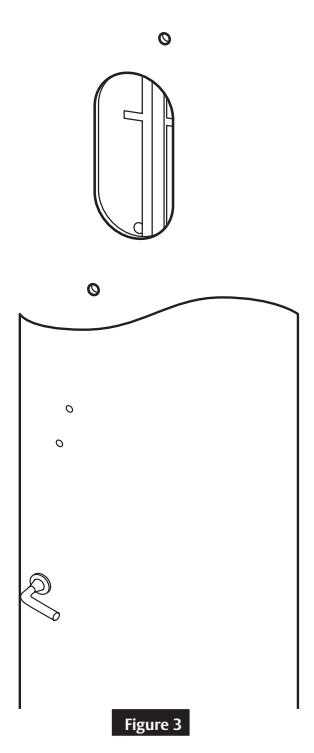
d Countersink Holes
Countersink holes on opposite face of door to fit supplied oval head screws. (Figure 3 )
FM489 04/20

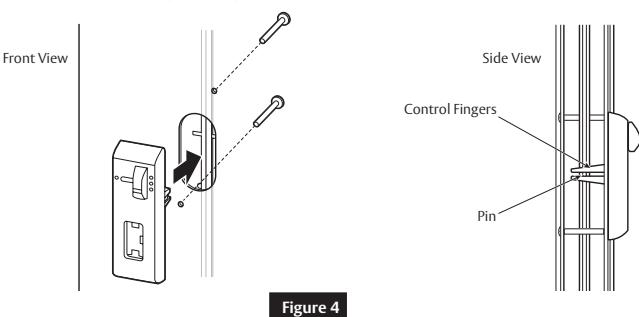
1 Dogging Indicator (cont.)
e Install Indicator
Install indicator on inside of door with supplied 10-24 x 2" oval head screws. Make sure that control fingers grab top rod pin. (Figure 4)
f Check for Proper Operation
Rotate lever until indicator window shows a single latch point. ( Figure 5)
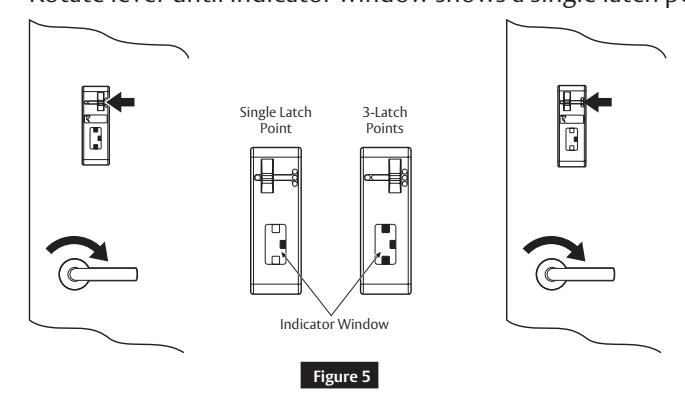
Note
To dog top and bottom latches in retracted state, fully rotate lever and move slider on indicator to left.
Corbin Russwin, Inc. 225 Episcopal Road Berlin, CT 06037 USA Phone: 800-543-3658 Fax: 800-447-6714 www.corbinrusswin.com