


← Corbin


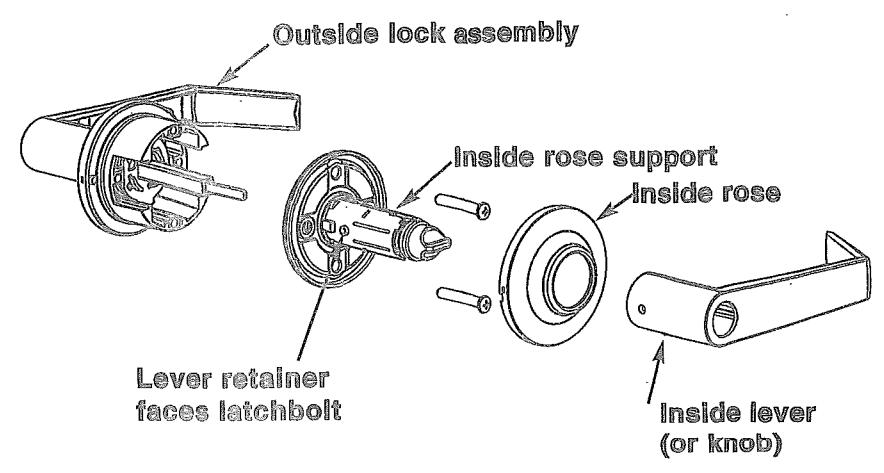
- 6. Disassemble lock.
- A Remove inside lever or knob and rose (depress the retainer button on the neck of the inside assembly with screwdriver.)
- B. Pull knob or lever away from inside rose support.
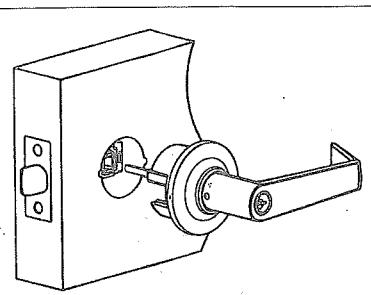
7. Install outside knob or lever.
Insert outside knob or lever with square spindle into latch
Warning: locking bar shaft must be in horizontal position as in drawing.
8. Installation of cylinder.
- A. Depress retainer button in outside lever and remove lever. If cylinder is already installed it must be unlocked to depress retainer button (insert key and rotate 90 degrees to unlock).
- For knobs only slip collar onto shaft and align small hole with retainer button. Insert cylinder into outside lever or knob shaft. For storeroom function first rotate key 90°.
- D. Slip knob or lever onto shaft and align small hole with retainer button. Depress retainer button and push knob or lever into position.
9. Install Inside assembly.
- A. Slip inside assembly over locking bar (turn button must be in vertical position).
- B. Insert screws through inside mounting plate and tighten evenly until secure. Note: Retainer pin and lever must be located toward the jamb of the door.
- ©. Slip knob or lever onto shaft aligning small hole with retainer button. Depress retainer button and push knob or lever into position.
Notes:
Storeroom Function
- * Latchbolt operated by inside lever, key in outside lever.
- * Outside lever always locked. Rotate key 90° clockwise to unlock lever. Lever retracts latchbolt, rotate key to relock.
Classroom Function
- * Either lever operates latchbolt (except when outside lever is locked by key).
- * Rotate key 360° counterclockwise to unlock lever. Rotate 360° to relock lever.
- * Inside lever always active.