Installation Instructions
- 1. Check box for contents. See previous page for components
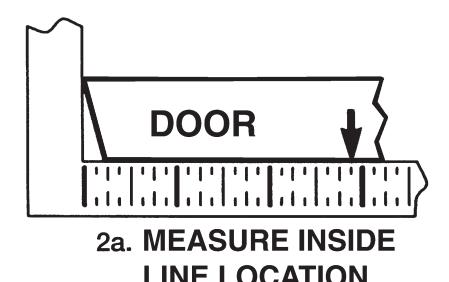
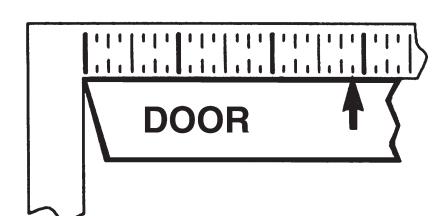
- 2. After marking door inside face for device location (Device Instructions), transfer "Vertical Reference Centerline" from inside to outside door face. Follow steps 2a. and 2b. below.
- 3. Transfer "Horizontal Reference Centerline" from inside to outside door face.
- 4. Align trim template and tape to outside door face. CAUTION: Office copiers and facsimile machines may change the size of a drawing and make the template inaccurate to use as a door marker. If this is not the original template packed with the trim, use only the dimensions written on the template to locate the holes on the door (do not use the template as a door marker).
- 5. Spot holes and prepare door for trim.
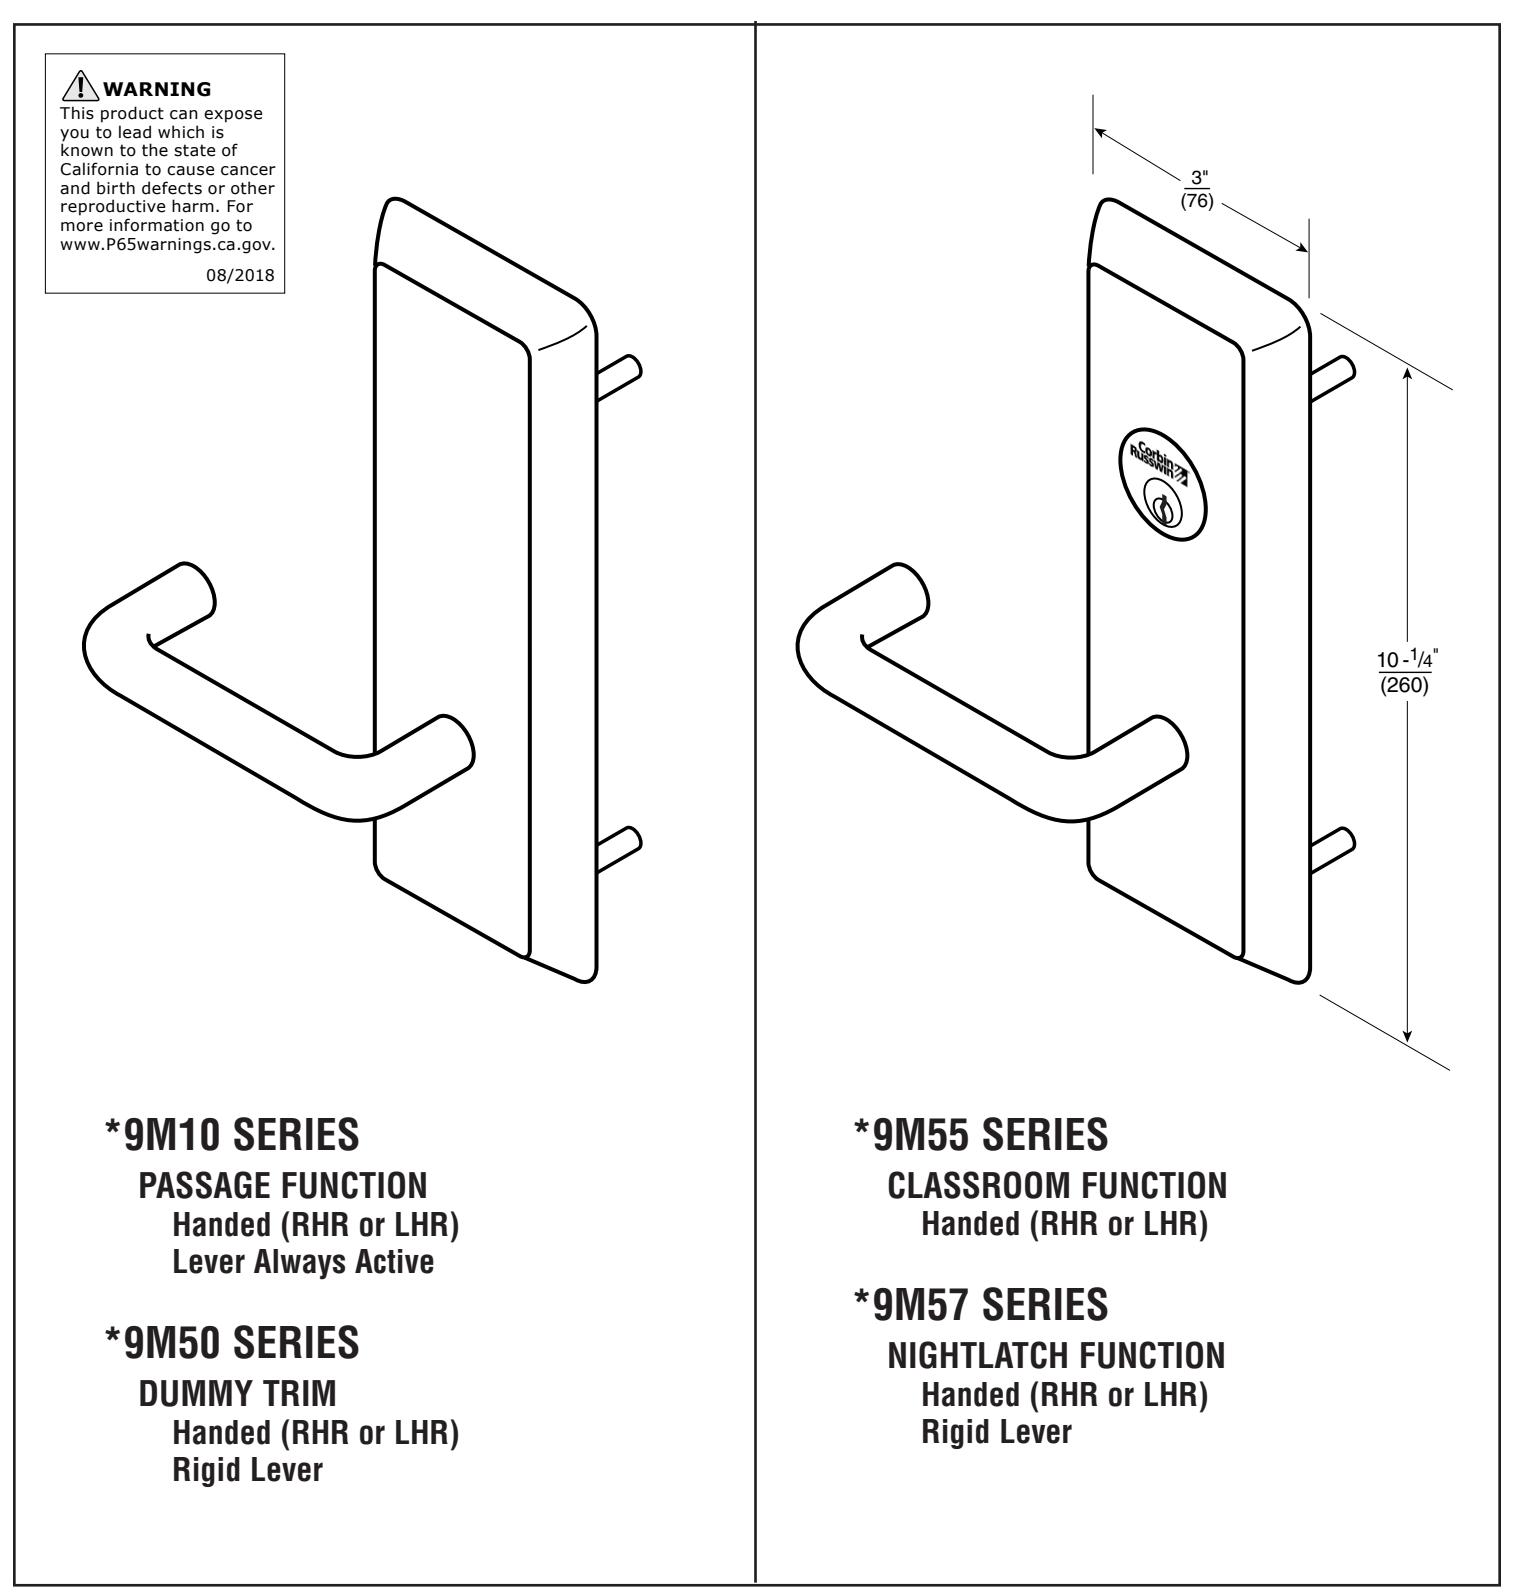
6. For *9M10 Passage Function:
Be sure mortise lock is unlocked before installing trim.
For *9M50 Dummy Trim:
Be sure mortise lock is locked before installing trim. To change to locked or unlocked mode, reach into cylinder hole of mortise lock with finger or screwdriver and move lever until it clicks into locked or unlocked position.
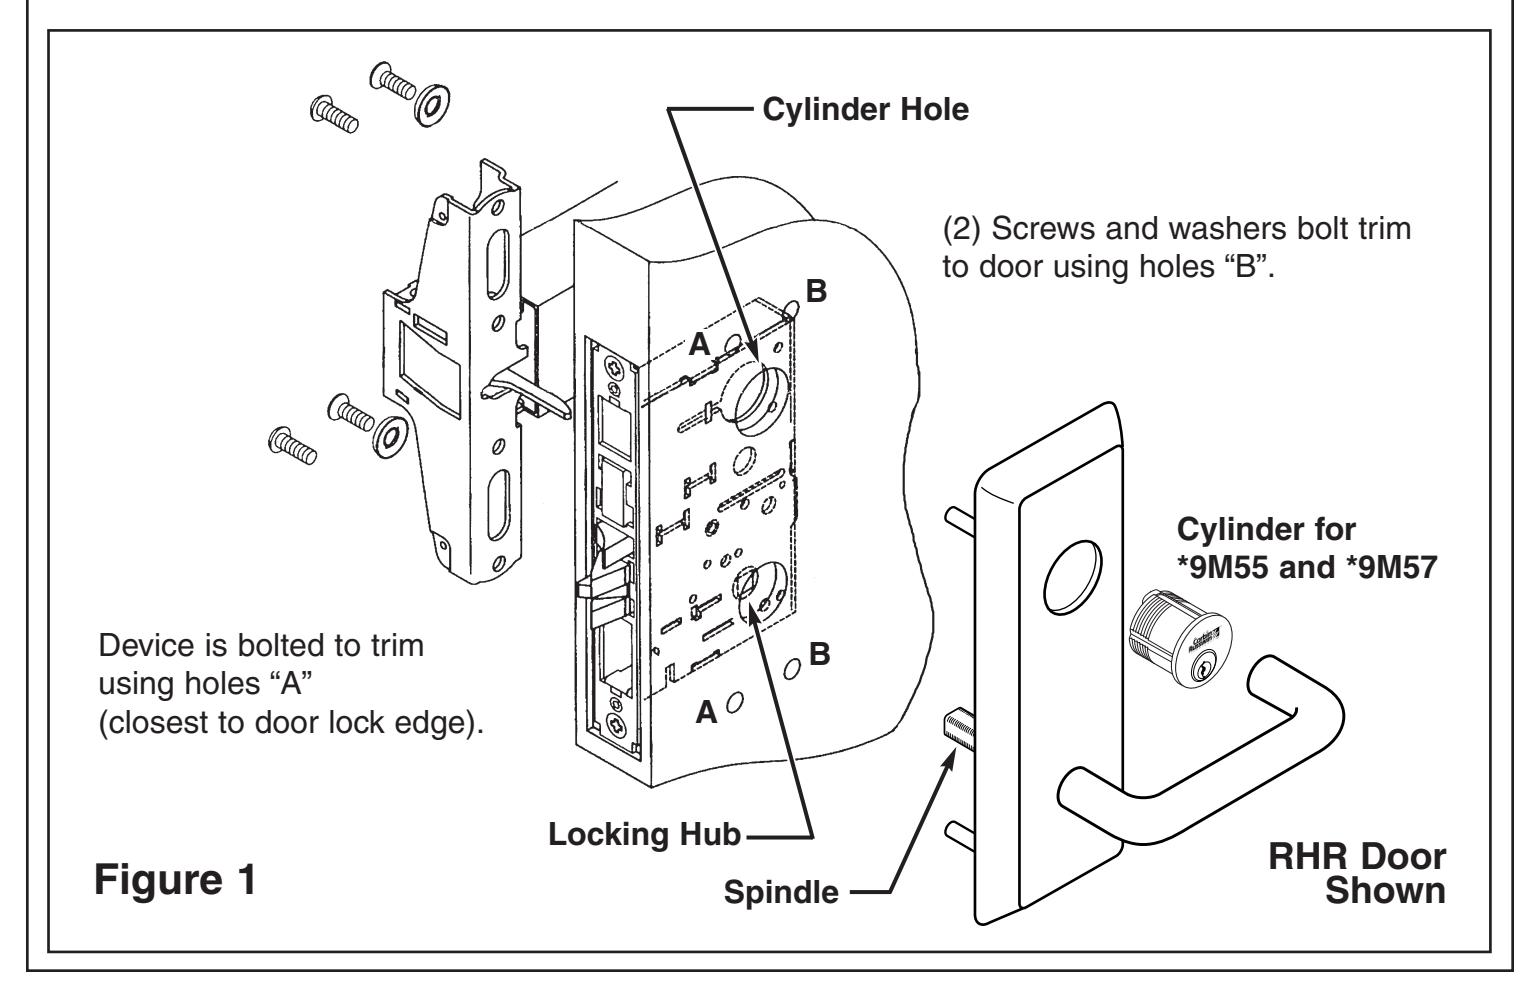
- 7. Rotate lever of trim for proper handing and engage spindle into mortise locking hub. Mount trim to door thru holes "B". Fasten, finger tight only, with 2 screws and washers seating on door as shown in Figure 1.
- 8. For *9M55 and *9M57 Functions: Thread cylinder into mortise lock until seated within escutcheon recess with keyway positioned vertically and with plug in lower cylinder as shown in Figure 1. Tighten cylinder locking screw thru mortise lock front.
- 9. Continue as shown in device instructions.

Installation Instructions
*9M10 and *9M50 SERIES *9M55 and *9M57 SERIES HEAVY DUTY MORTISE TRIM
For use with ED5600 Series Exit Device (Wood and Metal Doors)
FM 197 10/18
* Represents prefix letter(s) for various lever designs.
Outside Door Face ASSA ABLOY Dia. (Outside Face) 2-1/16 (52) VERTICAL REFERENCE ( Trim) HORIZONTAL REFERENCE (Device and Trim) 1<u>-13/1</u>6 (46) Dia. (Outside Face) See Chart 4 "X" HOLES "X"
ASSA ABLOY, the global leader in door opening solutions
Trim Template
HOLES MARKED "X" (4 Places)
METAL DOORS:
Inside Face 5 Outside Face 1
5/16" (8) Dia. 1/2" (13) Dia.
WOOD DOORS:
1/2" (13) Dia. Thru
Dimensions given in
| TRIM | HOLES |
|---|---|
| *9M10, *9M50 | Α |
| *9M55, *9M57 | A , B , |
Corbin 78° Russwin 78°
ASSA ABLOY
In U.S.: Corbin Russwin, Inc. 225 Episcopal Road Berlin, CT 06037 USA Phone: 800-543-3658
<u>Technical Product Support:</u> Phone: 888-607-5703
In Canada: ASSA ABLOY Door Security Solutions Canada 160 Four Valley Drive Vaughan, Ontario, Canada L4K 4T9
Trim Components