


← Corbin
INSTALLATION INSTRUCTIONS 988/988CR/988Y Surface Bolt
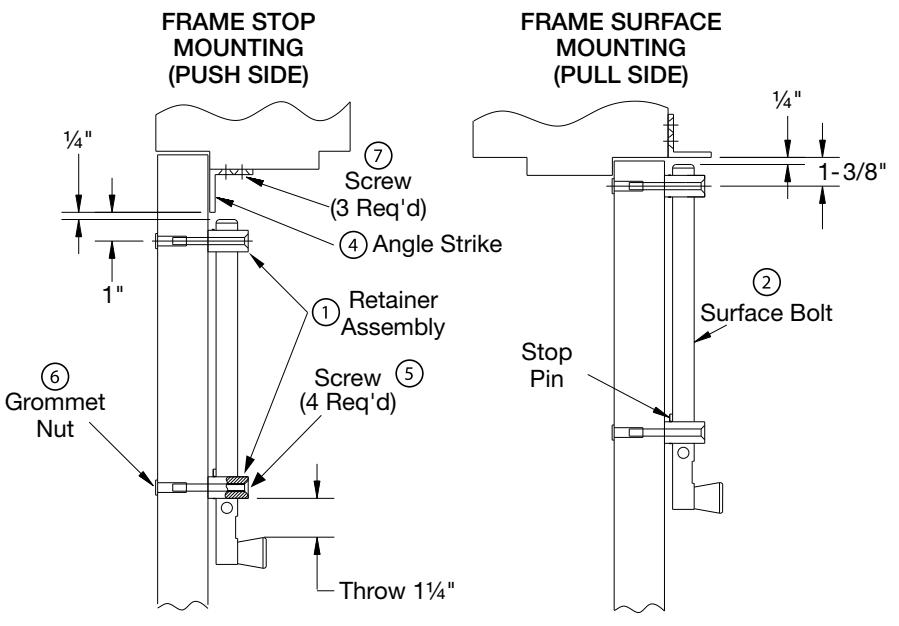
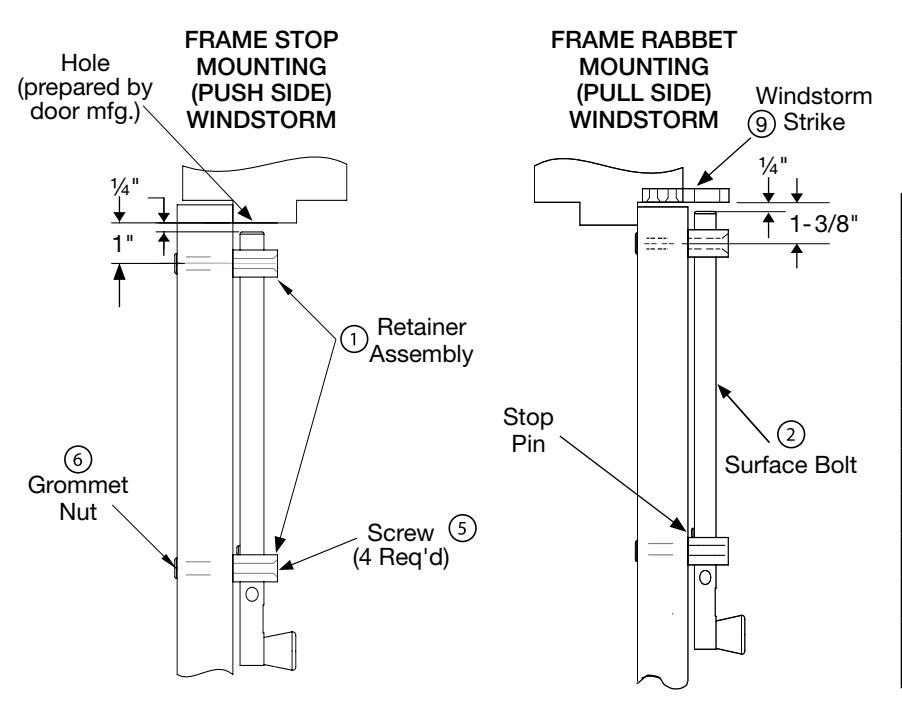
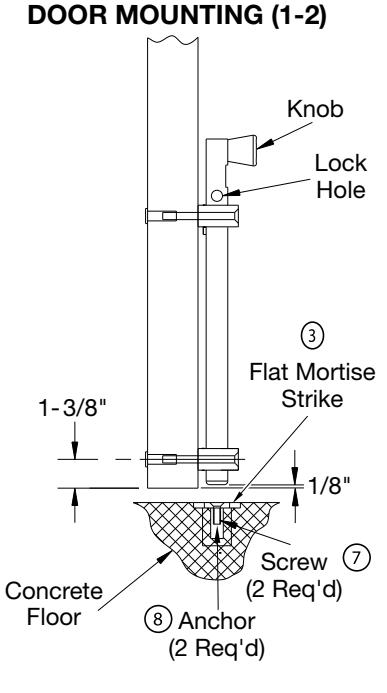
TOP OF DOOR MOUNTING (1-1)
ASSA ABLOY
The global leader in door opening solutions
BOTTOM OF
INSTALLATION PROCEDURE
1. Strike Mounting:
- Determine if bolt is to be mounted at top (1-1) or bottom (1-2) of door.
- A 2¾" backset is recommended.
1-1. Top of Door (frame mounted strike):
- Locate strike on frame as shown and mark hole locations. For Windstorm Strike, factory frame preparation is supplied.
- Drill and tap for 1/4"-20 machine screws (#8 drill and 1/4"-20 tap are required).
- Secure strike with three (3) 1/4"-20 x 3/4" screws (supplied).
1-2. Bottom of Door (floor mounted strike):
- 1-1/8" dia. x 11/2" deep hole required in floor to accept surface bolt.
- Mark and drill two (2) 7/16" dia. x 11/4" deep holes for strike anchors
- Secure strike with two (2) anchors and 1/4"-20 x ¾ screws (supplied).
2. Surface Bolt Mounting:
- Slide knob end retainer to stop pin.
- Locate surface bolt and retainers on door as shown. Mark location of through-bolts.
- Check bolt alignment in strike before drilling holes.
- Drill four (4) 9/32" dia. holes through door.
- Open holes for grommet nuts on opposite side of door using "V" size drill.
- Secure retainers to door using grommet nuts and " – 20 x 2-5/8" screws (supplied).
- Check for proper operation.
| Item | Description | Qty. |
| 1 | Retainer | 2 |
| 2 | Surface Bolt | 1 |
| 3 | Flat Mortise Strike | 1 |
| 4 | Angle Strike | 1 |
| 5 | Screw, 1/4-20 x 2-5/8" | 4 |
| 6 | Grommet Nut | 4 |
| 7 | Screw, 1/4-20 x 3/4" | 3 |
| 8 | Anchor | 2 |
| 9 | Windstorm Strike | 1 |
| NOTE: Parts used depend on mounting | ||
application.