Zero Kerf Frame Weatherstripping Model 8810 Installation Instructions 112461
Open the original PDF document
View PDF

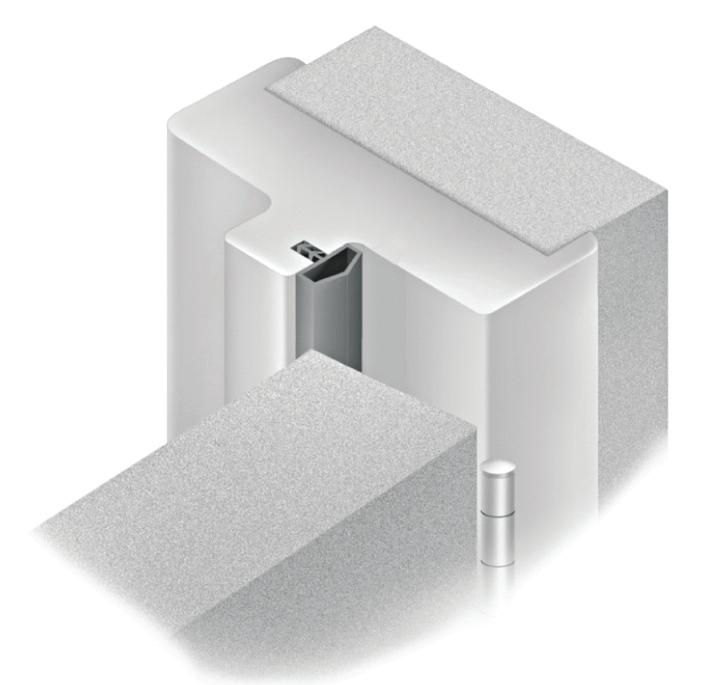
Model 8810 Kerf Frame Weatherstripping

Installation Instructions
-
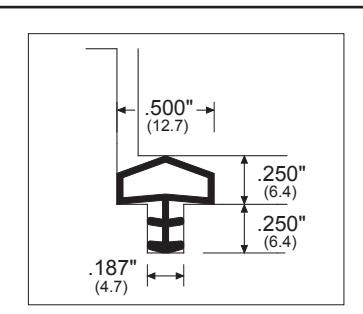
Pre-groove the jambs or stops before installation. Cut a 3/16" x 1/4" (4.7mm x 6.4mm) groove in the center of any width rebate. (See drawing for location).
- A grooving machine may be used to speed installation, however grooves can be cut on any table saw or shaper. Use the one equipped with an effective hold-down system to avoid widening the ends of a cut.
- Measure and cut seals to the full length required. (Small seals can be cut with scissors, but large
seals should be cut with a sharp knife).
The first piece of seal should be the head piece. Insert the seal into the groove by pressing with your finger (tumbtack). First, tack in the two ends. Second, tack in the middle. Third, tack the middle of each half. Fourth, tack the middle of each quarter, and so on until the seal has been tacked slightly every 6" to 8" (152mm to 203mm). Make sure installation properly done by rubbing along the seals with fingers or a rolling tool.
IMPORTANT: DO NOT STRETCH THE SEAL DURING INSTALLATION.
- The lock jamb gasketing should be installed next, following procedurs as outlined in step 3. 4
- Install the hinge jamb gasketing last, following procedures as outlined in step 3.


Customer Service
1-877-671-7011 www.allegion.com/us
© Allegion 2017 Printed in U.S.A. 47255394 Rev. 06/17-c