XME9000 Programming
Open the original PDF document
View PDF9000 Series
Program Guide
For XCE9010/9020/9030/9040 and XME9010/9020/9030/9040
Index
| Definition·······································02 | ||
|---|---|---|
| Factory Default Settings····························03 | ||
| Important Notes··································03 | ||
| Change Master Code·······························03 | ||
| Add Code·······································04 | ||
| | Add a User Code | |
| | Add Multiple User Codes | |
| |
Add
an Office Code |
|
| | Add Multiple office Codes | |
| | Add a Lockdown Cancellation Code | |
| |
Add Multiple Lockdown
Cancellation Code |
|
| Delete Code···································· | 06 |
Delete a User Code, Office Code or Lockdown Cancellation Code
| Disable or Enable Code·····························06 | ||
|
Disable or Enable aUser Code, Office Code or Lockdown Cancellation Code of Enable all Office Codes only Disable |
||
|
Disable or Enable all User Codes Office Codes and Lockdown Cancellation Codes |
||
| Code Location Function·····························08 | ||
|
Next Free Office Code ID
Locator·······················08 |
||
| Remote Control Code Setting·························09 | ||
| Revert to Factory Setting····························09 | ||
| Low Battery Warning·······························09 | ||
| Trouble Shooting··································10 | ||
| Q&A···········································10 | ||


Definition:
- Code Length:
- LED Indicator:
- Lockdown Cancellation Code:
- Locked Mode:
- Lockdown Mode:
- Master Code:
- Office Code:
- Pass Time:
- Penalty Time (Anti-Tamper Lockout):
- Remote Control Unit (RCU):

User Code:
Factory Default Setting
Master Code:
Pass Time:
Penalty Time:
RCU Code:
Important Notes:
- Factory Default Master Code must be changed to your own personal Master Code before programming any other codes.
- Pressing Star ("Ӿ") key cancels on-going programming.
- Pressing Pound ("#") key starts programming.
- Replacing batteries does not change existing settings.
- During programming, Blue LED indicator indicates either success of programming or programming in progress, and red LED indicator indicates failure of programming.
- Two blue LED flashes and 2 beeps (one short beep and one long beep) at the end of each successful program sequence.
- One blue LED flash and 2 short beeps during program sequence.
- Programming can be done only if the lock is in Locked Mode.
- The red LED will flash 0.5sec (with one long beep) after an invalid code is entered. (To quickly clear an invalid code entry, press □ # and immediately re-enter the correct Code).
Change Master Code – Program 01

Key Sequence
□ # [Master Code] ● □ 0 □ 1 ● [1-digit Code length] ● [New Master Code] ● [New Master Code] ●● For example , if you want your own personal Master Code to be "5555", press: □ # 12345 ● 01 ● 4 ● 5555 ● 5555 ●●
Notes:
- Factory Default Master Code is 12345. It's universal and known to the public. It must be replaced with your own Master Code immediately. Manufacture assumes no liability, direct or indirect, due to failure to do so.
- No other programming commands will be accepted until Factory Default Master Code has been changed.
- Length of Master Code defines length of all other codes. It cannot be changed to other lengths unless Factory Default Setting is restored.
- Master Code cannot be deleted.
- A lock has only one Master Code. Multiple locks can have the same Master Code.
Add Code
Add a User Code – Program 02
Key Sequence
□ # [Master Code] ● □ 0 □ 2 ● [2-digit User ID: 01, 02, 03, 04, 05, 06, 07, 08, 09 or 10] ● [New User Code] ●● For example , if you want to add User Code of "2010" with User ID 01, Press: □ # 5555 ● 02 ● 01 ● 2010 ●●
Add Multiple User Codes – Program 02
Key Sequence
1 st User Code Key Sequence: □ # [Master Code] ● □ 0 □ 2 ● [2-digit User ID] ● [New User Code] ●● Additional User Codes Key Sequence: ● [2-digit User ID] ● [New User Code] ●●
For example , if you want to add User Codes "2020", "2030" and "2040" with User ID 02, 03, and 04 respectively,
Press: □ # 5555 ● □ 0 □ 2 ● 02 ● 2020 ●● ● 03 ● 2030 ●●

● 04 ● 2040 ●●
Notes :
Input of additional User Code must start before blue LED indicator stops flashing.
Otherwise need to start from entering □# .
Add an Office Code – Program 02
Key Sequence
□# [Master Code] ● □0 □2 ● [2-digit office code ID: through 11 to 90] ● [New Office Code] ●●
For example , if you want to add Office Code of "9010" with Office Code ID 11, Press: □# 5555 ● 02 ● 11 ● 9010 ●●
Add Multiple Office Codes – Program 02
Key Sequence
1
 st Office Code Key Sequence: □# [Master Code] ● □0 □2 ● [2-digit Office Code ID: through 11 to 99] ● [New Office Code] ●●
Additional Office Codes Key Sequence: ● [2-digit Office Code ID] ● [New Office Code] ●●
For example, if you want to add Office Codes "9020", "9030" and "9040" with Office Code ID 12, 13, and 14 respectively,
Press: □# 5555 ● □0 □2 ● 12 ● 9020 ●●
       ● 13 ● 9030 ●●
       ● 14 ● 9040 ●●
Notes:
Input of additional Office Code must start before blue LED indicator stops flashing. Otherwise need to start from entering □# .
Add a Lockdown Cancellation Code – Program 02
Key Sequence
□# [Master Code] ● □ 0 □ 2 ● [2-digit Lockdown Cancellation ID: through 91 to 99] ● [New Lockdown Cancellation Code] ●●
For example, if you want to add Lockdown Cancellation Code of "9999" with ID 91, Press: □ # 5555 ● 02 ● 91 ● 9999 ●●

Add Multiple Lockdown Cancellation Codes – Program 02
Key Sequence
1 st Lockdown Cancellation Code Key Sequence:
□ # [Master Code] ● □ 0 □ 2 ● [2-digit Lockdown Cancellation Code ID: through 91 to 99] ● [New Lockdown Cancellation Code] ●●
Additional Lockdown Cancellation Codes Key Sequence:
● [2-digit Lockdown Cancellation Code ID] ● [New Lockdown Cancellation Code] ●●
For example, if you want to add Lockdown Cancellation Codes "8888", "7777" and "6666" with Code ID 92, 93, and 94 respectively,
Press □# 5555 ● □0 □2 ● 92 ● 8888 ●●
        ● 93 ● 7777 ●●
        ● 94 ● 6666 ●●
Notes:
Input of additional Lockdown Cancellation Code must start before blue LED indicator stops flashing. Otherwise need to start from entering □#
Delete Code
Delete a User Code, Office Code or Lockdown Cancellation Code – Program 03
Key Sequence
□# [Master Code] ● □0 □3 ● [2-digit User Code ID] ●●
For example, if you want to delete User Code "2040" with User Code ID "04", Press: □# 5555 ● 03 ● 04 ●●
To delete Office Code or Lockdown Cancellation Code, replace User Code ID in Key Sequence with Office Code ID or Lockdown Cancellation Code ID respectively.
Disable or Enable Code
Disable or Enable a User Code, Office Code or Lockdown Cancellation Code

Disable a User Code – Program 04
Key Sequence
□ # [Master Code] ● □ 0 □ 4 ● [2-digit User Code ID] ●●
For example , if you want to disable User Code "2030" with User Code ID "03", Press: □ # [5555] ● □ 0 □ 4 ● [03] ●●
To disable an Office Code or a Lockdown Cancellation Code, replace User Code ID in Key Sequence with Office Code ID or Lockdown Cancellation Code ID.
Enable a User Code, Office Code or Lockdown Cancellation Code – Program 05
Key Sequence
□ # [Master Code] ● □ 0 □ 5 ● [2-digit User Code ID] ●●
For example , if you want to enable User Code "2030" with User Code ID "03", Press □ # [5555] ● □ 0 □ 5 ● [03] ●●
To enable an Office Code or Lockdown Cancellation Code, replace User Code ID in Key Sequence with Office Code ID or Lockdown Cancellation Code ID.
Disable or Enable all Office Codes only
Disable all Office Codes
□ # [Master Code] ●□ 0 □ 7 ●●
Result: All 80 Office Codes are disabled.
Enable all Office Codes
□ # [Master Code] ●□ 0 □ 8 ●●
Result: All 80 Office Codes are enabled
Disable or Enable all User Codes, Office Codes and Lockdown Cancellation Codes within the System
Disable all User Codes, Office Codes and Lockdown Cancellation Codes – Program 06 Key Sequence

- □ # [Master Code] ●□ 0 □ 6 ●●
-
Enable all User Codes, Office Codes and Lockdown Cancellation Codes within the System Program 08
Key Sequence
- □ # [Master Code] ●□ 0 □ 8 ●●
Code Location Function - Program 09
□ # [Master Code] ● □ 0 □ 9 ● [Enter Code to be located] ●●
Result:
If the code entered is recognized, the following sequence will occur:
- 1.At the start of the Code Location sequence, the lock will Flash both the Blue and RED LEDs and emit 2 beeps.
- 2.The lock will identify the first digit by flashing the Blue LED and beeping the sounder from 0 9 times.
- 3.To signify the end of the first digit sequence, the lock will flash both the Blue and RED LEDs and will emit 2 beeps.
- 4.The lock will identify the second digit by flashing the Blue LED and beeping the sounder from 0 9 times.
- 5.To signify the end of the Code Location function, the lock will flash both the Blue and RED LEDs and will emit 2 beeps.
Note: Should the Code not be recognized, the lock will sound one long beep (0.5 sec) with a RED LED.
Next Free Office Code ID Locator - Program 10
□ # [Master Code] ● □ 1 □ 0 ●●
Report Sequence
- 1. At the start of the Next Free Office Code Location function, the lock will flash both the Blue and RED LEDs and will emit 2 beeps.
- 2. The lock will identify the first digit by flashing the Blue LED and beeping the sounder from 0 -9 times.
- 3. To signify the end of the first digit sequence, the lock will flash both the Blue and RED LEDs and will emit 2 beeps.
- 4. The lock will identify the second digit by flashing the Blue LED and beeping the sounder from 0 -9 times.
- 5. To signify the end of the Office Code Location function, the lock will flash both the Blue and RED LEDs and will emit 2 beeps. If no

free address is found, then the lock will emit one long beep (0.5 sec) with a Red LED.
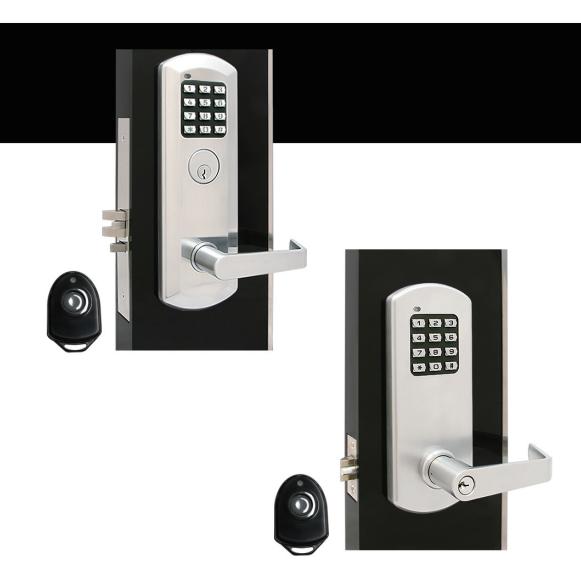
Remote Control Code Setting - Program 95
# [Master Code] • 9 5 • [RCU 8 digits Code] • •
For example, to set RCU Code "11110000"
Step 1 . XCE 9000 Keypad input: # 5555 • 95 • 11110000 • •
Step 2. Open RCU Cover, change DIP Switch to "11110000"
Step 3. Screw RCU Cover back, pressing button on RCU to test it.
Revert to Factory Setting – Program 99
Key Sequence
# [Master Code] • 9 9 • 9 9 • •
Result: Lock is reverted to factory default setting. All codes are deleted and Master Code changes to 12345.
Note: The Blue LED lights for 7 seconds and 2 beeps sounds.
Low Battery Warning
- 4 AA batteries for lock and a 23A battery for RCU.
- When the 4AA battery voltage is low, LED indicator flashes in red for 5 times before the Blue LED flashes to signal acceptance of the code. Batteries should be replaced as soon as this happens.
- When RCU has low battery, LED on the RCU flashes in red when pressing lockdown button.
- Only 200 operations are allowed under low battery condition. Over 200 operations, only Master Code is allowed to\nunlock the lock. All other codes are disabled. LED indicator flashes in red for 10 times before the Blue LED flashes to signal acceptance of the Master Code.
- Both 4AA batteries and a 23A battery are recommended to be replaced at least once every year.

Trouble Shooting
-
Master Code does not work
- Check keypad cable connection to PCB
- Check Battery connection to PCB
- ▼ If no issue is found, then the PCB may be dead. Call Technical Support at (877) 858-0888
-
User Code does not work
- Check your coding book; make sure the specific User Code is programmed into the lock.
- Check battery voltage. Try Master Code or Manager Code. If only Master and Manager Code are working, but not User Code, then the battery voltage is low. Replace all 4 AA batteries right away.
-
Service Code does not work
- Service code is for one time use only. It is deleted from the system once being used.
Q&A
1. How to replace lock batteries?
A: 4 AA alkaline batteries locate on the inside of the door lock. Take off inside escutcheon and battery cover to replace batteries.
2. How to replace Remote Control Unit (RCU) Battery?
A: unscrew the RCU cover, and replace the inside 23A battery
3. Does the lock have audit trail?
A: No
4. What is the product warranty?
A: one year limited.
5. What's the Technical Support Contact?
A: From 7:00AM-3:30PM, Mon-Fri, Pacific Time
Toll Free: (877) 858-0888 Email: sales@townsteel.com Website: www.townsteel.com

17901 Railroad Street, City of Industry, CA 91748
Toll Free: 877-858-0888 Tel: 626-965-8917
Fax: 626-965-8919
www.townsteel.com