Trine Service Kit Instructions for Coil & Spring Replacement
Open the original PDF document
View PDF

EN SERIES
Includes Fail Safe / Fail Secure Field Adjustment (on DCUnits) SERVICEKIT INSTRUCTIONS FOR COIL & SPRING REPLACEMENT
All operations are performed with the strike in the upright position
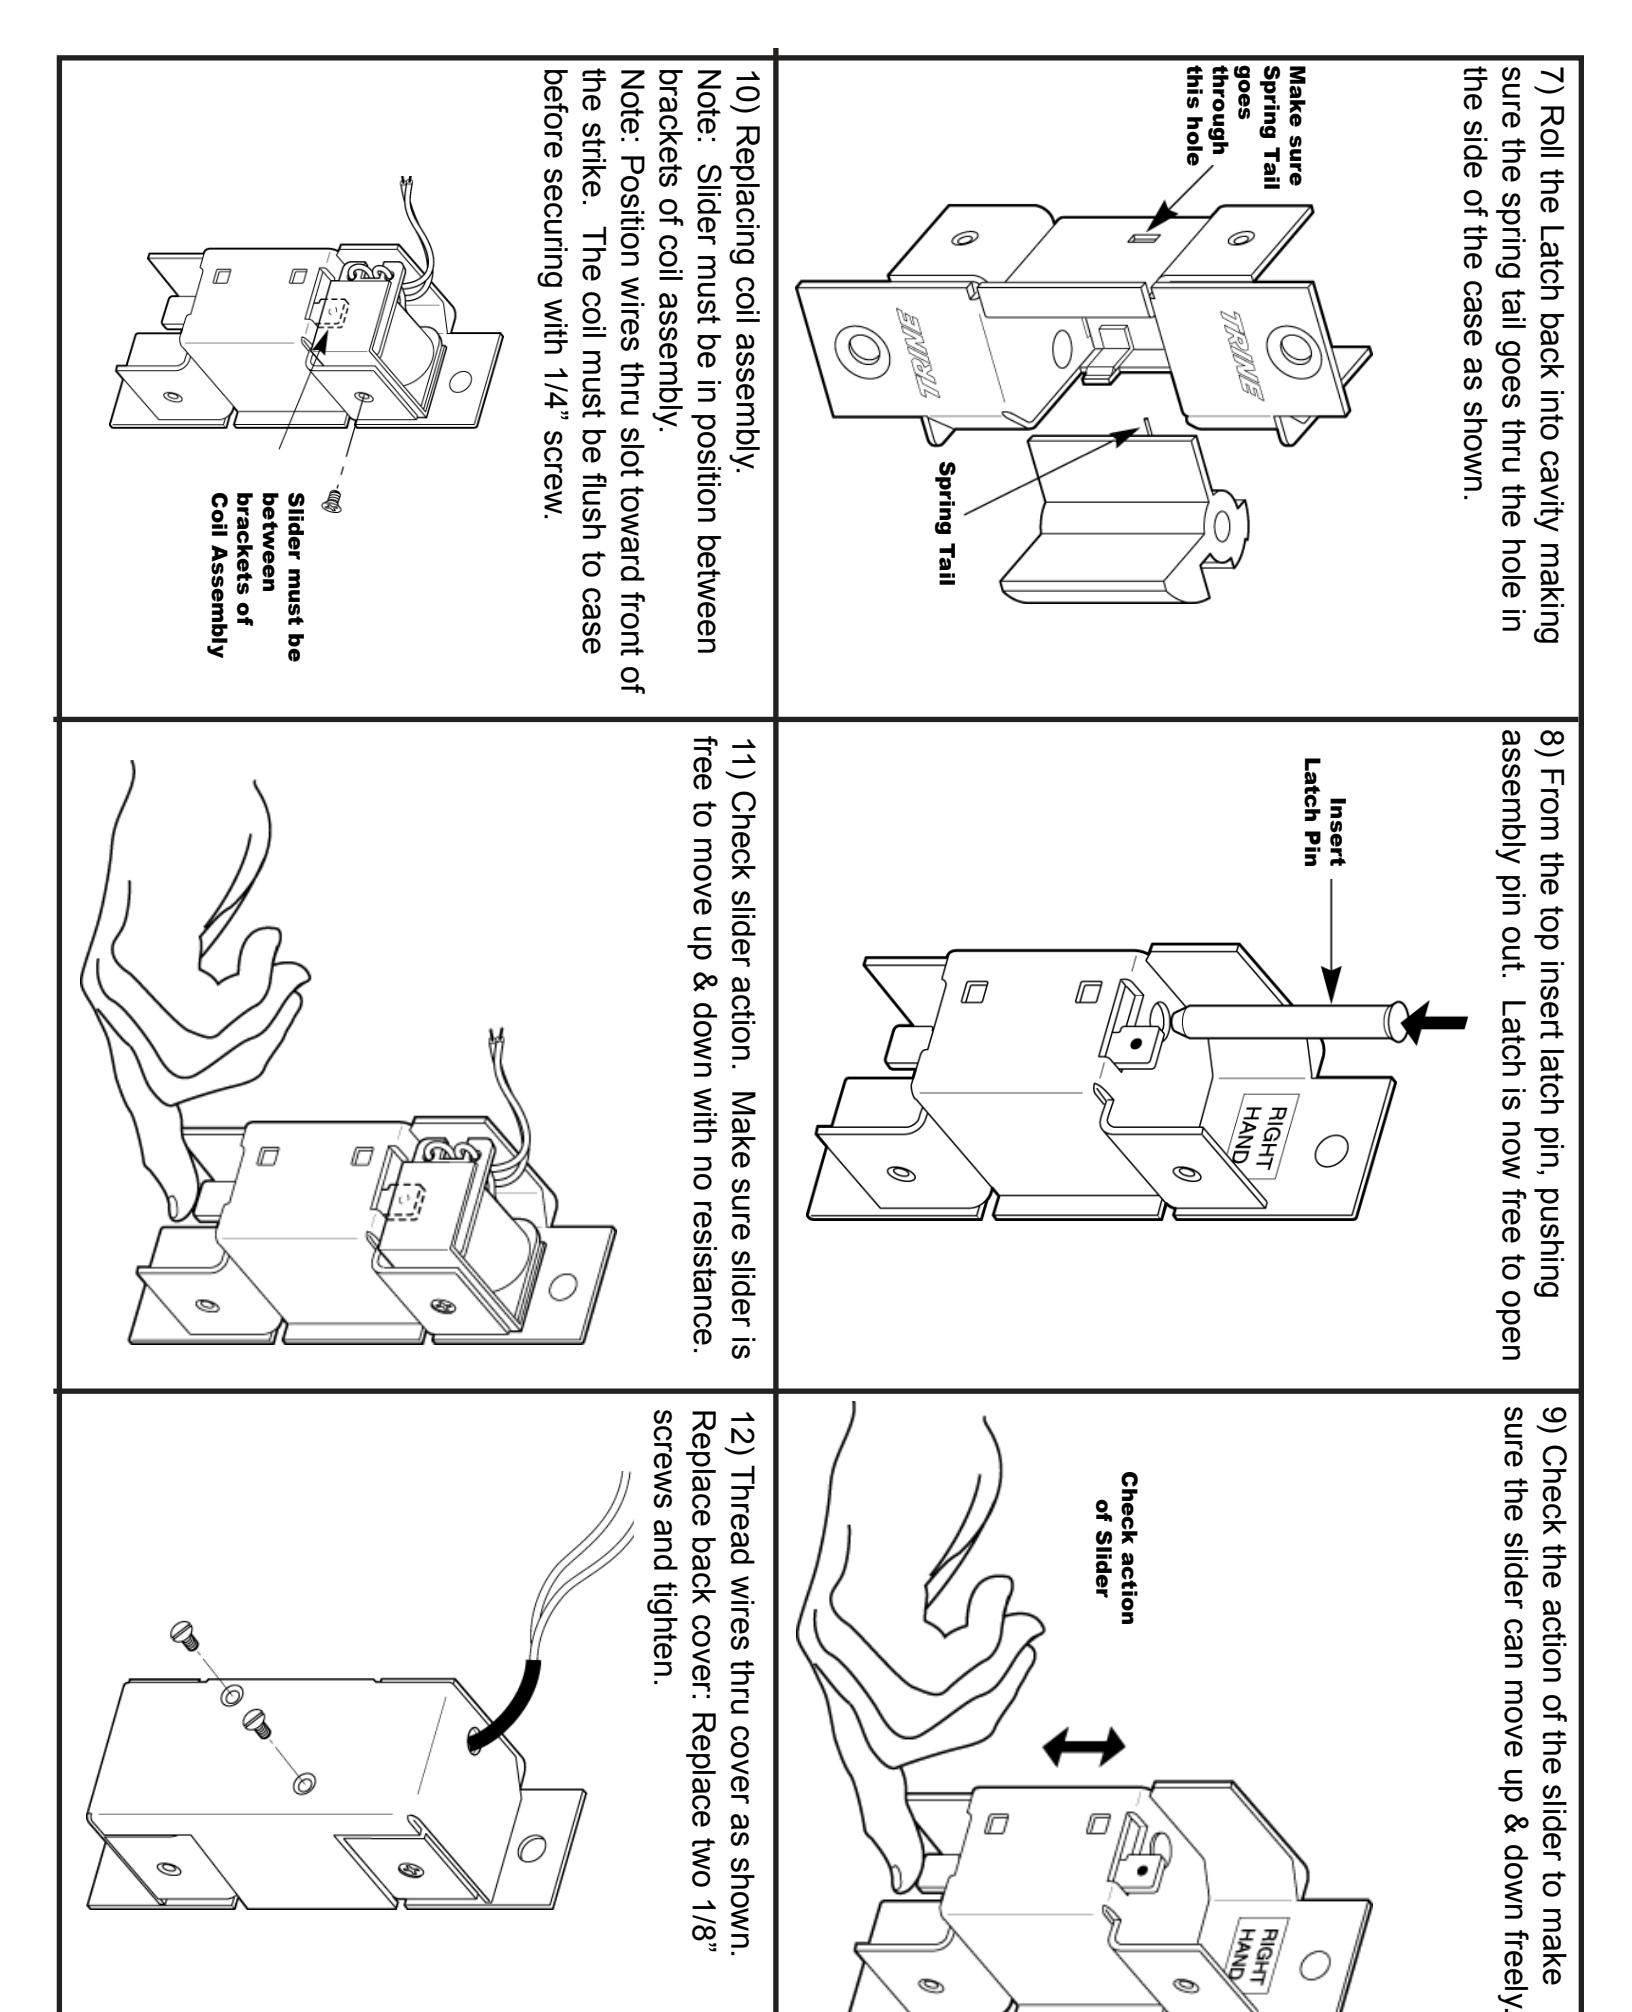
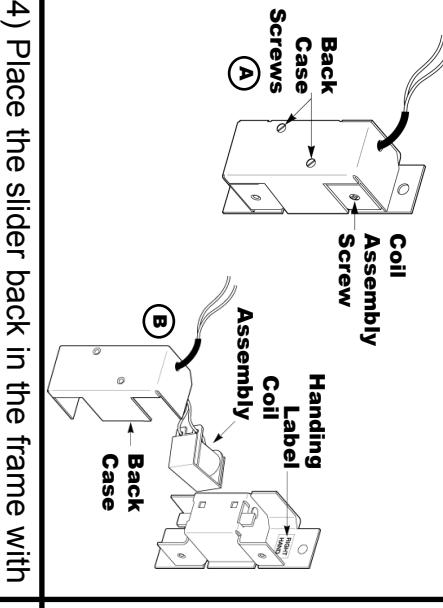
- back case shown. (3-screws). Remove two 1/8" 1) Remove the back cover and coil as
- (A) Screws, remove coil assembly screw.
- (B) Remove back cover &coil assembly.
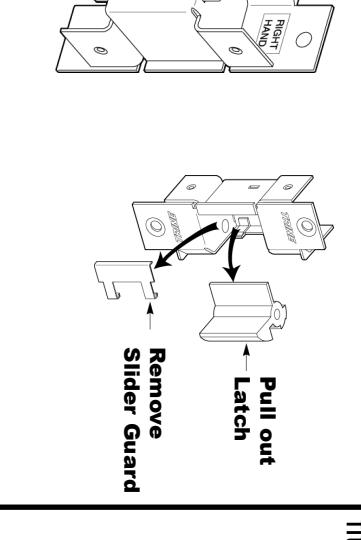
Pull out Latch Pin Insert Assembly latch pin & latch. 2) Insert assembly pin (provided) to remove Note: The slider should fall (remove) slider & slider guard. thru the strike body after latch is removed
3) To change the action, remove the slider fit to change action. guard must fit into slots in case with very loose slider guard as shown. Note: Tabs of slider Determine handing, and top of strike. Position from the frame and reverse its ends.
Fail Secure Safe Fail into slots) (tabs must go Slider Guard Position Fail Safe Indication
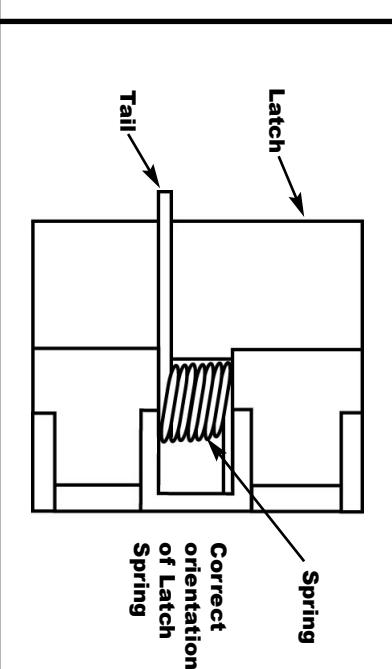
the top, fail safe side up (as shown). slider guard in position insert slider from the fail safe end up by the coil. With 5) To service spring , using replacement kit. assembly pin through latch and spring hole. as illustrated. Hold spring in position, place spring. Insert replacement spring, positioned Remove assembly pin from latch, releasing
push up Pin and
Fail Safe side up
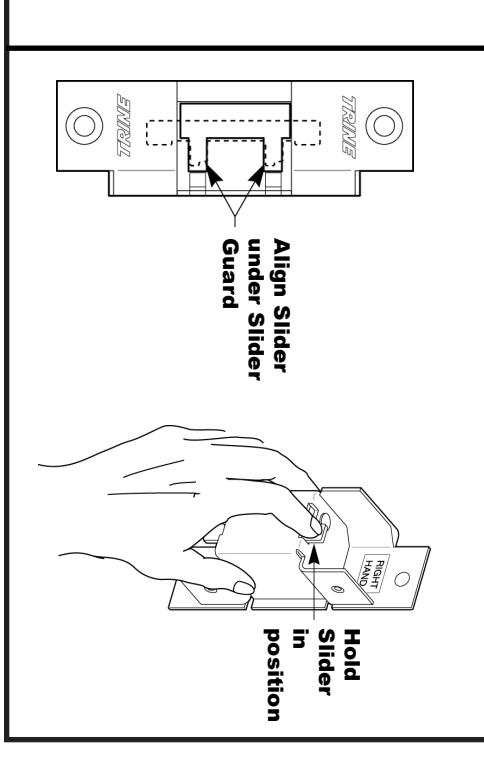
back of case. shown. Hold slider in position with finger from 6)Align slider tabs under slider guard, as