Trine 206-3 Wireless Entry Exit Signal Kit Instruction Sheet
Open the original PDF document
View PDF

206-3 -- Wireless Entry/Exit Signal Kit
Instruction Sheet
FEATURES:
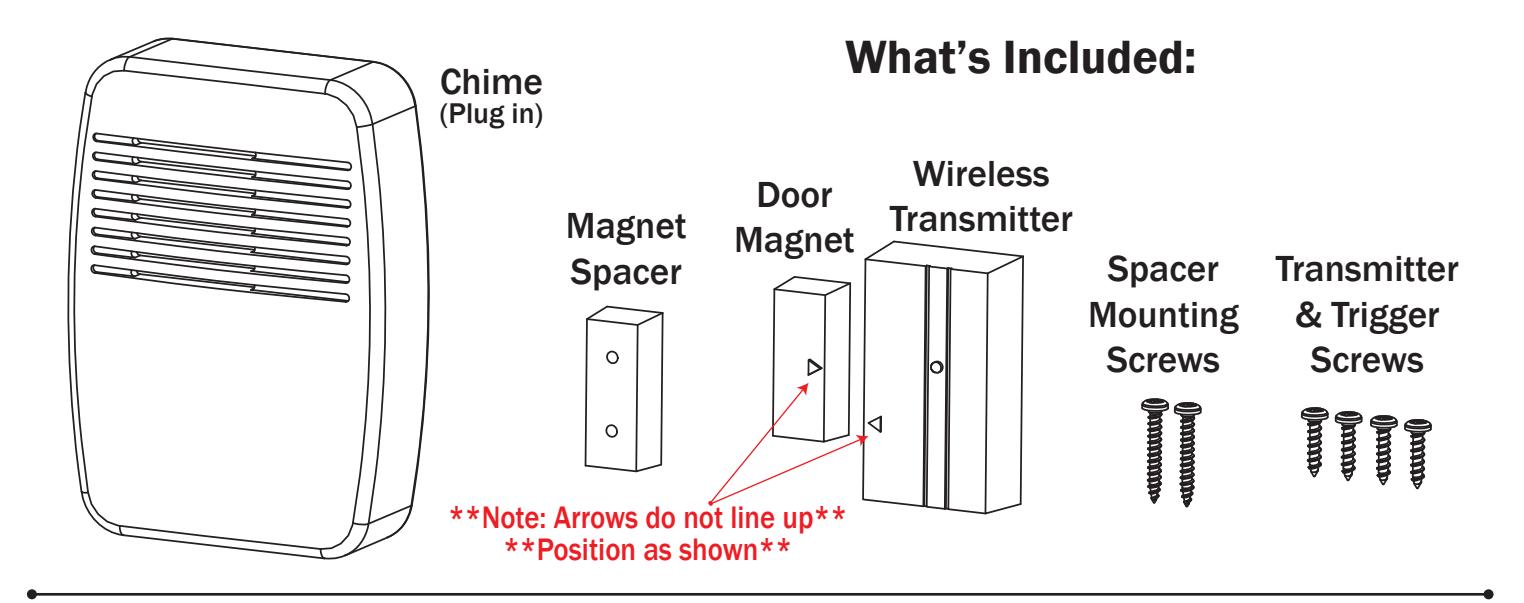
- Transmitter communicates with the chime wirelessly.
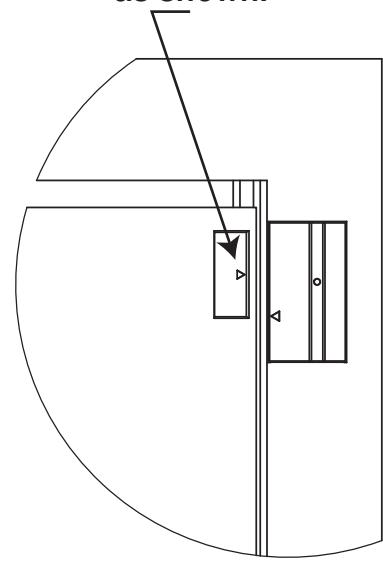
- Can be used with swinging or sliding doors
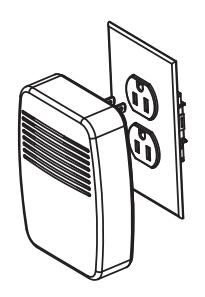
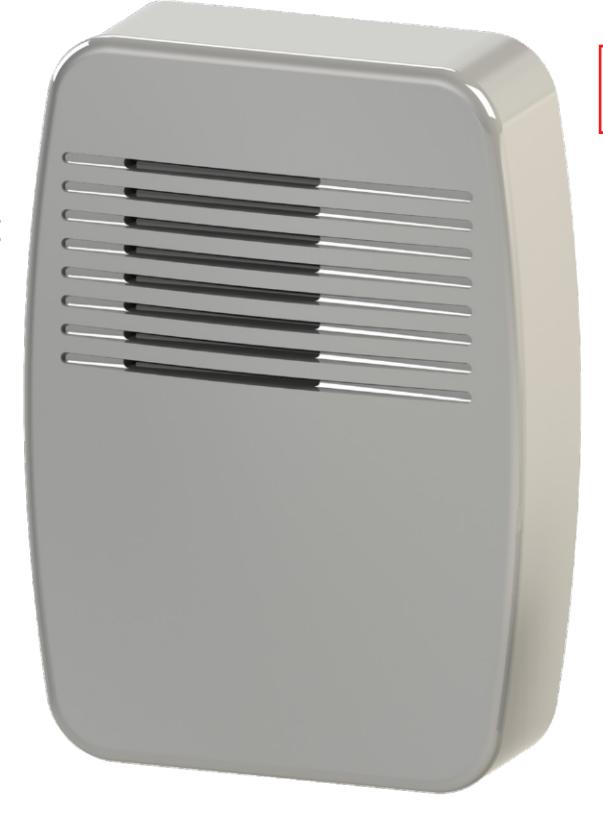
- Chime plugs into a standard electric outlet
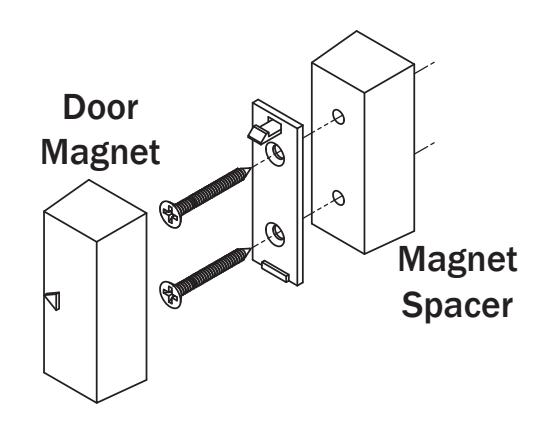
- Includes a Door Magnet Spacer and all the mounting screws
- Transmitter range: 100'
- Three High Quality Chime tunes
- (1) 12V A23 Battery is included
V. 16.0504
NOTE: This unit is NOT compatible with 206-3 units sold before December, 2014
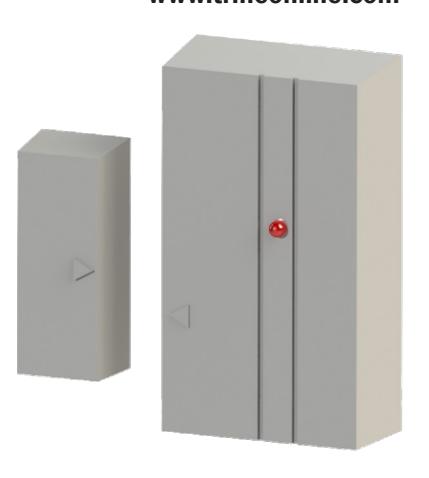
For swinging doors align the transmitter arrow to the bottom of the magnet as shown.
NOTE: This unit is <u>NOT</u> compatible with 206-3 units sold <u>before</u> December, 2014
PHONE: (203) 730-1756 FAX: (203) 730-1781 2 PARKLAWN DR. STE F, BETHEL, CT 06801 customerservice@trineonline.com www.trineonline.com
Troubleshooting
- A. Problem: Chime does not ring one time and stop.
- 1a. Possible Cause: Sensor battery is not installed properly.
- 1b. Fix: Make sure battery is installed according to the diagram inside sensor.
- 2a. Possible Cause: Sensor battery is dead.
- 2b. Fix: Replace sensor battery.
- 3a. Possible Cause: Chime is not receiving power
- 3b. Fix: Make sure the plug-in chime has power
- 4a. Possible Cause: Sensor & Chime are not synced
-
4b. Fix: Re-try syncing process
- Unplug chime
-
Ensure switch 1 on both chime and sensor is set to OFF
- Wait 30 Seconds
- Press and hold the "TEST" button inside the sensor within 20 seconds after plugging in chime. When the "Ding-dong" tune is played, the sensor is synced with the chime.
- B. Problem: Battery seems okay but the chime does not work after installation.
- 1a. Possible Cause: Chime or Transmitter is mounted on metal or near metal studs. (metal reduces range of unit)
- 1b. Fix: Use a 1/4" to 1/2" wooden shim to to move Transmitter away from metal surface. Move Chime to another wall outlet.
- 2a. Possible Cause: Chime or Transmitter is mounted near concrete. (concrete reduces range of unit)
- 2b. Fix: Move away from concrete
- 3a. Possible Cause: Chime & Transmitter are installed too far apart (over 100 feet)
- 3b. Fix: relocate pieces closer to one another.
- C. Problem: Chime sounds when not intended.
- 1. Possible Cause: Chime or Transmitter is receiving interference
-
2. Fix: Follow A. Problem 4b. Fix to Unsync the unit
- Follow A. Problem 4b. Fix Again to Resync the units
- If problem persists move Chime or Transmitter to another location to reduce interference.
Installation:
- 1. Plug the chime on an electric outlet within the range of the transmitter. It will take 30 seconds for the electronics to initialize.
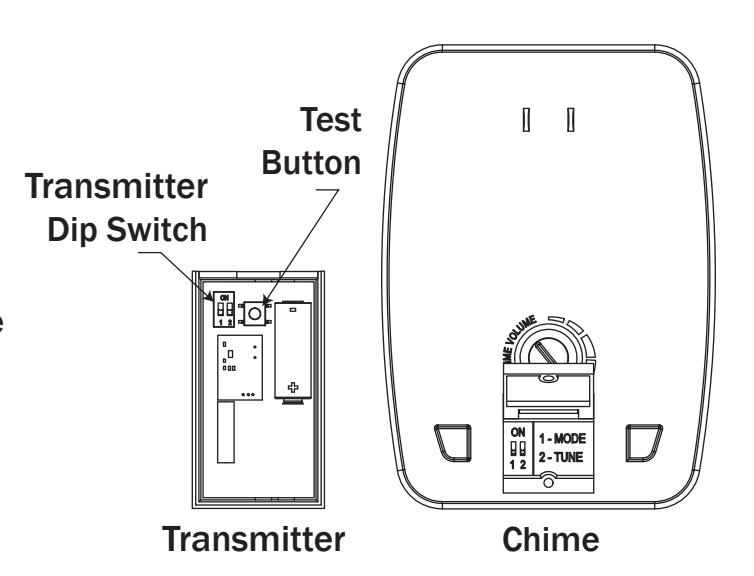
- 2. Take off the back cover of the transmitter unit to find the programming switches.
- 3. After the chime initializes, push the "Test Button" on the transmitter for 20 seconds so the chime can pair with the transmitter.
Note:
A "Ding-Dong" sound from the chime indicates that the transmitter has been successfully mated with the chime.
A single "Ding" from the chime indicates that the transmitter memory was erased.
- 4. Select the desired chime sound. See the selection chart for the dip switch combinations.
- 5. Mount the transmitter unit on to the door frame.
- 6. ** Align the door magnet with the transmitter see door positioning above ** Use the door magnet spacer if the door is recessed too far from the frame.
- 7. Test the completed installation. Refer to the troubleshooting section if the installation does not work.
Chime Selection Chart
| Transmitter | Chime | Tune |
|---|---|---|
| Switch 2 - ON | Switch 2 - ON | Ding |
| Switch 2 - OFF | Switch 2 - OFF | Ding-Dong |
| Switch 2 - OFF | Switch 2 - OFF | Ding-Dong |
| Switch 2 - ON | Switch 2 - ON | Westminster |