Select Hinges Toilet Partition Geared Continuous Installation Instructions
Open the original PDF document
View PDF

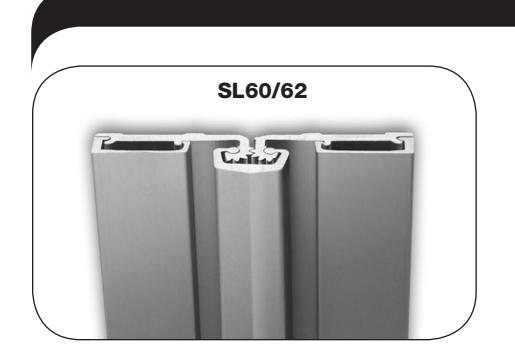
Toilet Partition Geared Continuous Hinges
Calculating Required Door Clearances
IMPORTANT: All standard length SELECT hinges are supplied slightly shorter than nominal door height to avoid threshold or flooring clearance problems.
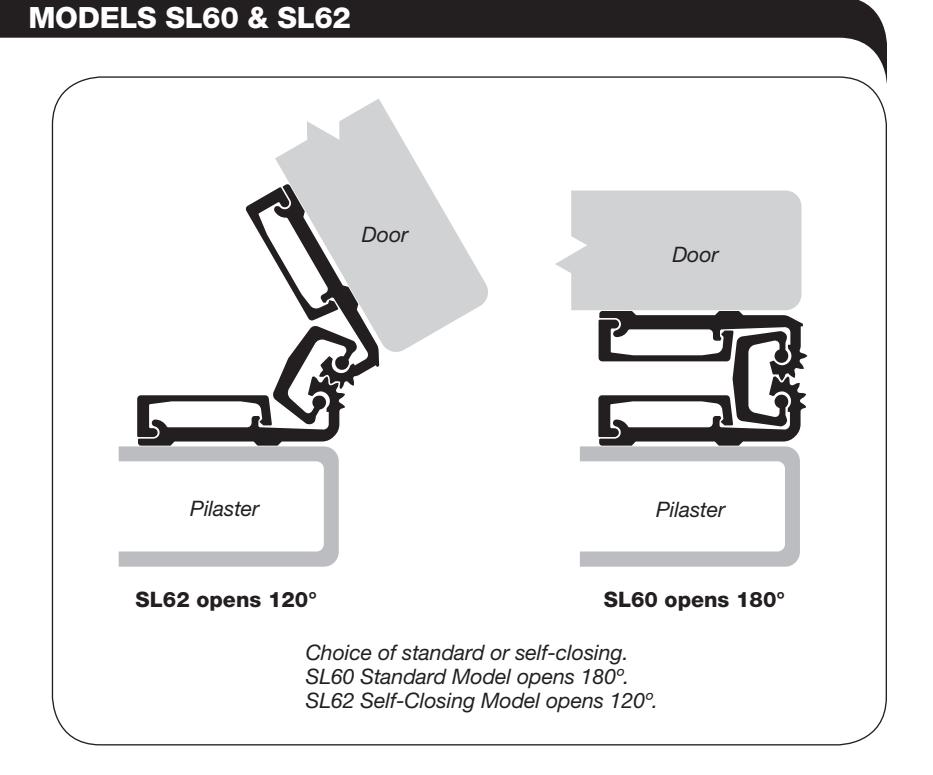
IMPORTANT: SL60 and SL62 hinges are non-handed and templated, and remain non-handed after cutting.
IMPORTANT: When installing Model SL62 Self-Closing Hinge, you must level or plumb the pilaster within + or - 1/8" to ensure complete door closure.
Important Warranty Information:
The following actions will void any warranty, expressed or implied:
- Failure to install the hinge according to manufacturer's specifications and requirements. (For more information, visit selecthingerequirements.com.)
- Use of fasteners other than those supplied with the hinge.
- Unauthorized field modifications, including alteration or removal of the factory-applied lubricant, altering the original finish or painting the hinge.
Tools Needed
- Metal-cutting saw
- Tape measure
- Dril
- 1/4" drill bit
- Transfer punch or pencil
- 5/64" Allen wrench
- Hammer
- Shims
Parts Supplied
- 10-24 x 5/8" one-way barrel nuts (sexnuts)
- Set screws
Optional Parts
- 10-24 one-way shoulder screws available for 3/4", 1" and 1-1/4" thick partitions
- Protective gloves are recommended
How to Cut the Hinge to Fit
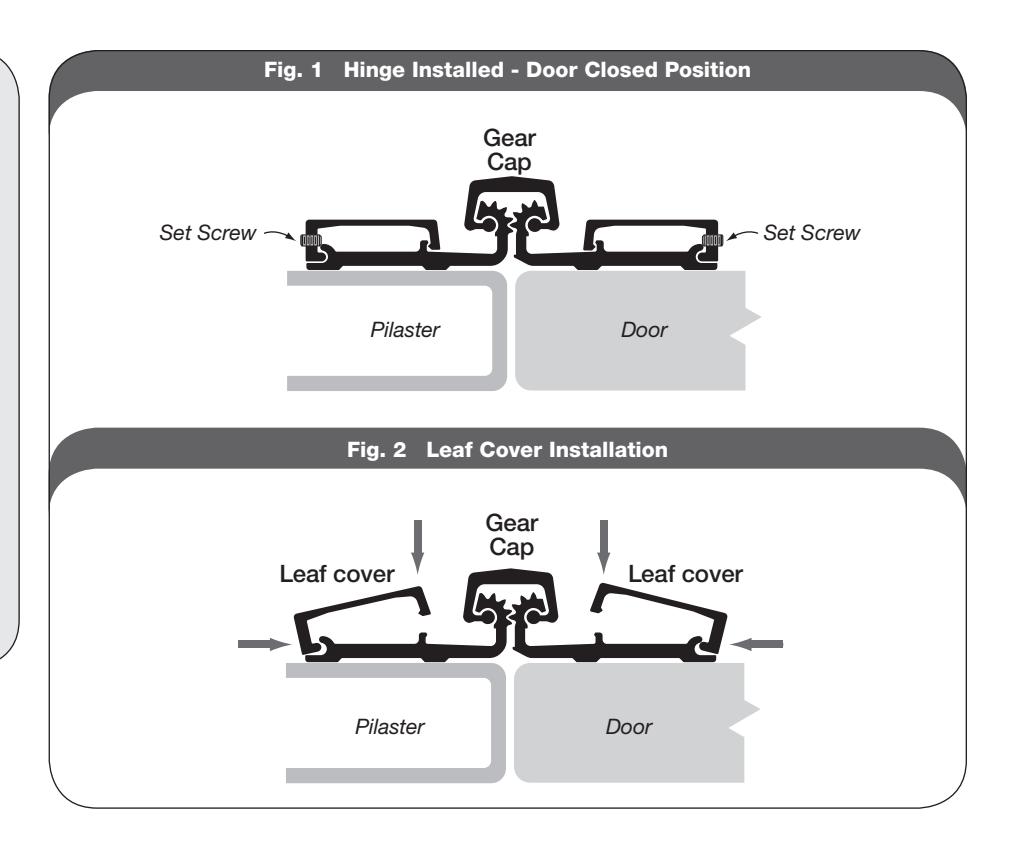
- Keep hinge in "door closed" position (Fig. 1).
- B. Using a metal-cutting saw, begin the cut through the hinge cap first.
NOTE: DO NOT cut through a set screw bearing.
- C. Loosen set screws from sides of leaf covers with 5/64" Allen wrench (Fig. 1).
- D. Remove leaf covers by sliding them off uncut end of hinge.
- E. Reinstall any set screw bearing that may have been cut off.
A. Attach Hinge to Pilaster
NOTE: Remove leaf covers if not already removed. See step C above.
- Align hinge with door-side edge of pilaster or alignment line. If replacing pivots, center the hinge between pilaster's pivot cutouts.
- Locate top hole for the barrel nut in the pilaster. Keep hinge centered between pivot cutouts. Using a pencil or transfer punch, mark the hole.
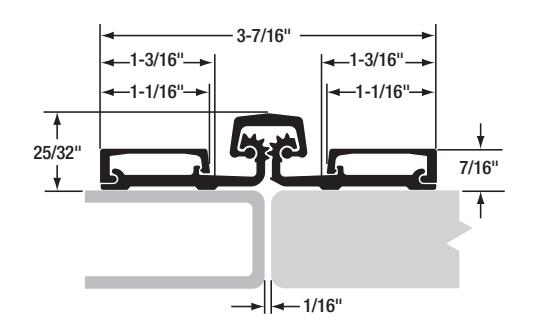
NOTE: Hinge leaf should overlap pilaster by 1-1/2" to 1-5/8".
- 3. Remove hinge. Using 1/4" bit, drill top hole in pilaster.
- 4. Fasten hinge leaf to top of pilaster using a barrel nut and shoulder screw.
IMPORTANT: DO NOT fully tighten the one-way screw.
Square hinge to the pilaster. Locate bottom hole on the pilaster. Mark (or centerpunch) hole.
- 6. Drill the hole using 1/4" bit.
- 7. Fasten hinge leaf to bottom of the pilaster using a barrel nut and shoulder screw.
IMPORTANT: Do NOT fully tighten the oneway screws at this time. Do NOT drill remaining holes at this time.
B. Prepare Door
NOTE: If a door inset is required, use a continuous shim under the door leaf.
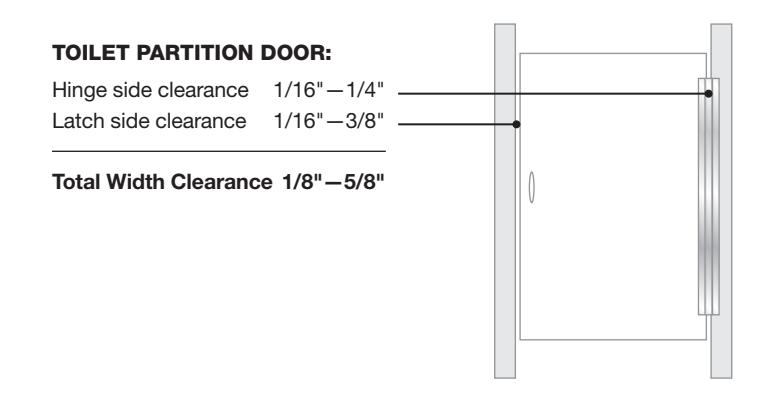
Place door in opening. Adjust for 1/16" to 1/4" clearance between the hinge edge of the door and the pilaster. If replacing pivots, center the hinge between door's pivot cutouts.
NOTE: Hinge leaf should overlap the door by 1-1/2" to 1-5/8" to allow 1/16" to 3/8" clearance on the latch side.
- 9. Locate top hole for the barrel nut in the door. Mark (or centerpunch) top hole.
- 10. Remove door from opening and lay it flat. Use 1/4" bit to drill the hole.
C. Attach Door to Hinge
Fasten the hinge door leaf to the top of the door using a barrel nut and shoulder screw
IMPORTANT: Do NOT fully tighten the one-way screw at this time.
- Square the door to the opening. Then locate the bottom hole for the door hinge leaf. Mark (or centerpunch) the hole.
- 13. Drill the hole using 1/4" drill bit.
- 14. Fasten hinge door leaf to the bottom of the door using a barrel nut and shoulder screw. Door should be centered in the opening and square to the pilaster.
IMPORTANT: Do NOT fully tighten the oneway screws at this time.
- 15. Check that the door and hinge are square and function properly. Use 1/4" bit to drill remaining holes through hinge into the pilaster and door.
- Install remaining barrel nuts and shoulder screws. Check door operation. If the door functions properly, fully tighten all screws.
D. Install Leaf Covers
- 17. Align leaf cover with top end of hinge.
- 18. Starting from the top and working downward, apply pressure to leaf cover to snap it into place (Fig. 2).
NOTE: If you use a hammer to tap cover into place, be sure to protect the surface of the cover from damage.
19. Tighten set screws with 5/64" Allen wrench.
NOTE: The door and pilaster covers can be removed and reinstalled.