Securakey RK LINK 1.3 Instructions
Open the original PDF document
View PDFSECURA KEY RK-LINKTM Ver. 1.3 - INSTRUCTIONS RK-LINKTM Version 1.3x Instructions
Quick Start
Requirements - Windows 95® or Windows NT® 4.0 or later, 16MB RAM, 20-30MB Hard Disk, 486 or better processor, Serial COM Port capable of 19.2K Baud. RKAT Module must be installed at the RK600 and connected to a PC COM port (COM 1 or COM 2).
Installation - Install Disk 1 in the floppy drive. Click on Start, Run and type a:\setup.exe. Follow the installation prompts and insert Disk 2 when prompted. Start the program from Windows Explorer, or create a shortcut on your Windows desktop.
Log In Password - A Log In password is not required. However, if you want to specify a Log In password, click on File on the top menu, then click on RK-LINKTM Password to display the Change Password window. The first time you change a password, leave the current password field blank, and enter and reconfirm the new password in the appropriate fields. Click OK to exit. Note: Password entry is case-sensitive.
Toolbar Buttons - All instructions are based on using the toolbar buttons. You can use the mouse to hold the cursor over a button to learn its name or function.
Set Reader Time and Date - Click on View/Set Reader Time and Date button to view the Reader Time and Date window. Click on Edit, enter time in 24-hour Military format; date in US format, mm/dd/yy, then click on Send. Click on Close to exit.
Set Relay Time - Factory default setting is 1 second. To change, click on View/Modify Reader Configuration button to display the RK600 Configuration window. Click on Edit, enter the Relay Time (1-30 Seconds, or 0 = 0.25 second pulse) then click on Send. Click on Close to exit.
Adding Key Tags to a New System - Click on View/Modify Tags button, click on Insert User, enter data into fields (User Number and Tag Number are required) click on Save (to save data at the PC). Repeat these steps for each tag. When all tags are entered, click on Send (to send Tag User data to the reader database).
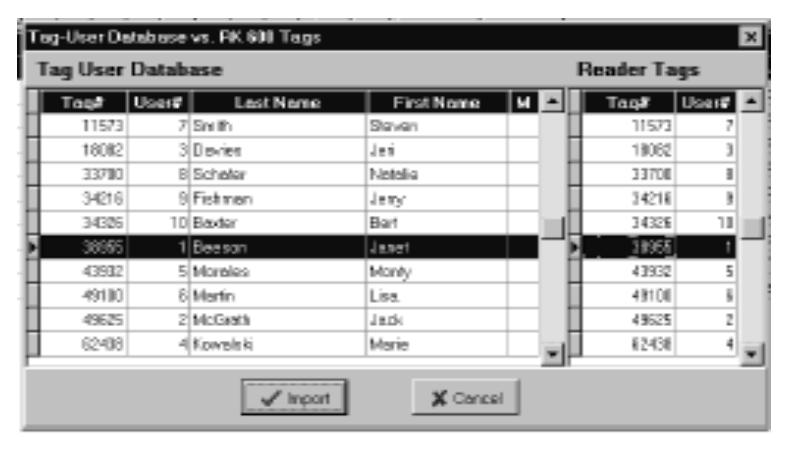
Adding RK-LINKTM to an Existing System - Use this procedure if Key Tags are already programmed into the RK600, using the reader's programming keypad. Click on View/Modify Tags. On the top menu, click on Tags, then select Import Tags. Display shows both PC and reader databases side-by side for comparison (PC database is empty when RK-LINK TM is newly installed). View tag data — if correct, click on Import to copy the Reader Tag User database into the PC Tag User database. For each user: double-click on the Tag User record to display the User Detail screen, click on Edit, add User Names and other information, then click on Save (to save the PC Database).
View Audit Trail Data - Click on View Transactions. To print a complete report, click on Print Transaction Reports button, select report destination, and click on Print. To print report for specific date ranges, first click on Filter, specify report parameters, click OK, then click on Print Transactions, select report destination, then click on Print
Using a Laptop? Disable any battery conservation or "energy monitor" programs before using RK-LINKTM.
Problems with Communications? Click on Set Reader Password and verify that the reader password at the PC matches with the reader password used at the RK600 programming keypad. (Default for both is 12345). Verify that the reader is operational and that the RKAT is properly installed. Check wiring. Click on Utilities then click on Com Port to verify that the correct COM port is selected. Verify that the COM port is operational, and that it is capable of communicating at 19.2KBaud.
What is RK-LINKTM?
RK-LINKTM is a software program written specifically for the Radio Key 600 access control unit. It allows you to program and control the reader from a PC, create a Tag User database and download it to the reader, and upload the last 150 transactions from the reader to print or display "audit trail" reports.
How does RK-LINKTM work with the RK600?
RK-LINKTM communicates with the PC by sending RS-232 serial data from the RKAT Module to the PC's Serial COM Port. RK-LINKTM has two databases: a Tag User database which can be modified and sent to the reader (updating the RK600's local Tag User database), and an Audit Trail or Transaction Database which consists of historical data acquired from the reader's local transaction buffer. RK-LINKTM also stores basic configuration data which can be modified and sent to the reader. Open Door and Reader Mode commands can be sent directly from the PC to the reader.
Tag User Database RK-LINK'sTM Tag User database, allows you to program or delete Key Tags at the PC, and then send the data to the reader. The PC Tag User database also contains additional data fields for the user name, and other employee or tenant information.
The Tag User database stored at the RK600 contains only User Numbers and Tag Numbers. The reader's Tag User database is used to grant or deny access to Key Tag users.
When adding RK-LINKTM to an existing RK600, key tags will already have been programmed into the reader database by using the programming keypad at the reader. You can use RK-LINK'sTM Import Tags option to copy the existing reader database into the PC database. Then, you can add User Names and employee or tenant information to the PC database. Once you begin using RK-LINKTM, it is recommended that you do all of your programming at the PC and send it to the reader. This will ensure that the databases at the PC and reader always agree.
Audit Trail (Transaction History) RK600 stores a time-stamped record of the latest 150 transactions. Each transaction includes the User Number, Tag Number, Time and Date, and what happened. Each time the RK-LINKTM program is started, it automatically acquires transactions from the RK600. RK-LINKTM will continue to acquire data in real time as long as the program is running and reader remains connected. If you exit RK-LINKTM and restart it later, only the transactions that occurred since the last connection to the reader will be uploaded to the PC.
If you close RK-LINKTM, disconnect the reader, or turn off the PC, the reader will continue to store transactions as people use the reader. If more than 150 transactions occur before the reader is reconnected to RK-LINKTM, then the oldest transactions will be lost, and only the latest 150 transactions will be uploaded.
Using RK-LINKTM
RK-LINK'sTM main screen area displays either the Transactions Window or the Tag User Database Window. The top menu allows you to switch between windows, and to access all commands and functions. When working in either window, you can click also the right mouse button for a pop-up menu providing quick access to commands.
Toolbars with picture buttons are provided for ease of use. The Main Toolbar is always displayed. The Transactions Window and the Tag User Database Window each have their own toolbars. To view the name or function of a toolbar button, use your mouse to hold the cursor over the button and the name will display.
Main Toolbar Buttons and Their Functions


View Transactions - Click on this button to display View Transactions. This window displays all transactions uploaded from the RK600. When RK-LINKTM is started, this window displays automatically. If you leave this screen displayed, you can view transactions as they occur. You can use the Navigation Buttons, scroll bar or arrow keys to move through the transaction database.

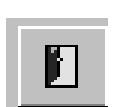
View/Modify Tags - Click on this button to display the Key Tag User database in a list format. You can use the Navigation Buttons, scroll bar or arrow keys to move through the list.

View/Modify Reader Configuration - Click on this button to view the RK600 Configuration menu. Use the tabs to select Configuration (set reader parameters) or Transaction Control (view/clear reader transaction buffer). Click on the Exit button to clear this window.

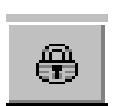
Set Reader Password - Click on this button to view or change the reader password. The reader password is transmitted automatically by RK-LINKTM whenever it communicates with the RK600. The RK600 must verify the password for communications to begin. This is the same password that is used at the reader keypad to manually program the RK600. If this password is changed at the reader, it must also be changed at the PC. The Reader Password must be 5-digit, numeric. This password does not perform the same function as the RK-LINKTM Log On password (although you could assign the same password). Click on the Cancel button to clear this window.

View/Set Reader Time and Date - Click on this button to view or change the reader time and date. Enter time in 24-hour Military format; enter the date in US format, mm/dd/yy.

Self Test - This is used by service technicians to check the RF level.
Open the Door Now - Click on this button to send an Open Door command to the reader. This activates the latch and shunt relay for the programmed time period.

Unlock the Door Now - Click on this button to send an indefinite Unlock command to the reader (same as Mode #3 via the reader keypad). Reader will remain unlocked and LED will blink green indefinitely.
Lock the Door Now - Click on this button to send an indefinite Inactive command to the reader (same as Mode #2 via the reader keypad). Reader will remain unlocked and LED will blink red.

Return Door to Normal - Click on this button to cancel an Unlock or Inactive command, and to return the reader to normal mode (same as Mode #1 via the reader keypad).
Transaction Window Toolbar Buttons

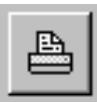
Print Transaction Reports - Click on this button to print or display a transaction report. You can also select a range of pages and print multiple copies. For a report on specific transaction types, a specific range of dates or a specific user, click on the Filter button first.
Navigation Buttons:
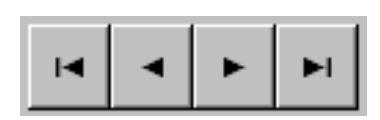
First Transaction - moves cursor to first record in the transaction database Previous Transaction - moves cursor back by one record
Next Transaction - moves cursor ahead by one record
Last Transaction - moves cursor to the last record in the database

Erase - Click on this button to delete all transactions from the PC transaction database.
Filter - Click on this button to specify which transactions will be displayed. You must use this button in order to print a report on specific data. The Transaction Filter Control window allows you to select the types of transactions, one individual user, a date range and a time range for transactions to be displayed. Click on the Defaults button to undo filtering and re-display all transactions.

Change Colors - Click on this button to change the color coding of Void (Red) and Valid (Green) transactions in the View Transactions display. Click on the Defaults button to restore the RK-LINKTM default colors.

Zoom In/Out - Click on this button to display an individual transaction record (the one at the current cursor location). Click this button again to return to the List View display.
Tag User Database Toolbar Buttons

Print Tag Reports - Click on this button to print or display a Tag User report. You can also select a range of pages and print multiple copies.
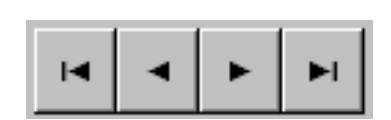
Navigation Buttons
First User moves cursor to first record in the Tag User database Previous User moves cursor back by one record Next User moves cursor ahead by one record Last User moves cursor to the last record in the database

Insert User - Click on this button to add a new user to the Tag User database. The software will automatically select the next available user number. Type in the Tag Number and the user's name and other pertinent data.

Delete User - First, place the cursor on the record of a user that you wish to delete, then click on this button to delete that user from the Tag User database. Click on the Send button to send this deletion to the reader If you change your mind, you can right-click the mouse anywhere in the database and select Undo Delete. Be sure to click on Send again if the deletion has already been sent.
Edit User - First, place the cursor on the record that you wish to change, then click on the Edit User button. The User Detail record is displayed. Make the desired changes, then click the Save button to confirm or the Cancel button to abort the changes. If you have changed the User Number, Tag Number, or have Voided the user, you must also click on Send to transmit the changes to the reader.

Save Changes - Click on this button to save Tag User Database changes to the PC database.
Cancel Changes - If you have not yet Saved changes, click on this button to undo User Tag database changes that you have just made.

Void User -This allows you to deny access to a selected user without removing his/her data from the database. First, place the cursor on the user record to be voided, then click on this button. The User Number is set to 0. Click on Send to transmit the changes to the reader. If you later wish to re-validate a voided user, the next button (next to the User # field) will insert the next available user number for you.

Zoom In - Click on this button to display an individual Tag User record (the one at the current cursor location). If you want to make changes to that record, click on the Edit button.
Send - Click on this button to send any Tag User database changes to the Reader.

Find - This feature allows you to search for a Tag User record. First, you must sort the Tag User database by the data field you will be using for the search, by clicking on the appropriate column heading (Last Name, Tag Number or User Number). Then click on the Find button and type in the name or number you wish to find. The cursor will jump to the first matching record.
Additional Options
These options are found only on the top menu (not on the tool bars).
Import Tags - This function allows you to copy the reader Tag User database into the PC Tag User database. This is useful when adding RK-LINKTM to an existing RK600 installation that has already been programmed via the reader keypad. Click on Tags on the top menu, then select Import Tags. RK-LINKTM will acquire the Tag User database from the reader and will display it together with the PC Tag User database in a split screen window, allowing you to view and compare the two databases. When RK-LINKTM is newly installed, the PC database is empty. To proceed with the import, click on Import.
You may need to import tags from the reader database to the PC database after some Tag User records have been programmed at the PC. If this is the case, it is recommended that you print a current Tag Report before proceeding with the import. Any tags from the reader database that match with tags stored in the PC database will remain unchanged. If the Tag Numbers at the PC and reader are the same, but the User Numbers are different, new PC database records will be created for the Tag Numbers imported from the reader, and the existing Tag User records at the PC will have their User Numbers and Tag ID Numbers set to zero in the database. Following the import, to reconcile your database, simply Click on View Tags, then sort by User Number (click on the User column heading). All the User Numbers with User Number 0 will appear first. Print the Tag User report. Then re-sort the Tag User database by Last Name (click on the Last Name column heading). The records with no name information will appear first. Again, print a Tag User report. Edit the database as required, and then click on Update Reader, so that the PC and Reader databases will agree. Note that RK-LINKTM will not allow multiple records with the same Tag Number or User Number, except for 0.
Update Reader - Click on Tags on the top menu, then select Update Reader. This will send the PC Tag User database to the reader, and it will clear the current reader Tag User database. Use this option to copy the PC database to any reader.
Utilities - This function allows you to set or change the COM Port where the RKAT is connected to the PC. Click on Utilities on the top menu, then click on COM Port and select 1 or 2 as appropriate.
How Do I?
Validate (Add) keytags? Click on View/Modify Tags, Click on Insert User. Fill in the User Name and Tag Number. RK-LINK will automatically select the next available User Number, but you can select a different User Number. Click on Save to save the new record at the PC, then Click on Send to transmit the data to the reader.
Void (delete) a Key Tag? Click on View/Modify Tags, click on the Tag User you want to delete, then click on Delete User. Click OK at the confirmation prompt. Click on Send to transmit the data to the reader.
View Audit Trail (Transaction History)? Click on View Transactions to display Audit Trail data. You can use the Navigation Buttons, scroll bar or Page Up and Page Down keys to move through the transaction history database.
Print Audit Trail (Transaction History)? Click on View Transactions to display Audit Trail data. Then click on the Print button to display the Report Destination window and click on Print.
Set the Time and Date at the Reader? Click on the View/Set Reader Time and Date button to open the Time and Date window. Click on Edit, set Time and Date, then click on Send. Click on the Close button to exit.
Set the Door Open Relay (Latch) Time? Click on View/Modify Reader Configuration to display the RK600 Configuration window. Click on Edit, set the Relay Time, then click on Send. Click on the Close button to exit.
Enter A New Reader ID (Name) for the RK600? Click on View/Modify Reader Configuration to display the RK600 Configuration window. Click on Edit, type in a new Reader ID, then click on Send. Click on the Close button to exit.
View Transactions Stored at the Reader? Click on View/Modify Reader Configuration to display the RK600 configuration window. Click on the Transactions tab, then click on the View All button. Click on the Close button to exit.
Upload Transactions from the Reader to the PC? This is done automatically every time you start the RK-LINKTM program. Subsequently, when you restart the program, RK-LINKTM uploads only the latest transactions, preventing duplicate records in the transaction history database.
Open the Controlled Door / Gate from the PC? Click on the Open the Door Now button to activate the latch relay for the programmed relay time.
Unlock the Controlled Door / Gate Indefinitely from the PC? Click on the Unlock the Door Now button to place the unit in Unlocked Mode, continuously activating the latch relay.
Lock the Controlled Door and Disable the Reader from the PC? Click on the Lock the Door Now button to place the unit in Locked Mode, disabling the reader and deactivating the latch relay.
Return the Reader to Normal Status after Setting to Unlock / Lock Mode? Click on the Return Door to Normal button.
Void a User without Removing Personal Information from the Database? Click on View / Modify Tags, then click on the desired User record. Click on the Void User button (this will set the User Number to 0) click on Save, then click on Send to transmit the changes to the reader. The user's name and personal information will remain in the PC database, but the Tag and User Numbers will be deleted from the reader. When the voided tag is used, the Tag User's name will display in the transaction history.
Delete Transaction History Database from the PC? Click on View Transactions to display the transaction history. Click on the Erase button, then click OK at the confirmation prompt.
Print a History Report for One Tag User? Click on View Transactions, then click on Filter to display the Transaction Filter Control Window, click on Single User, then click on Select. You can scroll through the list of user names or you can type in a name for which to search. Click on the desired name, then click OK to close the search window. Make any other appropriate selections on the Transaction Filter Control Window, then click on OK. The selected records are now displayed. Click on Print Button to display the Report Destination Window. You can preview the report by sending it to the screen, or just click on Print to send the report to the printer.
Print a History Report for a Specific Time Period? Click on View Transactions, then click on Filter to display the Transaction Filter Control Window, then click on View From Dates - Events On and enter the starting date, then click on View Through Dates - Events On and enter the ending date for the report. To include only transactions occurring during a specific range of hours, click on Daily Time - Time Range and specify the beginning and ending hours.
Make any other appropriate selections on the Transaction Filter Control Window, then click on OK. The selected records are now displayed. Click on Print Button to display the Report Destination Window. You can preview the report by sending it to the screen, or just click on Print to send the report to the printer.
Remove Filtering from the Transaction Viewer? Click on Filter to display the Transaction Filter Control Window, click Defaults, then Click OK.
Program Multiple RK600s? Install an RKAT Audit Trail Module permanently in each reader. If all RK600's will be programmed alike, just connect to each reader and do programming and transaction upload in the normal manner. You can program a unique reader name in each reader, so that you can recognize where a transaction occurred when viewing history. You will also want to make all reader passwords alike for convenience.
If each RK600 will be programmed differently (especially if different sets of keytags are used), install multiple copies of RK-LINKTM on your PC. You must install each copy in a different directory, and it is recommended that you edit the shortcut name on your Windows® 95 desktop, so that you can distinguish between copies. You must be certain to access each reader with the corresponding copy of RK-LINKTM, or you may download a database to the wrong reader.
Database backups are highly recommended if you will be using multiple copies of RK-LINKTM.

20447 Nordhoff Street Chatsworth, CA 91311 phone 818-882-0020 fax 818-882-7052
E-mail: mail@securakey.com 4777 Web site: www.securakey.com