Sargent & Greenleaf Mechanical and Safe Deposit Changeable Padlocks 8077 Combo Recovery
Open the original PDF document
View PDFISSUE DATE: June 1, 1992
8077 PADLOCK COMBINATION RECOVERY
A lost combination for an 8077 padlock can be recovered if the following conditions exist:
- The cover is removed from the padlock.
- The shutter control screw is rotated so the change key hole is open and not blocked by the change key hole shutter (see Figure 1).
If either of these two conditions is not met, the lock should be discarded and replaced with a new 8077. Combination recovery techniques which involve drilling holes or removing the inside cover are not acceptable. The 8077 is designed to show evidence of forced entry, so any procedure which leaves marks or holes — even though they may be repaired — is not allowed. Repair parts are not available from S&G for any version of the 8077 padlock.
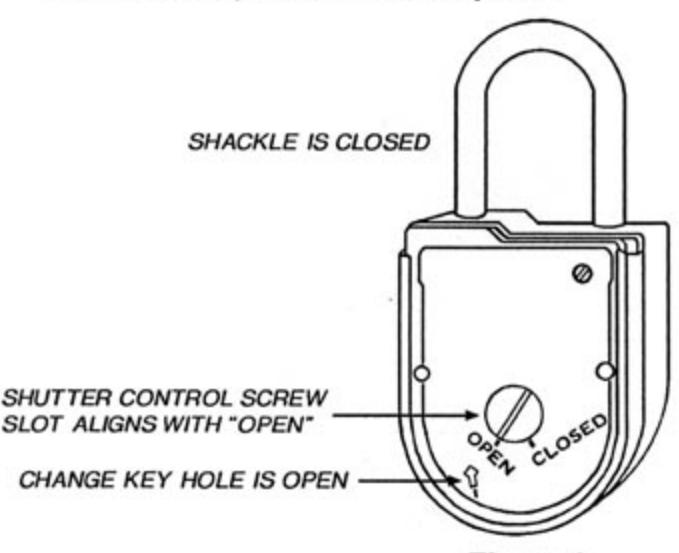
Figure 1
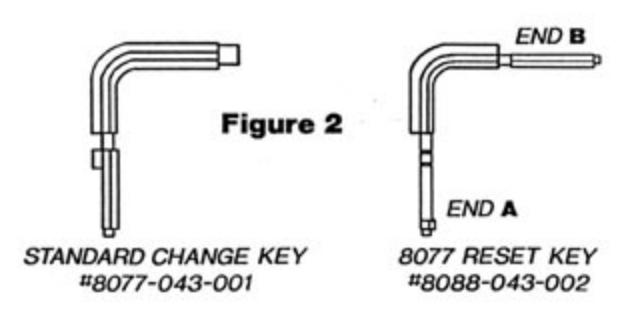
A standard 8077 change key and a special reset key (Figure 2) are required to perform the combination recovery procedure.
PROCEDURE
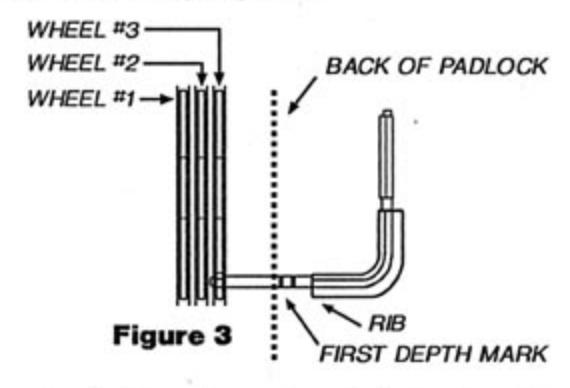
- Step 1 Insert end A of the reset key through the change key hole, and keep the tip of the key in contact with the #3 wheel as you slowly rotate the padlock dial counterclockwise.
- Step 2 When the change key opening in the wheel passes underneath the tip of the reset key, the key will move into the lock until the first depth mark is just barely outside the lock body (Figure 3).
Step 3 - Turn the reset key clockwise ninety degrees. You should feel a slight release of tension in the wheel mechanism. Again rotate the padlock dial counterclockwise.
Note: If the dial will not move more than a number or two, the tip of the reset key is not in the change key opening of the wheel. If this happens, pull the key out of the lock just until you can move the dial counterclockwise, then apply light inward pressure on the key as you continue to rotate the dial counterclockwise. Pick up the procedure at Step 2.
- Step 4 When the change key opening in the #2 wheel passes underneath the tip of the change key, the key will move into the lock until the second depth mark is just barely outside the lock body.
- Step 5 Turn the reset key clockwise ninety degrees. You should feel a slight release of tension in the wheel mechanism. Again rotate the padlock dial counterclockwise.
Note: If the dial will not move more than a number or two, the tip of the reset key is not in the change key opening of the 2 wheel. If this happens, pull the key out of the lock just far enough to allow you to rotate the dial counterclockwise. Pick up the procedure at Step 4.
(continued on the reverse side)
Sargent & Greenleaf
- Step 6 When the change key opening in the #1 wheel passes underneath the tip of the change key, the key will move into the lock until the change key rib is just barely outside the lock body.
- Step 7 Turn the reset key clockwise ninety degrees. You should feel a slight release of tension in the wheel mechanism. Again rotate the padlock dial counterclockwise.
Note: If the dial will not move more than a number or two, the tip of the reset key is not in the change key opening of the 1 wheel. If this happens, pull the key out of the lock just far enough to allow you to rotate the dial counterclockwise. Pick up the procedure at Step 6.
- Step 8 Carefully remove the reset key from the padlock. It may be necessary to wiggle the key slightly to withdraw it. Avoid moving the dial during this step.
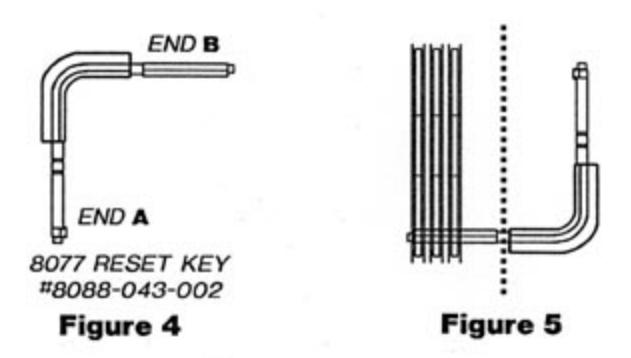
- Step 9 Insert end B of the reset key (Figure 4) through the padlock's change key hole until the rib of the key is just outside the padlock (Figure 5). It may be necessary to wiggle the key slightly to insert it fully into the lock.
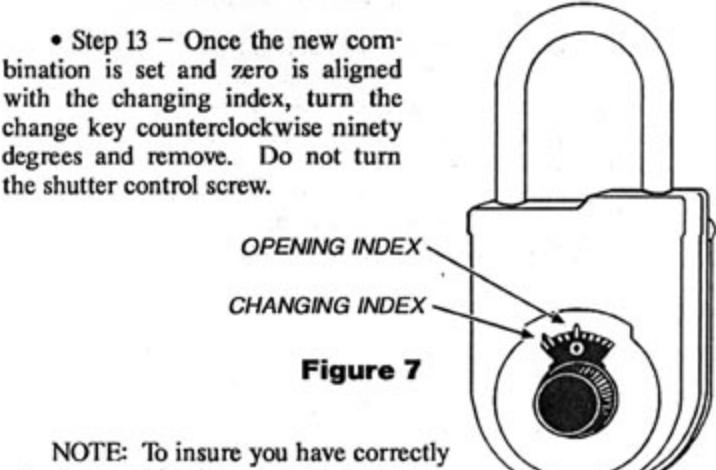
- Step 10 With the reset key in the padlock, turn the dial left (counterclockwise) until "25" aligns with the changing index (Figure 7) the fourth time.
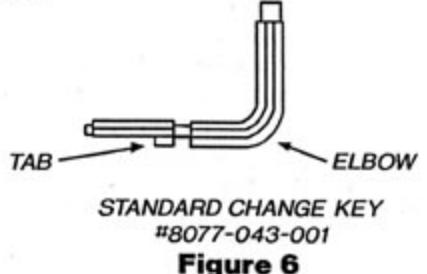
- Step 11 Turn the change key ninety degrees counterclockwise, and pull it straight out of the padlock. Do not turn the key as it is being withdrawn, and make sure the dial does not move off "25." As soon as the reset key is withdrawn, insert the standard change key (tip first) into the padlock's change key hole. The standard change key is properly seated when the tab on the key is fully inside the lock (Figure 6). Turn the key clockwise one-quarter turn.
- Step 12 Set the new combination as follows:
- A. Turn the dial left until the first number of the new combination aligns with the changing index the fourth time.
- B. Turn the dial right until the second number of the new combination aligns with the changing in dex the third time.
- C. Turn the dial left until the third number of the new combination aligns with the changing index the second time.
- D. Turn the dial clockwise until zero aligns with the changing index the first time.
NOTE: To insure you have correctly set the combination, you should once again completely redial the new combination as directed in Step 12. Re-insert
the change key fully into the lock, but do not turn. If the key will fully insert, it simply means you have set the combination correctly.
- Step 14 Remove the change key and again dial the new combination (including the final turn right to zero) to the changing index. Using the change key elbow, turn the shutter control screw to the closed position.
- Step 15 If the shutter control screw will not return to the closed position, the combination has been incorrectly dialed. Redial the combination to the changing index and try again.
- Step 16 Dial the new combination to the opening index following the steps under OPENING PROCEDURE in the standard 8077 PADLOCK OPERATING INSTRUCTIONS (document 630-159), and pull on the shackle sharply to open the lock.
-
Step 17 Turn the cover locking screw clockwise until it comes to a complete stop.
- Step 18 Slide the rear cover into place.
- Step 19 Turn the cover locking screw counterclockwise as far as possible. Close the shackle.
- Step 20 After any combination number change, it is advisable to operate the lock at least three times before putting it into use.