STB Microtechniques Finger Lock Managers Instructions
Open the original PDF document
View PDFFingerlock
Managers' instructions

FL3500 Managers' instructions
| FL-MAMe-2602-JB | |
|---|---|
| Crée le 27.05.02 | Par: JMB |
| Contrôlé le: | Par |
| Modifié le | Par: |
| Content | 1 | |
|---|---|---|
| 1. | Introduction | 2 |
| 2. | Stand-alone mode | 2 |
| 3. | PC mode | 3 |
|
3.1.
Principle |
3 | |
|
3.2.
Procedure |
3 | |
|
3.3.
Manager menu |
4 | |
|
3.3.1.
[Time and stand-alone mode] |
4 | |
|
3.3.2.
[Timelock and Time Delay management] |
4 | |
|
3.3.3.
[Holidays] |
5 | |
|
3.3.4.
[Audit trail] |
6 | |
|
3.3.5.
[Managers administration] |
7 | |
|
3.3.6.
[Users administration] |
10 | |
|
3.3.7.
[Saving parameters] |
11 | |
| Appendix: LED Status | 12 |
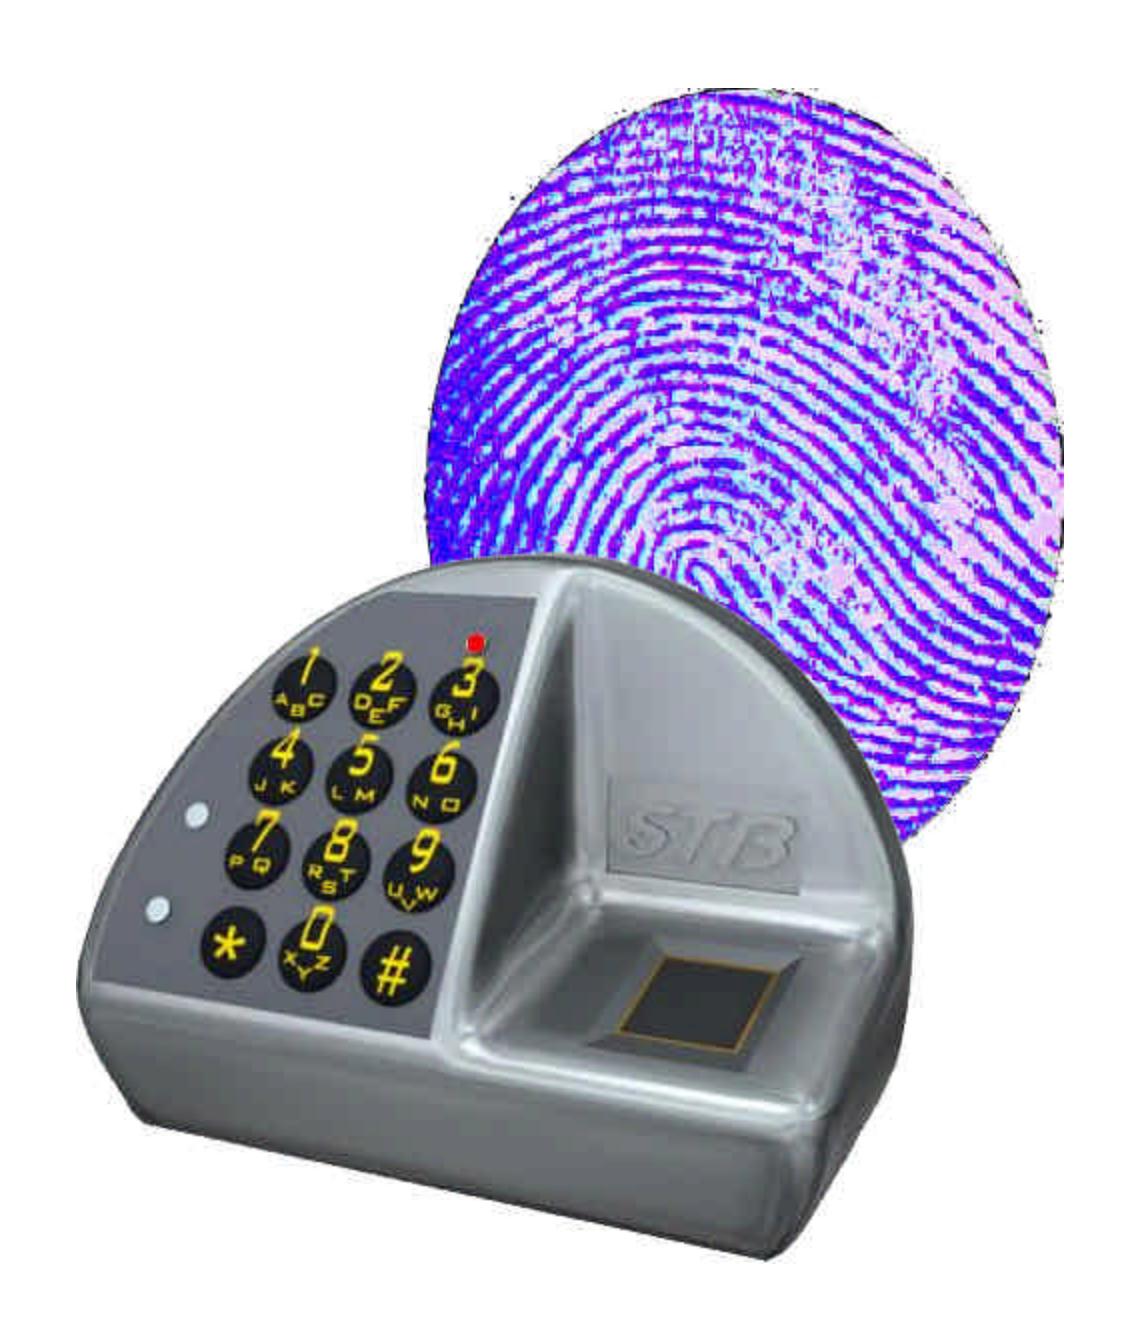
1. Introduction
Management of users can be performed easily and rapidly in stand-alone mode, without using a PC, or in a more sophisticated way with the assistance of the FL3500 PC software in connected mode.
2. Stand-alone mode
Provided that this mode is allowed and that the manager is enrolled accordingly (see § 3.3.5), the manager can enroll and/or delete users without using a PC or the FL3500 software.
Proceed as follows:
VERIFICATION
- ♦ Enter the manager's combination (FL3520) or
- ♦ Place the manager's key onto the contacts in the middle of the lock front (FL3530) or
- ♦ Press the ON button and present the manager card, about 5 cm from the lock front (FL3540)
The LED flashes in green
♦ Place the manager's finger on the sensor (enroll or delete finger, depending on what you want to do)
The LED flashes in orange
- ♦ Enter the new user's combination (FL3520) or
- ♦ Place the new user's key onto the contacts in the middle of the lock front (FL3530) or
- ♦ Press the ON button and present the new user's card, about 5 cm from the lock front (FL3540)
The LED flashes in green
♦ Place the new user's finger on the sensor The LED changes to fixed green
The user is enrolled
The procedure is identical for deleting a user.
IDENTIFICATION
- ♦ Press the ON button
- ♦ Place the manager's finger on the sensor (enroll or delete finger, depending on what you want to do)
The LED flashes in orange
♦ Press the ON button
The LED flashes in green
♦ Place the new user's finger on the sensor
The LED changes to fixed green
The user is enrolled
Important: Always place the finger in a horizontal position, centered on the sensor.
The procedure is identical for deleting a user.
Assigning special prerogatives is not possible in stand-alone mode. It is therefore advisable to add the enrolment parameters (name, shift…) as soon as possible using a PC and the FL3500 software.
3. PC mode
3.1. Principle
Regular use parameters can be configured through the FL3500 software. This software can be accessed when the door is open and the lock is connected to a PC by a special serial cable supplied by the manufacturer. The software can be used for ten minutes following the manger's positive recognition.
Note: No data is stored on the PC. As soon as the PC is connected, the lock sends all its parameters. It is therefore not necessary to use the same PC each time.
3.2. Procedure
- 1. Connect the lock to the PC through the special RJ45/DB9 cable.
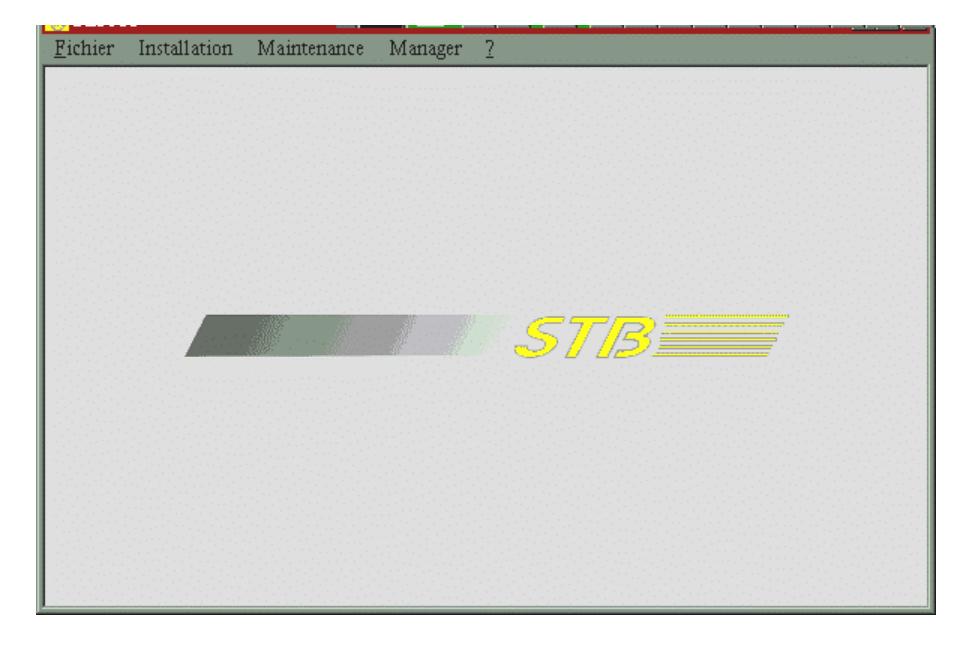
- 2. Start the FL3500 software by clicking on the icon.

- 3. Confirm the serial port used by the PC (COM1, COM2…)
- 4. Identify yourself as a manager.
- 5. Check and confirm the date and time in order to make sure the audit data will be accurate.
You have now reached the software's main screen.
You can only access the [File] menu to quit and the [Manager] menu.
The [Installation] menu and the [Maintenance] menu require an installer code.
3.3. Manager Menu
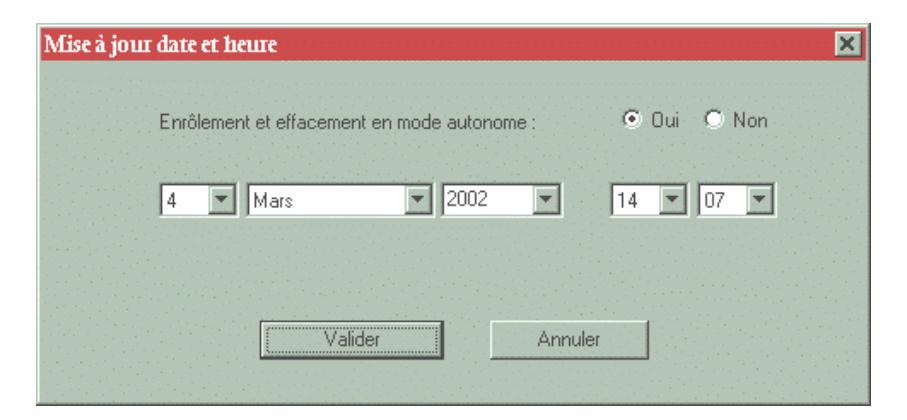
3.3.1. [Time and stand-alone mode]
- Verification/adjustment of date and time
- Enabling /Disabling of users enrollment and removal in stand-alone mode (see §2 above)
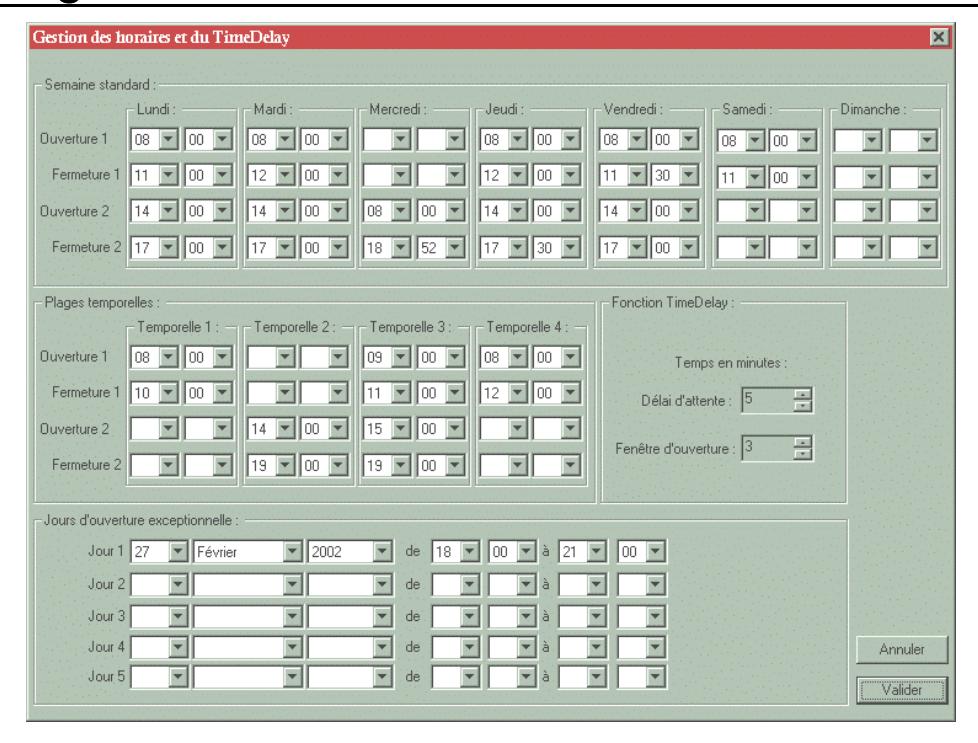
3.3.2. [Timelock and Time Delay management]
- Standard weekly program and shift programs
- Time Delay parameters
Note: These features are only available when the installer has enabled them. Similarly, the minimum delay period is set at the installation.
Standard week : All users are ruled by this general opening and locking weekly program, when the Timelock feature is enabled.
Shifts schedule : A program intended for part-time shifts or for those whose lock access has to be limited.
Note: These shift schedules are dependent on the standard week program. Any opening or closing scheduled out of the weekly program will automatically be limited to the weekly program. Eg. If shift number 3 is between 14h00 and 18h00, when the weekly program closes today at 17h30, the Timelock will be active from 17h30.
Exceptions : It is possible to program 5 exceptions to the standard weekly program. Each exceptional opening indicates the date, the starting time and the end time. These openings can correspond to normally closed days or to an extension of the standard program. Each elapsed exceptional opening can be replaced by a forthcoming one; the chronological order is not required.
Time Delay : The delay period can be set from X to 99 minutes. X being the minimum value set by the installer.
The opening window can be set from 1 to 9 minutes.
3.3.3. [Holidays]
- - Holidays programming
- Vacation
Note: These functions are available provided that the "Timelock" feature has been activated by the installer.
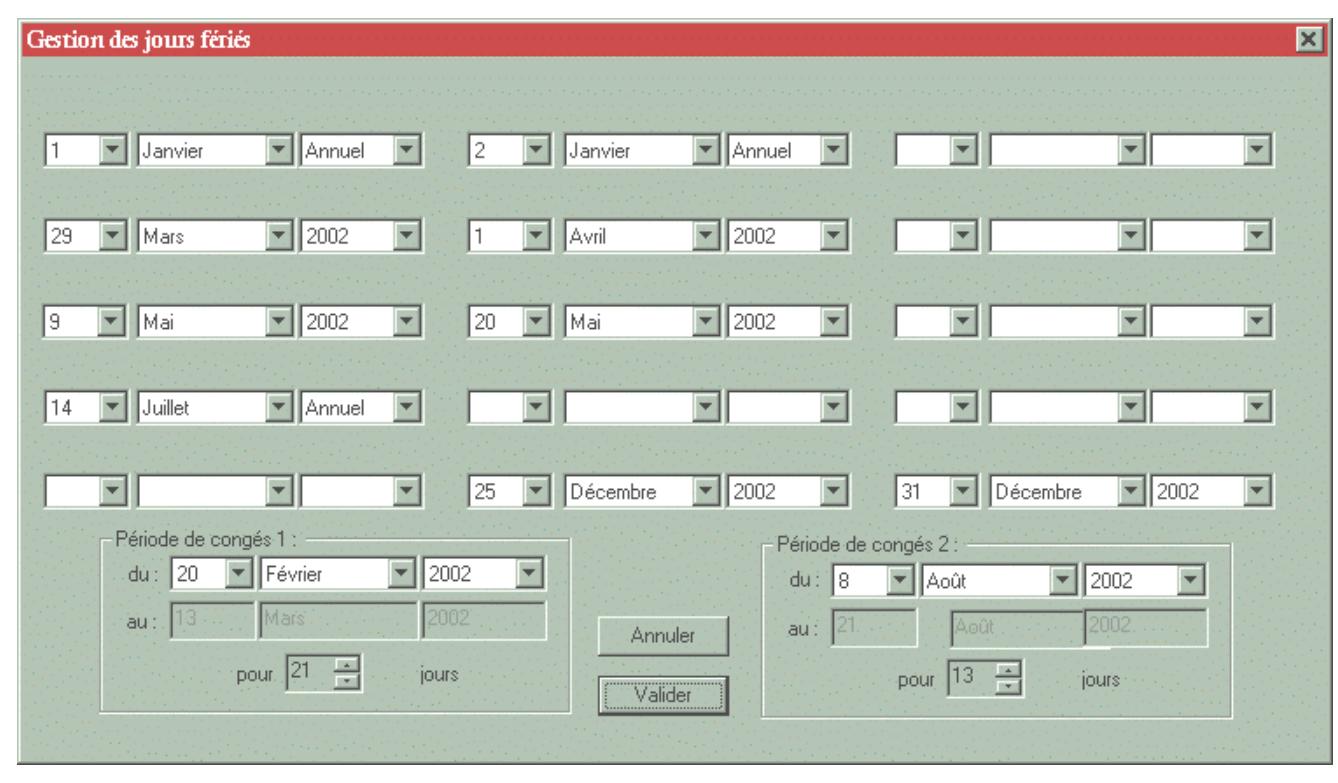
Holidays : 15 holidays can be programmed. Each date is defined by the day, the month and the year. The option "Annual" can be chosen for holidays with a fixed date, such as Christmas or the New Year.
Holiday period (vacation) : 2 periods can be scheduled. For each one, the first day and the duration have to be set. The computer displays the last day of the period for checking purpose. Each elapsed period can be immediately replaced by a forthcoming one.
3.3.4. [Audit trail]
- - Display of the last 300 events
- Storage of the data onto a PC
Audit trail: The system keeps track of the last 100 (300) events. As soon as the
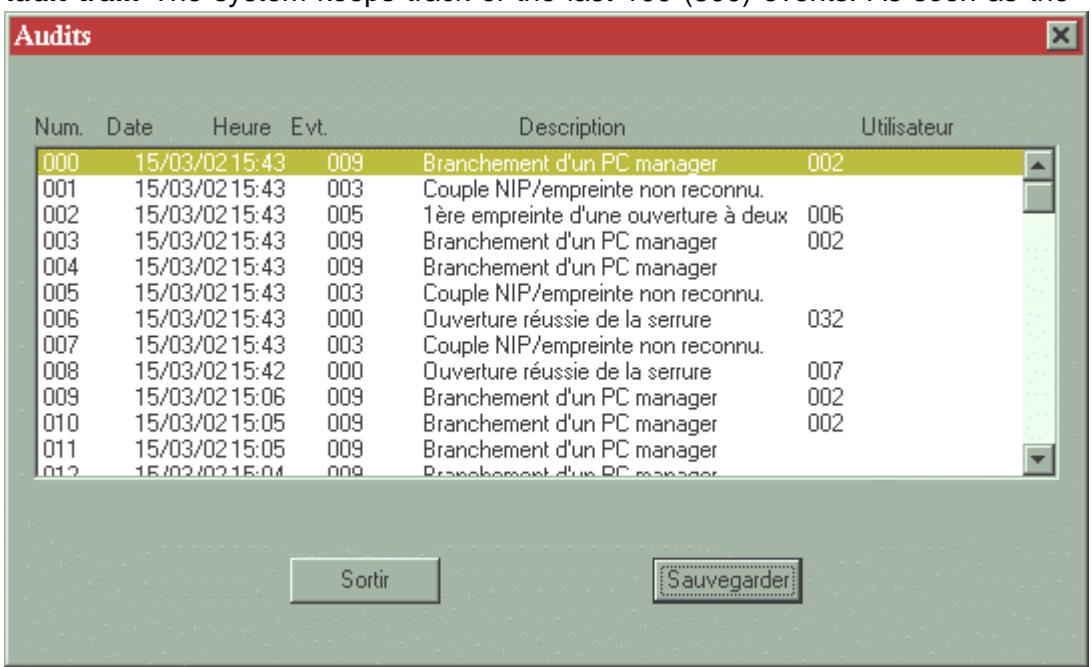
maximum number of events is reached, the oldest are replaced by the newest ones.
Each event is described by :
The event serial number: 000 is the latest event
The date: dd/mm/yy The time: hh:mm The event type number: see below The event description: see below
The user number: according to user/manager list
List of recognized events
- a) Successful lock opening
- b) Opening attempt out of the standard program
- c) Opening attempt out of the shift schedule
- d) Pair PIN / Fingerprint not recognized
- e) Recognized Fingerprint starting the Time Delay
- f) 1 st fingerprint of a dual opening
- g) Remote fingerprint activation
- h) Stand-alone user enrollment
- i) Stand-alone user removal
- j) Manager PC plugging
- k) Transmission of status and prerogative
- l) Access to the maintenance menu
The data can be saved on the PC.
3.3.5. [Managers administration]
- - Consultation of the manager list
- - Creation of a new manager
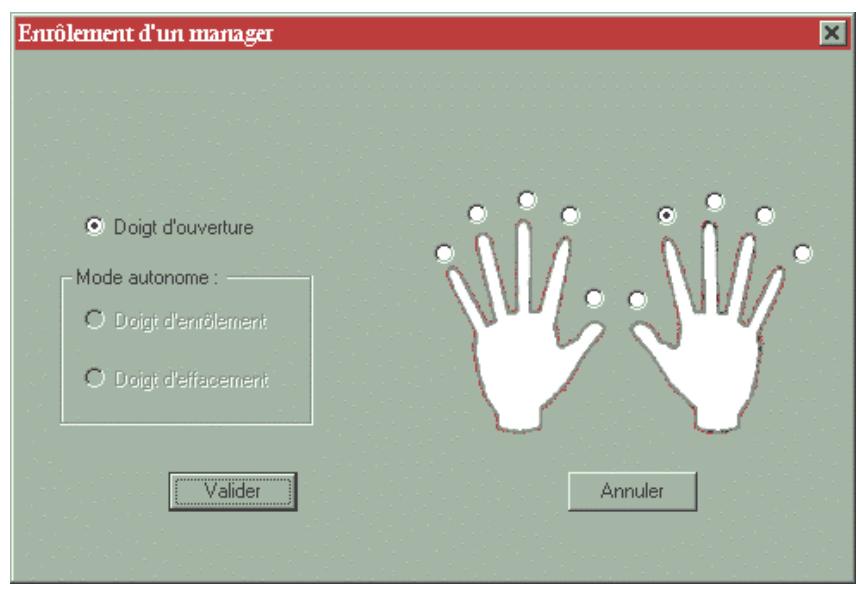
- - Administration of the fingers in stand-alone mode
- - Creation of a second opening finger
- - Removal of a manager
- Prerogative assignment
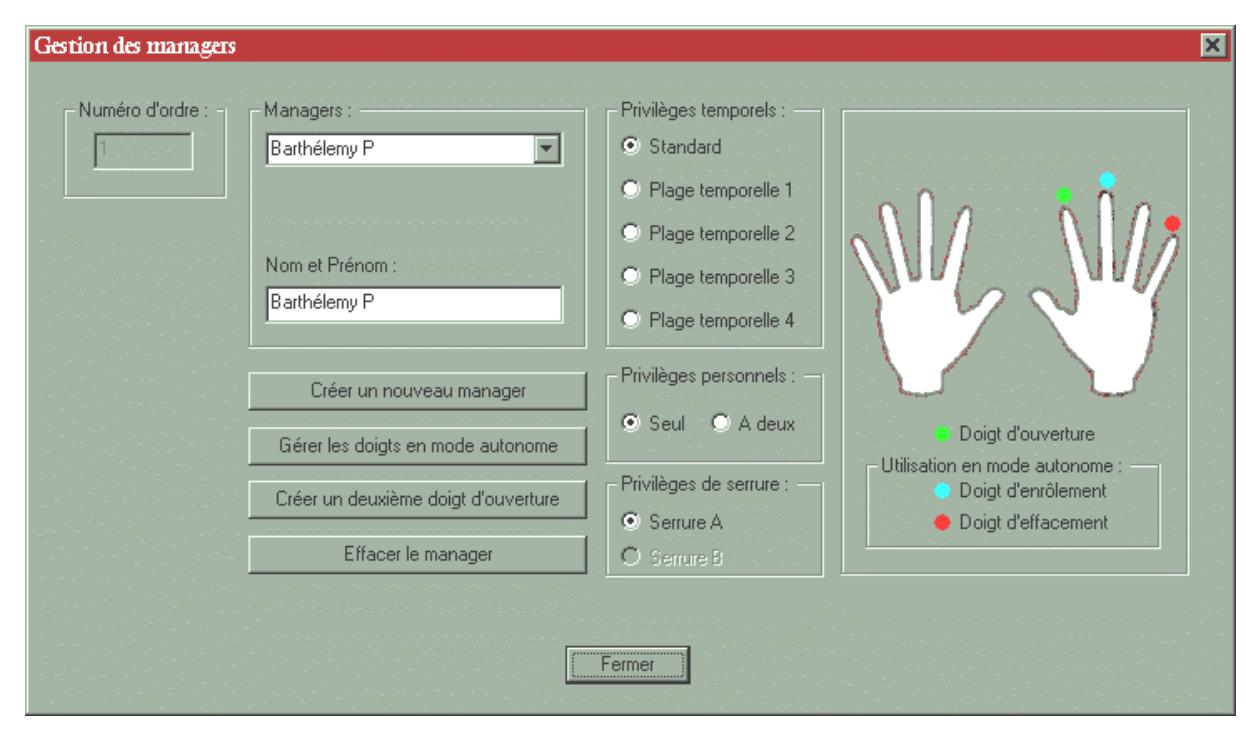
Consultation of the Managers list: To display managers' parameters, time, personal and lock prerogatives as well as stored fingers, select a name in the listbox. In the top-left corner of the window, his serial number is displayed; it helps to identify the manager in the audit trail.
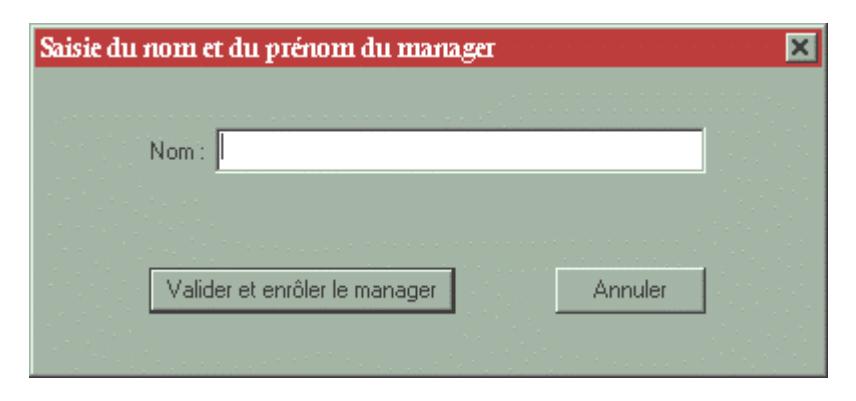
Creation of a new manager: This feature allows the enrolling of a new manager.
1. FL3510 Identification
- x Type manager's name and first name, then accept
- x As the LED flashes in orange, press ON
- x As the LED flashes in green, place finger on the sensor
- x When the LED stops flashing, remove finger A message confirms that the new manager has been successfully enrolled.
2. FL3520 Verification with keypad
- x Type manager's name and first name, then accept
- x As the LED flashes in orange, enter the new combination on the keypad
- x As the LED flashes in green, place finger on the sensor
- x When the LED stops flashing, remove finger A message confirms that the new manager has been successfully enrolled.
3. FL3530 Verification with Dallas key
- x Type manager's name and first name, then accept
- x As the LED flashes in orange, press the Dallas key on the three contact pads located in the center of the lock front
- x As the LED flashes in green, remove the key and place finger on the sensor
- x When the LED stops flashing, remove finger A message confirms that the new manager has been successfully enrolled.
4. FL3530 Verification with HID contactless card
- x Type manager's name and first name, then accept
- x As the LED flashes in orange, press ON and bring your HID card near to the lock front (about 5 cm away).
- x As the LED flashes in green, place finger on the sensor
- x When the LED stops flashing, remove finger A message confirms that the new manager has been successfully enrolled.
Important: Always place the finger in a horizontal position, centered on the sensor.
The first enrolled finger is an opening finger, indicated by a green dot.
Administration of the stand-alone mode fingers: It is possible to enroll fingers which allow the enrolling and removing of users in stand-alone mode. (p.1 §2). These fingers will be active provided that stand-alone mode is enabled (Menu Time and stand-alone mode). These fingers will be indicated by a blue and red dot, respectively. These fingers do not open the lock!
Enrollment of a second opening finger: It is advisable to enroll two opening fingers per manager, in order to be able to operate the lock, should the first finger be cut or injured.
Removal of a manager: Select the manager to be removed from the list-box and confirm.
Prerogative assignment: Each manager can have individual access rights. These rights are classified into three groups:
- − Time prerogatives are related to the Timelock features (Menu Timelock and Time Delay management). The standard option means that the manager will be ruled by the weekly program. Otherwise, he can be restricted to one of the four shift schedules.
- − Personal prerogatives allow the manager to either open by himself, or to require a dual opening (2 managers).
- − Lock prerogatives are only effective when two locks are linked to the system. In this case, the manager will have the option of operating either lock A or lock B.
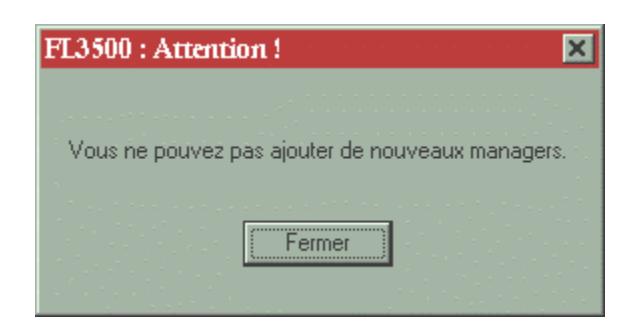
The Fingerlock can accept up to 5 managers, each with a maximum of 4 fingers. The maximum manager number can be set at the time of installation, if requested. As this maximum number is reached, the system will refuse the enrollment of any additional manager.
3.3.6. [Users administration]
- - Consultation of the User list
- - Creation of a new User
- - Removal of a User
- Prerogative assignment
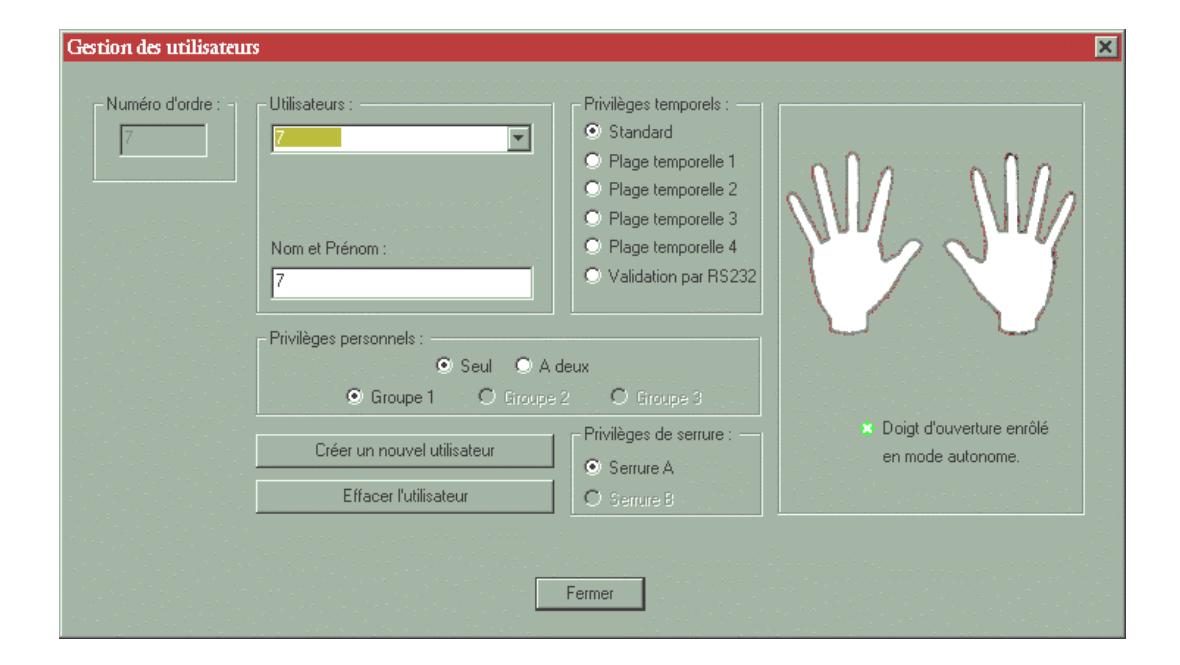
Consultation of the users list: To display users parameters, time, personal and lock prerogatives as well as stored fingers, select a name in the list-box. In the topleft corner of the window, his serial number is displayed; this helps to identify the user in the audit trail.
Creation of a new user: This feature allows the enrolling of a new user. The procedure is identical to that used to enroll a new manager. (See § 3.3.5.)

Important: Always place the finger in a horizontal position, centered on the sensor.
Removal of a user: Select the user to be removed from the list-box and confirm.
Prerogative assignment: Each manager can have individual access rights. These rights are classified into three groups:
- − Time prerogatives are related to the Timelock features (Menu Timelock and Time Delay management). The standard option means that the manager will be ruled by the weekly program. Otherwise, he can be restricted to one of the four shift schedules. If the lock is connected to a remote computer, it is possible to assign the user the special status "Activation through RS232". In this case, the user can only access the system after activating his fingerprint from the remote computer for a limited period of time.
-
− Personal prerogatives allow the manager to either open by himself, or to require a dual opening (2 users). Each user has to be allotted a group - 1, 2 or 3.
- Members of group 1 are allowed to open with any other user. Members of group 2 are allowed to open with any user of group 1 or 3. Members of group 3 are allowed to open with any user of group 1 or 2.
- − Lock prerogatives are only effective when two locks are linked to the system. In this case, the user will have the option of operating either lock A or lock B.
3.3.7. [Saving parameters]
- Storage of all data onto a disk
Saving parameters: The system can save all parameters onto a PC hard disk or a floppy disk. This list includes:
- a) All installation parameters (configuration, power supply, lock number…)
- b) Managers list with prerogatives
- c) Users list with prerogatives
- d) Holidays and vacations
- e) Standard weekly program
- f) Shift schedules
- g) Timelock exceptions
- h) Time Delay parameters
Appendix 1: LED Status
| Status / Event | Green | Orange | Red | Note |
|---|---|---|---|---|
| Lock asleep | ||||
| Waiting for a TAG / PIN | ||||
| Waiting for a finger | ||||
| Wrong TAG or PIN | ||||
| Wrong fingerprint | ||||
| Waiting for new TAG or PIN | Blinking | |||
| Waiting for new finger | Blinking | |||
| Waiting for TAG or PIN to be deleted | Alternately | |||
| Waiting for finger to be deleted | Alternately | |||
| Lock open | Fast blinking during opening | |||
| Low battery | Fast blinking during opening | |||
| System default | Fast blinking during opening | |||
|
Opening attempt during Timelock
period |
G: 0.5s O: 0.5s R: 1s | |||
|
Opening attempt in dual mode with
non-authorized user |
G: 0.5s O: 0.5s R: 1s | |||
| Time delay | Alternately, every 10 seconds | |||
| Opening window | 2 blinks every 10 seconds | |||
| Penalty period | Alternately, every 10 seconds | |||
| Desynchronised clock | Blinking during opening |