SL402 Installation Instructions English
Open the original PDF document
View PDFINSTALLATION INSTRUCTIONS Toilet Partition Pin and Barrel Continuous Hinge SL402

PRODUCT MUST BE INSTALLED ACCORDING TO ALL APPLICABLE BUILDING AND LIFE SAFETY CODES
All holes in door and frame must be drilled correctly and fasteners properly installed.
Important Warranty Information:
The following actions will void any warranty, expressed or implied:
- Failure to install the hinge according to the manufacturer's specifications and requirements. (for more information, visit selecthingerequirements.com)
- Use of fasteners other than those supplied with the hinge.
- Unauthorized field modifications, including alteration of the original finish or painting the hinge.
Do Not install Snap-On Cover until installation is 100% complete, and all aspects of the assembly are correctly fastened and properly fitted. The cover is impossible to remove without damage and replacement may be necessary.
Perform each step of the following instructions:
1. Door Preparation and Mounting
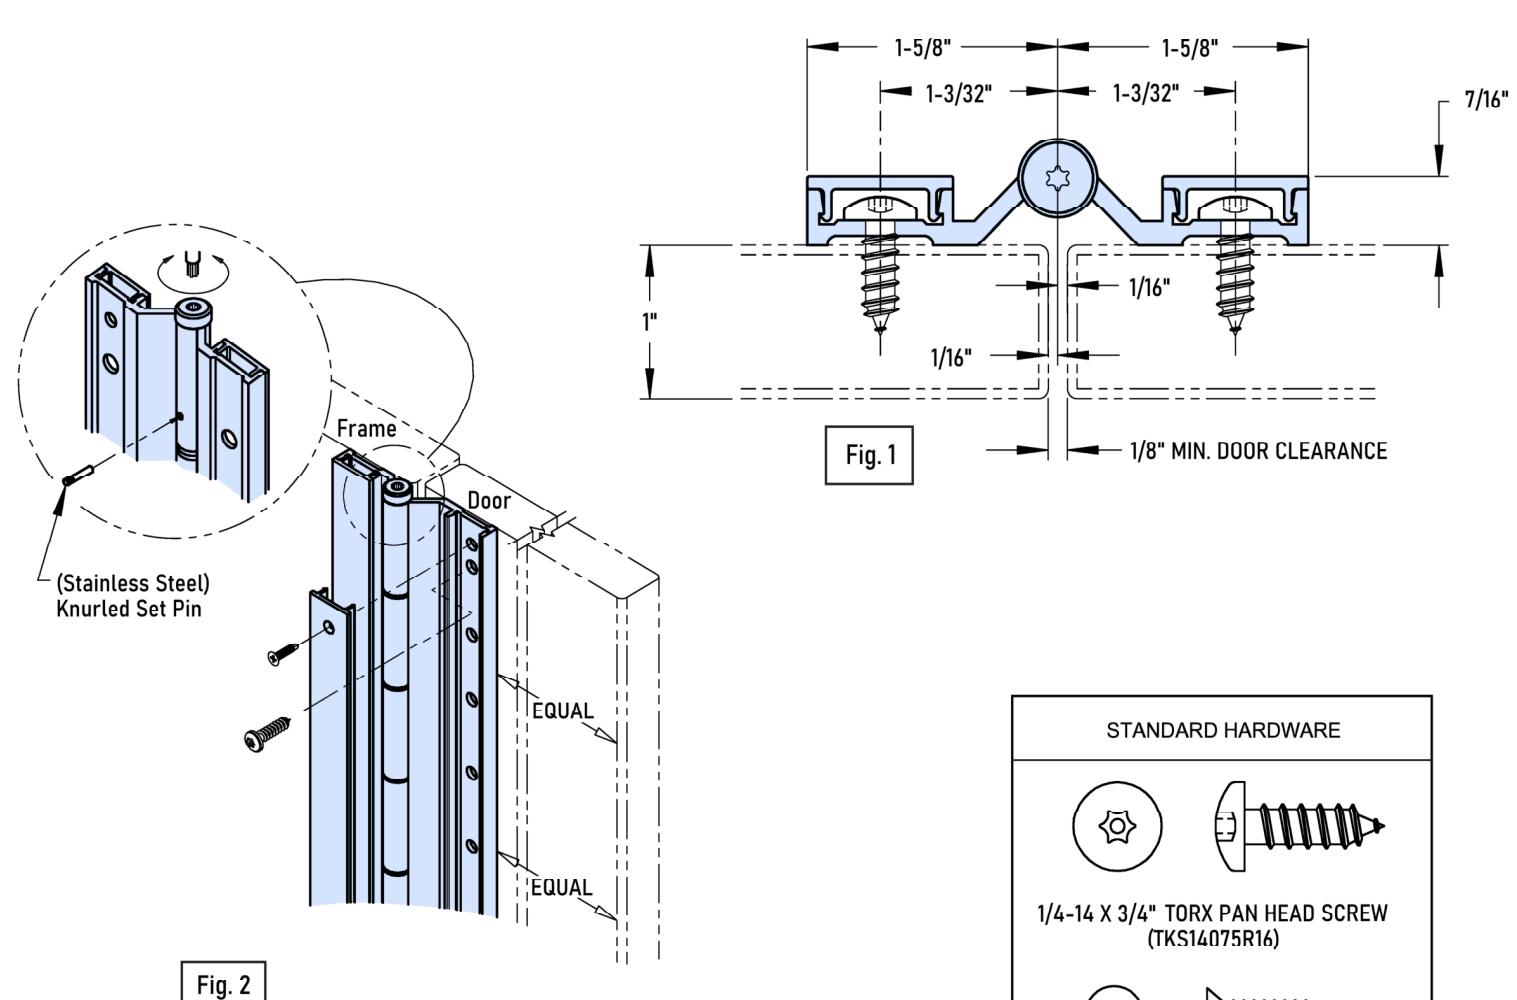
- A. Place the hinge on partition door as shown (Fig. 1). Be sure the hinge is properly aligned with the top of the door. Measure from the edge of the door to hinge at both the top and bottom to ensure that the hinge is located squarely on the door (Fig. 2).
- B. Mark the top and bottom holes on the door with a center punch. The use of a center punch can help center the hole so that the fasteners will enter straight. Drill the hole using a #14 (0.182") drill bit.
- C. Fasten the hinge to the door with 1/4" 14 x 3/4" Torx Pan Head Screws.
- D. Install the three cover clips in each leaf by passing a screw through the clip and hinge leaf and into the door (Fig. 2). We recommend that the clips be positioned at the top, center and bottom holes.
2. Frame Preparation and Mounting
- A. Place the door and hinge assembly into the partition opening at the desired height from the finished floor. A small frame constructed of several blocks of wood can help support the door assembly.
- B. Place the hinge leaf onto the pilaster, center the door in the opening and repeat steps (1B) and (1C) above.
- C. Check the swing of the door to see if the clearance at the latch side is correct.
- D. Center punch the remaining holes, drill and fasten with the remaining Torx Pan Head Screws.
- E. When installation is complete, hold the Snap-On cover squarely on the leaf.
- F. Starting at the top and working downwards, press the cover in place until the entire length is firmly engaged.
Note that the hinge pin has been staked at one end with a roll pin on the back of the knuckle. All adjustments are made at the opposite end of the hinge.
- G. With the covers firmly in place, secure them at both ends through the hinge and into the door or frame with #8 x 3/4" Torx Flat Head Undercut Self-Drilling Screws.
- H. Use the Torx bit to turn the adjustment approximately one complete revolution. The hinge pin has a hole through it allowing adjustments to be made every half turn.
- I. Check the swing of the door. If the door will not close fast or hard enough, remove the 1/2" set pin and turn the adjusting screw one half turn. Reinsert the pin and check the swing of the door.
- J. Repeat steps (H) and (I) until the desired spring tension is reached. DO NOT over-tighten the spring, seven turns maximum.
- K. Hold the adjusting screw in place and tap the set pin in permanently with a hammer and nail set. Note that the knurled end of the set pin should lock into place. Approximately 1/8" to 1/16" of the set pin will stick out, allowing for readjustment of the hinge at a later date.
Model SL402
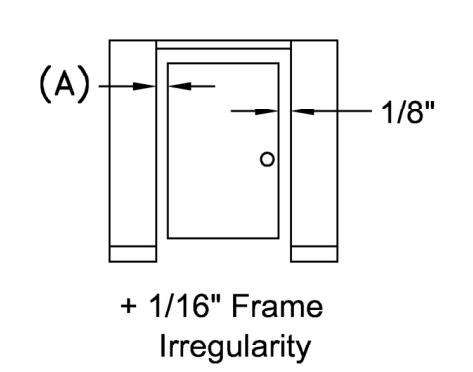
Standard "Non-Adjustable" application clearances
Total Under-Sizing Required
| Clearance (A) | Single Door |
|---|---|
| 1/8" | 5/16" |

#8 X 3/4" TORX FLAT HEAD UNDERCUT SELF-DRILLING SCREW (TKS8075Z)

3/32" x 1/2" STAINLESS KNURLED ROLL PIN (RLPN33250SS)
OPTIONAL HARDWARE AVAILABLE UPON REQUEST


#12-8 x 1-1/2" FLAT HEAD UNDERCUT WOOD SCREW (PBS12150SP10SS)

3258 Stadium Park Way Kalamazoo, MI 49009 PH: 800-423-1174 Fax: 800-423-7107 www.select-hinges.com