Rixson Smok-Chek V Series Closer Model 0101 Push Side Mounting Independent Closing Means Installation Instructions
Open the original PDF document
View PDF

SMOK-CHEK® V
A Fire/Life Safety Holder Product
Model 0101
Push Side Mounting Independent Closing Means
*85° thru Maximum Degree of Swing Single Point Hold Open
Not for Use on Doors that will be Manually Closed on a Daily Basis
General Information:
Non Handed
Door Hanging Means:
- Standard 4", 4-1/2", or 5" Butt Hinges
- 3/4" Offset Pivot
- For other means, contact factory
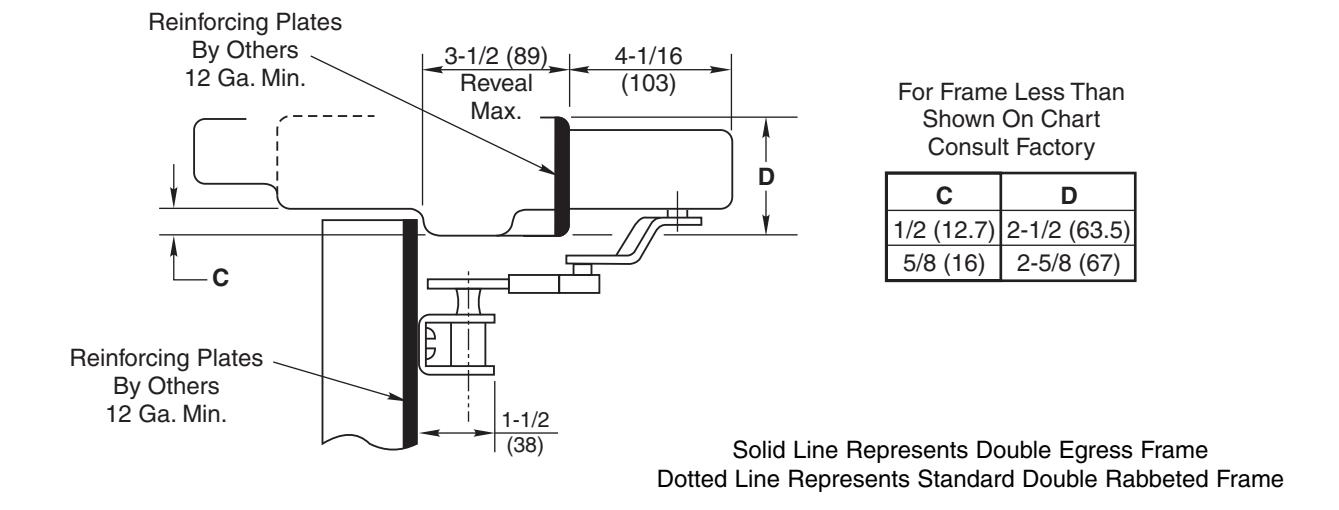
2" Minimum head frame
For frame face sizes less than 2", contact factory
Maximum reveal 3-1/2"
For reveals from 3-1/2 to 7", use arm 550789
*For hold-open from 105° - 180°, use arm 550789
Door Closing Device by others
Mounting Hole Locations
- Right hand shown
- Door hanging means: 4", 4-1/2", 5" Butts or 3/4" Offset Pivots
- All dimensions given in inches (mm)

Page 2 Push Side Mounting
www.rixson.com ISFM0101
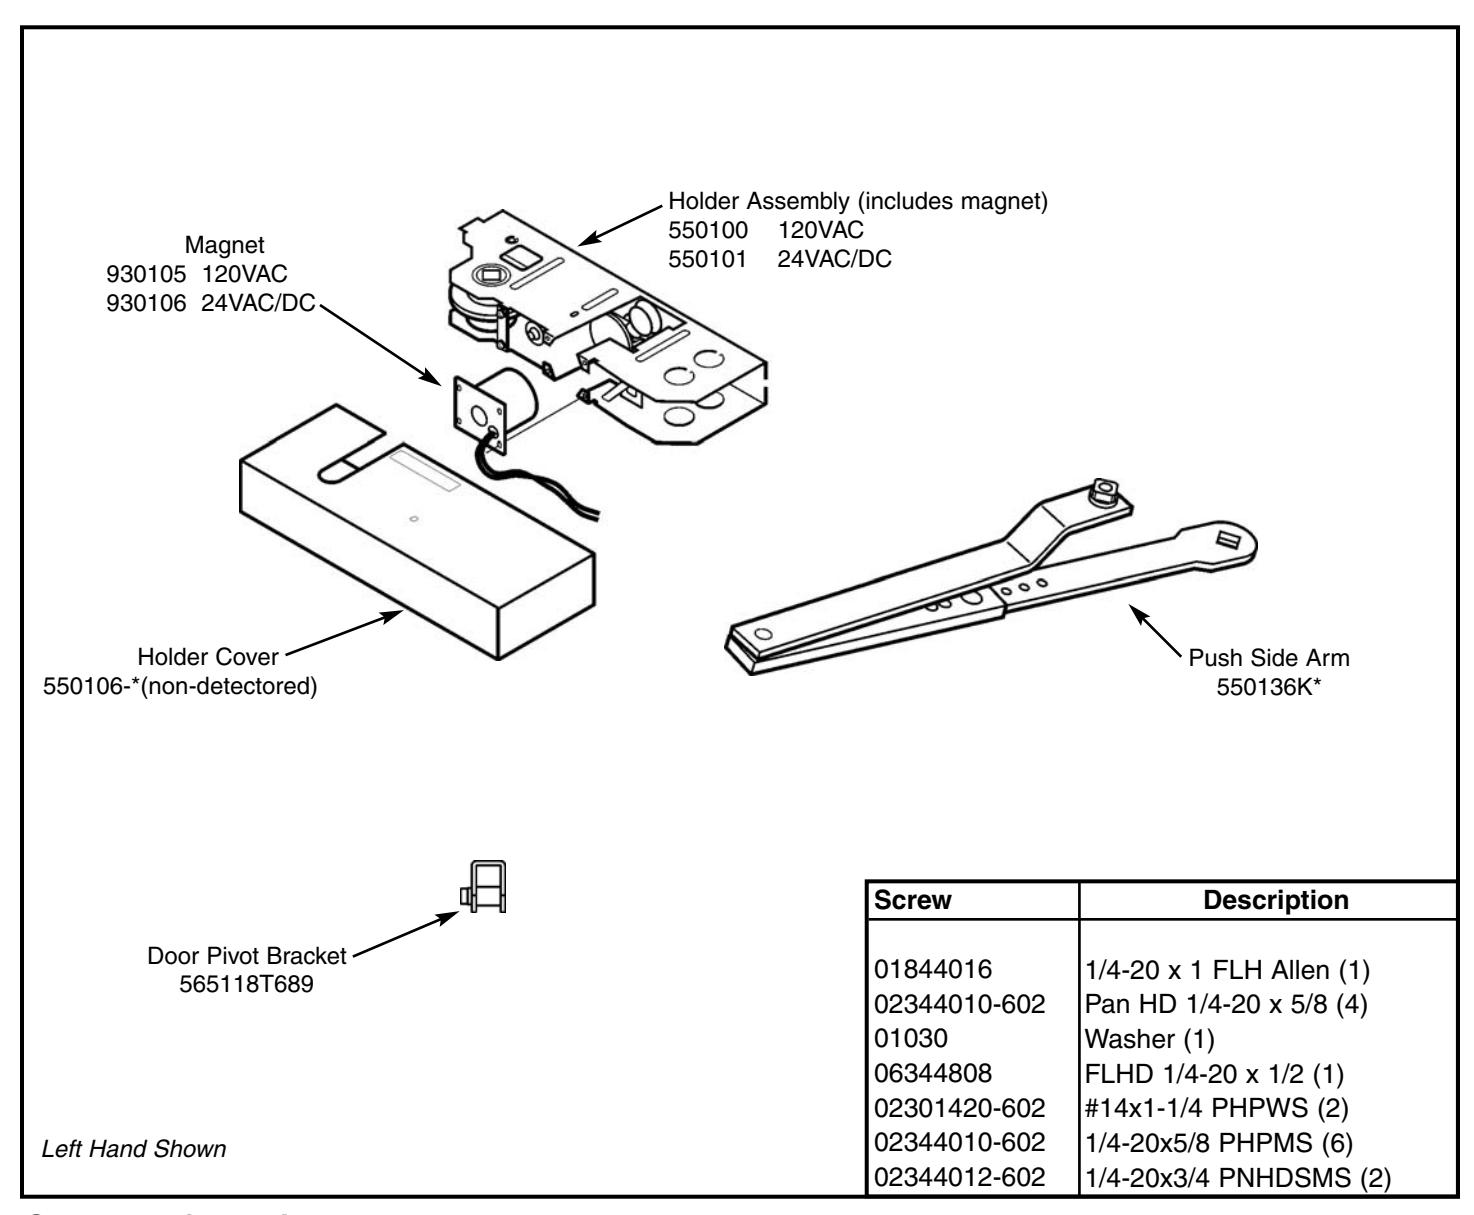
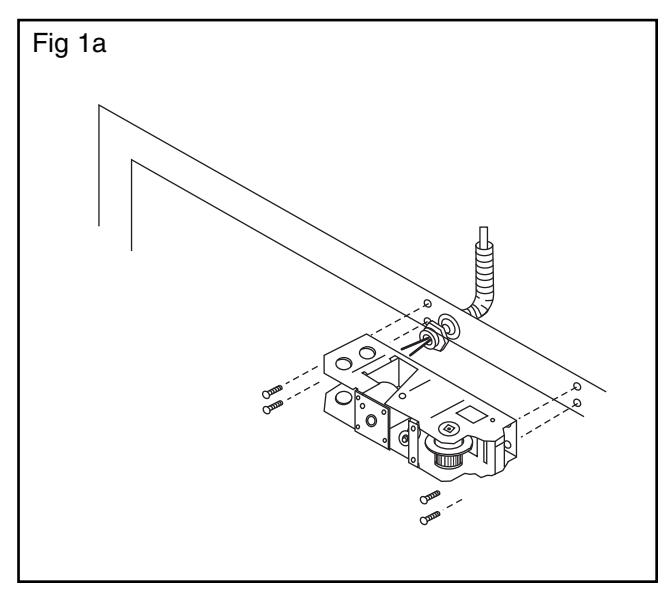
1. Mounting Holder
- A. Layout & prepare screw holes.
- B. Remove appropriate knock out in Smok-Chek & attach 3/8" (9.5) conduit fitting. (Fig. 1a)
- C. Push conduit back into frame.
- D. Attach holder with (6) 1/4-20 x 5/8 pan HD screws tighten securely.
- E. Attach arm to holder with (1) 1/4-20 x 1 FHD allen screw. (Fig. 1b)
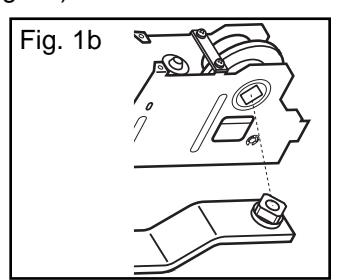
CAUTION: SQUARE ON ARM MUST BE INSERTED AND TIGHTENED INTO HOLDER VERY SECURELY BEFORE ARM IS ATTACHED TO SPINDLE OF CLOSER.
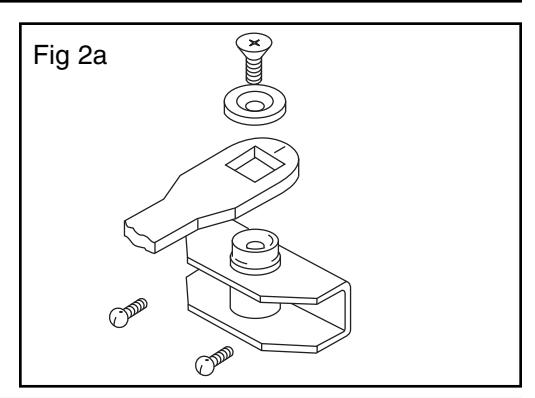
2. Mounting Door Pivot Bracket
- A. Mount door bracket to door and fasten with two 1/4-20x1/2" RDH or #14x1-1/4 Pan HD screws.
- B. Slide bracket arm into holder arm.
- C. Attach arm to bracket spindle with washer and 1/4-28x1/2" FLH screws. (Fig. 2a)
- D. Position arm as per suggested arm settings listed in chart. (Fig. 2b)
- E. Assemble holder and bracket arms together with the 1/4-20x5/16" RDH screws.
| Fig 2b | Door Hanging | Arm Settings | ||
|---|---|---|---|---|
| Means | 85°/135° 130°/180° | |||
| Arm Setting No. 18 | 4" Wide Butts | 17 | 16 | |
| 4-1/2" Wide Butts | 18 | 16 | ||
|
1 2
3 4 8 1012 14 16 1 |
5" Wide Butts | 19 | 16 | |
| Swing Clear | 17 | - | ||
| 3/4" Offset Pivot | 18 | 16 | ||
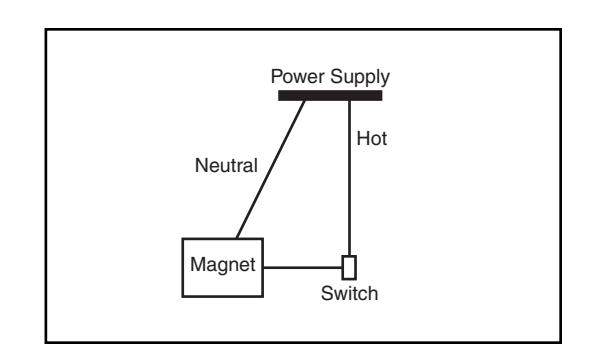
BEFORE BEGINNING WIRING, INSTALLER MUST BE GROUNDED!
3. Electrical Wiring
Field Wires should be 18ga OR as required by local code
A. Connect switch – in series – with HOT lead of electromagnet.
Note:
120vAC draws .018 amp 24vAC/DC draws .091 amp
Page 3 Push Side Mounting
ISFM0101 www.rixson.com
4. Making Adjustments to the Holder
- A. Closer spring force should be as low as possible. (Closer should arrive at lowest setting).
- B. Turn OFF Power (using ON/OFF switch).
-
C. To set Hold Open:
- 1. Door should be in CLOSED position.
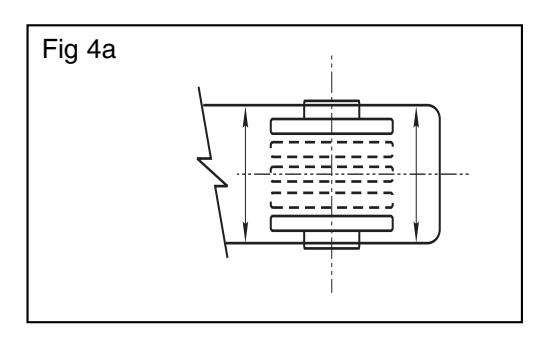
- 2. Raise or lower cam until the word "Push" is displayed from the UNDERSIDE of the unit (Fig 4a).
- 3. Open door to desired Hold Open position.
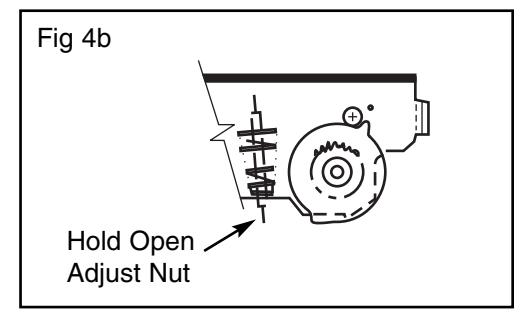
- 4. Raise or lower cam and ROTATE until pocket of cam is in position next to Roller A shown in Fig 4b
- 5. Release cam to re-engage teeth.
- 6. Turn ON power (using ON/OFF switch).
- 7. OPEN DOOR. Door should stay in Hold Open position–if not, repeat Steps 3 and 4.
- 8. Pull door OUT of Hold Open–door should close freely.
- 9. OPEN DOOR . If releasing force needs to be increased, turn adjusting nut IN. If lesser holding force is desired, turn nut OUT .
- 10. Attach holder cover.
Trouble-Shooting Tips:
- 1. Turn ON power.
- 2. Can door swing far enough to engage hold open? Minimum opening is 85°.
- 3. Make sure closer is at lowest spring setting.
- 4. Put piece of metal against the magnet to make sure it is receiving current.
- 5. If not, double check wiring instructions.
- 6. If so, with door in closed position look up at holder mechanism. Word PUSH should be visible, if not, adjust cam.
- 7. Turn adjusting nut.
- 8. Check arm indexing.