Rixson Duo Floor Closer 90° Hold Open Center Hung Double Acting Installation Instructions
Open the original PDF document
View PDFCloser Adjustment
Closing speeds can be adjusted to suit local conditions and requirements. Turn the adjusting screw that projects through the floor plate or threshold, either in or out as the case may be until the desired action is attained. Turn this valve screw to the right, clockwise, to decrease closing speed and to the left to increase the closing speed. FORCING THIS SCREW DOWN WILL IMPAIR ITS OPERATION.
Spring Power Adjustments
There is no spring power adjustment. If the spring power is not adequate a heavier duo-check should be installed. All duo-checks PH10, PH12, 15, 16 are interchangeable.
ASSA ABLOY RIXSON ®
RIXSON ®
ASSA ABLOY
Installation Instructions
800T (06-09)
Duo Floor Closer
Furnished with 90° Hold-Open unless otherwise Specified Center Hung Double Acting
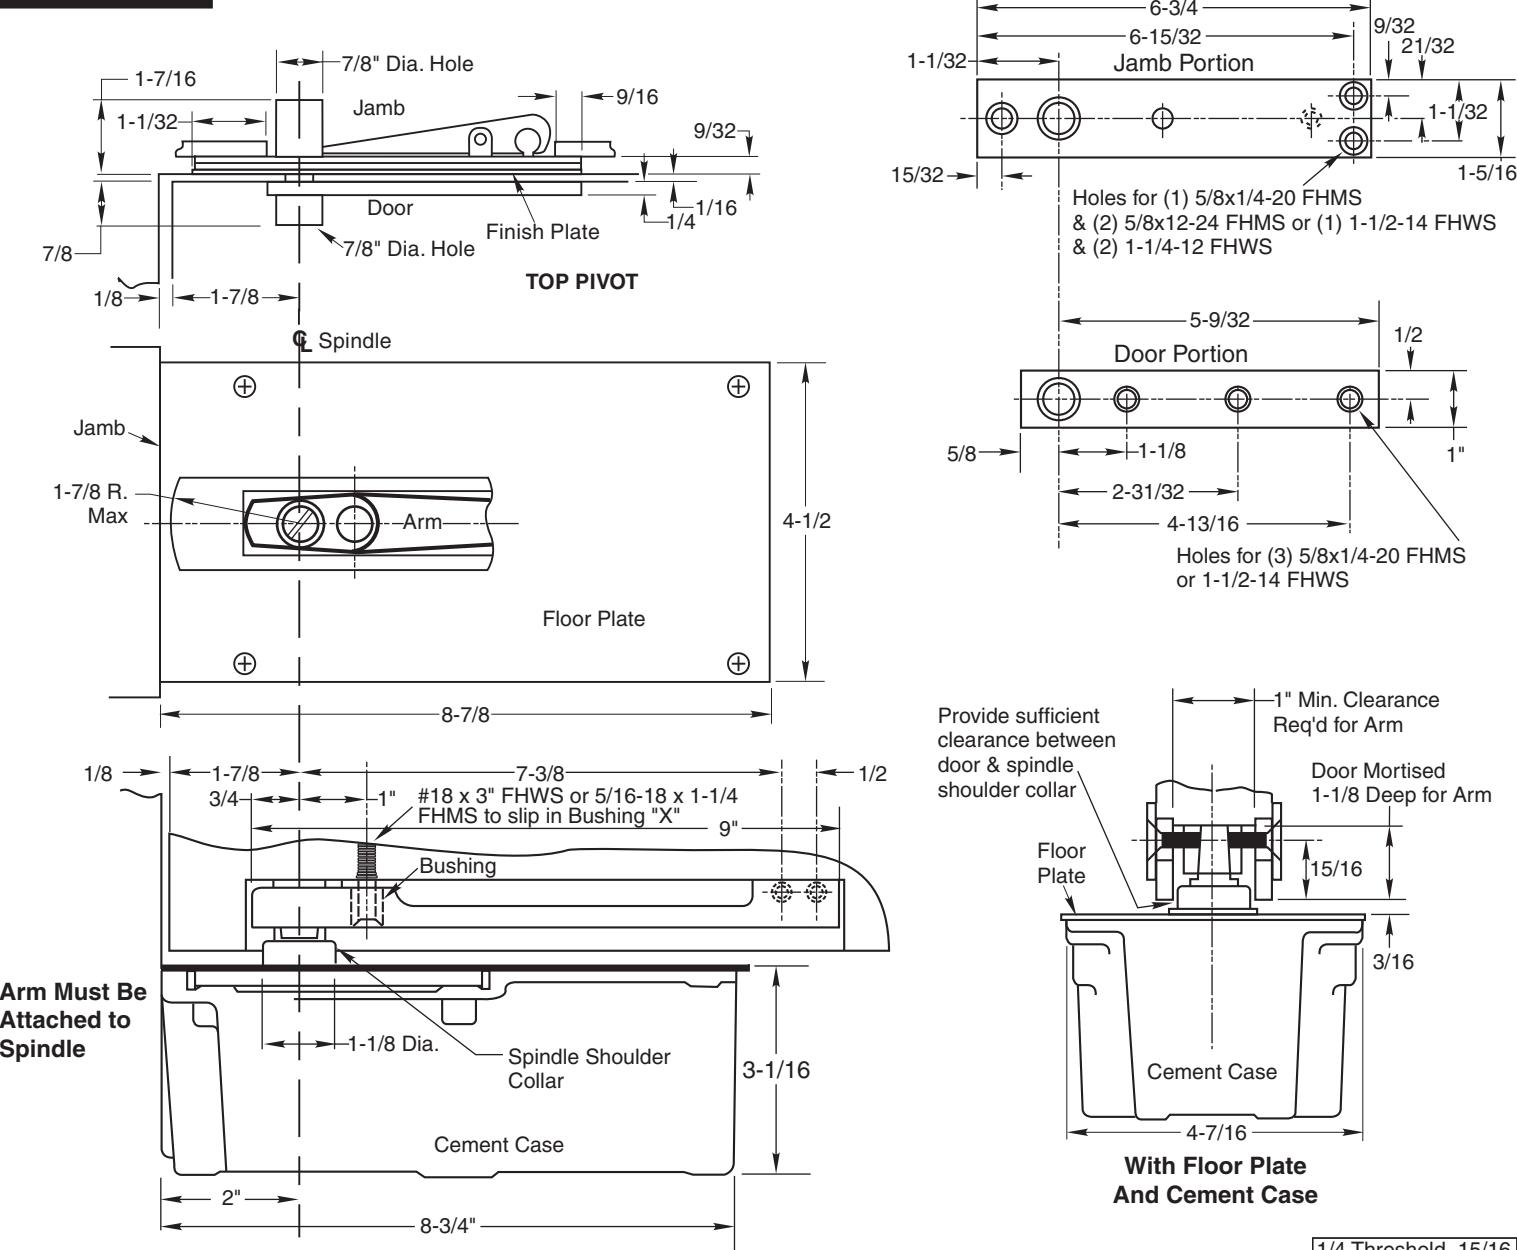
Template
PAGE 4
Conversion from inches to metric: inch x 25.4. Suitable reinforcing by others.
Provide 5/8" Dia. Holes for Alignment Screws Thres 1/2 3/16 Door Mortised Deep for Arm 1/4 Threshold 15/16 1/2 Threshold 11/16 With Threshold 2-15/16 (4) 1-1/2 #14 FHWS
Rixson® is a registered trademark of Yale Security Inc., an ASSA ABLOY Group company. Copyright© 2002, 2009, Yale Security Inc., an ASSA ABLOY Group company. All rights reserved. Reproduction in whole or in part without the express written permission of Yale Security Inc. is prohibited.
Rixson Specialty Door Controls www.rixson.com 866-474-9766 Technical Department Rixson Specialty Door Controls www.rixson.com 866-474-9766 Technical Department
WARNING: Do not strike closer with a hammer. The closer can be made completely inoperative by denting the closer tube with a hammer blow.
DOOR MUST NOT BE PERMITTED TO OPEN BEYOND 105°.
Installation Instructions
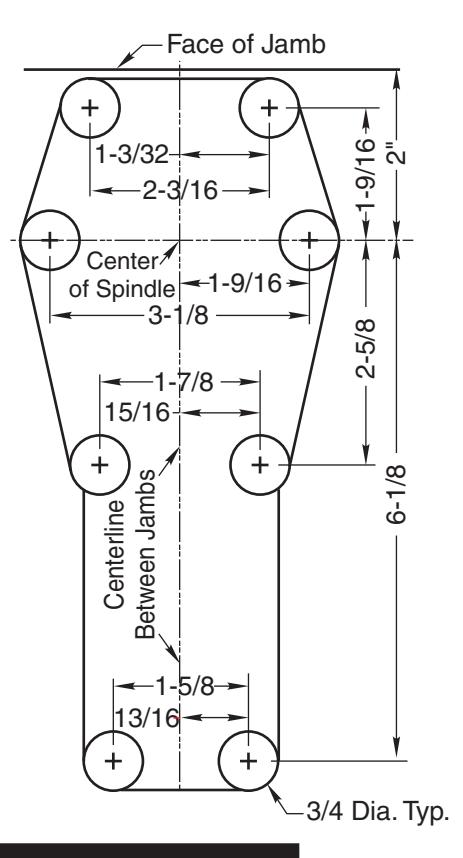
1. Locating Closer
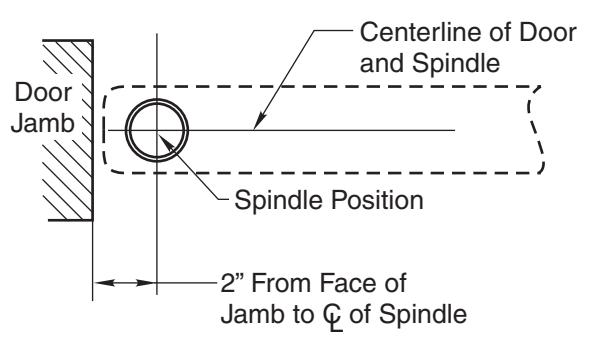
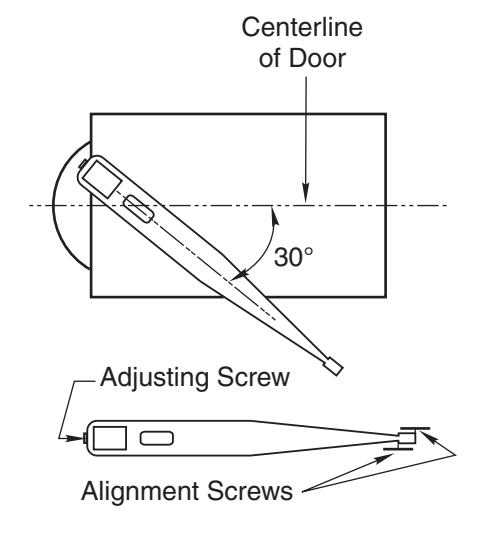
A. Measure 2" out from door jamb on centerline of door. This is the location of the spindle center.
2. Install Closer in Floor
A. For floor plate application: the top of the closer case (or cement case as both are the same level) is set 1/16" below finished floor.
B. For threshold application: the closer case is set flush with the finished floor.
C. CEMENT FLOOR INSTALLATION:
- 1. Set Cement case in floor and block in position.
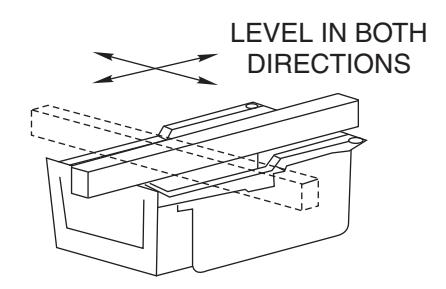
- 2. Case should be parallel with centerline of door.
- CEMENT CASE SHOULD BE LEVEL. Place levels per illustration.
- 4. Grout in cement case with closer. Cement should not get between closer and case.
D. WOOD FLOOR INSTALLATION:
- Locate center line of closer 2" out from face of frame. Using dimensioned outline of closer locate and bore (8) 3/4" diameter holes. Cut out the floor using these bored holes and the dimensioned outline as a guide.
- 2. Place arm on spindle of closer and set closer into opening, with center of arm on line with center of door. Draw a line around overlapping square top of casting. Mortise for this overlap allowing 1/16" for floor plate thickness. Top of closer case will be 1/16" below finished floor.
- 3. CLOSER CASE SHOULD BE LEVEL. Place levels per illustration
- 4. Fasten closer securely with screws furnished.
- 5. Place floor plate on closer, mark around it and mortise into floor. Fasten with screws furnished.
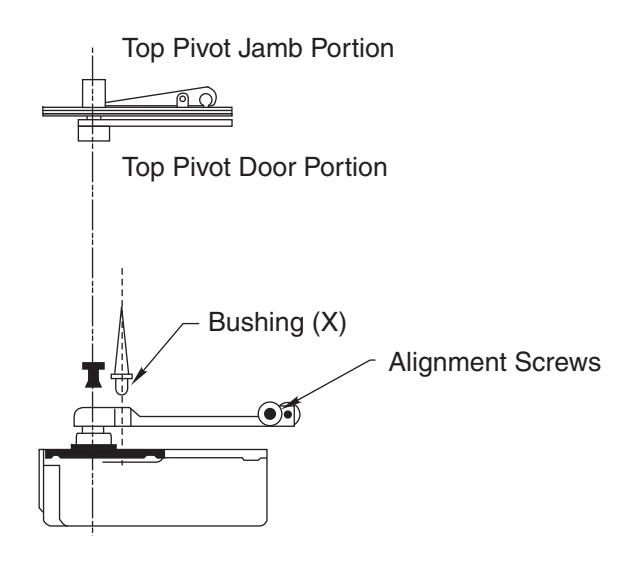
3. Install Top Pivot and Closer Arm
- A. Install top pivot in door per template.
- B. Install top pivot in jamb per template.
- C. Centerline of pivot should line up with centerline of closer. Use a plumb line to assure accuracy.
- Mortise door to receive arm. (Mortise varies if threshold is used–refer to template).
- E. Secure bushing to bottom of door with screw furnished.
- F. Drill two 5/8" holes for alignment screws.
4. Hang Door
- A. Turn valve screw down. NEVER FORCE VALVE SCREW DOWN AS THIS WILL DAMAGE TIP SEATING.
- 3. Fasten arm to closer spindle then turn spindle right (or left) until spindle and arm reach a door opening position of about 30°.
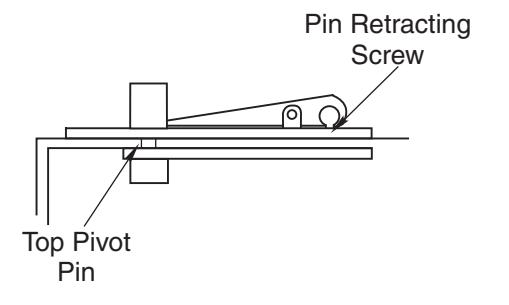
- C. Set door on arm and engage the top pivot pin by turning pin retracting screw up.
- D. Turn in arm alignment screws lightly.
www.rixson.com
- E. Open stroke valve (counter-clockwise) one turn.
- Adjust arm alignment screws until door rests in center of doorway.