Rixson 5040 Series Floor Closer Center Hung Single Acting 74010 Top Pivot Patch Fitting Installation Instructions
Open the original PDF document
View PDFCloser Adjustment PAGE 4
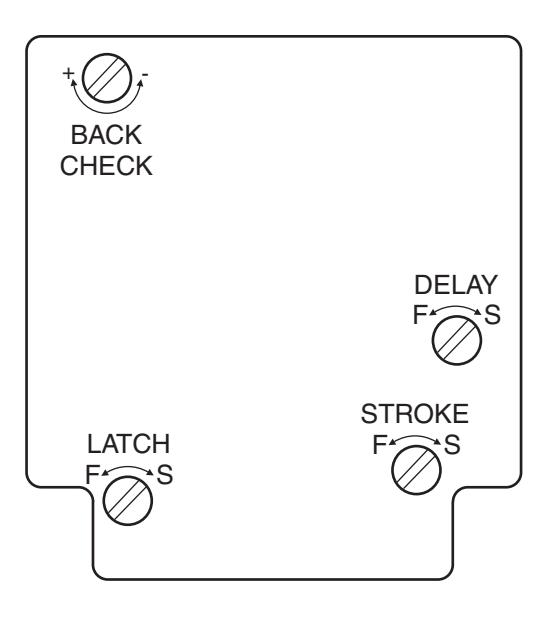
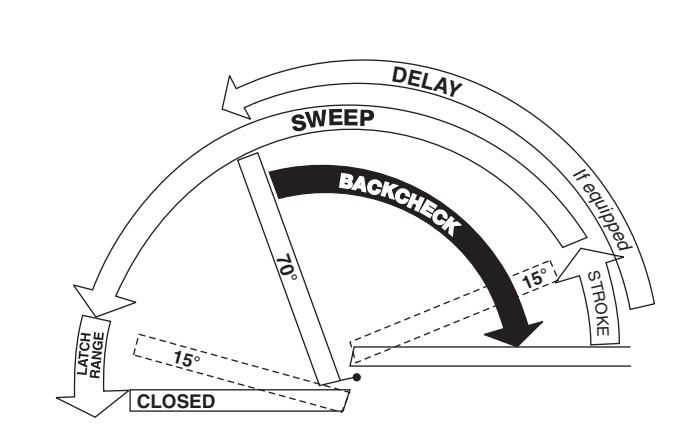
Closing speeds can be adjusted to suit local conditions and requirements. Label on closer face designates the purpose of each adjustment screw.
- A. The Stroke valve allows adjustment from open to 15°.
- B. The Latch valve allows adjustment from 15° to closed position.
- C. Backcheck valve option must be adjusted to vary resistance from light to firm at 70° of door opening. Important:
- D. The Delay valve option allows closing speed adjustment from open position to 65°.
Repairs, parts replacement or internal adjustments must be done by a Rixson authorized rep ir agency. Consult a Rixson representative for an authorized repair agency in your area. a

Rixson® is a registered trademark of Yale Security Inc., an ASSA ABLOY Group company. Copyright© 2003, 2009, Yale Security Inc., an ASSA ABLOY Group company. All rights reserved. Reproduction in whole or in part without the express written permission of Yale Security Inc. is prohibited.
RIXSON ®
ASSA ABLOY
5040 Floor Closer
Center Hung Single Acting – Handed 74010 Top Pivot – Non Handed Patch Fitting Installation
Template
Installation Instructions IS5040 (06-09)
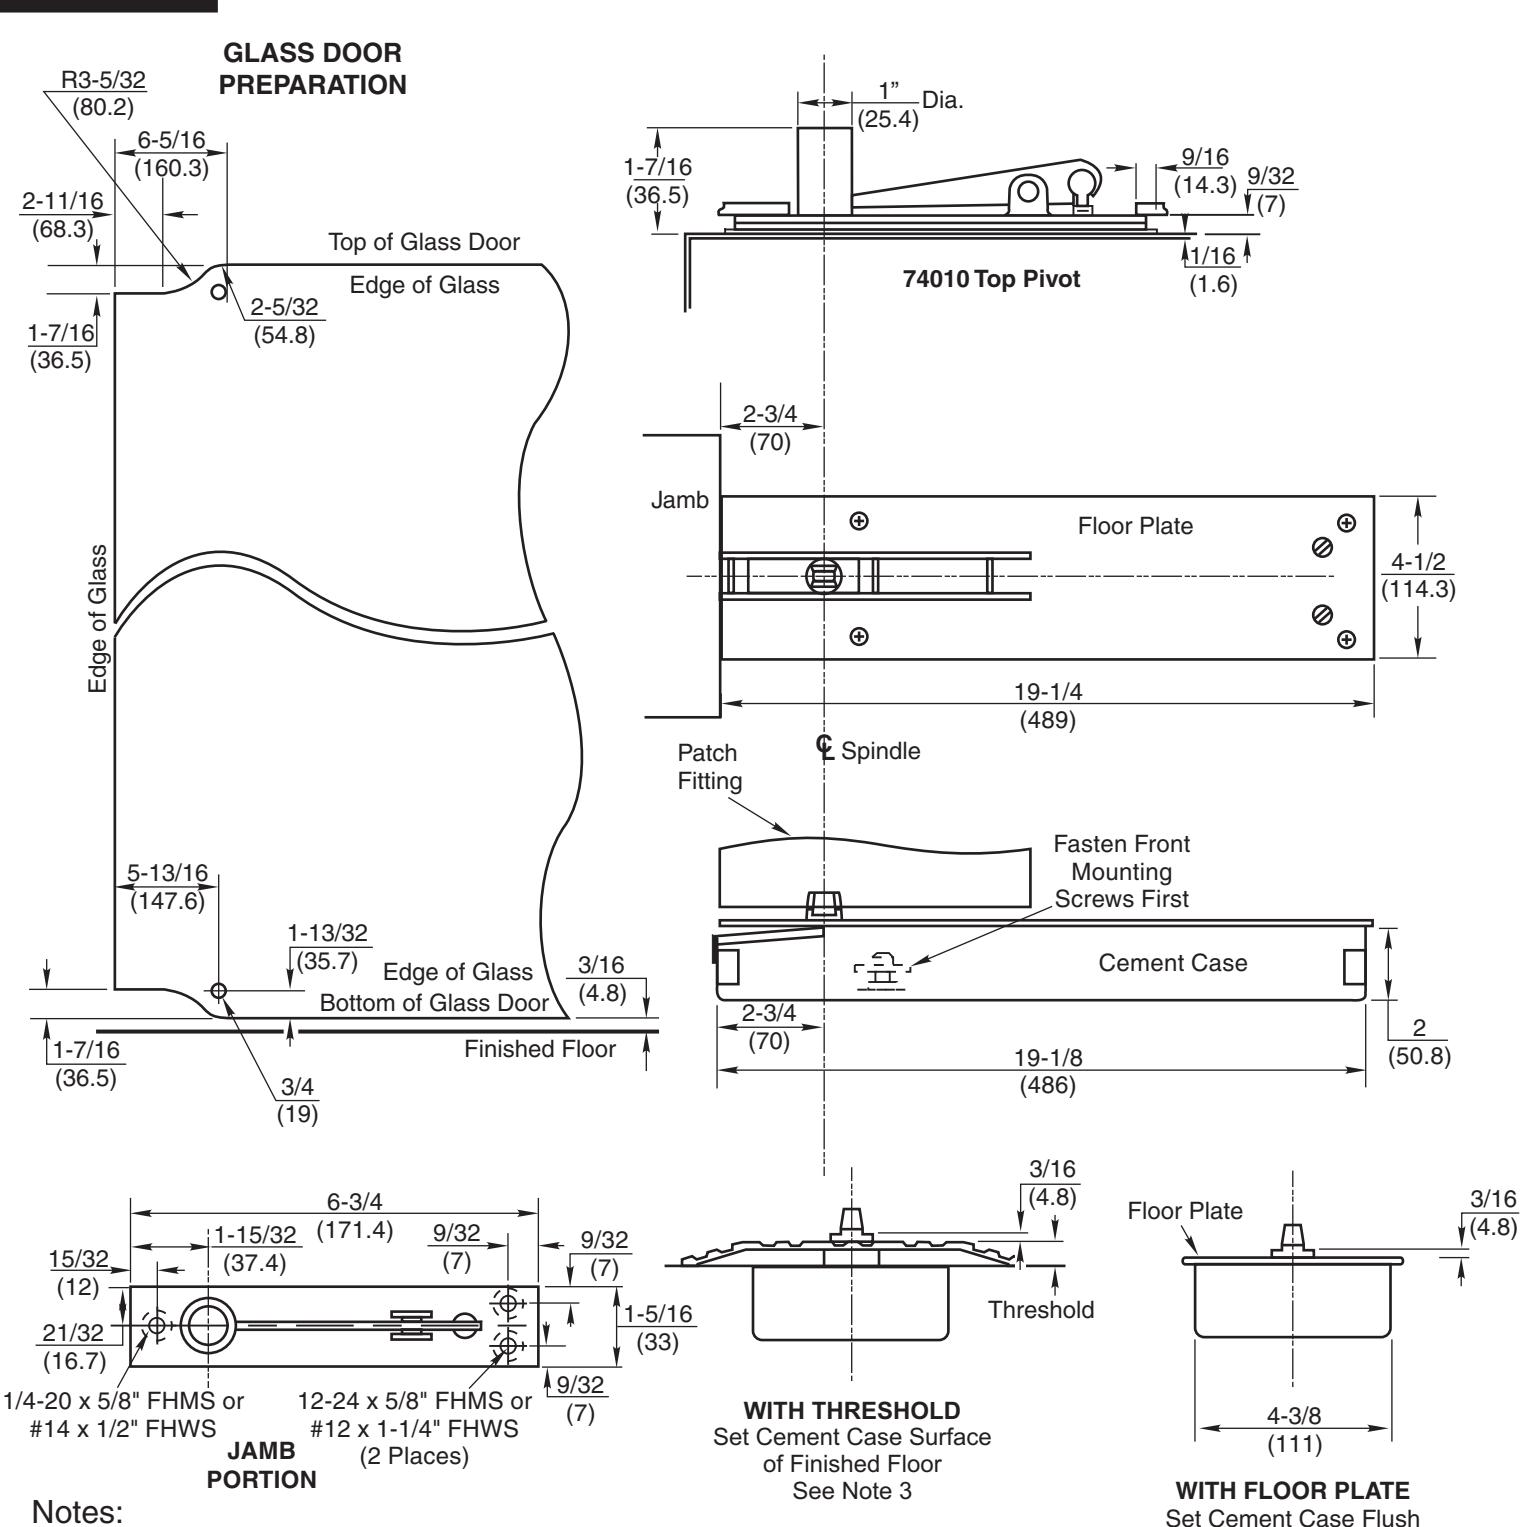
Notes:
- 1. Do not scale drawing.
- 2. Suitable reinforcing by others.
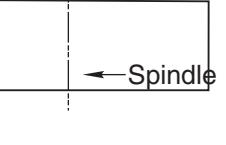
- 3. 1/2" Extended Spindle required.
- 4. Rixson design Threshold available on request.
- 5. All dimensions given in inches (mm).
with Finished Floor
PAGE 2 PAGE 3
How To Determine Hand of Door
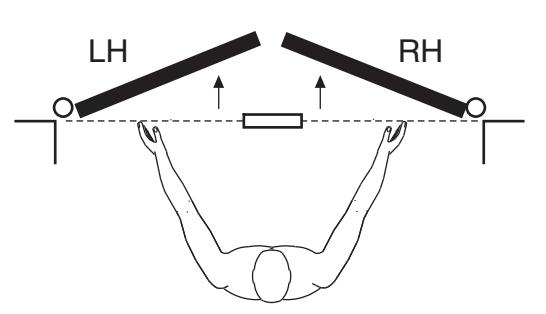
Face a door swinging open away from you. If it opens to the right, it is right hand. If it opens to the left, it is left hand.
IMPORTANT:
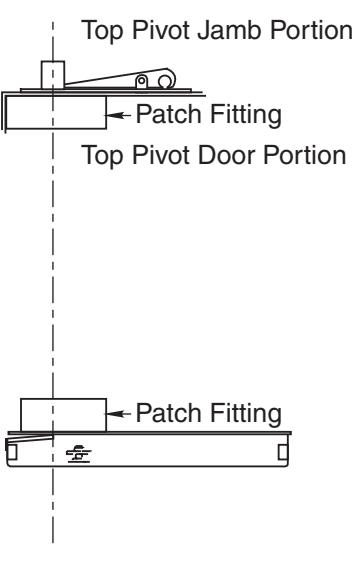
Use plumb line to make sure that center line of top pivot pin lines up with center line of closer spindle.
A. Install patch fittings (top & bottom) into door per template.
- B. Install top pivot in jamb per template.
- C. Centerline of pivot pin should line up with centerline of spindle. Use plumb line to assure accuracy.
Patch Fitting
Cement Case
DOOR
Installation Instructions
1. Locating Closer
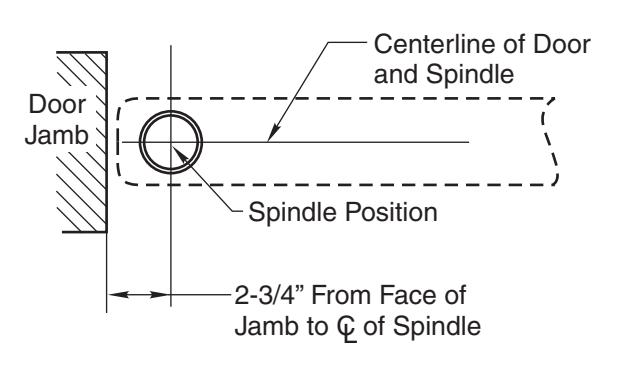
A. Measure 2-3/4" out from door jamb on centerline of door. This is the location of the spindle center.
2. Install Cement Case in Floor
- A. For floor plate application: Cement case is set 1/8" (3.2mm) below floor level.
- B. For threshold application: Cement case is set flush with floor.
- C. Set cement case in floor and block in position.
- D. Case should be parallel with center line of door.
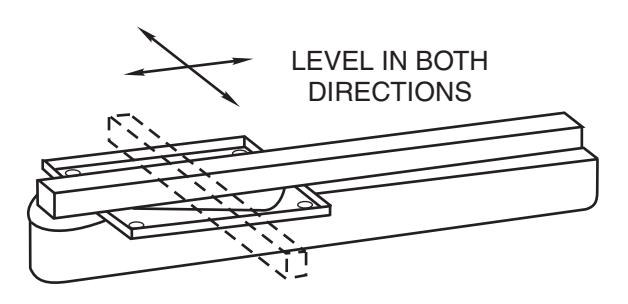
- E. CEMENT CASE SHOULD BE LEVEL. Place levels per Illustration.
- F. Grout in cement case with closer. Cement should not get between closer and case.
4. Hang Door
3. Install Pivot
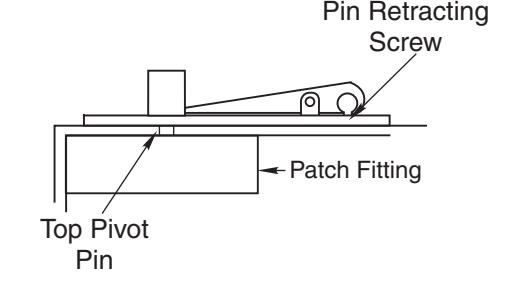
CAUTION: Closer is shipped with valve screws down. DO NOT FORCE VALVES DOWN.
- A. Retract top pivot pin by turning retracting pin screw counterclockwise. (see illustration)
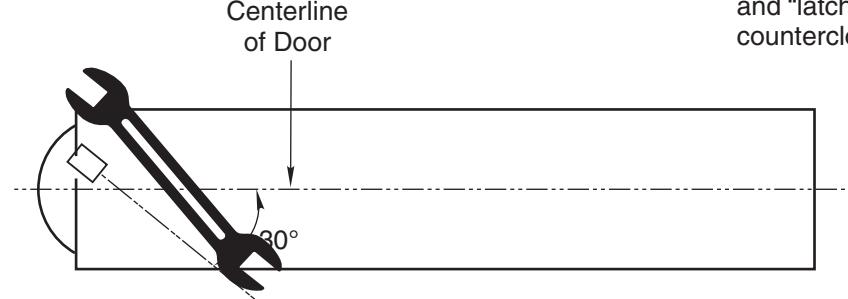
- B. Using wrench, turn until arm is in 30° open position. (see illustration)
- C. Set door on spindle. DO NOT ATTEMPT TO CLOSE DOOR.
- D. Align jamb po tion of the pivot with top patch and turn pin retracting screw clockwise. r
- E. Open door to 60° or more and open "closing speed" and "latch" valves by turning screws counterclockwise. Door will then close.
Rixson Specialty Door Controls www.rixson.com 866-474-9766 Technical Department Rixson Specialty Door Controls www.rixson.com 847-671-5670 Technical Department