Rixson 2807D Cover Pan for 53 Closer Independently Hung Installation Instructions
Open the original PDF document
View PDF
|
C
P # ov er an |
P
D pth an e |
S
pi nd l e S i ze |
|
2
8 0 7- 1 |
/
( ) 7 8 2 2 .2 |
1"
( ) L 2 5 .4 on ge r |
|
2
8 0 2 7- |
1
/ 4 ( 6 .4 ) |
1
/ 4" ( 6 .4 ) L on ge r |
|
2
8 0 3 7- |
3
/ 8 ( 9 ) .5 |
3
/ 8" ( 9 ) L .5 on ge r |
|
2
8 0 7- 4 |
/
( ) 1 2 1 2 .7 |
/
( ) 1 2" 1 2 .7 L on ge r |
|
2
8 0 7- 5 |
/
( ) 5 8 1 5 .9 |
/
( ) 5 8" 1 5 .9 L on ge r |
|
2
8 0 7- 6 |
/
( ) 3 4 1 9 |
/
4" ( ) L 3 1 9 on ge r |
|
2
8 0 7- 7 |
(
) 1 2 5 .4 |
1"
( ) L 2 5 .4 on ge r |
|
2
8 0 8 7- |
1-
1 / 4 ( 3 1 .8 ) |
1-
1 / 4" ( 3 1 .8 ) L on ge r |
|
2
8 0 7- 9 |
1-
1 / 2 ( 3 8 .1 ) |
1-
1 / 2" ( 3 8 .1 ) L on ge r |
|
2
8 0 7- 1 0 |
/
( ) 1- 3 4 4 4 .4 |
/
( ) 1- 3 4" 4 4 .4 L on ge r |
|
2
8 0 7- 1 1 |
(
) 2 5 0 .8 |
(
) 2" 5 0 .8 L on ge r |
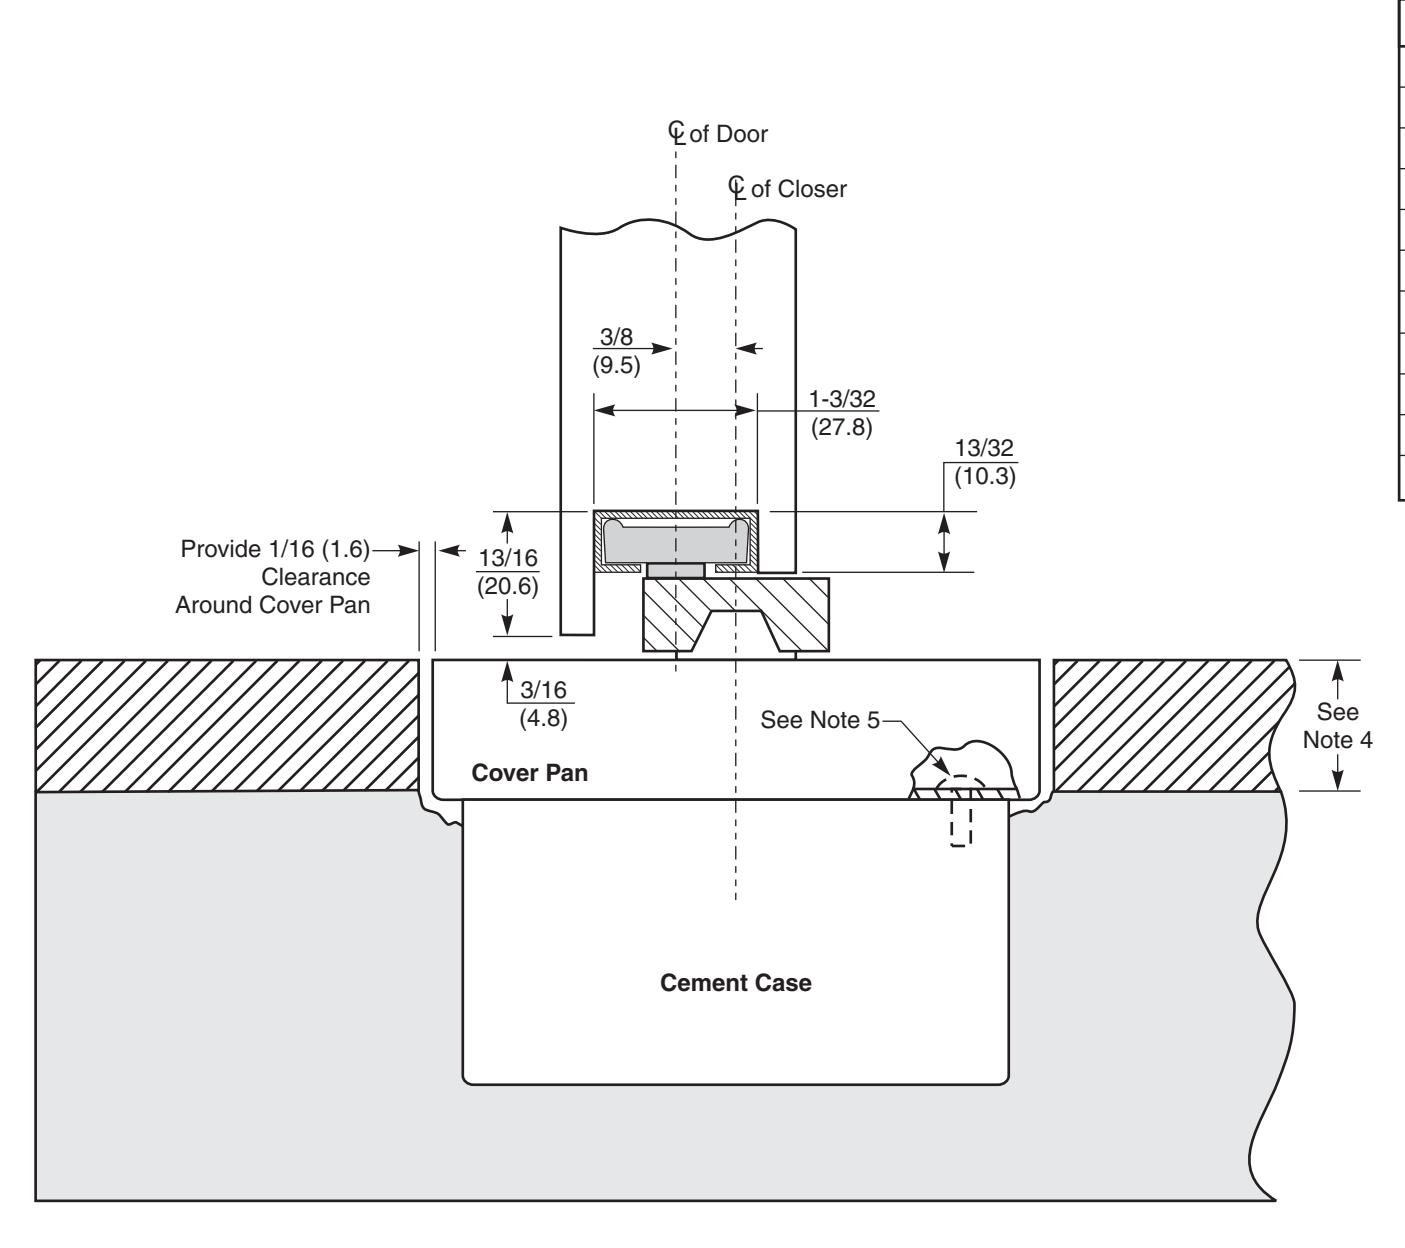
NOTE:
- 1. Do not scale drawing.
- 2. It is suggested that a divider be placed around the pan and that the height be equal to the height of the cover pan.
- 3. For additional installation details see template OS10600.
- 4. Set cement case 1/16" (1.6) lower than depth of cover pan ordered. Use cover pan to facilitate installation of cement case.
- 5. Brass alignment pins (4) to align pan with closer. Pan is not fastened to floor closer.
- 6. All dimensions given in inches (mm).
CAUTION: Prevent grout from collecting between the closer and cement case in the event it may be necessary to remove the closer after the grout is set.
Cover Pan 2807D For 53 Closer, Independently Hung
ASSA ABLOY RIXSON ®
www.rixson.com
TEMPLATE NUMBER DATE
MS140010
04-09