Rixson 185 Quick Spotter Installation Instructions
Open the original PDF document
View PDF

Installation Instructions
40016 (03-09)
185 Quick Spotter
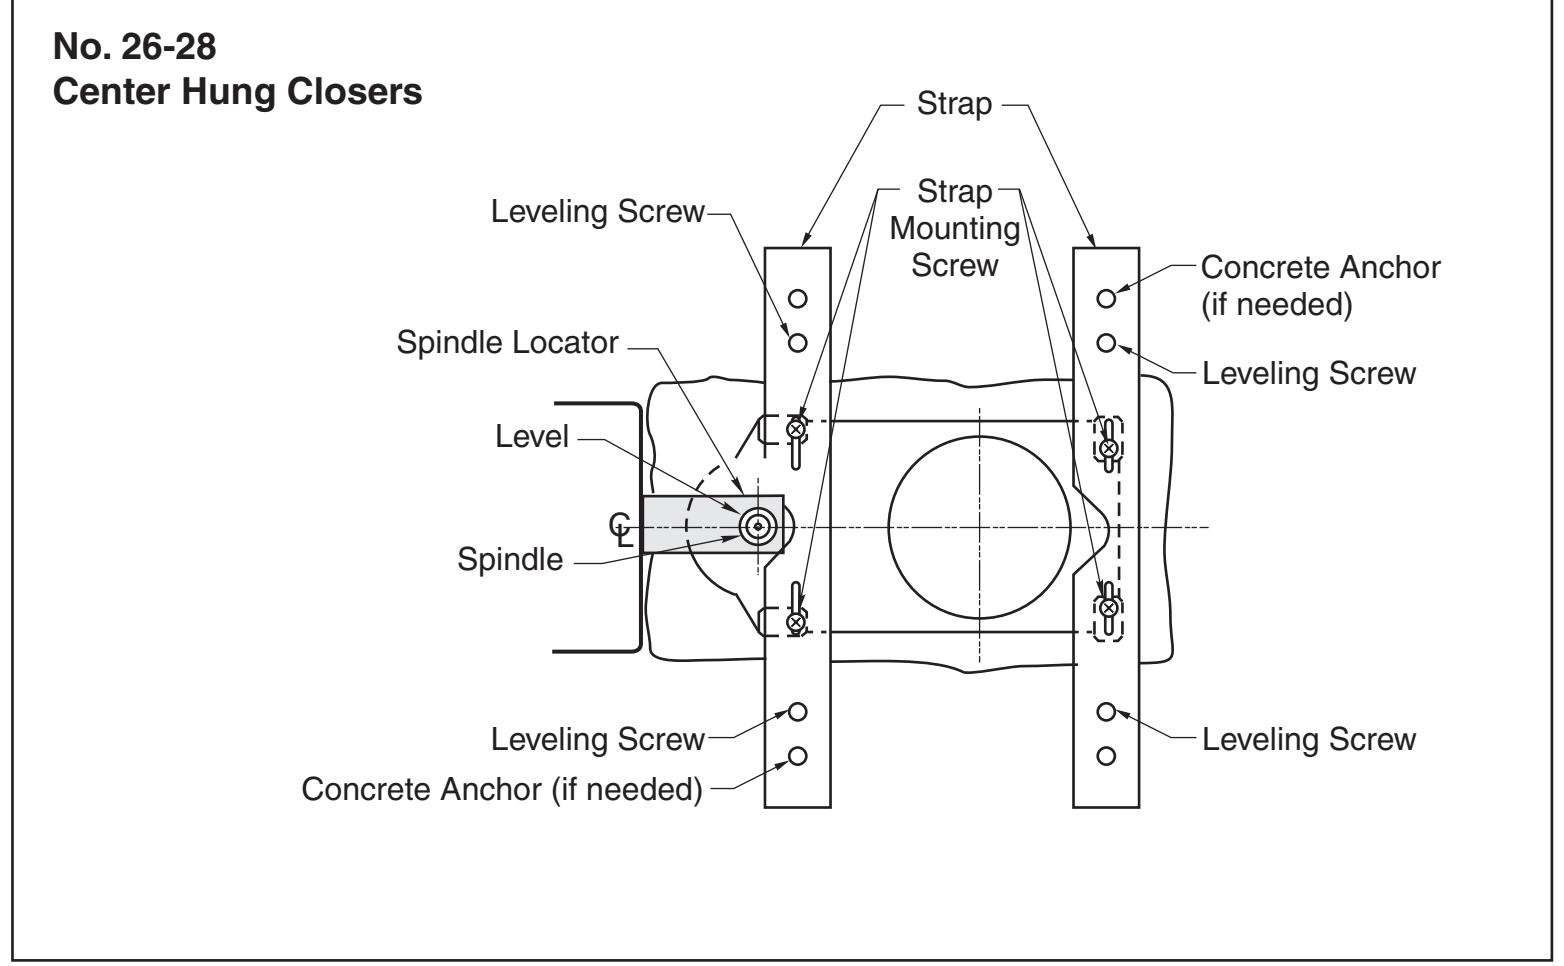
For use with Closer Models 25, 26, 27, 30, & 40 Cement Cases 79501 & 1101 28,
Figure 1
Blocking Instructions
Check template for location of rough hole.
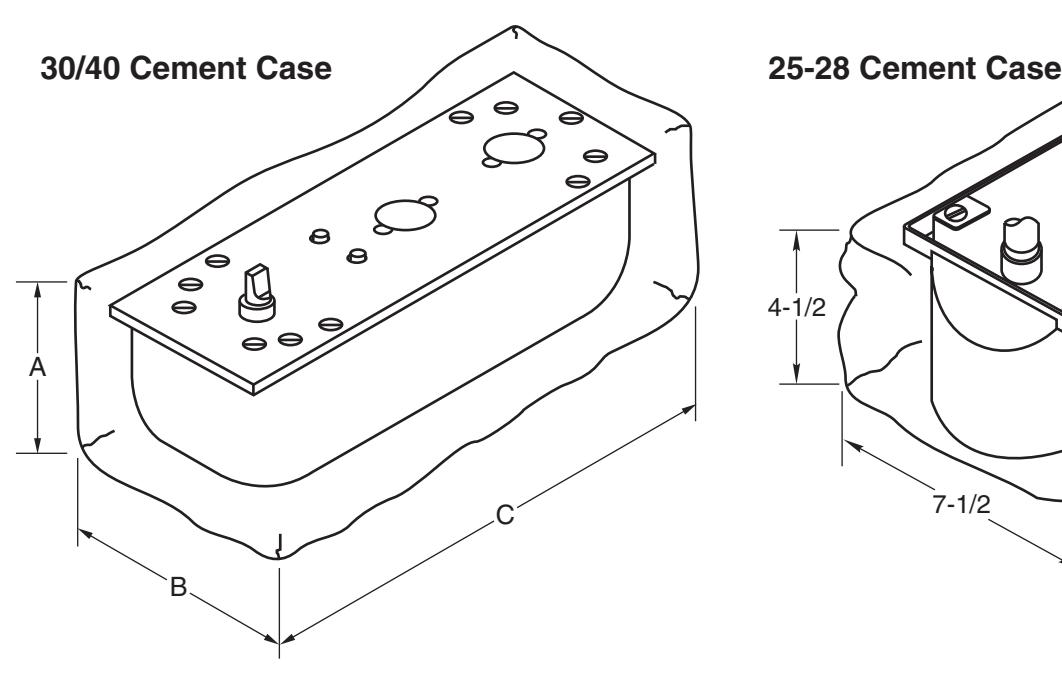
| Closer | A | B | C |
|---|---|---|---|
| No. 30 | 4 | 7 | 15-1/2 |
| No. 40 | 4-1/2 | 7-1/2 | 18 |
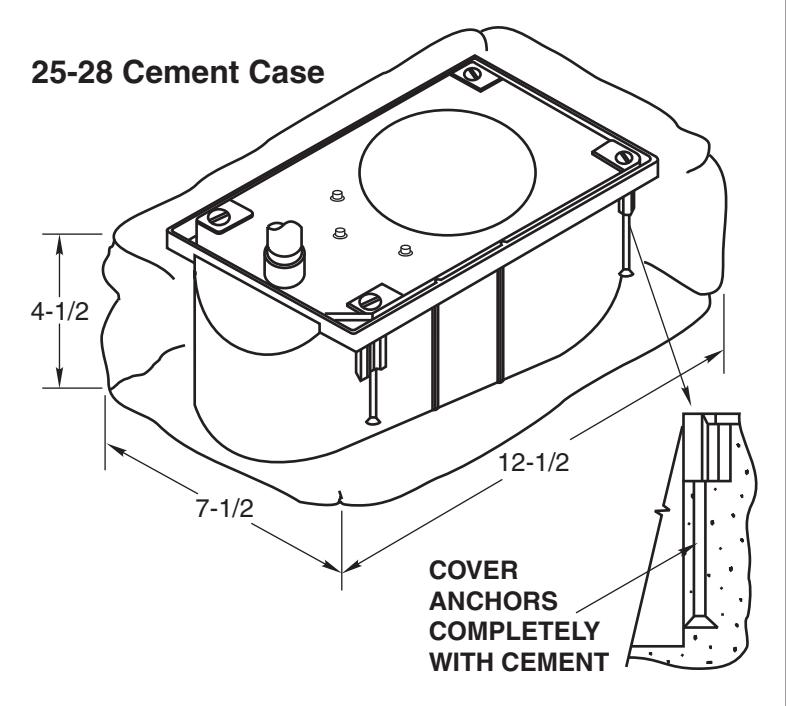
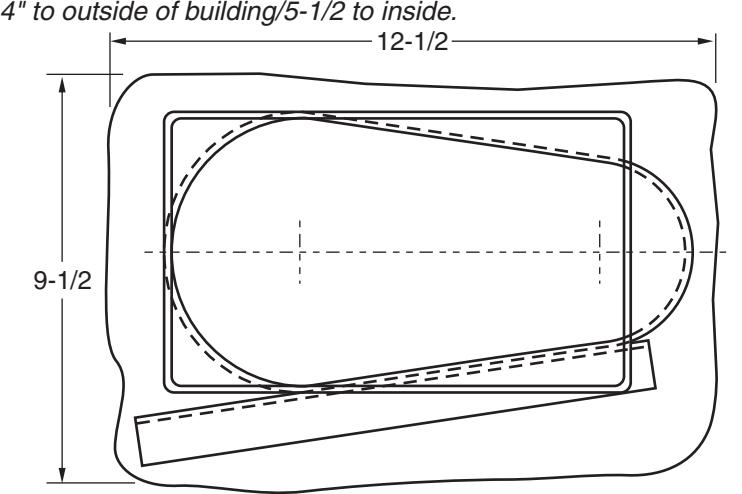
Figure 1A
79501 Cement Case 1101 Cement Case
4-1/2" Deep
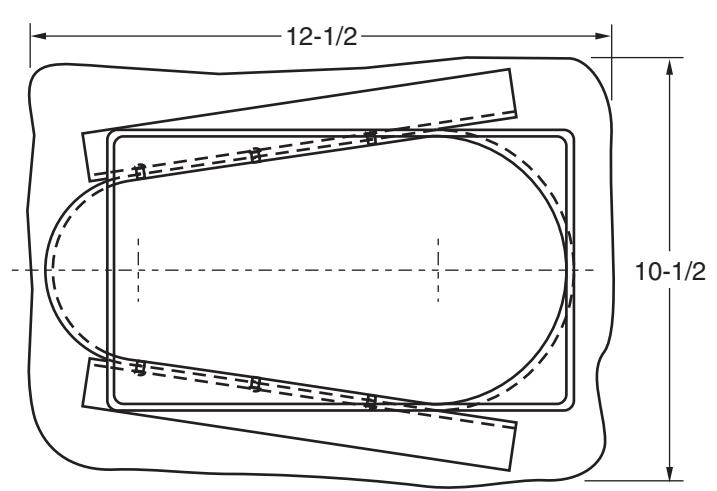
4-1/2" Deep
Concrete pour should not go past expansion joint.
Note:
- 1. Do not scale drawing.
- 2. Dimensions given in inches. Conversion from inches to metric: inch x 25.4.
- 3. If necessary to prevent cement from entering foundation case, apply duct tape to seal the gap between closer and foundation case.
5/88
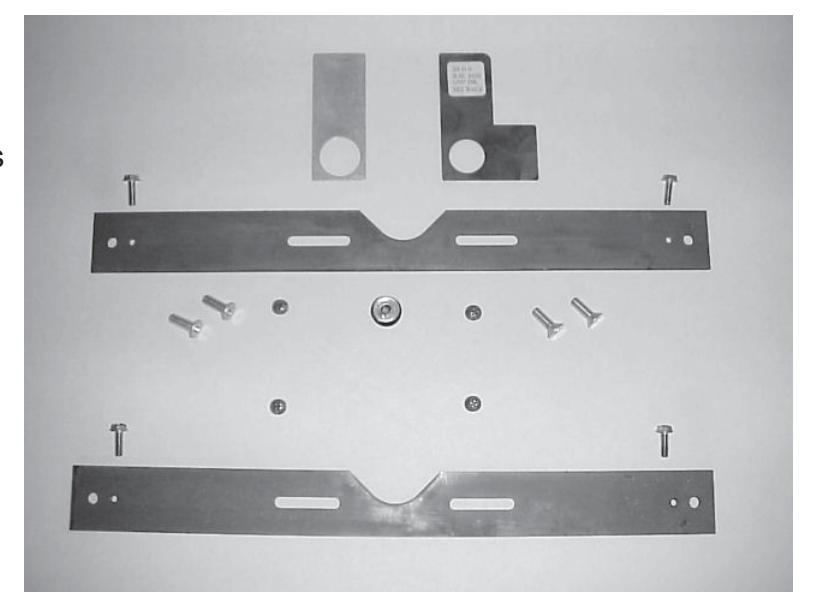
Kit includes:
- 4 ea 1/4 -20 x 3/4 Flat Head Phillips Screws
- 4 ea #10-24 x 5/16 Round Head Phillips Screws
- 4 ea #10-24 x 3/4 Hex Washer Head Screws
- 2 ea Straps
- 1 Spindle locator 3/4 offset
- 1 Spindle locator 2-3/4 center hung
- 1 Bubble level
No. 30/40 Closers Non-Handed
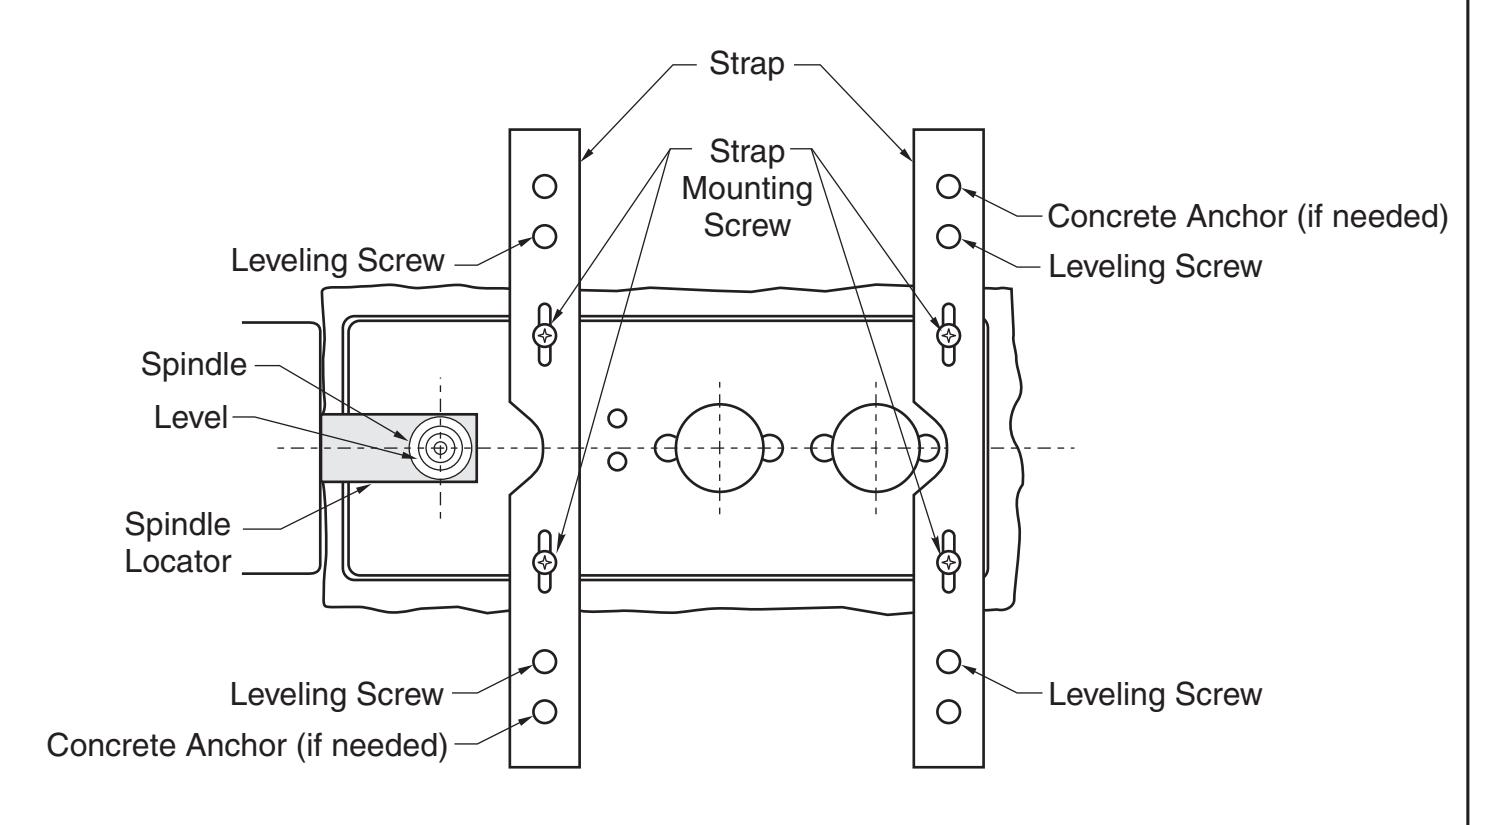
No. 25-27 Offset Closers Right Hand Shown 3/4 Offset Only Spindle Spindle Locator Level CL Strap Mounting Screw Strap Leveling Screw Leveling Screw Leveling Screw Leveling Screw Concrete Anchor (if needed) Concrete Anchor (if needed)
Installation:
- 1. With frame set in place, cut hole in floor to dimensions for closer model on page 1; Figure 1. Clean out excess concrete.
- 2. Install top pivot in frame.

- 4. Place closer in cement case and attach with 4 each 1/4-20 x 3/4 Flat Head Phillips screws.
- 5. Place straps on top of cement case and center each.
- See Figure 3 at right. 6. Using 10-24 x 5/16 round head screws, tighten straps to top of closer.
- 7. Set closer/foundation case in hole in floor.
- 8. Put spindle locator over spindle and position closer next to frame. See appropriate closer model illustration on previous pages.
- 9. Make sure that plumb line is centered over spindle.
- 10.Place bubble level on top of closer spindle and torpedo level. See Figure 4 at right.
- 11.Using 4 leveling screws (10-24 x 3/4 hex washer head screws), turn screws to raise and lower straps until closer is completely level. This is determined by bubble level provided.
- 12.Re-check all areas, locator, plumb line and level.
- 13.If needed, insert cement anchors to stabilize installation.
- 14.Use two pour grouting procedure: Use EXPANDABLE QUICKSET CEMENT, (Por-Rok or equivalent grout). Grout in only bottom 3/4" of foundation case, including bottom of cement anchor. Allow grout to harden. Step 1
- 15. Hang door.
- 16. Use a regular cement mixture, EXTERIOR TYPE (Sakrete or equivalent) to finish setting the foundation case. ALL 4 ANCHORS MUST BE COMPLETELY COVERED WITH CEMENT. (See Figure 1A on page 1) Step 2
Rixson® is a registered trademark of Yale Security Inc., an ASSA ABLOY Group company. Copyright© 1988, 2009, Yale Security Inc., an ASSA ABLOY Group company. All rights reserved. Reproduction in whole or in part without the express written permission of Yale Security Inc. is prohibited.
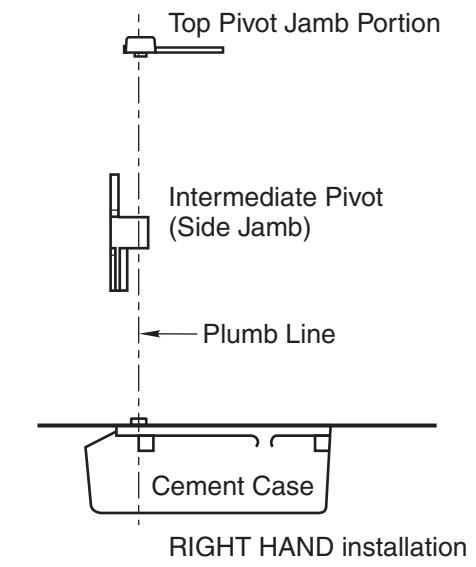
Figure 2
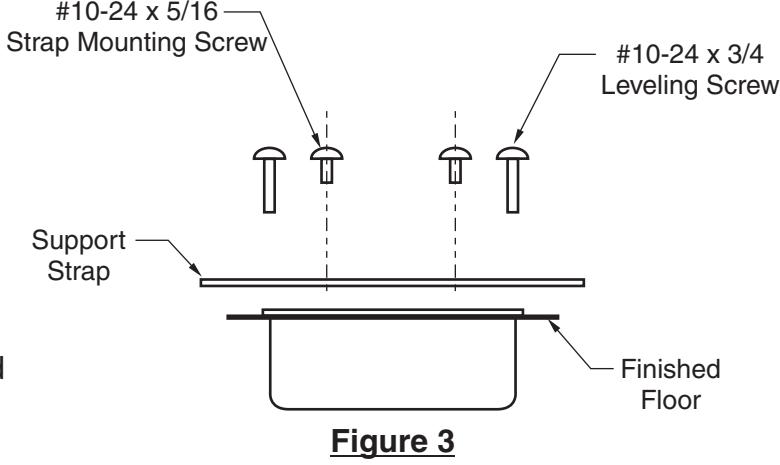
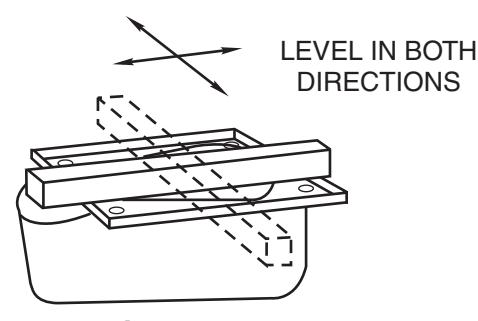
Figure 4