Programming Instructions Aegis 134W Digital Movement
Open the original PDF document
View PDF

Programming Instructions Aegis 134W Digital Movement
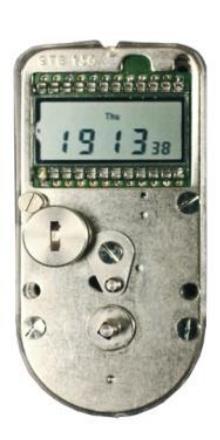
Fig 1 The display above shows that 7:13:38 PM has been set as "Real-Time" and that the day of the week is Thursday
The Aegis 134W digital movement is designed to provide the ultimate in security with the combined ease of operation and durability. The digital liquid crystal display and quartz technology provides simplicity of operation with exceptional readability and opening accuracy not obtainable in mechanical movements. The movement features instant open, which means the unlocking pin does not release the lock until exactly "0" hour.
The movement is programmed using the winding key supplied with the timelock assembly.
Setting Real Time
After installation of the power cell (either to address inadequate power or to reinitiate programming) the display on the movement will appear as in Fig 2
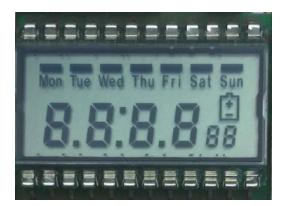
Fig 2
Begin installing the day of the week and the exact time of day in "military" format, by insert the winding key onto the winding arbor and rotate counter clockwise until you no longer feel any resistance on the winding key. Immediately, "Mon" will begin to flash. Refer to Fig 3 below.
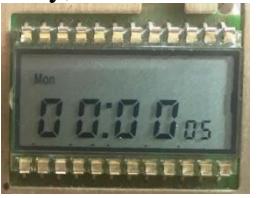
Fig 3
If Mon is not the current day of the week, rotate the winding key very slowly clockwise until the current day of the week is blinking. Stop on the correct day and wait several seconds and you will see the hour start flashing and the day of the week will remain solid. Advance the winding key clockwise to increase, counterclockwise to back-up and reduce the set hour. When you reach the correct hour, pause several seconds until the minute numerals begin to flash. Advance the minute numerals in the same manner as the hour numerals. When you reach the exact minute, stop all winding key motion and carefully remove the winding key from the winding arbor. The entire display will flash several seconds, followed by the unlocking or release of the unlocking pin back to its neutral point. The display will appear similar to the one shown in Fig 1 above. Only the colon will flash while the seconds advance in a normal manner.
Setting Unlocking (Opening) Times for Each Day
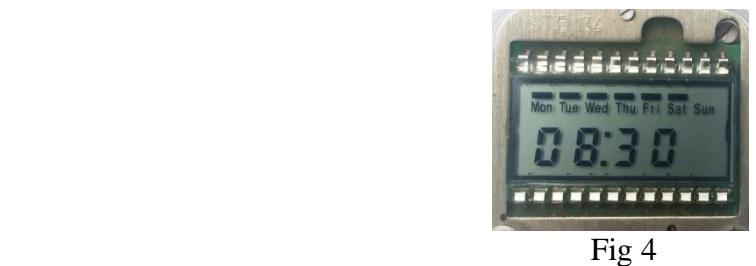
After installing "Real-Time" your timelock movement will unwind and the display will look similar to Fig 1. The next step is to program in an opening time for each day you want the timelock to unlock. For example, your normal time each day to access your safe or vault is 8:15AM. On Saturday, you do not open the safe or vault until 10:00AM and you are closed on Sunday. Start by rotating the winding key counterclockwise until you no longer feel any resistance on the winding key. Immediately, "Mon" will flash. Let the day of the week flash until the hour numerals begin to flash. Once the hour numerals begin to flash, advance the winding key clockwise until "08" appears. If you over-shoot your target hour, reverse key rotation. When you are satisfied with the hour, stop rotating the winding key. Within several seconds, the minute numerals will begin to flash. Set the minutes in the same manner you set the hour. When you are satisfied that the minutes are set correctly, stop rotating the winding key. Within several seconds, "Tue" will begin to flash. Repeat the same several seconds, "Tue" will begin to flash. Repeat the same process for "Tue" that you did for "Mon." If your schedule includes a day off either on Sunday or any other day of the week, simply take no action when that day, hour and minute flashes. For each scheduled opening day and time a solid cursor will show above that day, indicating that day has a program in place. Refer to Figure 4 below.
When all the days of the week are programmed, a verifying program takes effect automatically. The entire program sequence will step through each day of the week allowing you to verify the accuracy of your programmed opening days and times. If the days and times are correct, take no action, allowing the verifying program to run its course. If an error was detected in the day or time programming, remove the power cell for a minimum of 30 seconds and reinitiate the programming, beginning with "Setting Real Time". At the end of the verification program, the movement will unlock, releasing the movement's unlocking pin back to the neutral, unlocked position. The display will appear similar to Fig 1 above.
The following programs can be initiated after the above programming has been completed.
Program 1: This feature is commonly referred to as "Extra-Close/Short-Close." Occasions will arise where it will be desirable to close and lock your safe, vault or chest for a short period of time during the day. This feature allows you to add an additional opening time to your existing program without disturbing your existing programming. Example: The current time is 1:00PM (13:00 military time). You decide to lock your safe until 4:30PM (16:30 military time). Insert and rotate the winding key counterclockwise until no resistance is felt. Wait 5 seconds and begin rotating the winding key clockwise until the LCD displays "Pr 1". Stop rotating the winding key. When the hour numerals begin to flash, install the next opening hour, which in our example is 16. After installing the hour, wait for the minute numerals to begin flashing. Install the actual minutes of the next opening, which in our example is 30. After you stop rotating the winding key the entire display will flash several times, cease flashing and the unlocking pin will remain in the fully locked position. Prepare all remaining movements in the same manner. Your timelock will now open at 16:30 (4:30PM). This is a one-time program which will not repeat.
Program 2: "Skip A Day" - this feature allows you to cancel a scheduled opening. Example: Monday is a holiday and you want your safe, vault or chest to remain locked rather than open as scheduled Monday morning. Insert and rotate the winding key counterclockwise until no resistance is noted. Wait 5 seconds and begin rotating the winding key clockwise until "PR 1" appears. Continue rotating clockwise, stopping when "PR 2" appears in the display. Each day of the week that has a scheduled opening time will appear. The cursor will flash above each day individually. When the cursor flashes over the day you wish to cancel, rotate the winding key clockwise until the cursor over that day disappears. You may cancel 6 out of 7 opening times. After the cursor over the day you chose disappears, stop rotating the winding key. After the program steps through the remainder of the days, the movement will release to the fully unlocked position.
Program 3: "Daylight Savings Time" - this feature allows you to adjust "Real-Time" for seasonal changes. Insert and rotate the winding key counterclockwise until no resistance is noted. Wait 5 seconds and begin rotating the winding key clockwise. Scroll through "PR 1 & PR 2" stopping when "PR 3" appears on the display. The hour numerals will begin to flash. Adjust the hour reading up or down by one hour. Shortly after you stop rotating the winding key, the minute numerals will flash. Adjust the minute reading in the usual manner. After you stop rotating the winding key, the display will begin to flash and release the movement to the fully unlocked position.
WWW.tmilock.com Corporate Headquarters : 127 SE 29th St • Topeka, Kansas 66605 • USA Tel. 785-232-8705 Fax 785-232-2603