Programming Instructions Aegis 134N Digital Movement
Open the original PDF document
View PDF

Programming Instructions Aegis 134N Digital Movement
Product Introduction
The 134N movement supersedes the 134W movement and incorporates several new features that enhance the value and versatility of this product.
- · Day Time Changes can now be made without having to power down the Movement to re-program
- · New P5 position, which allows the Movement to be programmed for long close periods simply by entering the total number of desiredhours
- · Next Opening time will be displayed automatically when the confirm signal sequence is completed
- · Once the movement has completed the long close, the time is deleted automatically and the movement reverts back to the regular programmed schedule when the movement isre-armed
- · New revised battery life threshold battery life now exceeds 70,000 plus openings
- · LCD powers down 15 MINUTES after the programming has been completed, or when movement dictates no activity powering up automatically at the next arming.
Table of Contents
| Page | |
|---|---|
|
Product
Introduction |
2 |
|
Identification of
Key Components |
4 |
|
Initial Set-up
of Movement |
5 |
|
Setting The Daily
Opening Times |
6 |
|
Brief Description of The
"P" Functions |
7 |
|
P1 Programming the Short
Close Function |
8 |
|
P2 Programming the Deleting an
Opening Time |
9 |
|
P3 Programming the
Summer/Winter Time |
10 |
|
P4 Programming the
Long Close |
11 |
|
P5 Programming the P5 Creating
Day/Time Changes |
13 |
|
Trouble
Shooting |
14 |
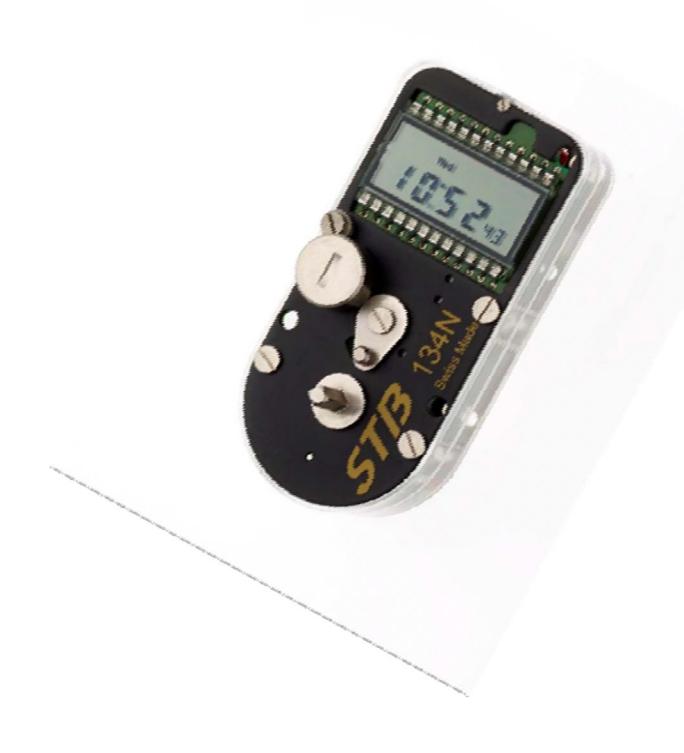
Identification of Key Components

Programming Indicatiors
Selection Flashes x2 = Ready to accept selection
Selection Flashes x3 = Selection registered
Initial Setup
- 1. With top of "Winding Key" insert into the slot in top of battery cap and turn ANTI-CLOCKWISE
- 2. Carefully insert battery with the + facingUpwards
- 3. Never hold battery between thumb and forefinger on the + and - poles of the battery simultaneously, as this will immediately discharge the battery
- 4. Replace cover by gently pushing down and turning clock-wise until cap is securely fixed in position
- 5. The LCD will light up and all icons on the screen will be shown. Make sure that all the icons shown are free from defect
- 6. Take the key and insert onto the Winding arbor and turn ANTI-CLOCKWISE until a "click is heard, turn another 1/4 turn to make sure arming mechanism is fully engaged
- 7. At this point the MON will flash x 2 at the top left corner of the LCD screen. Immediately turn the key clockwise if you are setting up on any other daythan Monday
- 8. When you are on the desired day allow it to flash x 3 after which itwill automatically enter into the Hour programming sequence
- 9. The Hour will flash x 2 after which turn the key clock-wise to select the desired Hour.
- 10. Once the desired Hour is selected wait, until the Hour flashes 3 times indicating the Hour has been registered after which the MINUTES display will flash twice
- 11. By turning the key Clockwise will allow the current MINUTES to be selected
- 12. Once the desired MINUTES is selected wait, until the MINUTES flashes 3 times indicating the MINUTES has beenregistered.
- 13. The total selection will now flash Three Times Indicating the primary setup has been completed satisfactorily.
- 14. At this point if any errors have been made they can be easily corrected by going back through the previous programming procedure.
- 15. After Flashing 3 times the movement will disarm (Trigger Pin moves to the Open position) if there is no further activity LCD will power down automatically after 15 Minutes thereby considerably increasing batterylife.
Setting Up Daily Opening Times
- 1. Take the key and insert onto the Winding arbor and turn ANTI-CLOCKWISE until a "click is heard, turn another 1/4 turn to make sure the arming mechanism is fully engaged.
- 2. In the upper right hand corner the MONDAY Icon will flash twice after which the Hour and then the MINUTES.
- 3. To skip this day simply turn the key clockwise until the following days of the week are observed.
- 4. Stop on the day you wish to create a new opening, it will flash times followed by the
- 5. Hour and then the MINUTES, each successfully completed programming operation will flash 3 times
- 6. To program 7 days, Monday is always the default day in the programming sequence as its considered that most working weeks start on a Monday, although the week can be configured to local conditions withease.
- 7. Once Monday has flashed three times you will be presented with the Hour opening display.
- 8. Once the Hour has flashed twice immediately turn the Winding Key clockwise to the desired Hour, after selection wait 3 seconds, after which the Hour will now flash 3 times indicating the Hour has been programmed successfully now, the MINUTES will flash 2 times.
- 9. Once the MINUTES have flashed 2 times, immediately turn the WindingKey Clockwise until the desired MINUTES. The MINUTES will now flash 3 times
Brief Description Of The "P" Functions
- 1. The "P" positions on the Movement are considered as the utility parts of the product, allowing the user to modify fundamental functionality of the product and be able to respond more closely to user and local operatingconditions.
- 2. It is strongly advised that the "P" functions be read closely and the user be fully conversant with the different "P" functions" before final programming and the shutting of the container door .
- 3. It should be noted that the "P" positions can only be accessed once the Movement has been armed.
- 4. Care must be taken when setting up any of the time lock functions, especially the long close function.
- 5. Once programmed and the door of the container is shut, the container cannot be opened until the program has completed its runtime.
- 6. P1 Allows the Movement to be "Short Closed" from a Minimum of 1 Hour. Once programmed no further Hour changes can be made until the Hour has passed.
- 7. P2 Allows the user to remove previously programmed days and hour information and Hour information without having to power down theMovement
- 8. P3 Allows the user to change local Summer to Winter Time (this is a manual not automatic function)
- 9. P4 Allows the user to program a long close accurately by the desired number of Hours. Once the run down is completed the Movement reverts automatically back to the preprogrammed opening schedule, no need to power down the movement.
- 10. P5 Allows the creation or change of daily opening without having to power down the Movement
Programming The P1 Short Close Function
- 1. Turn the Winding Key ANTI-CLOCKWISE until it CLICKS
- 2. After the movement CLICKS turn Winding Key CLOCK-WISE several times until the "P1" is displayed in the LCD Screen
- 3. After the "P1" is displayed, it will flash 2 Times followed by the Hour Value which will then flash 2 times
- 4. After the HOUR has flashed 2 times enter a new HOUR value, and the NEW HOUR value will flash 3 Times and the MINUTES value will be displayed and flash 2 times.
NOTE:
The minimum value that can be entered is 1 Hour more than the current time displayed.
- 5. After the MINUTES have flashed 2 times, enter the NEW MINUTE value, the NEW MINUTES value will then flash 3 times.
- 6. After the MINUTES value has flashed 3 times the NEW HOUR and Minutes values will flash 3 times together indicating a successful programming of the SHORT CLOSE function and the Movement willDisarm.
P2 Programming Function, Deleting An Opening Day Or Time
- 1. Turn the Winding Key ANTI-CLOCKWISE until it CLICKS
- 2. After the movement CLICKS turn Winding Key CLOCK-WISE several times until the "P2" is displayed in the LCD Screen.
- 3. After the "P2" is displayed, it will flash 2 Times followed by the DAY of the Week Value with a black bar icon at the top of the LCDScreen.
- 4. If you wish to delete the day turn the key clockwise, the black icon will be deleted and the black day icon will be removed, after which and the day curser will move to the next previously programmed opening day.
- 5. If the next opening Day is to remain unchanged, then allow the DAY curser to move to the subsequent day opening .
- 6. Once the desired days have been removed, the program will pass so that the changes can be verified
- 7. Once this cycle is completed the LCD will then flash 3 times all the days of the week simultaneously, showing active and non-active days, after which the movement will disarm
NOTE:
It is impossible to delete all the programmed openings, one valid opening will always remain, in order top prevent a total container Lockout.
P3 Programming Function Programming For Daylight Savings
- 1. Turn the Winding Key ANTI-CLOCKWISE until it CLICKS
- 2. After the movement CLICKS turn Winding Key CLOCK-WISE several times until the P3 is displayed in the LCD Screen
- 3. "P3" Flashes 2 times in the LCD Screen after which the Hour flashes 2 times
- 4. After the Hour has flashed 2 times, turn the key either 1 hour forward or 1 hour back of the current local time
- 5. The new current time will now flash 3 times after which the Movement will disarm
P4 Programming A Long Close Time
- 1. Turn the Winding Key ANTI-CLOCKWISE until it CLICKS
- 2. After the movement CLICKS turn Winding Key CLOCK-WISE several times until the "P4" is displayed in the LCD Screen.
- 3. "P4" Flashes 2 times in the LCD Screen after which the MONDAY flashes 2 times.
- 4. When the MONDAY Flashes turn the Winding Key CLOCK-WISE, the Day Cursor will skip to the desired Start Day
- 5. At the desired Start Day allow to flash 2 times and now enter a value of 1-9 by turning the key Clockwise or Anti Clockwise (remember this value is in 100's) I.E the value of 1 equals 100 Hours
- 6. After the 100 HOUR value has been entered it will flash 3 times and move to the next value window and flash 2 times
- 7. Once the LCD flashes 2 times enter a value of 1-99 by turning the key clockwise
- 8. A value of 1 equals 1 hour, while a value of 44 would be 44Hours
- 9. Once the desired value has been entered the display will flash 3times
NOTE:
It is strongly advised that this sectioned be thoroughly understood before starting to program the movement.
NEVER SHUT THE CONTAINER DOOR BRFORE THE PROGRAMMING HAS BEEN VERIFIED 100%..
An error in the desired number of hours will secure the container until the countdown has completed, creating a possibility of a premature or seriously delayed opening, either way compromising normal operation.
P4 Programming A Long Close Time
- 10. After which the next opening time and the opening day will beflashed
- 11. Then the display will revert back to the current time
Example:
We want to set 240 Hours closing.
First we set the far left display to 2 indicating a value of 200 Hrs. After it will Flash 3 time confirming the entry and move to the next level where it will flash 2 times indicating it is ready to accept the next hour value. In this case we add a 4 in the tens slot. Turn the key clockwise until 40 hours appears.
The display will now flash 3 times confirming the value of 40 Hours has been confirmed.
After which the next opening time after 240 hours has expired will be displayed and the day of the next opening
The unit will then disarm.
NOTE:
If the first 100's hour value is not required enter no value after the 100's hour value flashes 2 times, then allow the 100's hour to flash 3 times, after which it will move automatically to the 10's hour display and flash 2 times.
The long close will start from the previously programmed opening time.
Programming The P5 Function Creating Day Change
- 1. Turn the Winding Key ANTI-CLOCKWISE until it CLICKS
- 2. After the movement CLICKS turn Winding KeyCLOCK-WISE
- 3. several times until the "P5" is displayed in the LCDScreen
- 4. "P5" Flashes 2 times in the LCD Screen after which the DAY flashes 2 times
- 5. After the DAY flashes 2 times the days can be skipped by turning the Winding Key CLOCK-WISE
- 6. Once the desired day is selected, the HOUR will flash 2times
- 7. After the Hour has flashed 2 times, enter the desired HOUR value after which the Hour will flash 3 times and move to the MINUTESdisplay
- 8. After the MINUTES display has flashed 2 times enter the desired Minutes value.
- 9. After the MINUTES has flashed 3 times, the Days of the week the day being changed and the Black Icon over the changed day flash 3 times, indicating a successful opening time change, without having to power down theMovement.
- 10. The Movement will disarm and the current time be displayed.
Troubleshooting
This Section is intended as a first level reference to resolving operational issues that may occur with the unit. In the event that the problem cannot be resolved contact your nearest Safe Technician or TMi Customer Support
LCD Remains blank Check Battery Insulator has beenremoved
Remove Battery and ground Battery contact to top plate, to reset movement electronics then re-install
battery or replace battery
Check battery retaining spring in cap is present
Movement won't arm Replace battery as above
Turn winding Key Anti clockwise, if no click is heard then problem is mechanical, the movement should be returned
to TMi service center for repair
LCD is faint or Number Check Battery Condition, Electronic board grounding
Icons are malformed or missing issue
Circuit Board ground failure, the movement should be
returned to TMi service center for repair
NOTE:
The new 134N Movement will show a battery icon on first time power up and when the battery is approaching a change requirement.
When the battery level reaches the lowest operating level possible, the LCD will power down automatically and the movement will not arm, forcing an immediate battery change. If the battery is changed within a 10 second time span all programming data will be retained by the unit.
If the movement detects no activity after 5 minutes, it will power down to maximize battery life