PDQ SDS-XLS Installation Instructions 88328 Rev2
Open the original PDF document
View PDFSDS pdqSMART INSTALLATION INSTRUCTION CYLINDRICAL LOCK

Phone: 866-874-3662 | www.pdqlocks.com
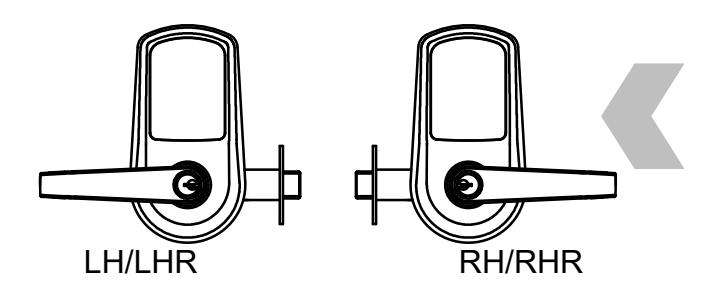
1. CHECK HANDING OF LOCK
If handing of lock is not correct for opening, see next page for handing instructions.
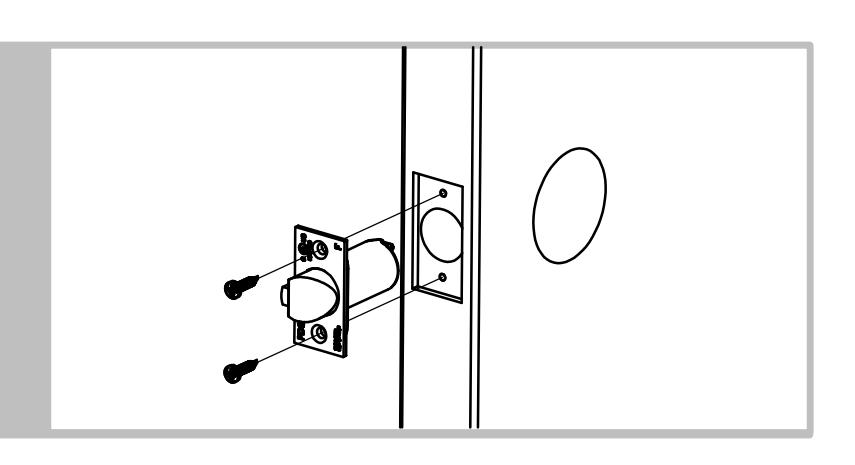
2. PREPARE DOOR & INSTALL LATCH
- Prepare door according to template.
- Install latch, radius toward door frame
- Secure with (2) #8 x ¾" combo screws.
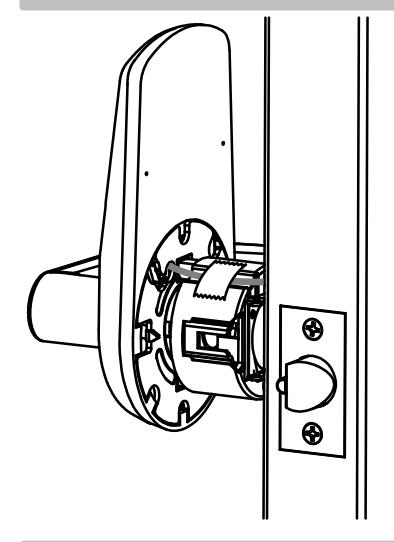
3. INSTALL OUTSIDE TRIM / CHASSIS ASSEMBLY
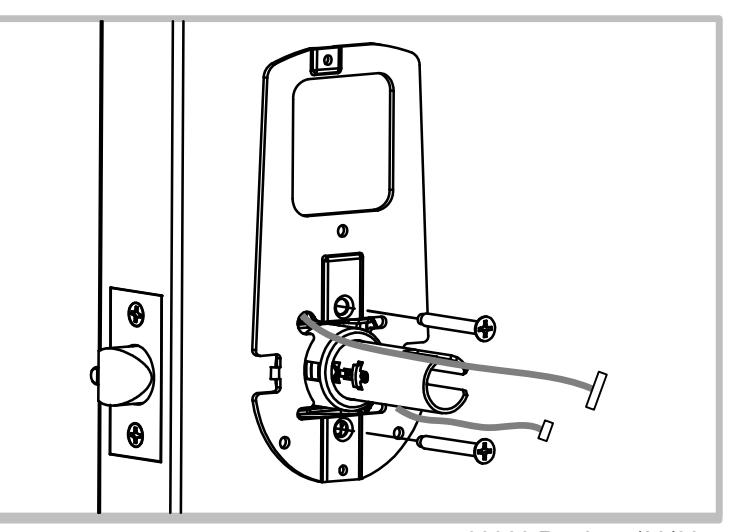
Install escutcheon/chassis assembly from outside of door – feeding wires through chassis hole in door.
4. INSTALL INSIDE MOUNTING PLATE
Install inside mounting plate and secure with (2) #10-32 x 1-7/16" flat head screws.
SDS pdqSMART INSTALLATION INSTRUCTION

5. CONNECT READER AND INSTALL INSIDE TRIM
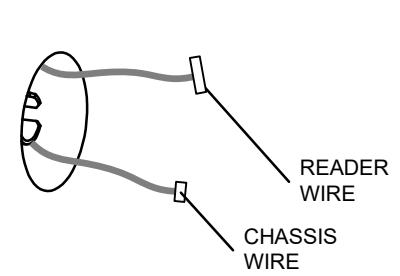
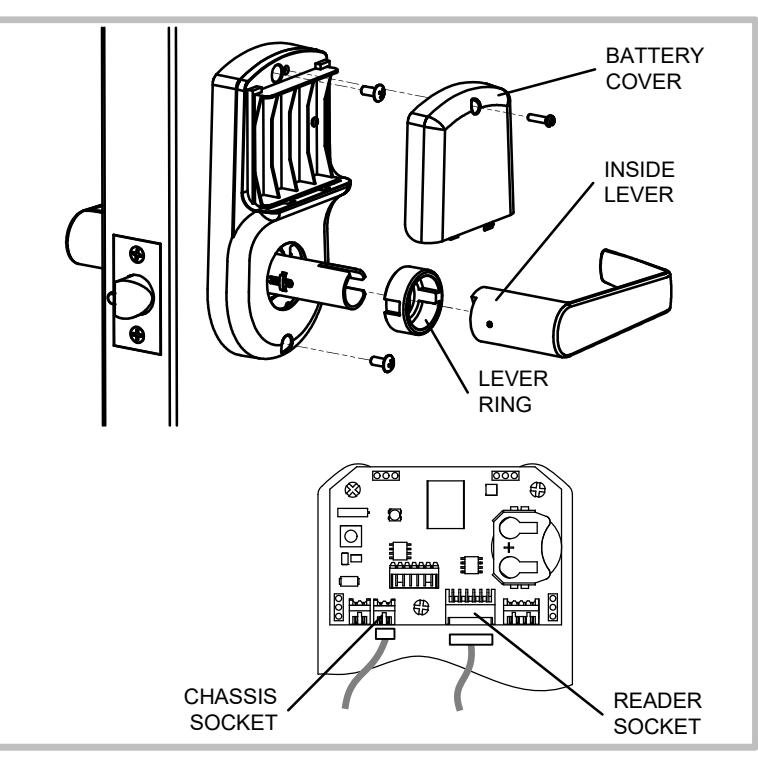
- Plug reader wire and chassis wire into sockets on control board on back of escutcheon, install escutcheon onto door. Be careful not to pinch wires.
- Secure escutcheon with (2) M4 x 12 Pan head screws.
- Install batteries and battery cover with M3 x 12 pan head screw.
- Install lever ring and inside lever push until lever retaining clip clicks into place.
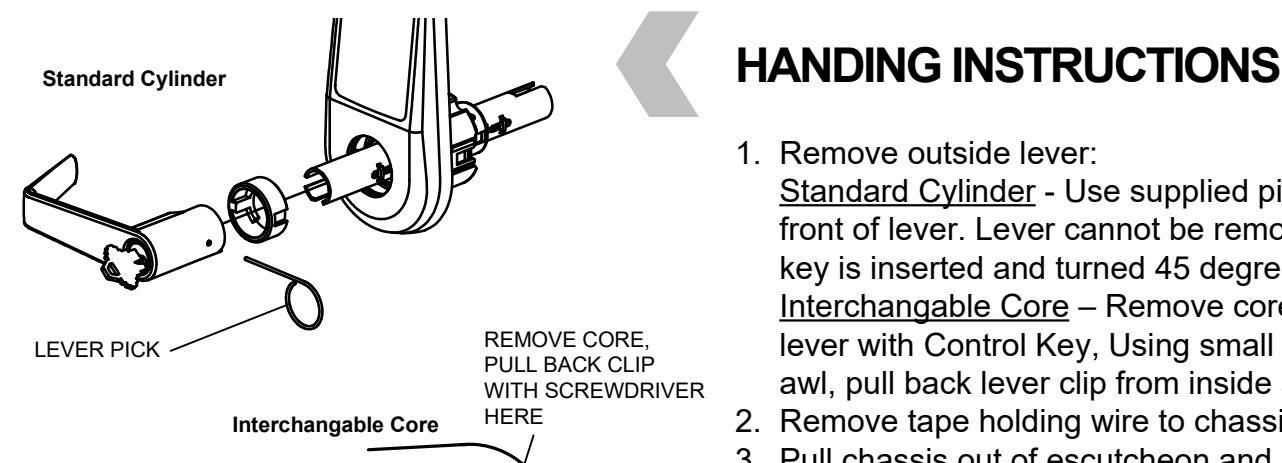
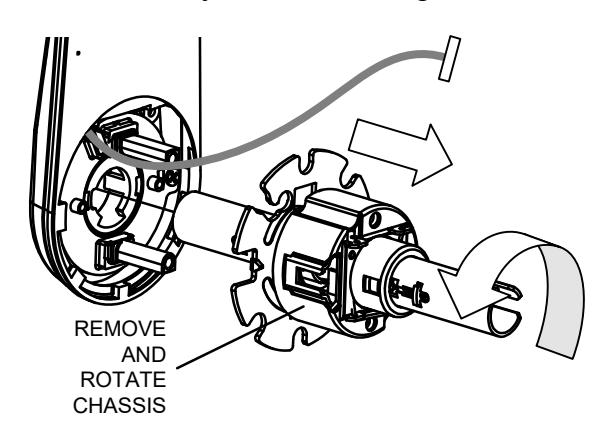
- 1. Remove outside lever:
- Standard Cylinder Use supplied pick in hole on front of lever. Lever cannot be removed with pick until key is inserted and turned 45 degrees. Interchangable Core – Remove core from outside lever with Control Key, Using small screwdriver or
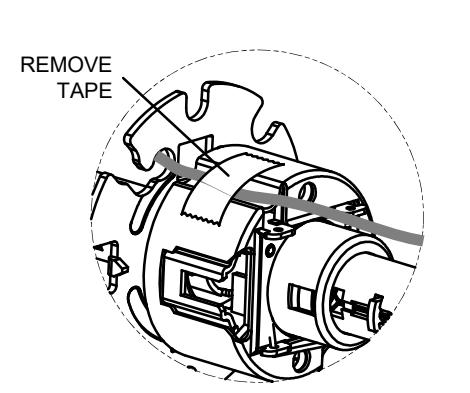
- 2. Remove tape holding wire to chassis.
awl, pull back lever clip from inside as shown.
- 3. Pull chassis out of escutcheon and rotate chassis 1/2 turn (180°) maximum.
- 4. Replace chassis and attach tape.
- 5. Re-install lever Standard: Rotate key while installing / IC: Insert Core