PDQ CL Series Installation Instructions and Marking Template
Open the original PDF document
View PDFInstructions For Installation of Interconnected Lock
1. Mark door
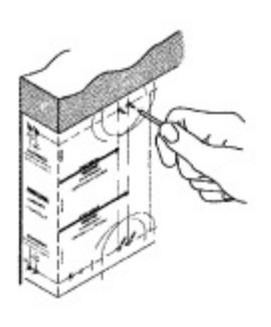
- A. Check lock for proper backset and door thickness of the door before marking.
- B. Fold template at correct marking for door.
- C. Mark appropriate centers for 2 ½" (54mm) holes.
- D. Mark center for 1" (25mm) diameter latch holes in door edge.
2. Drill holes
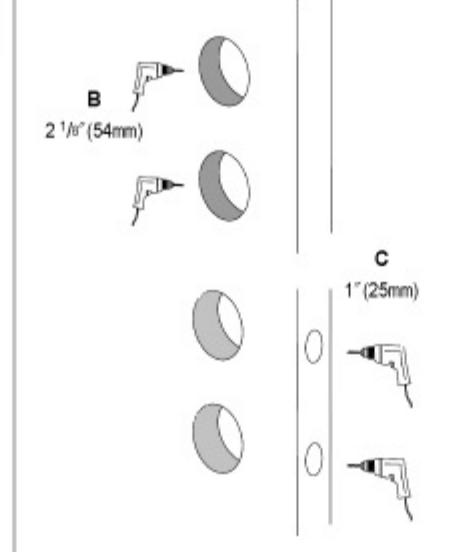
- A. Determine backset(2 3/4" or 2 3/6") of the lock.
- B. Drill the 2 ¹/o" (54mm) holes about halfway through door face from both sides to avoid damaging wood.
- C. Drill 1" (25mm) diameter holes in door edge.
3. Install Deadbolt & Latchbolt
Adjustable deadbolt is factory preset 23/4[[//0]mm) backset.
A. Bolt must be retracted.
Retract deadbolt(If necessary, use screw driver to turn carn and retract bolt).
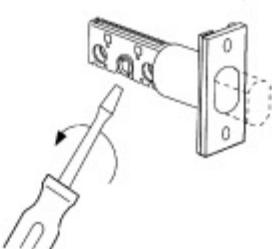
B. How to adjust for 2 3/8" (60mm) backset.
NOTE: Rotate faceplate and push down to move housing to next position.
C. Insert latch bolt and dead bolt into hole. Trace around faceplate.
combi-screws
Drill(4) 9/64" (3.5mm)
Mortise a 5/32" (4mm) deep cutout
- D. Chisel out wood until faceplate fits flat with door edge.
- E. Drill(4) %4" (3.5mm) holes and secure latchbolt and deadbolt with combi-screws supplied.
4. Prepare Door Jamb
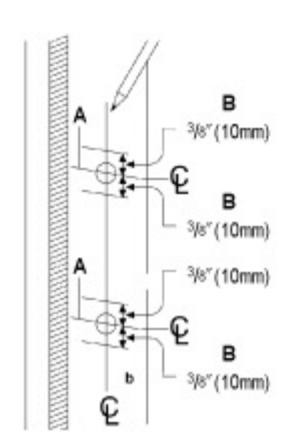
- A. Locate exact centerline of bolt and mark centerline on jamb.
- B. Mark drill points 3/6" (10mm) above and below centerline.
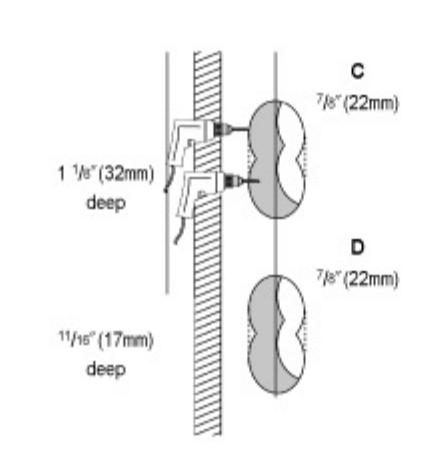
- C. Drill two overlapping 7/8" (22mm) holes 1 1/8" (32mm) deep for deadbolt. Clean out hole.
- D. Drill two overlapping 7/8" (22mm) holes, 11/16" (17mm) deep for latchbolt, into door jamb as shown.
5. Install Strike
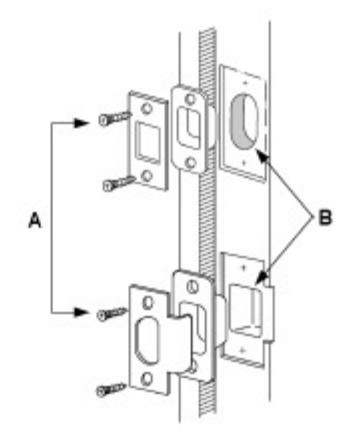
- A. Place strike box in hole. Place strike over the strike box and use it as pattern for cutout.
- B. Chisel about 1/6" (3.2mm) deep for flush fit of box and strike.
- C. Install strike box and strike.
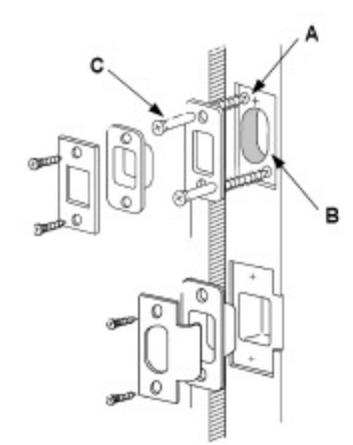
- A. Place reinforcer in cutout with screw holes as shown.
- Mark and drill 3/16" (5mm) pilot holes.
- B. Chisel about 1/4" (6mm) deep for flush fit of reinforcer, box and strike.
- C. Install reinforcer with 3" (76mm) wood screws.
- D. Install strike box and strike.
DOOR TEMPLATE

6. Prepare Handing
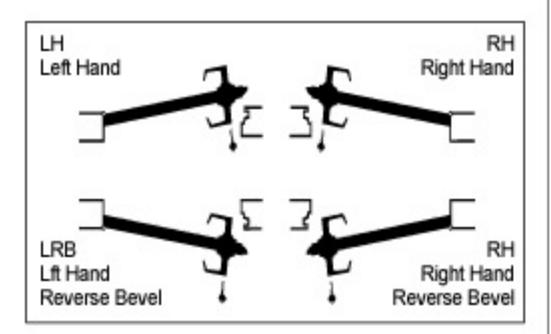
- A. Determine and note your hand of door
- B. If when standing on the exterior side of door, your door hinges are to the right, you have a right hand door
- C. If your door hinges are to the left, you have a left hand door.
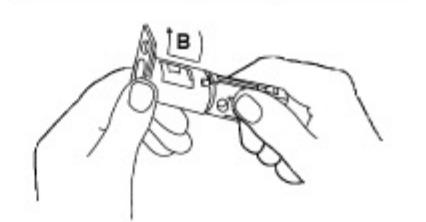
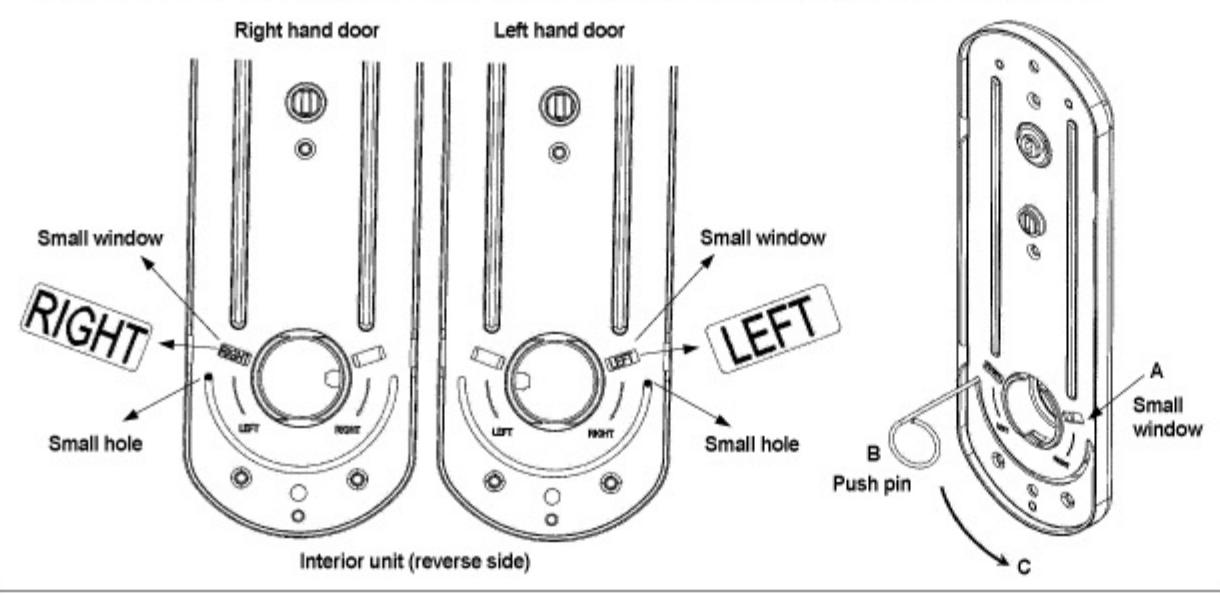
7. How to Change Door Hand
NOTE: The standard setting from factory is for right-hand door
How to Change Door Hand
- A. Check right-hand or left-hand.
- B. Insert push pin(provided) into a small hole at the end of semicircle as shown on following diagram.
- C. Move the push pin(provided) with holding a small hole align semicircle till to see " LEFT" or " RIGHT" in the small window.
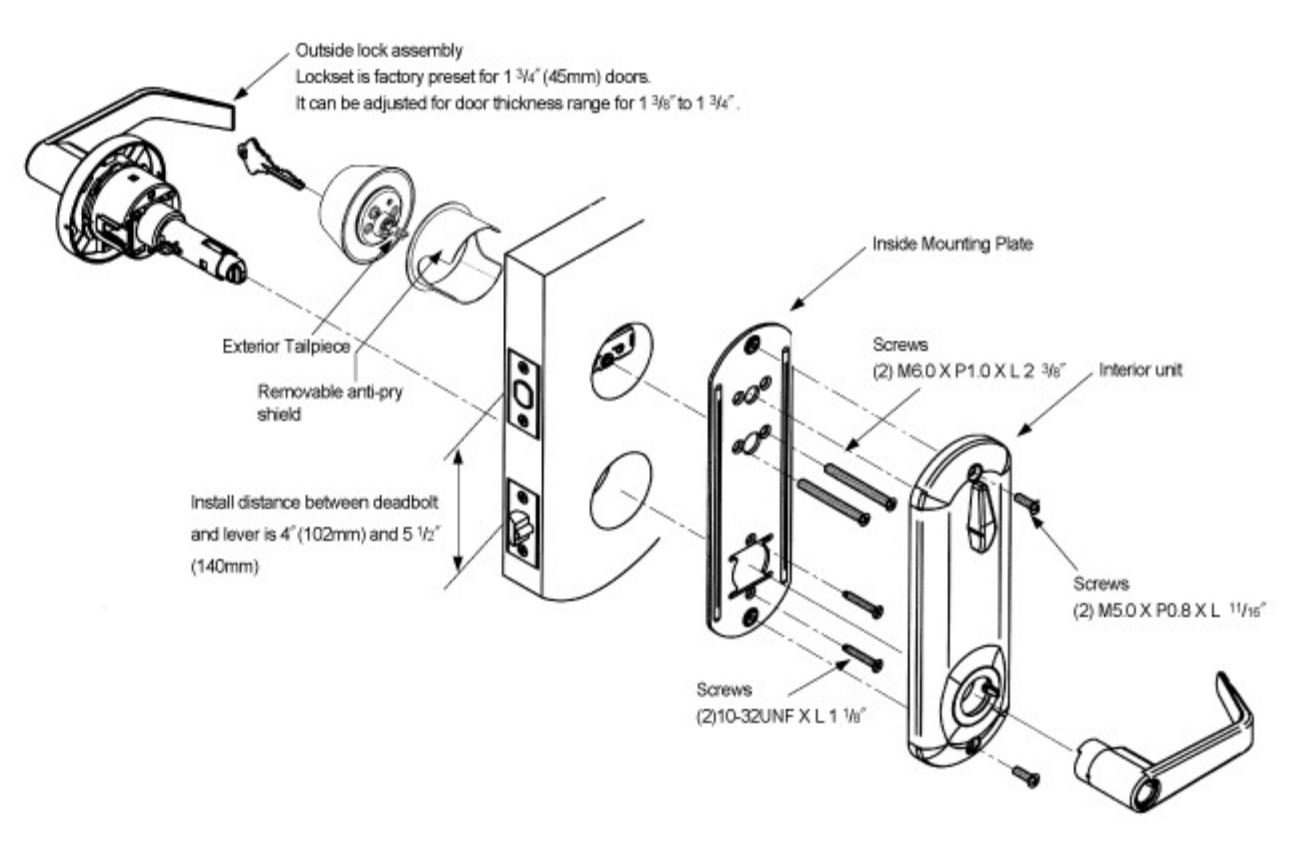
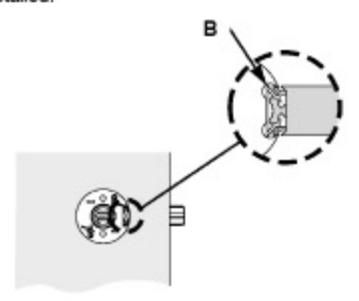
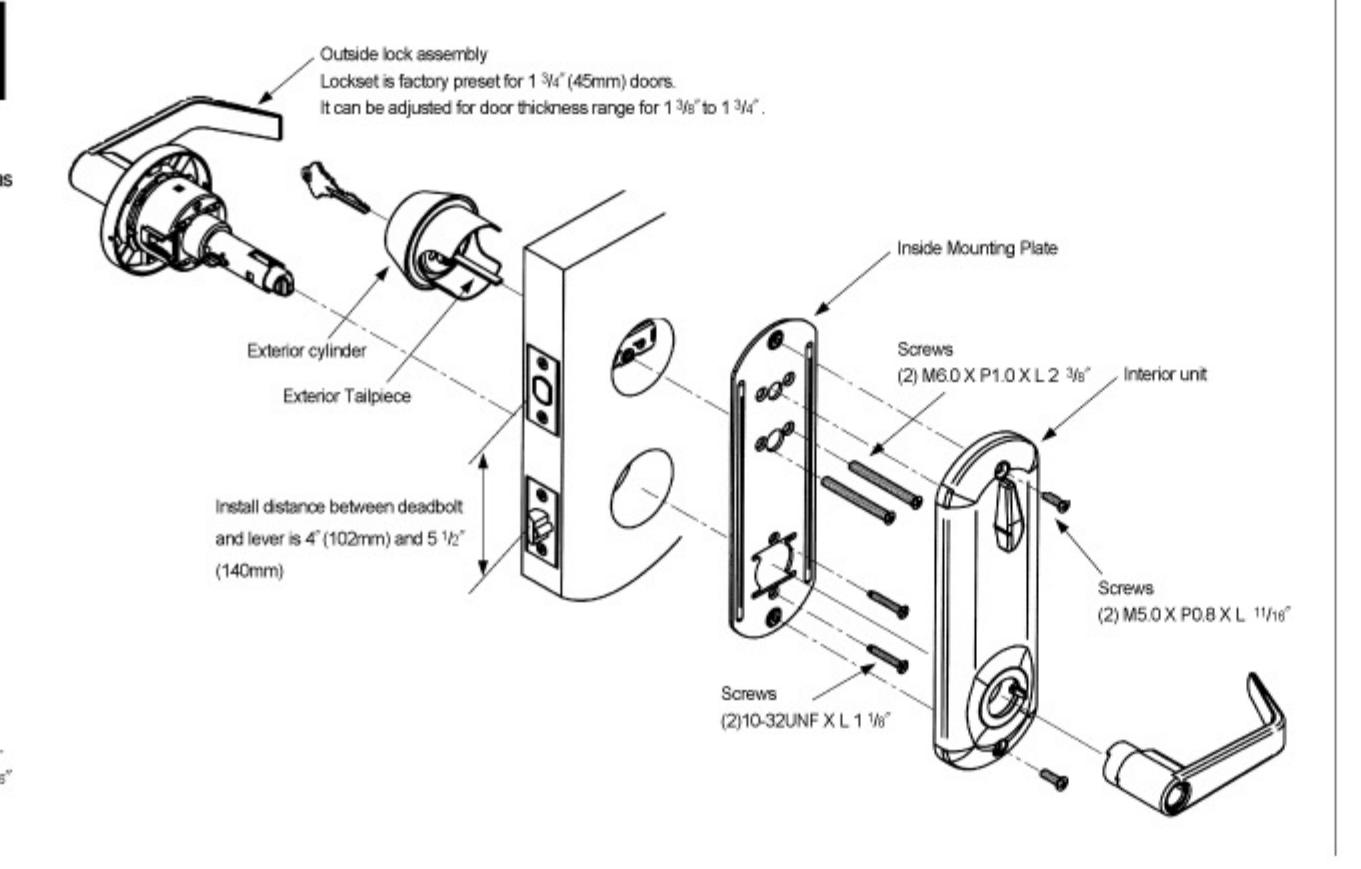
Lock Installation
- A. Remove inside lever from lock, using push pin.
- B. Install lock assembly into door and engage latch as detailed.
- C. Place inside mounting plate. Tighten it to lock body with two(2) 10-32UNF X L 1 1/s° screws.
- D. Install exterior <u>deadbolt</u> cylinder assembly, with tailpiece horizontally.
- E. Tighten inside mounting plate to exterior deadbolt cylinder with two(2) M6.0 X P1.0 X L23/8" screws.
- F. Installi interior unit with two(2) M5.0 X P0.8 X L<sup>11</sup>/16" screws.
- G. Install inside lever.

CL SERIES INTERCONNECTED LOCKS
PDQ Industries, Inc.
2754 Creek Hill Road Leola, PA 17540 1-800-441-9692 Fax: 717-656-6892
Web: www.pdqlocks.com