PDQ 6300 PDQ 6400 Alarm Kit Instruction – 639407 R0
Open the original PDF document
View PDF
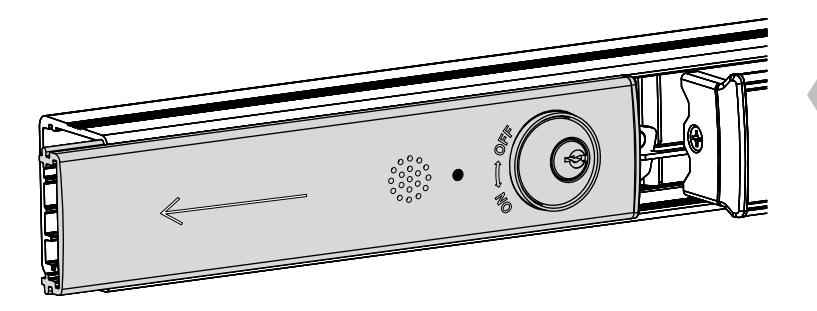
1. REMOVE FILLER PLATE
- Slide filler plate away from pushbar
- If plastic filler plug remains inside main rail, remove and reinstall into filler plate
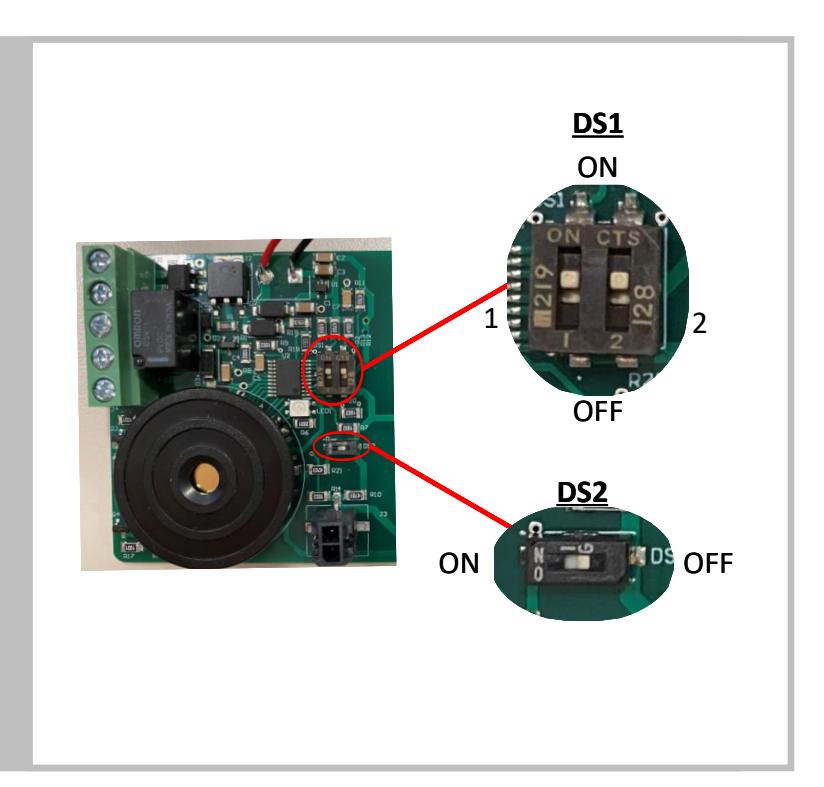
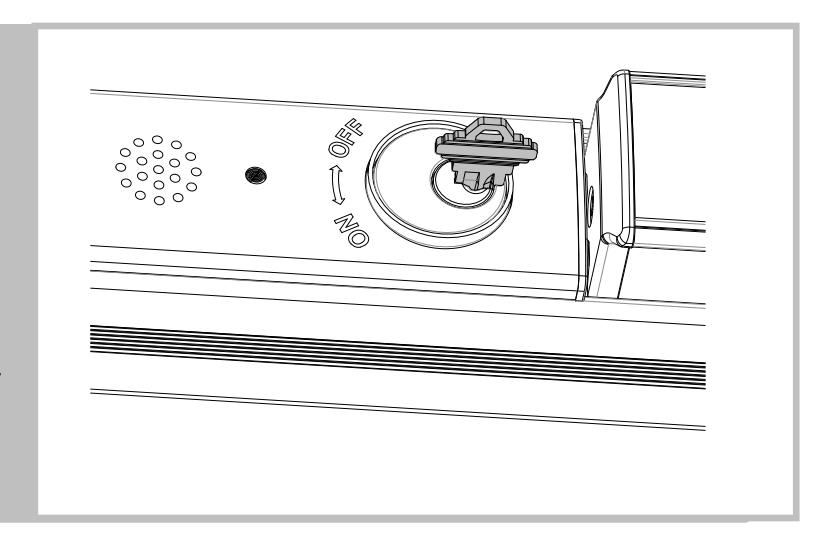
2. SET SIREN TIME
DS1 - Siren Time
| 1 | 2 | Siren Time | |
|---|---|---|---|
| OFF | OFF | Infinite | FACTORY |
| OFF | ON | 1 minute | DEFAULT |
| ON | OFF | 3 minute | |
| ON | ON | 7 minute |
• For relay option only: enable or disable relay
DS2 - Relay Output
| 1 | Relay Output | |
|---|---|---|
| OFF | Disabled | FACTORY |
| ON | Enabled | DEFAULT |
| Relay Specs | |||||
|---|---|---|---|---|---|
| Contact Current Rating | 1A | ||||
| Switching Voltage |
125VAC/60VDC
MAX |
||||
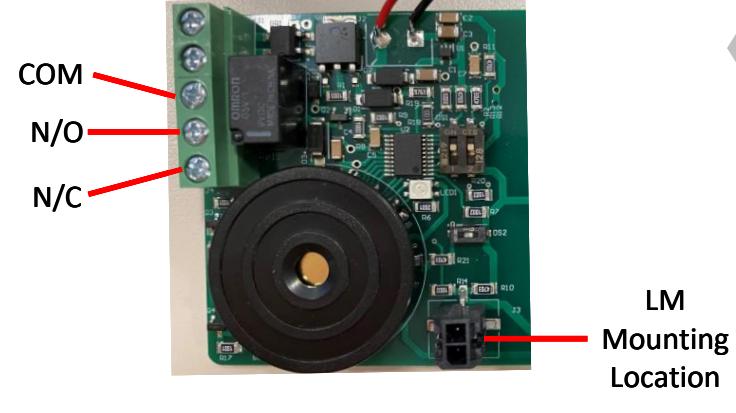
3. ADD OPTIONAL ITEMS
- Connect latchbolt monitor (LM) switch to alarm board
- For relay option:
LM
o Connect external system to relay terminals
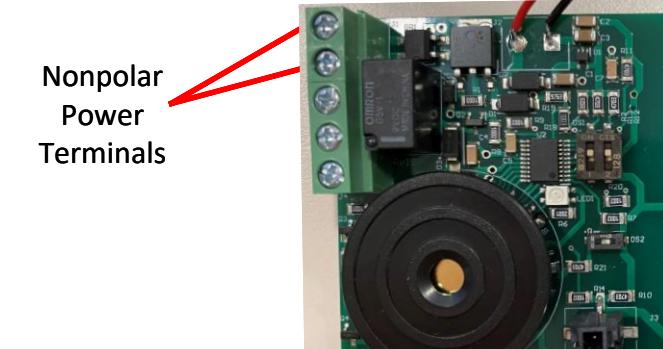
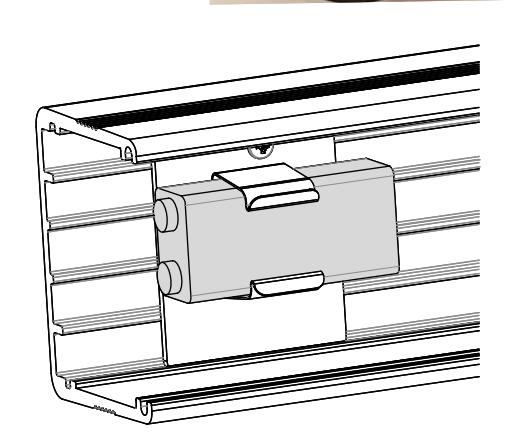


- Complete one or both of the following:
- Add 12-24VDC/VAC to power terminals
- Install 9V alkaline battery in rail and connect to battery lead
5. VERIFY FUNCTION
-
For fire labeled devices:
- o Verify ON and OFF positions
-
For panic labeled devices
-
o Verify ON and OFF positions
- Verify OFF and DOGGED only possible when pushbar is first depressed
-
o Verify ON and OFF positions
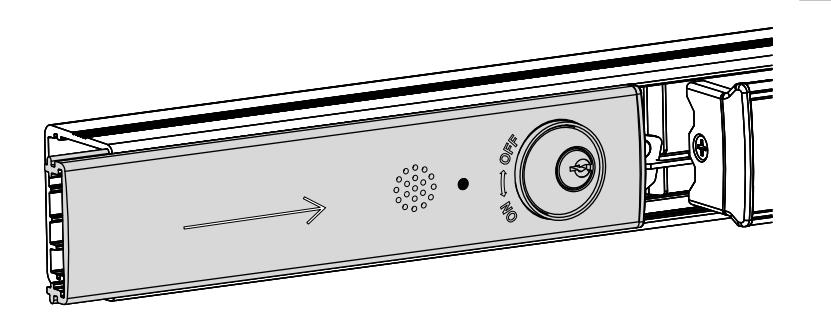
6. REINSTALL FILLER PLATE AND END CAP
- Ensure filler plate is flush with main rail
- Reinstall end cap
- Visit pdqlocks.com for alarm kit datasheet