Norton Rixson 91 Series 91BH Security Overhead Concealed Closer Non-Hold Open, Metal Frame Installation Instruct…_IS-91BH
Open the original PDF document
View PDFModel 91BH
Security Overhead Concealed Closer Non-Hold Open, Metal Frame

ASSA ABLOY
Installation Instructions

This product can expose you to lead which is known to the state of California to cause cancer and birth defects or other reproductive harm. For more information go to: www.P65warnings.ca.gov.
READ AND FOLLOW ALL INSTRUCTIONS. SAVE THESE INSTRUCTIONS.

Contents
| Before You Begin: | 2 |
|---|---|
| Installation . | 3 |
| Adjustments | 5 |
| Troubleshooting . | 6 |
| Templates | 7 |
IMPORTANT:
- y An improperly installed or incorrectly adjusted door closer may cause property damage or personal injury and will void product warranty.
- y To avoid personal injury, DO NOT DISASSEMBLE THIS DOOR CLOSER BODY.
- y Protective equipment, including personal protective equipment for eyes, face, head, and extremities shall be worn as necessary in compliance with OSHA standards.
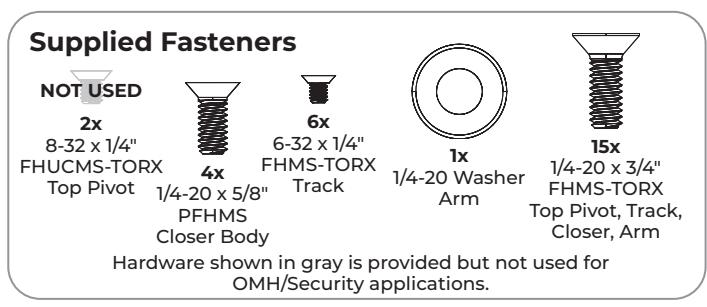
- y Door closers must be securely fastened to a prepared door and frame with fasteners provided.
Before You Begin:

- y The Americans with Disabilities Act (ADA) requires that doors having door closers have an opening force not to exceed 5 lbf.
- y Door closer's power size adjustment feature may require adjustment to its lowest setting to comply with ADA opening force guidelines.
- y ADA compliant closers may not latch doors, manufacturer does not guarantee latching on lower opening force settings.
- y A separate auxiliary door stop, supplied by others, is strongly recommended to avoid damage to door closer and adjacent property.
- y Doors should be hung on ball bearing or anti-friction hinges/pivots. Door must swing freely. For other hanging means a special layout may be required, consult factory.
- y Door and frame must be reinforced for attaching screws.
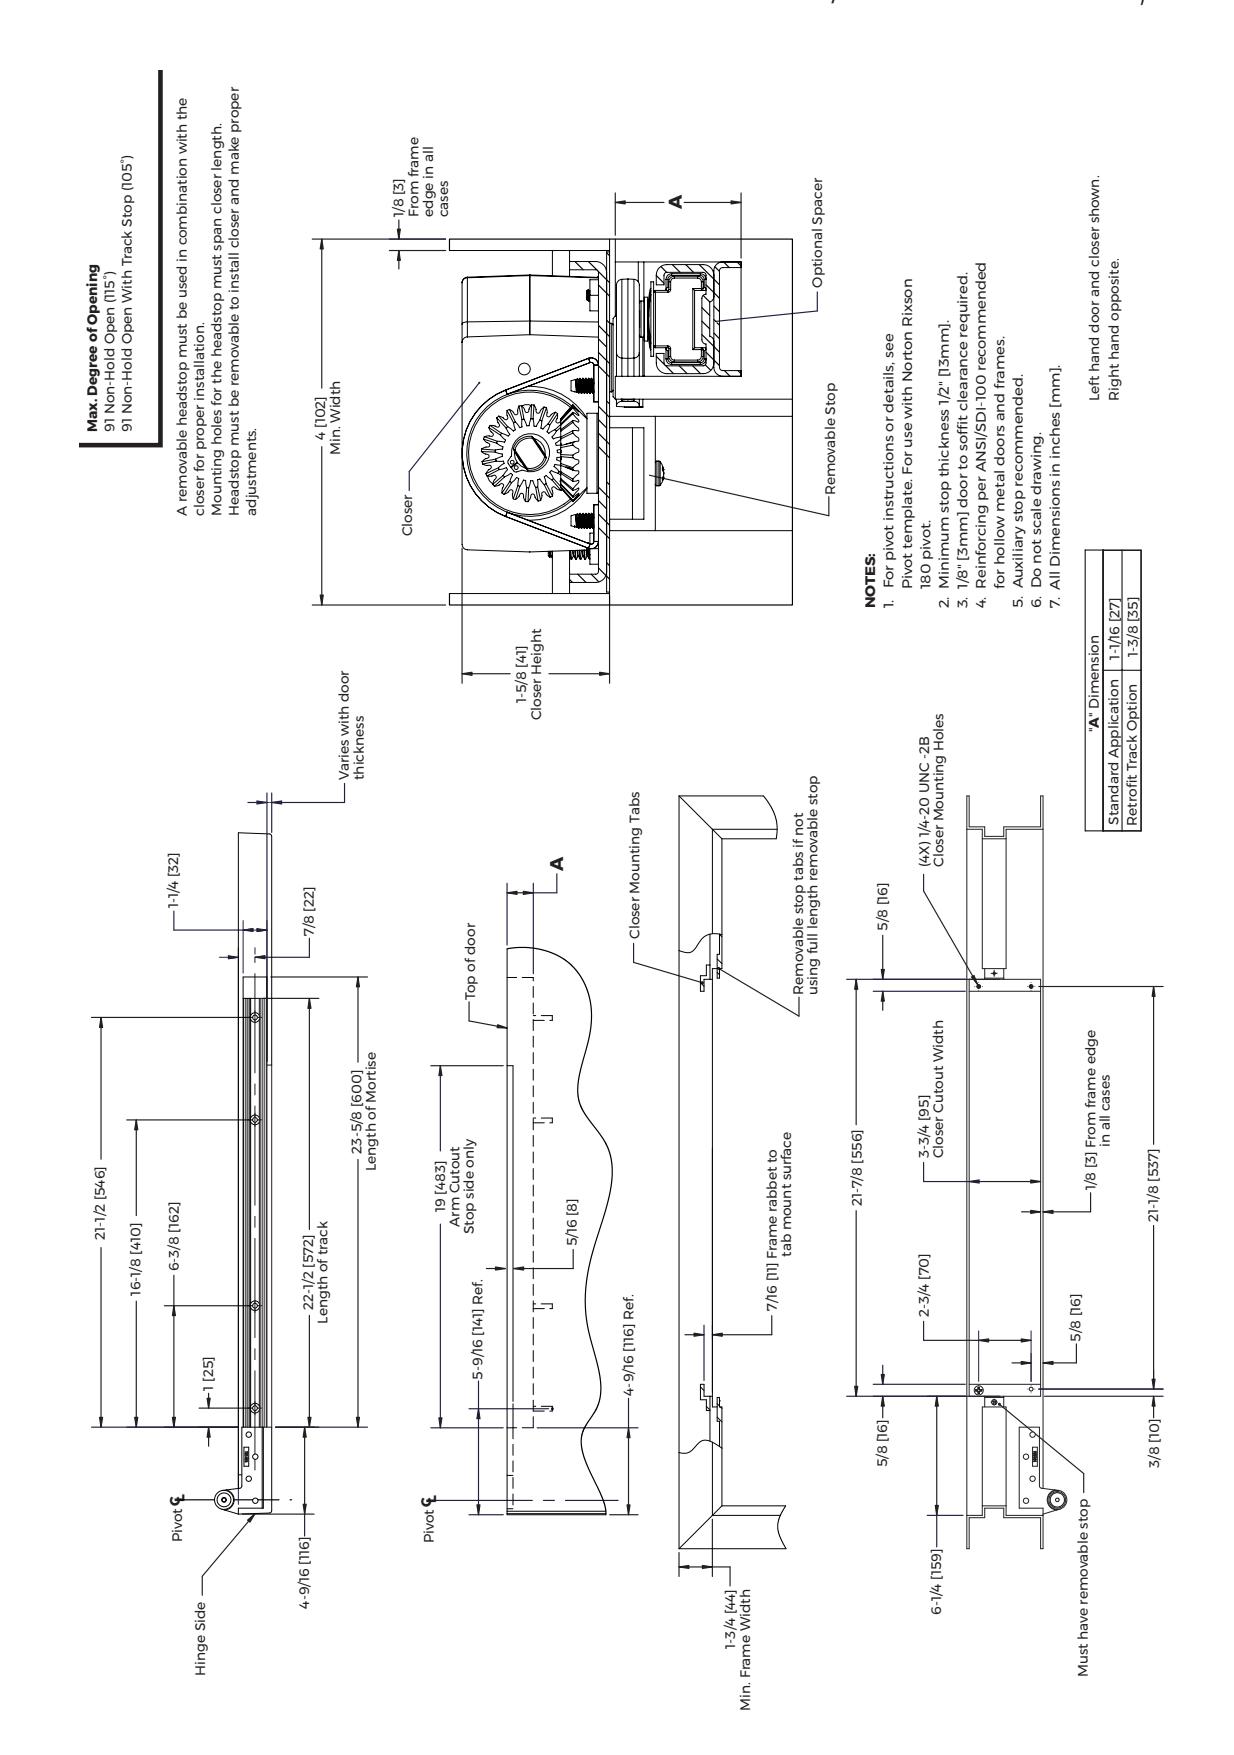
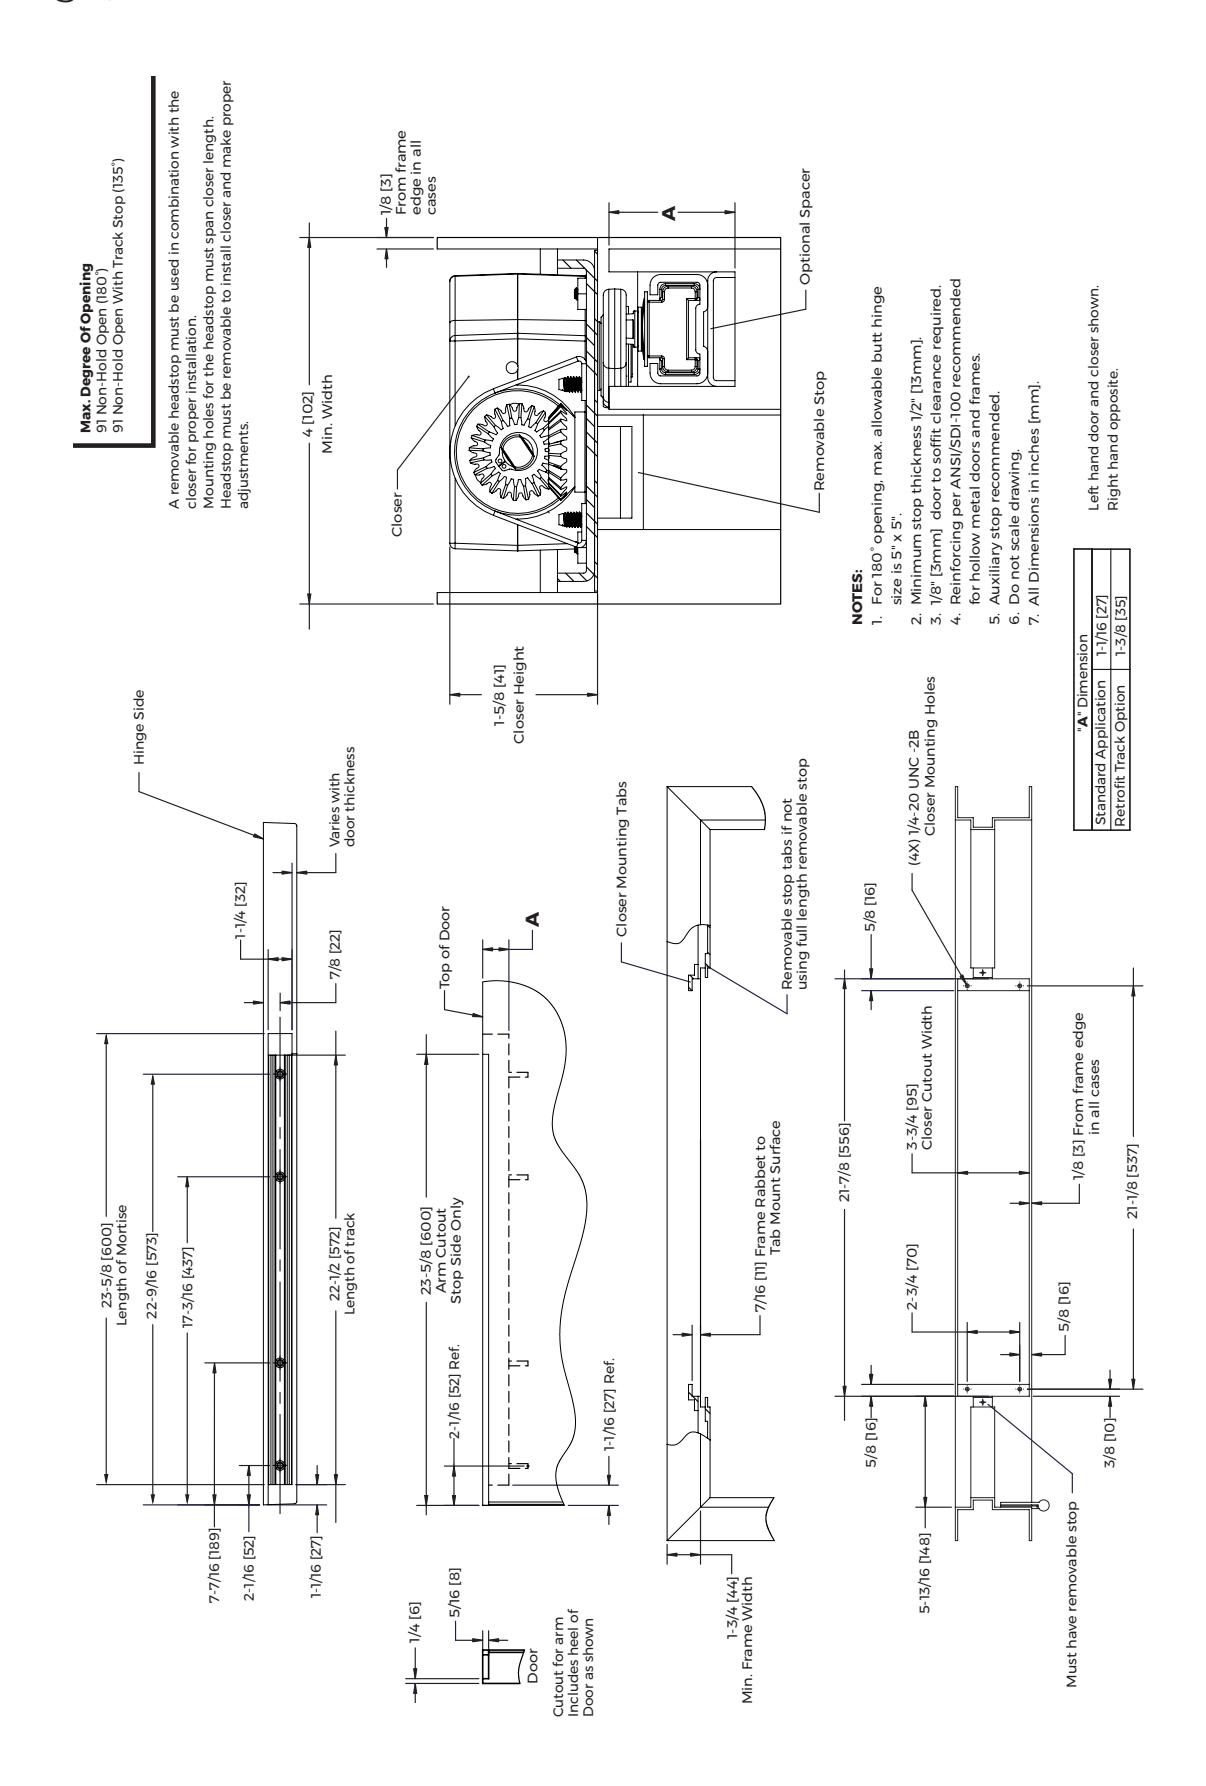
- y All dimensions are given in inches (millimeters).

Installation
A. Verify frame and door installation.
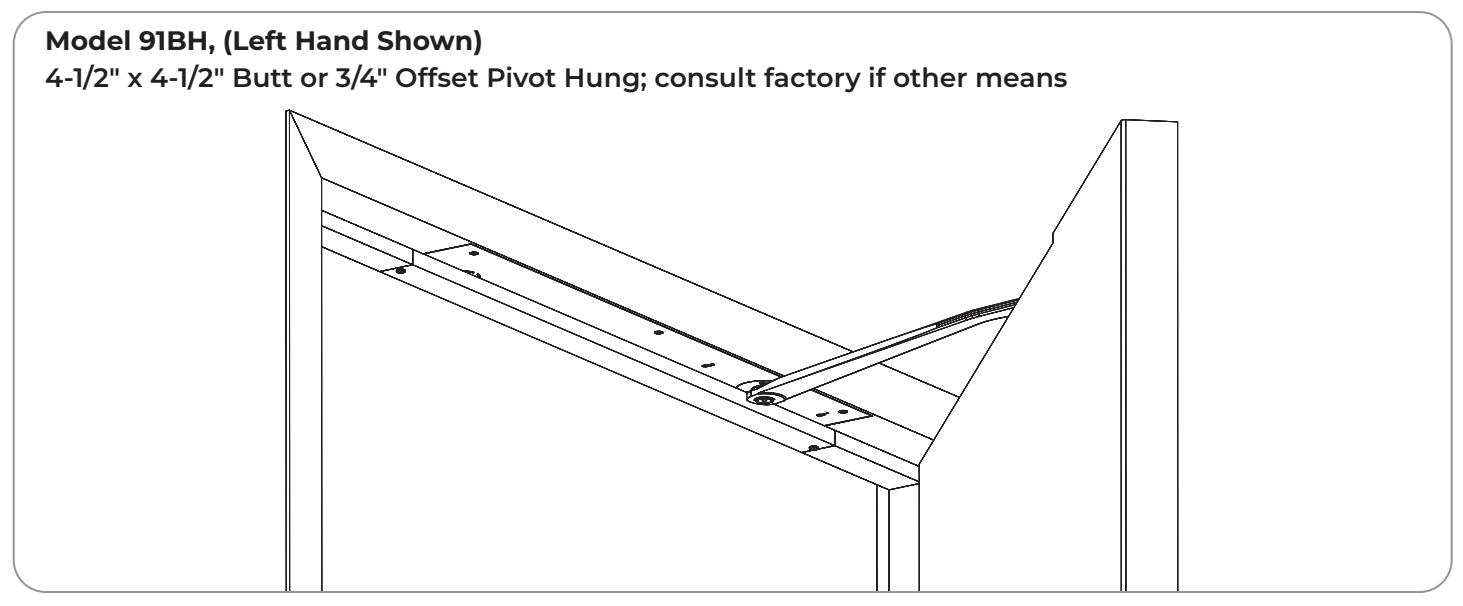
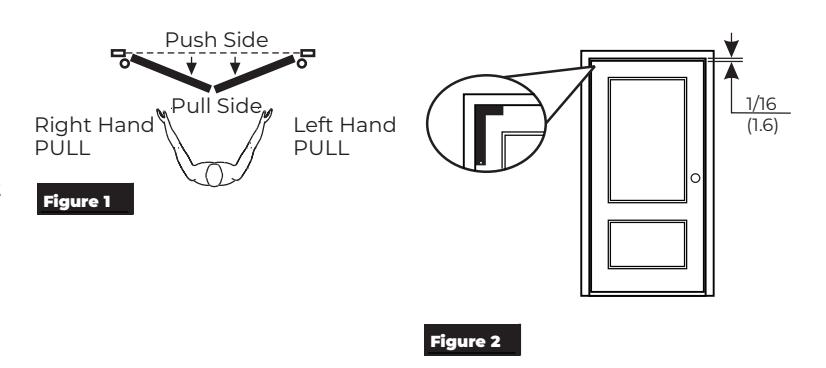
- 1. Determine if right hand or left hand installation. (Figure 1)
- 2. Verify frame is square by using a carpenter's square. (Figure 2)
- 3. Note if gaps between door and frame are consistent. Gap should be 1/16" (1.6) at jamb and header.
- 4. Using supplied templates, confirm all dimensions of cut-outs.
B. Install closer.
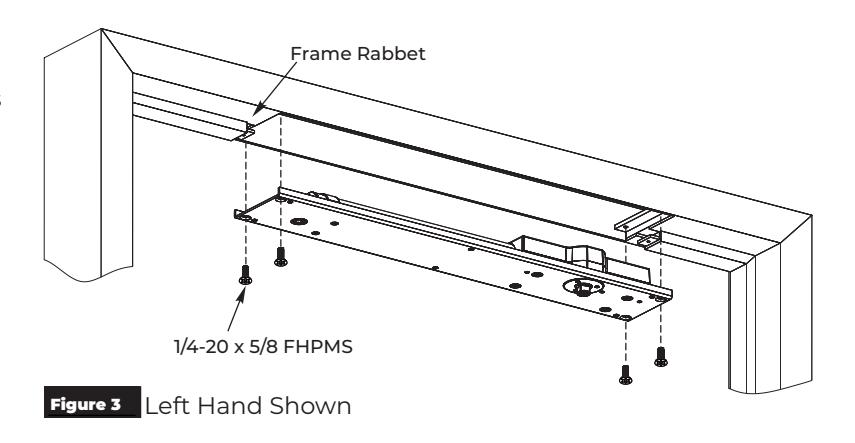
1. Install closer in prepped frame with four (4) 1/4-20 x 5/8" FHPMS mounting screws provided. (Figure 3)
NOTE: Mounting plate should be flush with frame rabbet.
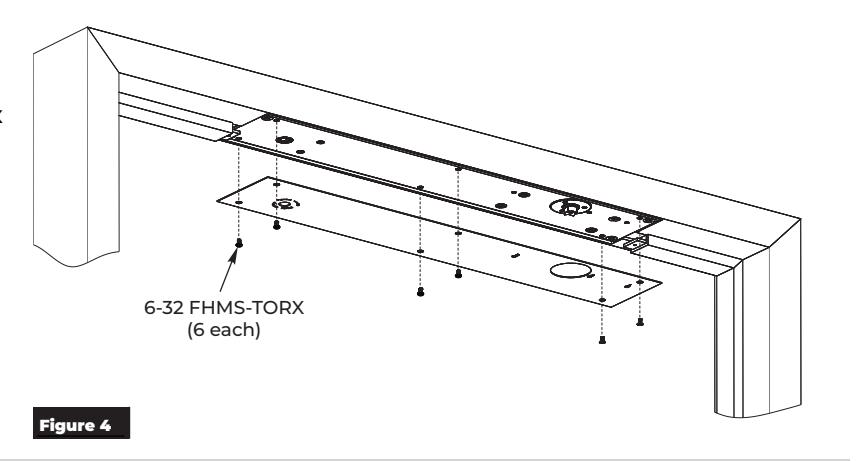
C. Install cover plate.

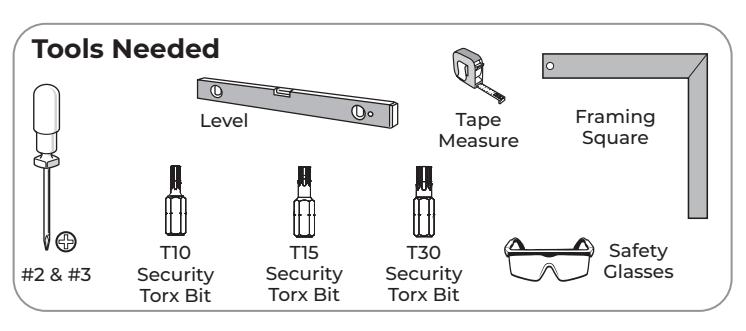
1. Install cover plate to closer mounting plate using a T10 Security Torx bit with six (6) 6-32 x FHMS-TORX mounting screws provided. (Figure 4)
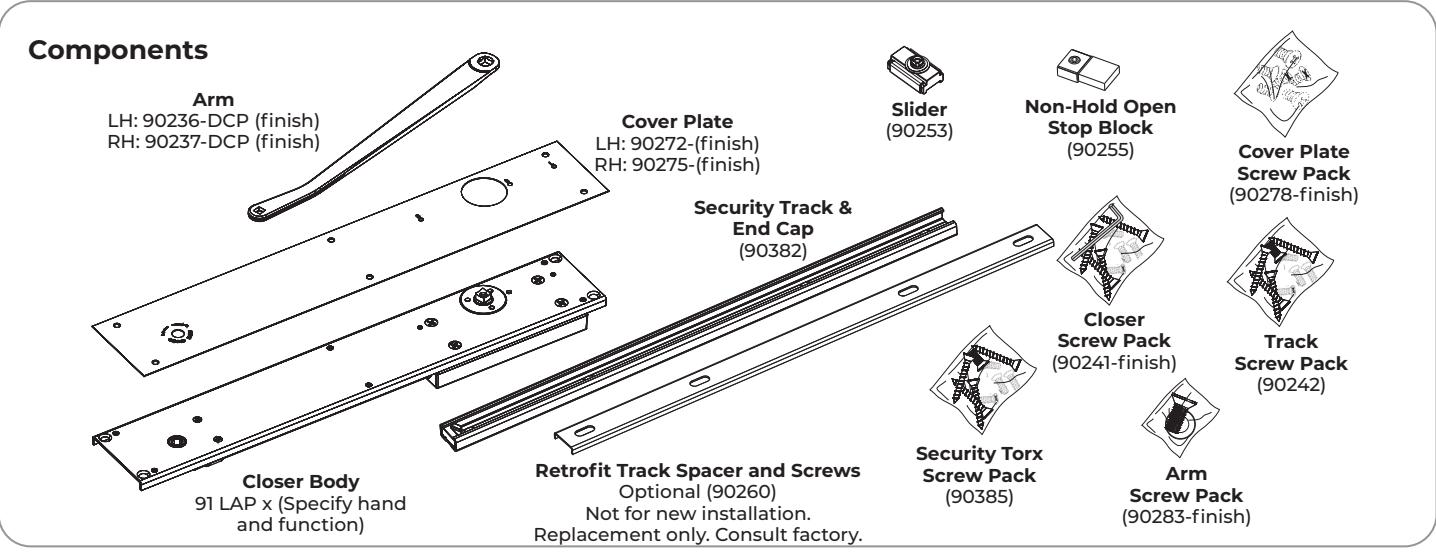
D. Attach arm.
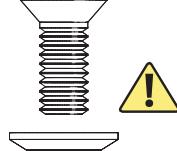
1. Using a T30 Security Torx bit and 1/4-20 x 3/4" Torx screw with Patch screw and washer, attach arm to closer spindle. (Figure 5)
IMPORTANT: Arm should rest at 15° away from door side of closer mounting plate. Arm always rotates in direction of door.

Installation (cont.)
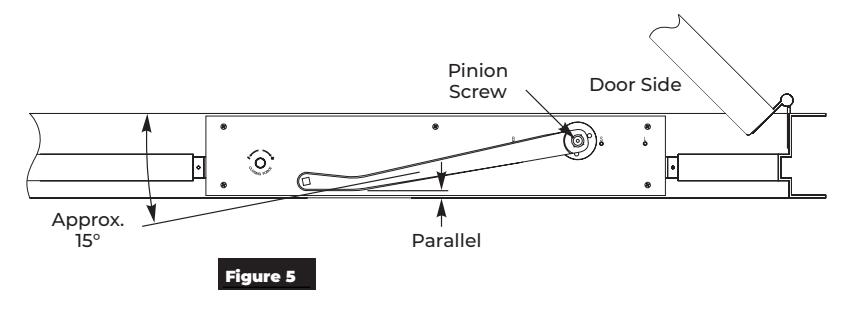
E. Assemble track.
1. Slide track components into track. (Figure 6)
NOTES:
- y All track components must be placed in track before installing track into door.
- y Stop block should be last component at hinge side of track.
- y The longer end of slider should be pointed towards hinge end of track.
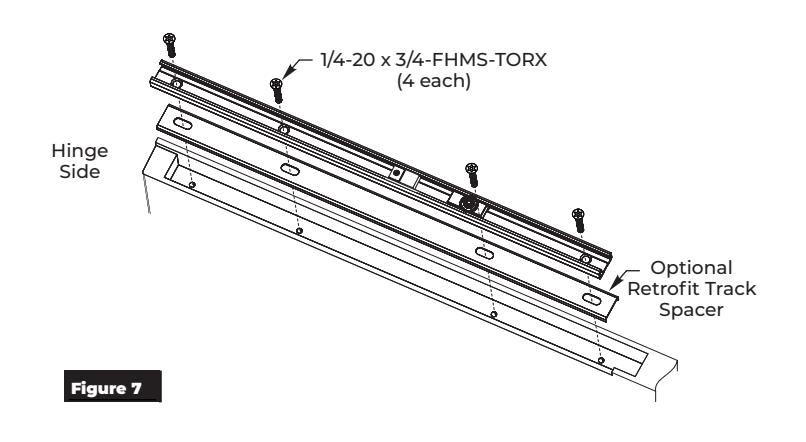
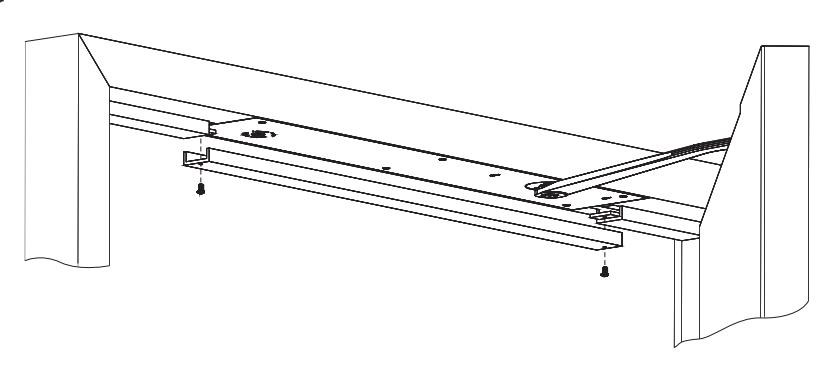
F. Install track to door.
- 1. Make sure slider and track components are installed prior to installing track to door.
- 2. Install track and, if necessary, optional retrofit spacer (replacement application only, consult factory) using a T30 Security Torx bit with four (4) provided 1/4-20 x 3/4-FHMS-TORX screws for metal door. (Figure 7)
G. Attach arm to track.
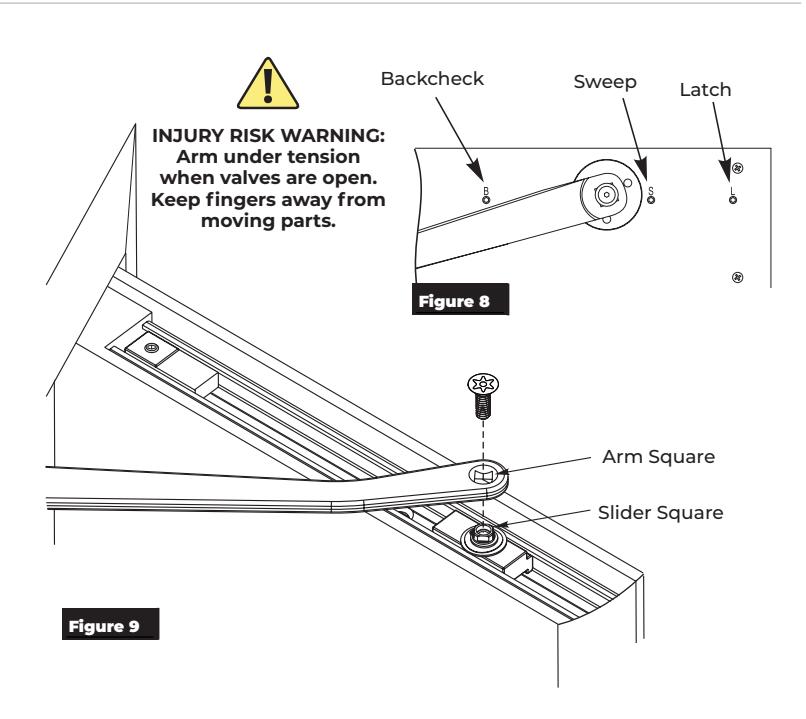
- 1. With provided 1/8" hex wrench, completely tighten latch and sweep valves by turning screws clockwise. This will allow for an easier closer-to-door connection. (Figure 8)
- 2. Open door to about 45° then rotate arm over to door.
NOTE: Arm should maintain position because latch and sweep valves have been tightened.
3. Align slider square with arm square and connect using a T30 Security Torx bit with provided 1/4-20 x 3/4-FHMS-TORX with Patch screw. (Figure 9)
NOTE: If door is to be open beyond 45°, backcheck may need to be adjusted counter clockwise to easily rotate arm to door position.

Installation (cont.)
H. Install removable stop.
After closer is installed and all adjustments are complete, install removable stop.

NOTE: DO NOT drill holes into closer cover plate.
The Model 91BH Overhead Concealed Closer has now been installed.
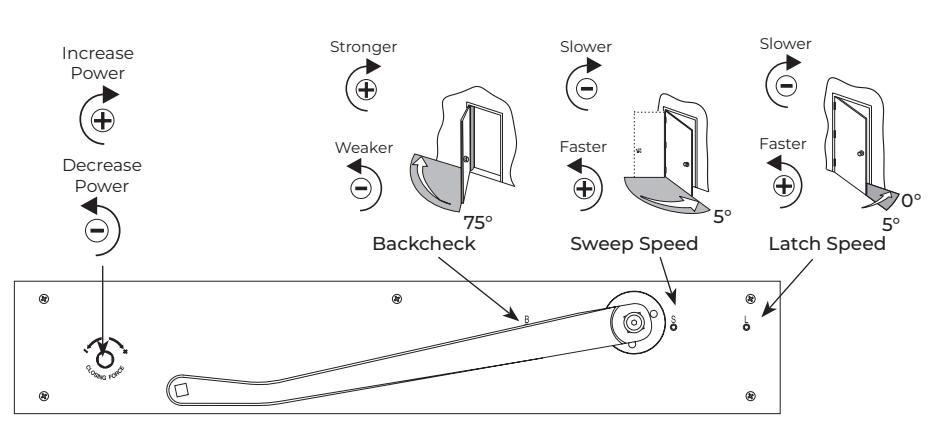
Adjustments
Speed Adjustment
Use provided 1/8" hex wrench to adjust sweep, latch and backcheck valves to control speed of door.

NEVER completely close backcheck valve.
NEVER use backcheck as a dead stop. NEVER fully open valves. Valves will leak. Do not use a power drill. Warranty will be void.
Closing Force Adjustment
If additional force is needed, use 3/8" hex wrench to adjust closing force. Refer to chart.

Do not use a power drill. Warranty will be void.
All 91BH closers are factory set to minimum force. Adjust closer as necessary for more force taking into consideration door size, weight, positive room pressure, etc.
|
Spring Power Adjustment for Closing Force
(Closer shipped at lowest setting) |
||||
|---|---|---|---|---|
| Model PH91BH | Model 91BH | |||
|
Closer
Size |
Approx # of 360°
Turns |
Closer
Size |
Approx # of 360°
Turns |
|
| ADA | 0 | 3 | 0 | |
| 1 | 15 | 4 | 17 | |
| 2 | 30 | 5 | 25 | |
| 3 | 55 | 6 | 32 | |
5

Troubleshooting
| Symptom | Cause | Remedy |
|---|---|---|
| Spring tension not strong enough |
Increase opening force.
See "Adjustments" on page 5. |
|
| Latch speed control not fast enough |
Adjust latch speed valve.
See "Adjustments" on page 5. |
|
| Door won't latch |
Door hung on products other than
4-1/2 x 4-1/2 butts or 3/4 offset pivots |
Send template for hanging means
to factory. A new installation sheet is required. Closer will need to be relocated. |
| Arm is not preloaded | See Step G. Attach Arm to Track | |
| Door is too difficult to open | Spring tension is set too strong |
Decrease opening force.
See "Adjustments" on page 5 |
Model 91BH Overhead Concealed Closer Template Butt Hinge, Metal Frame


Model 91BH Overhead Concealed Closer Template 3/4" Offset Pivot, Metal Frame