Norton Rixson 195 Pivot Set, 3, 4 Offset Installation Instructions_IS-195
Open the original PDF document
View PDF
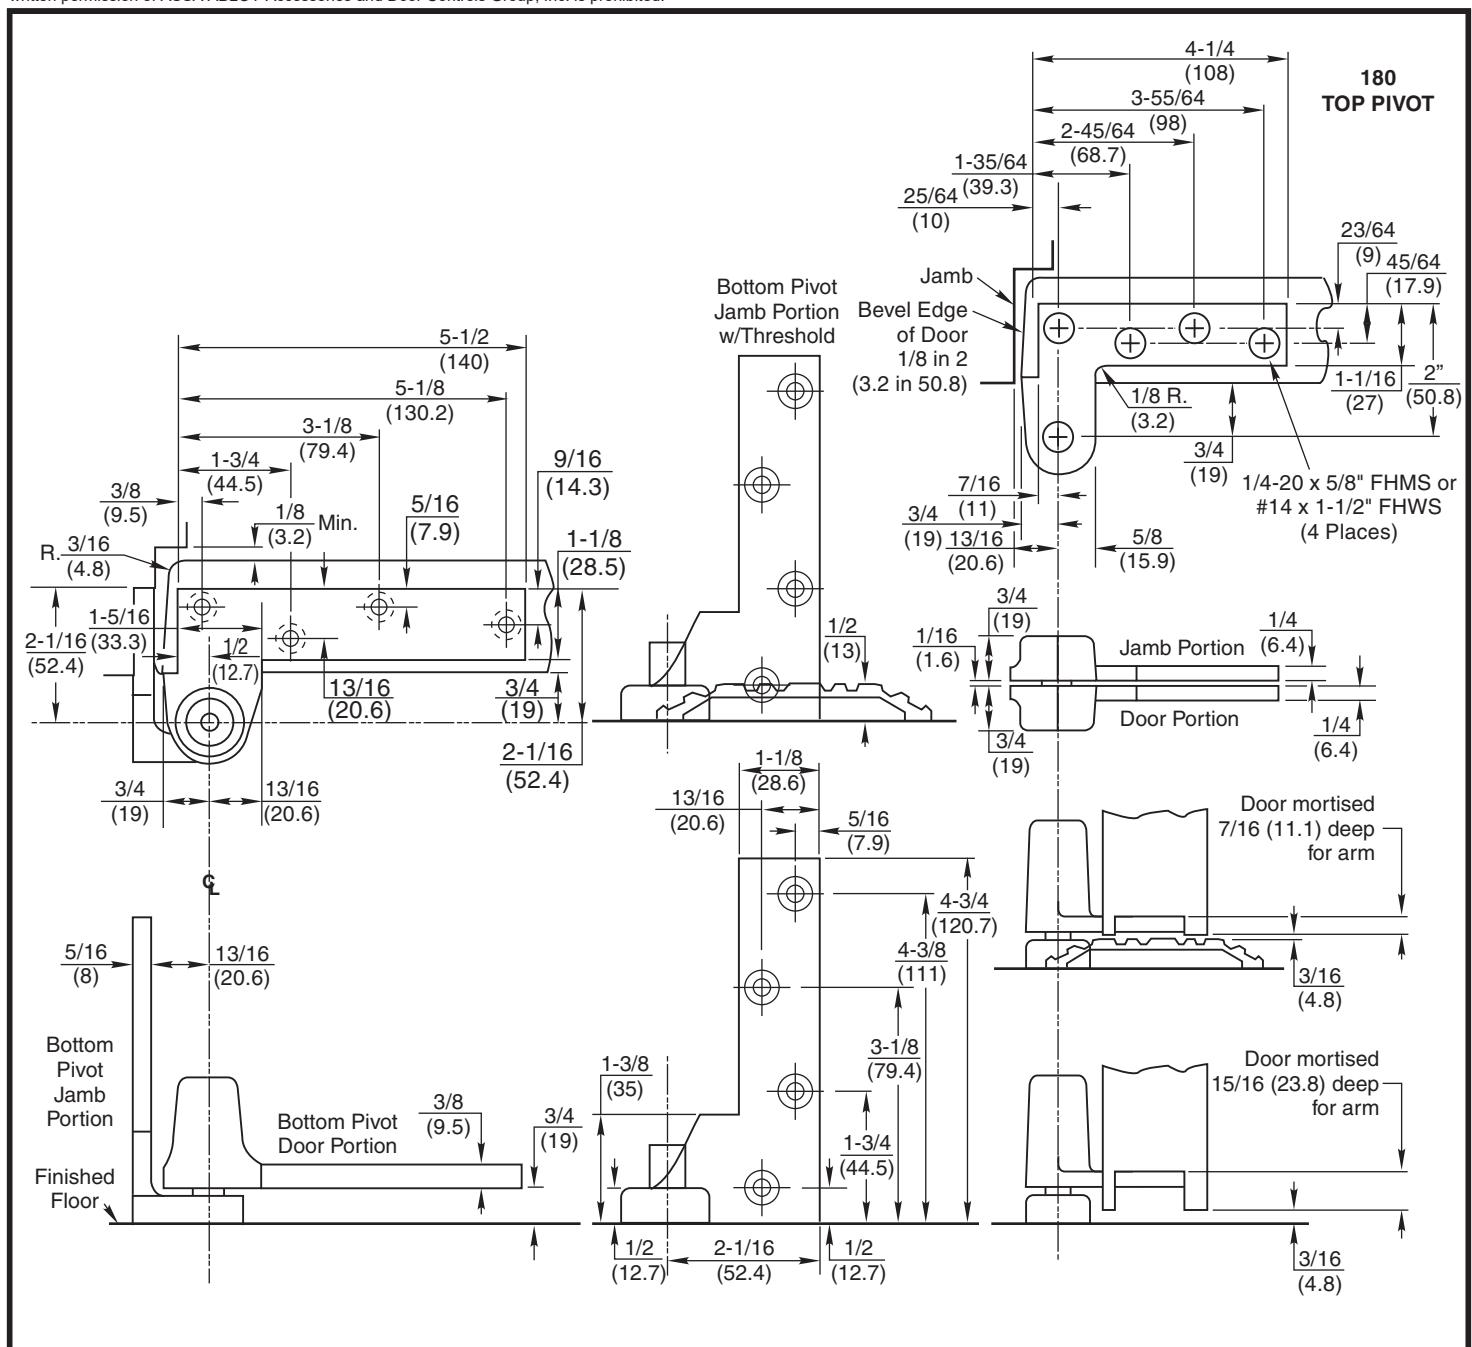
Notes:
- 1. Do not scale drawing.
- 2. Right hand shown.
- 3. Suitable reinforcing by others.
- 4. Pivots drilled for 1/4-20 x 5/8 FHMS or #14 x 1-1/2 FHWS.
- 5. When jamb portion is installed on top of threshold allow for threshold height when preparing frame and door mortise depth.
- 6. All dimensions are in inches (mm).
|
Pivot Set
3/4" Offset, Handed |
RIXSON° ASSA ABLOY www.rixson.com | ||
|---|---|---|---|
| NUMBER | Rev | DATE | |
| IS-195 | 3 | 05-24 | |
Approved 2024-05-08
195 Pivot Set
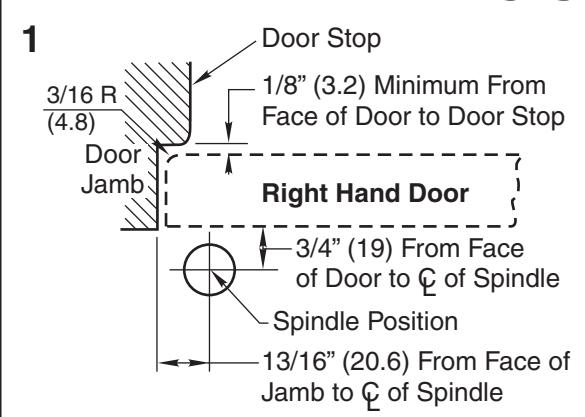
1. Install Pivot
- A. Measure 13/16" (20.6) out from door jamb.
- B. Allow 1/8" (3.2) min. clearance from door stop to door face. Measure door thickness. Add 3/4" (19).
- C. Where lines meet determines center line of closer.
2. Set Pivot Set
- A. Mortise jamb to receive jamb leaf as shown on reverse side.
- B. Care must be exercised to see that pivot end of jamb leaf is level. Place levels as per illustration.
A. Install top pivot in door per template.
-
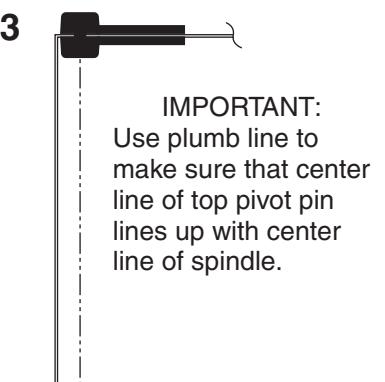
3. Install Top Pivot & Pivot Arm
- B. Install top pivot in frame per template.
- C. Install arm in door per template.
- D. Center line of pivot should line up with center line of spindle. Use plumb line as illustrated.
- E. If side jamb pivot is used, see required template.
Side Face
2
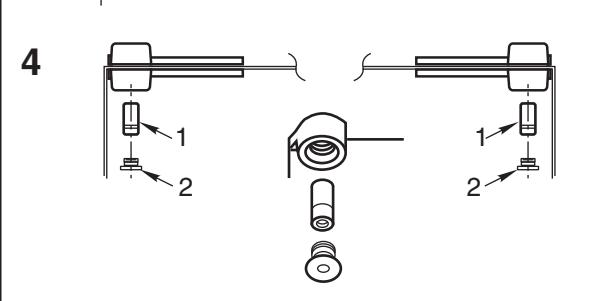
4. Hang Door
- A. Set door on pivot set spindle.
- B. Push Item 1 "top pivot pin" into place. Attach "cap" Item 2.
- C. If door drags at floor (or threshold, if used) loosen arm locking screw and raise door to desired clearance and insert one or more 1/16" (1.6) shims. Retighten arm locking screw securely.
- D. Put arm cap on arm and secure tightly with cap screw furnished.
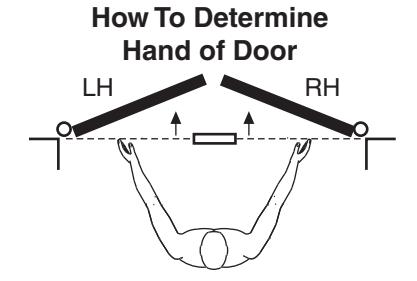
Face a door swinging open away from you. If it opens to the right, it is right hand. If it opens to the left, it is left hand.
Pivot Set 3/4" Offset, Handed
ASSA ABLOY RIXSON ®
www.rixson.com NUMBER DATE Rev
05-24 IS-195 3
Approved 2024-05-08