Norton Rixson 185 Quick Spotter Installation Tool for 50, 51, 53 Closers Installation Instructions_1855051T
Open the original PDF document
View PDF185 Quickspotter
Model 1855051
for use with 50, 51, and 53 Series Closers


How to Use Instructions

This product can expose you to lead which is known to the state of California to cause cancer and birth defects or other reproductive harm. For more information go to: www.P65warnings.ca.gov.
An incorrectly installed or improperly adjusted door closer can cause property damage or personal injury. These instructions should be followed to avoid the possibility of misapplication or misadjustment.
READ AND FOLLOW ALL INSTRUCTIONS. SAVE THESE INSTRUCTIONS.
Blocking Instructions
NOTES:
- 1. Do not scale drawing.
- 2. Dimensions given in inches (mm).
- 3. If necessary to prevent cement from entering foundation case, apply tape to seal the gap between closer and foundation case.


for use with 50, 51, and 53 Series Closers
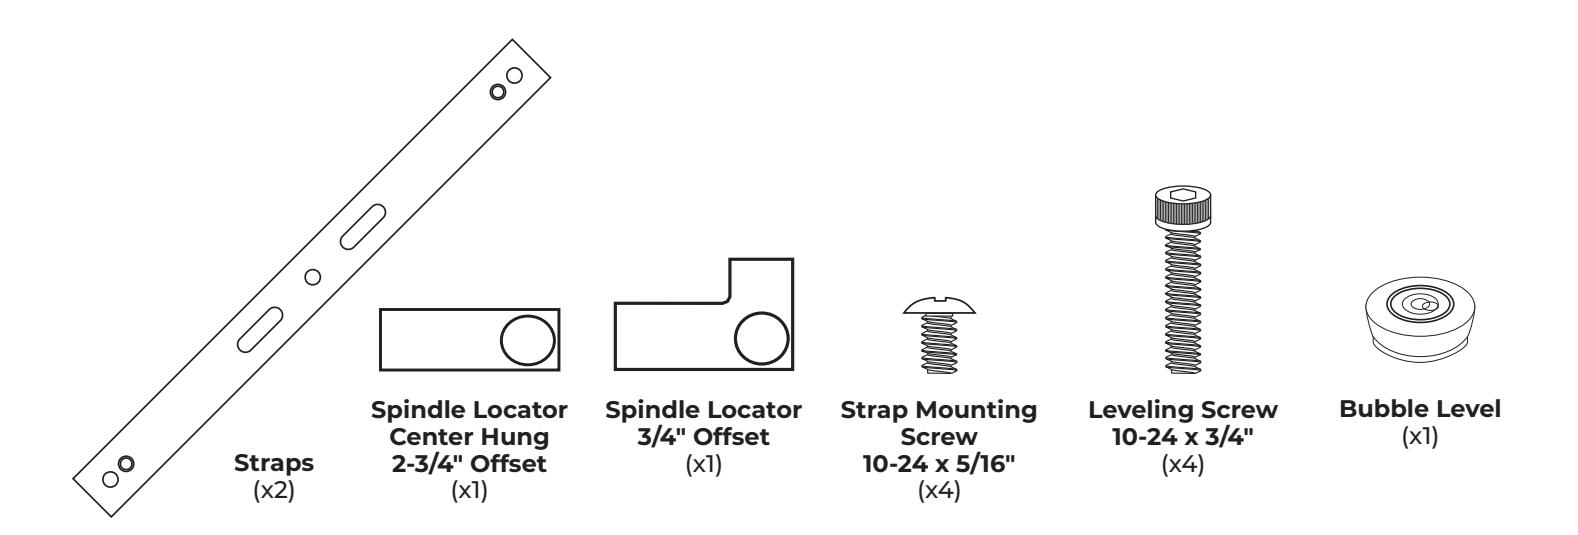
Included Components:
50 Closers:
Model 1855051
for use with 50, 51, and 53 Series Closers

51 Closers:
53 Closers:

Installation:
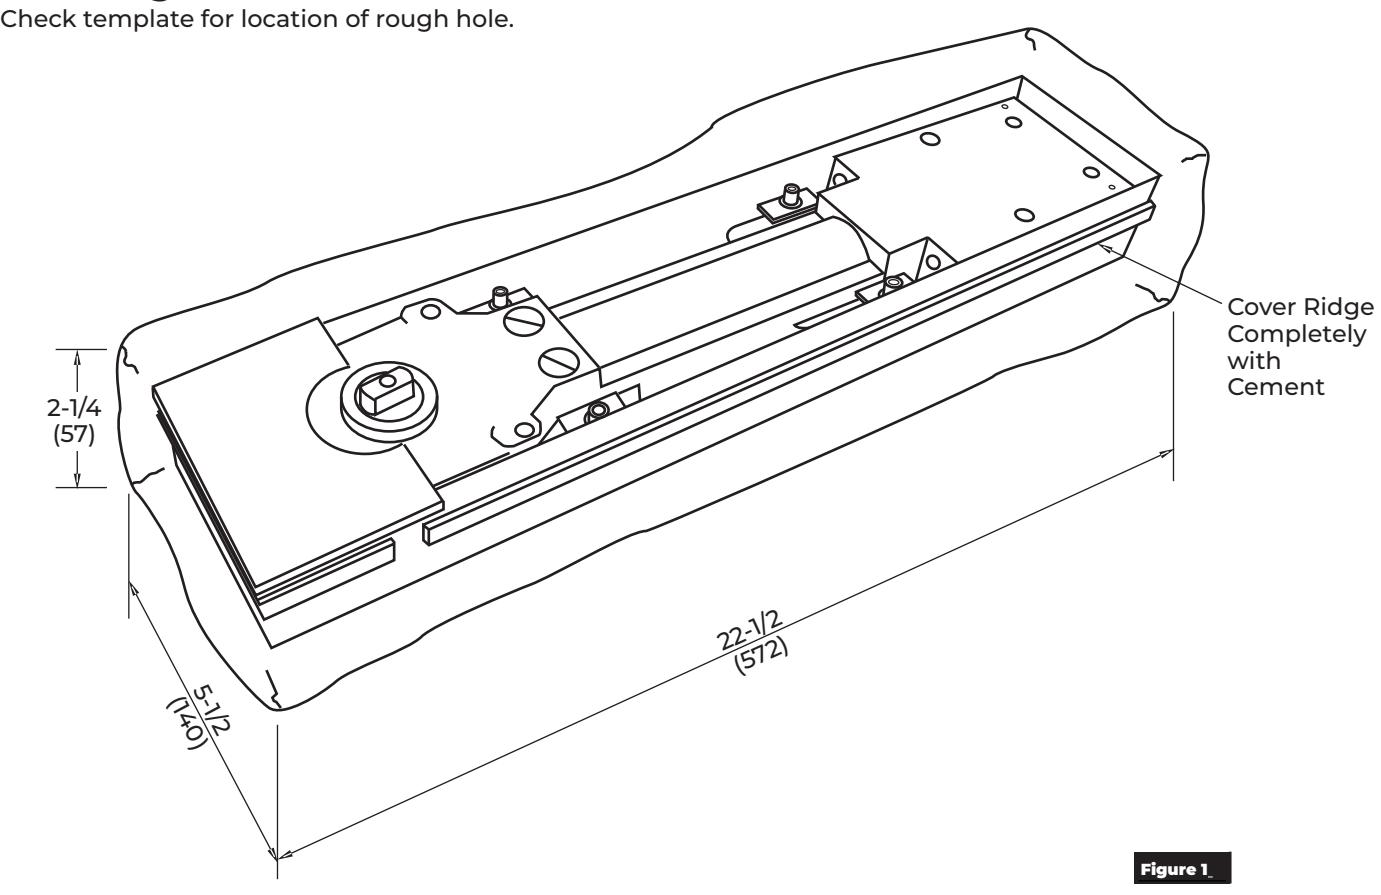
- 1. With frame set in place, cut a hole in the floor to dimensions for the closer model. Refer to "Figure 1" on page 1. Clean out excess concrete.
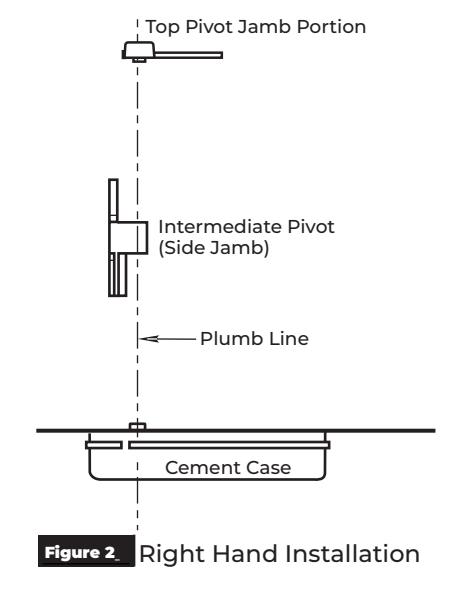
- 2. Install top pivot in frame.
- 3. Drop plumb line from top pivot. (Figure 2) (Use of Norton Rixson 2604 Pivot Aligning Tool is recommended)
- 4. Place the closer in the cement case and secure with 1/4-20 mounting screws and washers provided with closer.
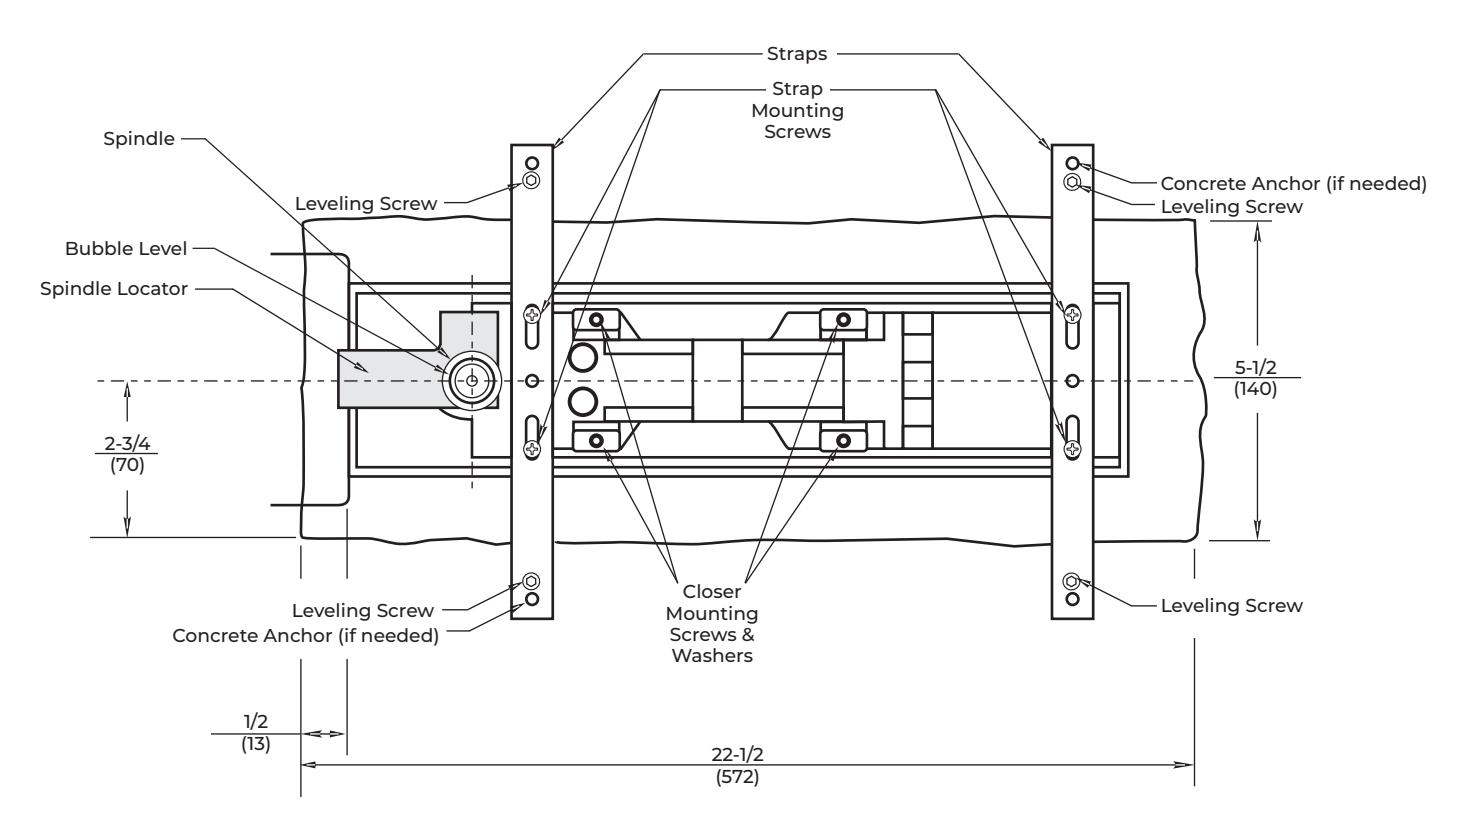
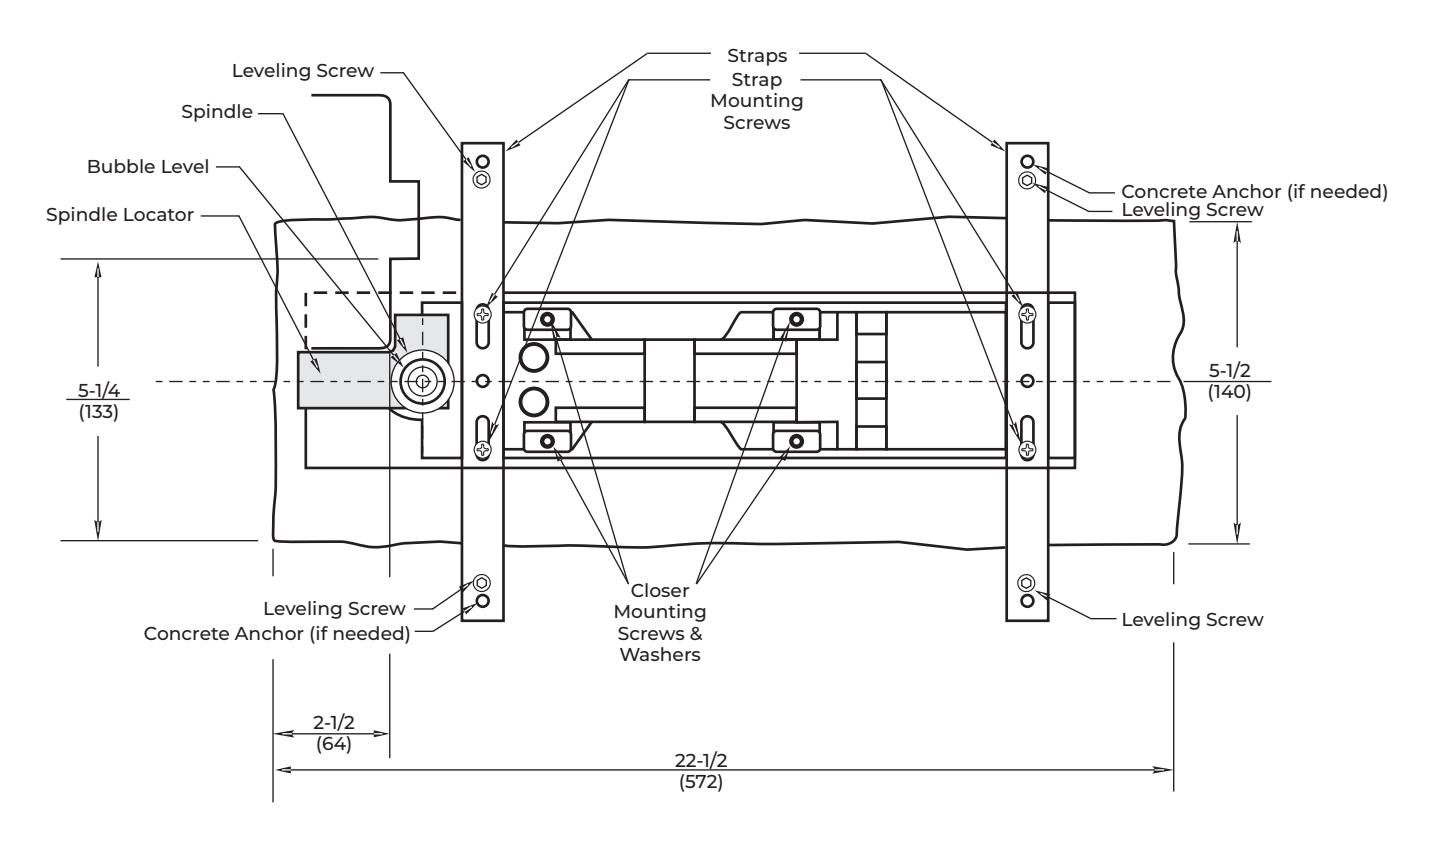
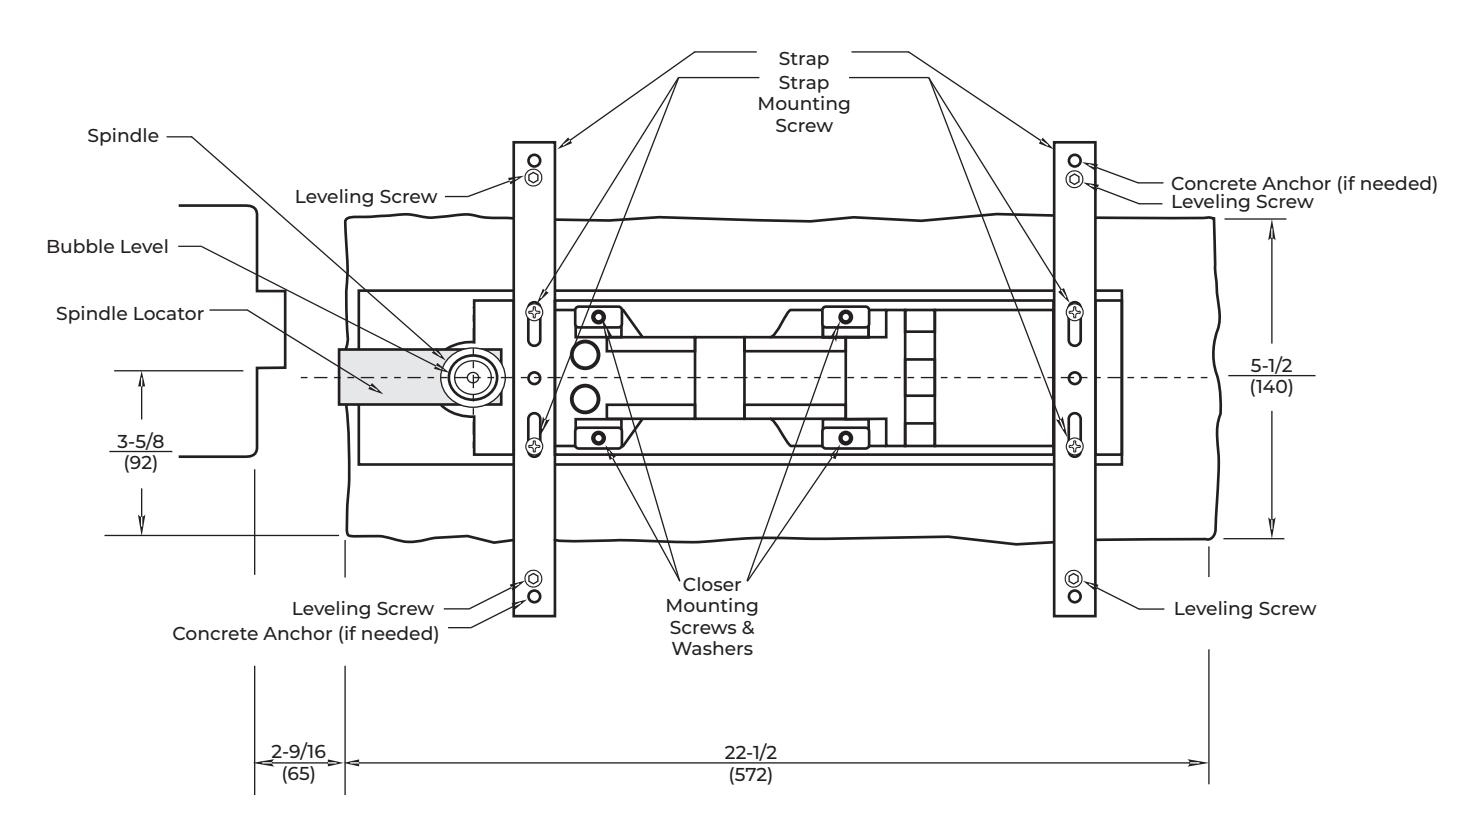
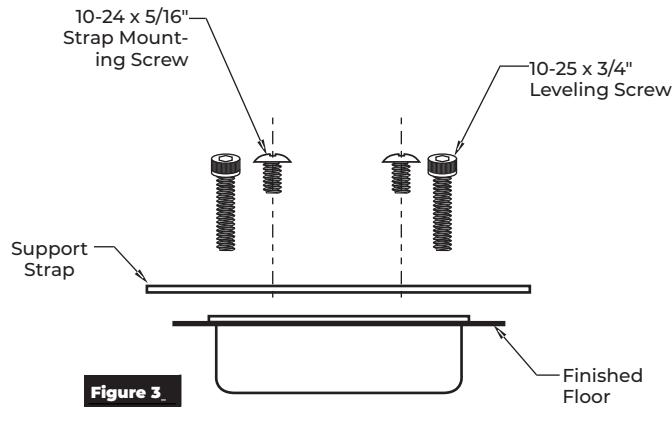
- 5. Place straps on top of cement case and center each over the closer as indicated in the associated model graphic on pages 2 or 3.
- 6. Using 10-24 x 5/16" truss head screws, tighten straps to top of closer. (Figure 3)
- 7. Set closer/foundation case in hole in floor.
- 8. Put spindle locator over spindle and position closer next to frame. See closer model illustration on previous pages.
- 9. Make sure that plumb line is centered over spindle.
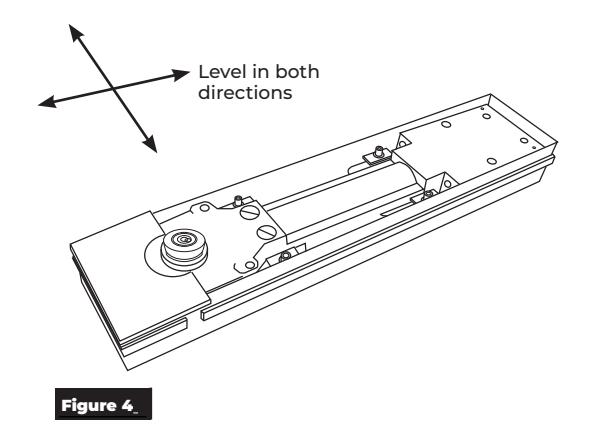
- 10. Place bubble level on top of closer spindle. (Figure 4)
- 11. Using the four (4) leveling screws (10-24 x 3/4" socket head screws), turn screws to raise and lower straps until closer is completely level. This is determined by bubble level provided.
- 12. Re-check all areas, locator, plumb line and level.
- 13. Use two pour grouting procedure:
Step 1:
Use EXPANDABLE QUICKSET CEMENT, (Por-Rok or equivalent grout). Grout in only bottom 3/4" of foundation case, including bottom of cement anchor. Allow grout to harden.
Step 2:
Hang door.
Step 3:
Use a regular cement mixture, EXTERIOR TYPE (Sakrete or equivalent) to finish setting the foundation case. RIDGE MUST BE COMPLETELY COVERED WITH CEMENT. Refer to "Figure 1" on page 1.
Refer to the associated closer series installation instructions to finalize installation.
Technical Product Support: Monroe, NC 28112 USA Phone: 877.974.2255 ext: 2
Techsupport.NortonRixson@assaabloy.com
NortonRixson.com