Norton 7500 Series Door Closer RP75-4010 Adapter Plate Regular and Parallel Arm to Retrofit a Norton 7500 for an LCN 4010 Intstallation Instructions
Open the original PDF document
View PDFThis is a SUPPLEMENT SHEET to the Standard Installation Instructions
(Use this sheet for preparation of the door frame and the installation of the adaptor plate only) (Use the installation instructions packed with the door closer for installation sequence and adjustments)
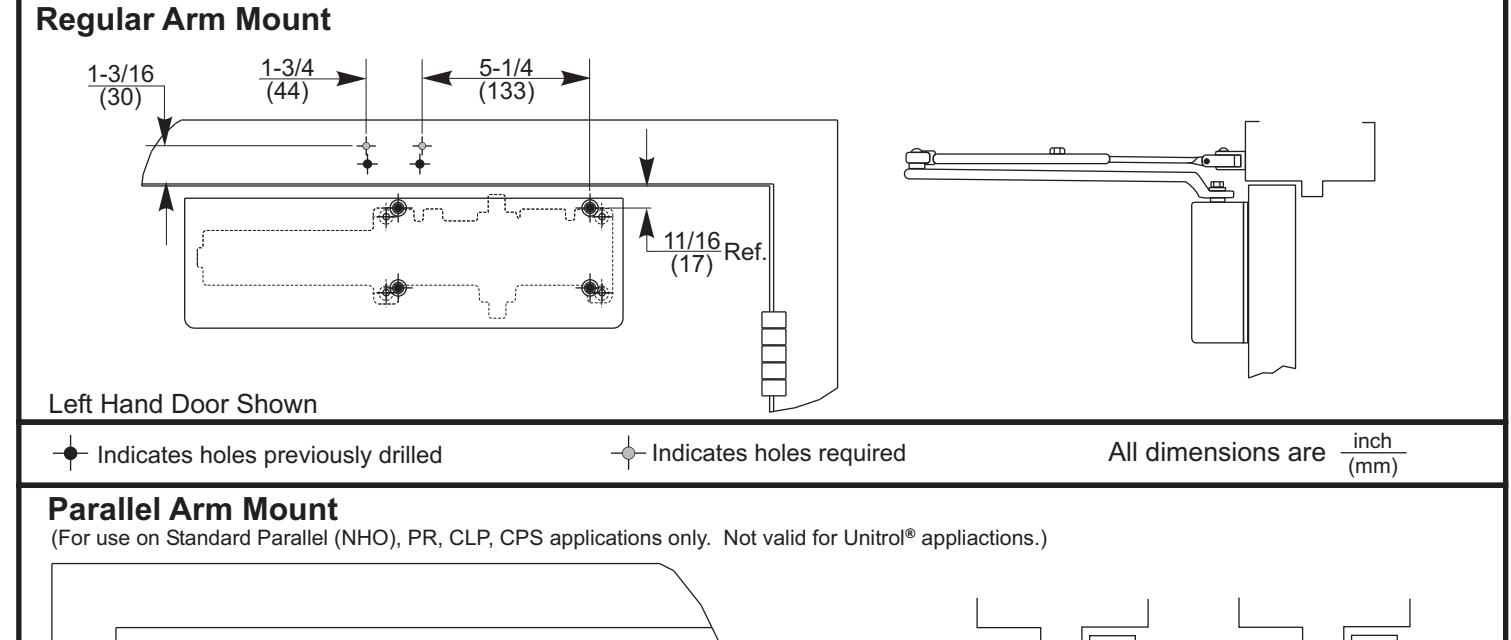
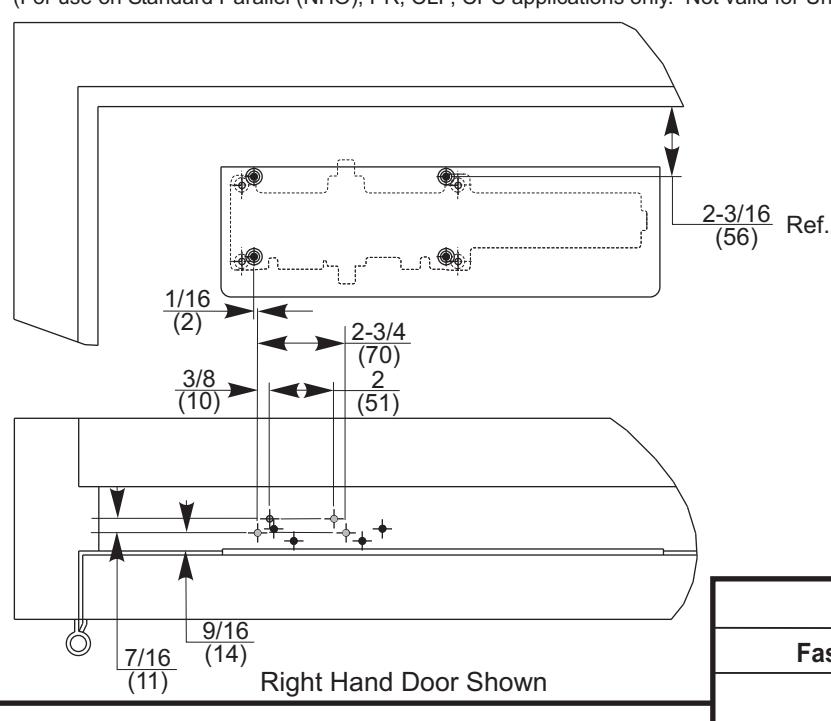
RP75-4010 Adapter Plate for Regular Arm and Parallel Arm Applications To Retrofit a Norton® 7500 Door Closer For An LCN 4010 Door Closer
(56)
| Preparation for Fasteners | ||
|---|---|---|
| Fasteners | Door or Frame | Drill-Sizes |
| Self-Drilling Screw | Aluminum or Metal | No drill required |
|
Wood
(see Note) |
3/16" (4.30 mm) | |
| 1/4" - 20 machine screw | Metal |
Drill: #7 (0.201" dia.)
Tap: 1/4" - 20 |
- Remove old closer body and arm assembly from door and frame.
- Using illustrations at left, drill and/or tap holes in frame as shown for Regular or Parallel Arm Mount (see "Preparation for Fasteners at right).
- Using existing holes, attach adaptor plate to door using 1/4"-20 x 9/16" screws provided. Thru bolt applications may require different fasteners
- Attach door closer to adaptor plate using 1/4"-20 x 2" screws provided (see Installation Instructions)
- Attach arm assembly to frame and closer pinion (see installation instructions)
Note: Wood doors/frames MUST have pilot hole when using Self-Drilling Screws.

www.nortondoorcontrols.com
Norton ® is a registered trademark of Yale Security Inc., an ASSA ABLOY Group company. Copyright © 2004, 2008 Yale Security Inc., an ASSA ABLOY Group company. All rights reserved. Reproduction in whole or in part without the express written permission of Yale Security Inc. is prohibited.