Marks USA i-Dat Mark2 Software Programming Guide
Open the original PDF document
View PDF

SOFTWARE GUIDE

365 Bayview Ave., Amityville, NY 11701 631-225-5400 • 800-526-0233 • Fax: 631-225-6136 www.marksusa.com

Table of Contents:
| Deleting A User7 | |
|---|---|
| Zones7 | |
| Adding A Zone8 | |
| Adding Lock(s) to Zone8 | |
| Renaming A Zone8 | |
| Deleting A Zone8 | |
| Adding User/Group To Zone8 | |
| Zone Configuration8 | |
| Zone Configuration Settings9 | |
| Prox10 | |
| Assigning Prox10 | |
| Assigning Prox ID To A New User10 | |
| Assigning Prox ID To An Existing User10 | |
| Facility Code10 | |
| Using pcProx10 | |
| Schedules11 | |
| Adding A Basic Or Passage Schedule11 | |
| Adding Group Schedule12 | |
| Adding User Schedule12 | |
| Editing A Schedule12 | |
| Deleting A Schedule12 | |
| Temporary User Schedule13 | |
| Creating Temporary User Schedule13 | |
| I-DAT USB UNITi | Deleting A User7 | Saving And Backing Up13 |
|---|---|---|
| Systemi | Zones7 | To Create A Back Up13 |
| U3 Smart Memory Sticki | Adding A Zone8 | Removing The Memory Stick13 |
| A Brand New Look!1 | Adding Lock(s) to Zone8 | i-Dat Module14 |
| Getting Started1 | Renaming A Zone8 | To Set The Time And Date14 |
| U3 Launchpad2 | Deleting A Zone8 | To Upload To The Lockset14 |
| Add Facility2 | Adding User/Group To Zone8 | To Download From The Lockset14 |
| Add GGM User2 | Zone Configuration8 | i-Dat Positioning14 |
| Holiday Maintenance3 | Zone Configuration Settings9 | Audit Trail15 |
| Adding A Holiday3 | Prox10 | View Audit Trail15 |
| Editing A Holiday3 | Assigning Prox10 | Audit Trail Will Display15 |
| Deleting A Holiday3 | Assigning Prox ID To A New User10 | Sorting Data15 |
| Group Maintenance4 | Assigning Prox ID To An Existing User10 | Print Or Save To File16 |
| Adding A Group4 | Facility Code10 | Print16 |
| Editing A Group4 | Using pcProx10 | Save To File16 |
| Deleting A Group4 | Schedules11 | To View Saved File16 |
| Group Structure5 | Adding A Basic Or Passage Schedule11 | Importing Users16, 17 |
| User Maintenance6 | Adding Group Schedule12 | Creating A .CSV File16 |
| Adding A User6 | Adding User Schedule12 | To Import The User File17 |
| Editing A User6 | Editing A Schedule12 | U3 Security Password17 |
| Random UID/PIN6 | Deleting A Schedule12 | Enable U3 Password17 |
| Removing User From Group7 | Temporary User Schedule13 | Disable U3 Password17 |
| To Change Users Group Association7 | Creating Temporary User Schedule13 | Glossary18 |
| i-Dat USB UNIT: | Notes19, 20, 21 |
- No software to install!
- All information resides on the U3 Memory Stick
- No administration rights needed on PC to use software
- High security infrared data transmission
- 4 Line LCD display shows:
- Lock ID/Lock serial number
- Battery status of lockset on upload/download
- Number of events uploaded/downloaded
- Built-in menus
- USB enabled
SYSTEM:
- Works on Windows 2000 (service pack 4), XP and Windows Vista with an available USB port
- Net Framework required (Version 2.0 or later)
- Power requirements; 9 volts (one 9v alkaline battery included)
- New software modeled after Windows Explorer
- Minimal learning curve
- Drag and drop capability
- Fully portable (no software to install on PC)
- U3 Drive password for added security
- Unlimited time zones
- Easy to read audit trail
U3 SMART MEMORY STICK:
- USB Compliant; USB 2.0 Compliant and 1.1 compatible
- Works with U3 compliant software
- U3 Works with Windows
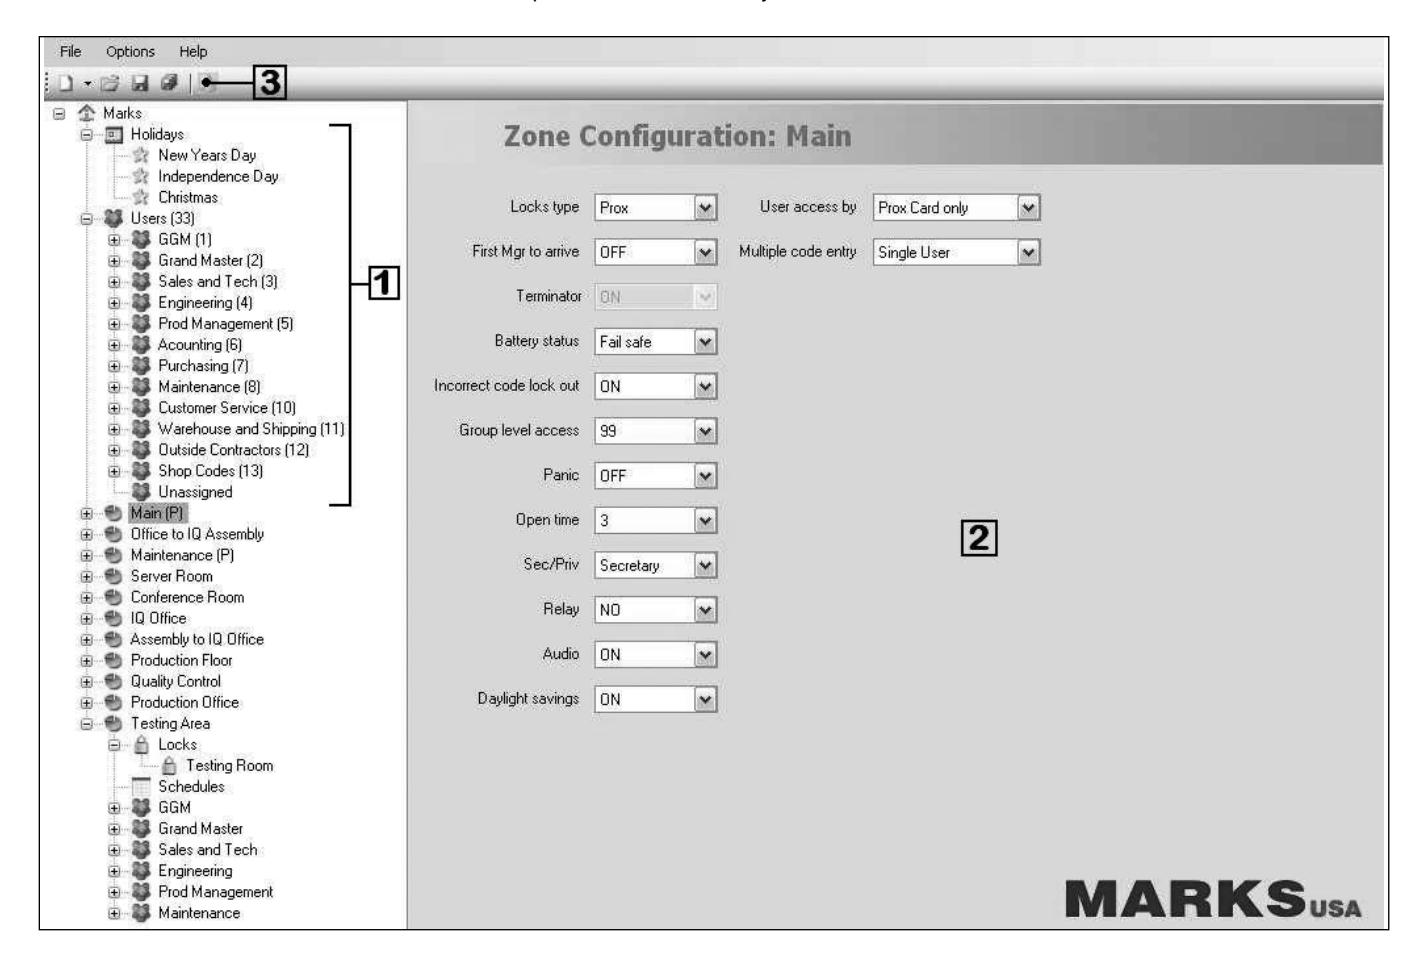
A BRAND NEW LOOK
Easy to navigate menus with "drag and drop" capabilities! Quickly and easily manage locks and personnel. Add and delete groups, users, holidays, locks, and schedules with just a few clicks of the mouse. View and print user lists and audit reports.
1: Expandable menus:
Expandable menus allow the user to view every level of the facility. Select [+] to expand, [-] to collapse. Use drag and drop in this area to organize the facility.
2: Work Space:
View information for users, locks, zones, etc. Make Zone configuration changes.
3: Print button:
One click sends user lists and audit trails to a printer or file on memory stick.
GETTING STARTED
- Insert U3 Flash Drive into USB port.
- "Found New Hardware" ballon will appear in icon tray.
-
When hardware is ready for use, a window for the memory stick will open showing the contents of the drive.
- If the window does not open, open the directory of the "Removable" drive.
- Double click the "Launch U3" icon to start the U3 launchpad.
- This U3 icon will appear in the tray.
- Click on the U3 icon to open the launchpad.
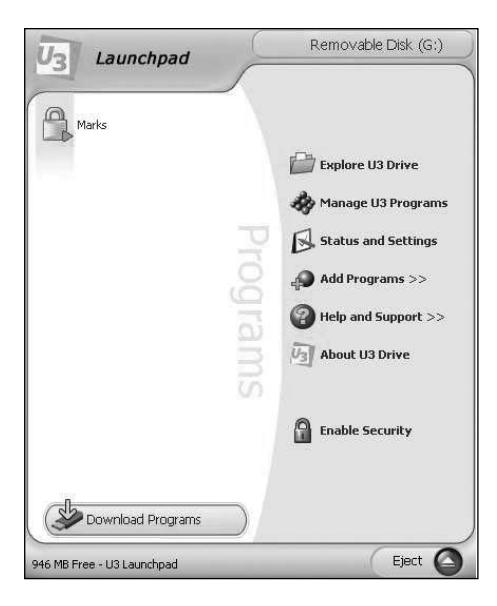
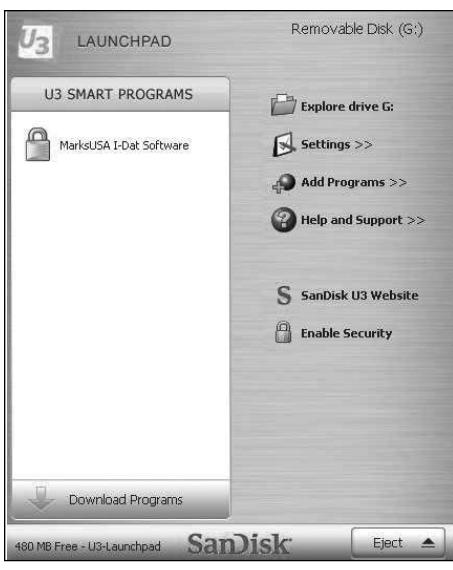
U3 LAUNCHPAD
Starting the Marks Facility Management Software:
- Select "Marks USA i-Dat Software" from the program menu on the launchpad. (launchpad may differ slightly in appearance as shown right)
- The creation of the facility can begin.
ADD FACILITY
Facility Name:
- The name which describes the database.
- Ex: Company name.
Password:
(This password will be used the next time the software is run).
Duplicate Prox ID:
- Not allowed prevents Prox ID from being assigned to more than one user.
- Allowed allows Prox ID to be assigned to multiple users.
UID Length:
• Length can be 3 or 4 digits.
PIN Length:
• Length can be 3, 4, 5 or 6 digits.
NOTE: UID can not contain more digits than the PIN!
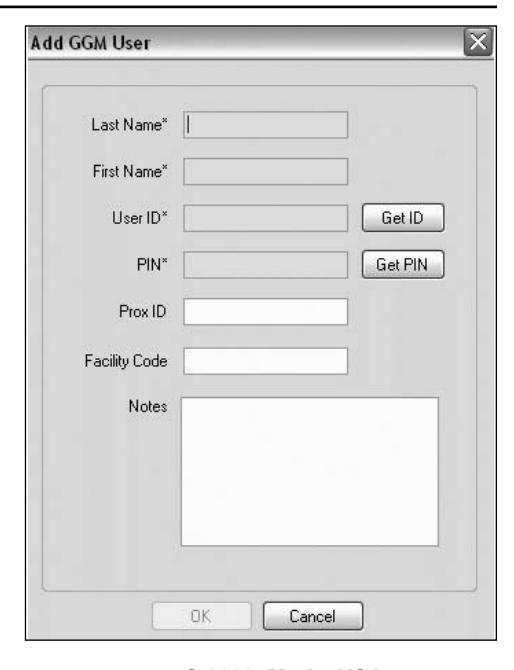
ADD GGM USER
Fill in the required, highlighted fields indicated by the asterisks. The UID and PIN fields can be filled manually or they can be auto-filled by clicking the "Get ID" or "Get PIN" buttons. The amount of digits in the UID and PIN must match what was set when the facility was created.
Optional Fields:
- Prox ID
- Facility Code
- Note
- Click "OK"
- Prompt for the GGM password will appear.
- Enter GGM password and click "OK".
- This password is required for making changes to the GGM code for added security.
NOTE: At this point it is recommended that the Facility be saved. Refer to page 13 for instructions on how to save the Facility.
HOLIDAY MAINTENANCE
NOTE: Holidays reoccur and need to be maintained annually.
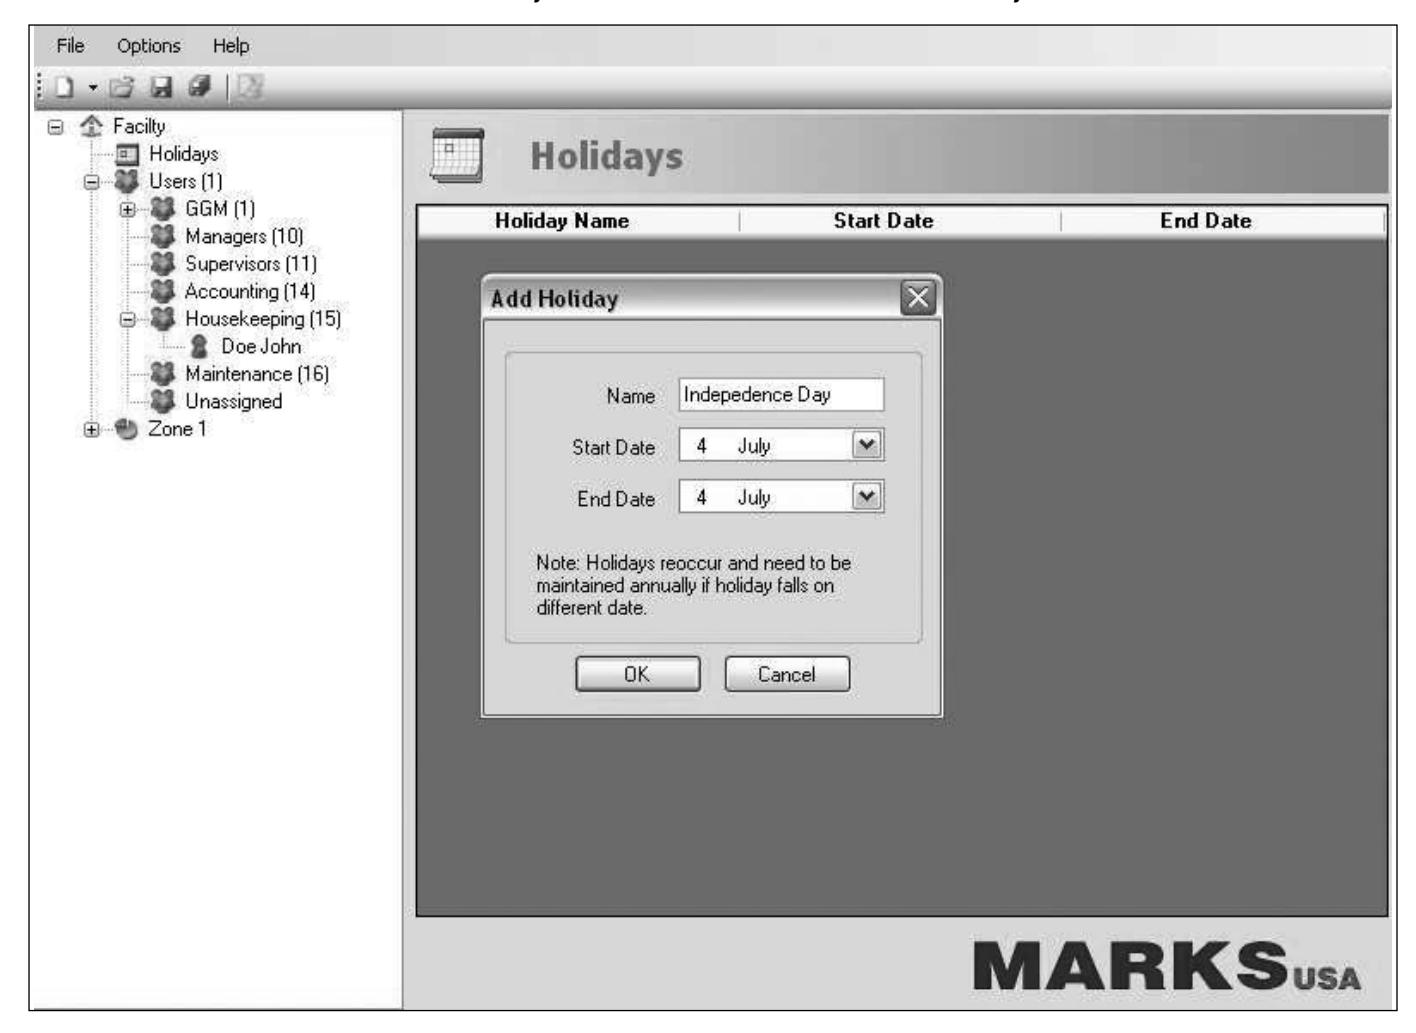
Adding A Holiday:
- Right click on "Holidays".
- Select "Add Holiday".
- Fill in the name of the holiday.
- Select the start and end date.
- Click "OK" to add the holiday.
Editing A Holiday:
- Right click on holiday to be edited.
- Select "Edit Holiday".
- Edit holiday information.
Deleting A Holiday:
- Right click on holiday to be deleted.
- Select "Delete Holiday".
- Holiday is removed from system.
| NOTES | |||
|---|---|---|---|
GROUP MAINTENANCE
*Creating users before groups are created will place those users into the unassigned group. (Unassigned group is created by default)
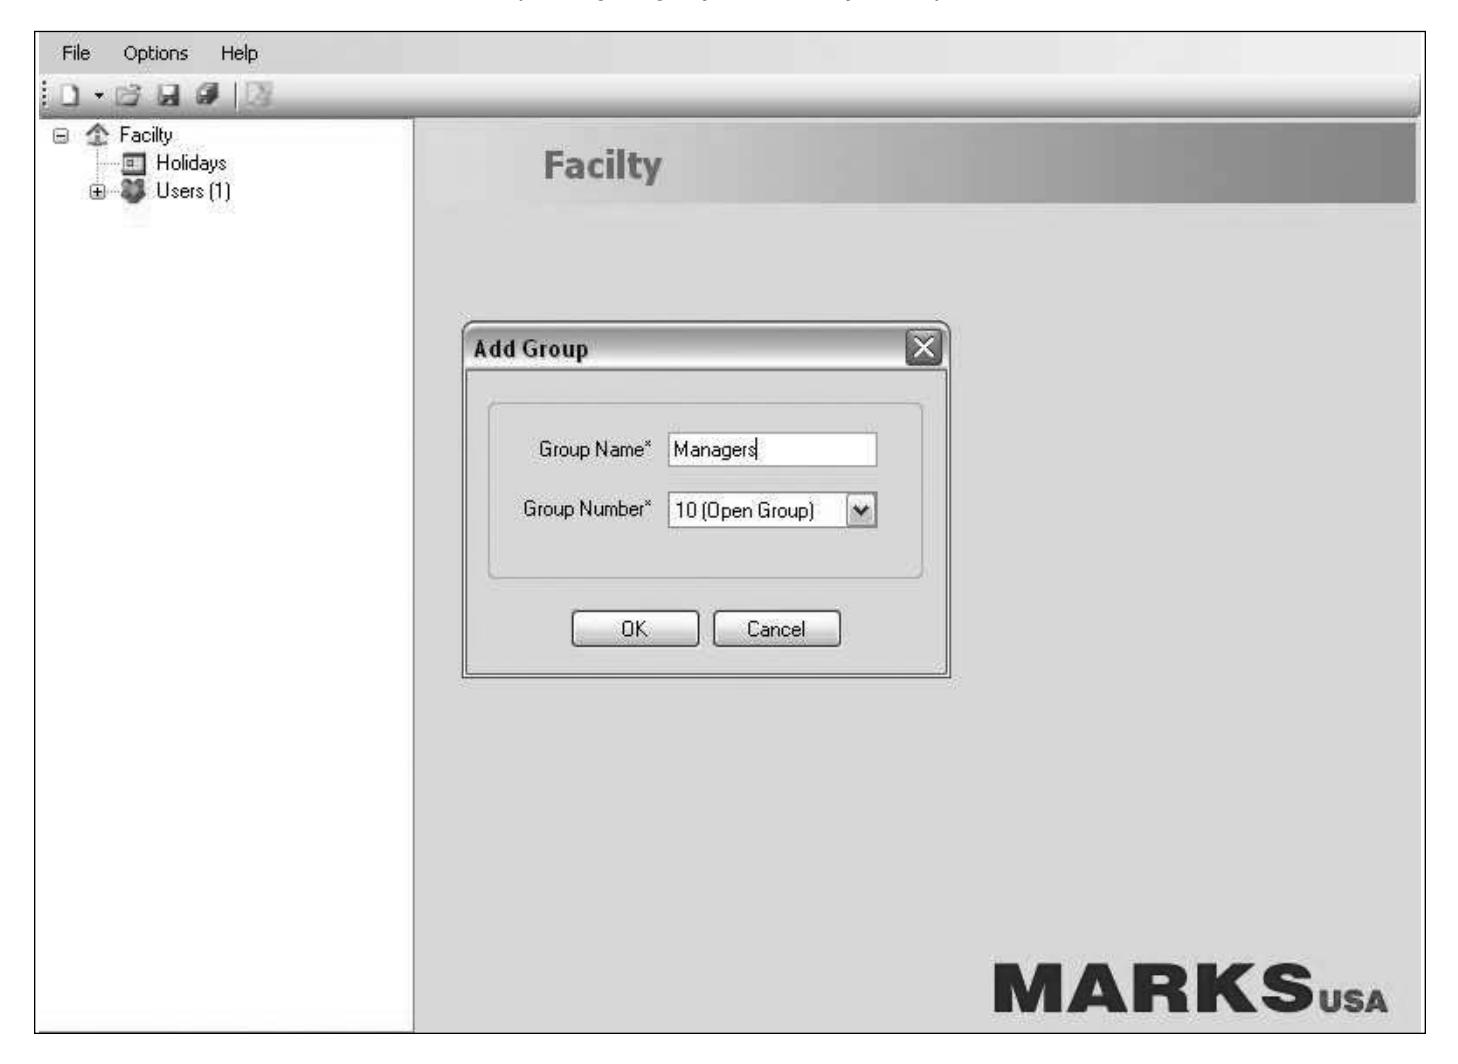
Adding A Group:
- Right click the facility name and select "New Group".
- Enter the group name and select the group number from the dropdown list. (see group structure on page 5)
- Click "OK" and the group will appear on the menu.
Editing A Group:
- Right click on group to be edited.
- Select "Edit Group" to change the group name or group number.
- Click "OK" to update the group information.
Deleting A Group:
- Right click on the group to be deleted.
- Select "Delete Group" to remove the group from the system.
- If there are users in the group, this message will appear: "There are users assigned to this group. Do you want to keep them in the system?"
- Click "Yes" to keep the users in the system. (The users are placed in the unassigned group)
- Click "No" to delete the users along with the group.
GROUP STRUCTURE
Group #1 - Great Grand Master (GGM):
- First code entered into the facility.
- Only one user code in this group which has the highest level of access.
- This code will be used for programming and adding other users.
Group #2 - Grand Master (GM):
• Full programming rights.
Group #3 - Master (M):
- Can program users.
- Can not program security settings.
Group #4 - Supervisor:
- Last group with the ability to be first supervisor to arrive.
- No programming rights.
Group #5-8 - Management Groups:
- 24/7 Access.
- No programming rights.
Group #9 - Passage Group:
This is a special group that places the lock in passage mode when a user from this group enters their code.
The lock will remain in passage mode until a user code from this group is entered again or until midnight (12:00 a.m.) of the same day.
NOTE: Users in this group will override Manual Passage Mode (See programming guide).
Users in this group will override Passage Schedules temporarily until midnight (12:00 a.m.) of the same day.
(See programming guide)
Group #10-99 - User Groups:
Users in these groups will have limited access based upon schedules and/or holidays. In the absence of schedules and/pr holidays these users will have 24/7 access.
Special Function:
All users can perform Function 8 to change their PIN . Each user must know his/her UID in order to perform this function.
User Maintenance
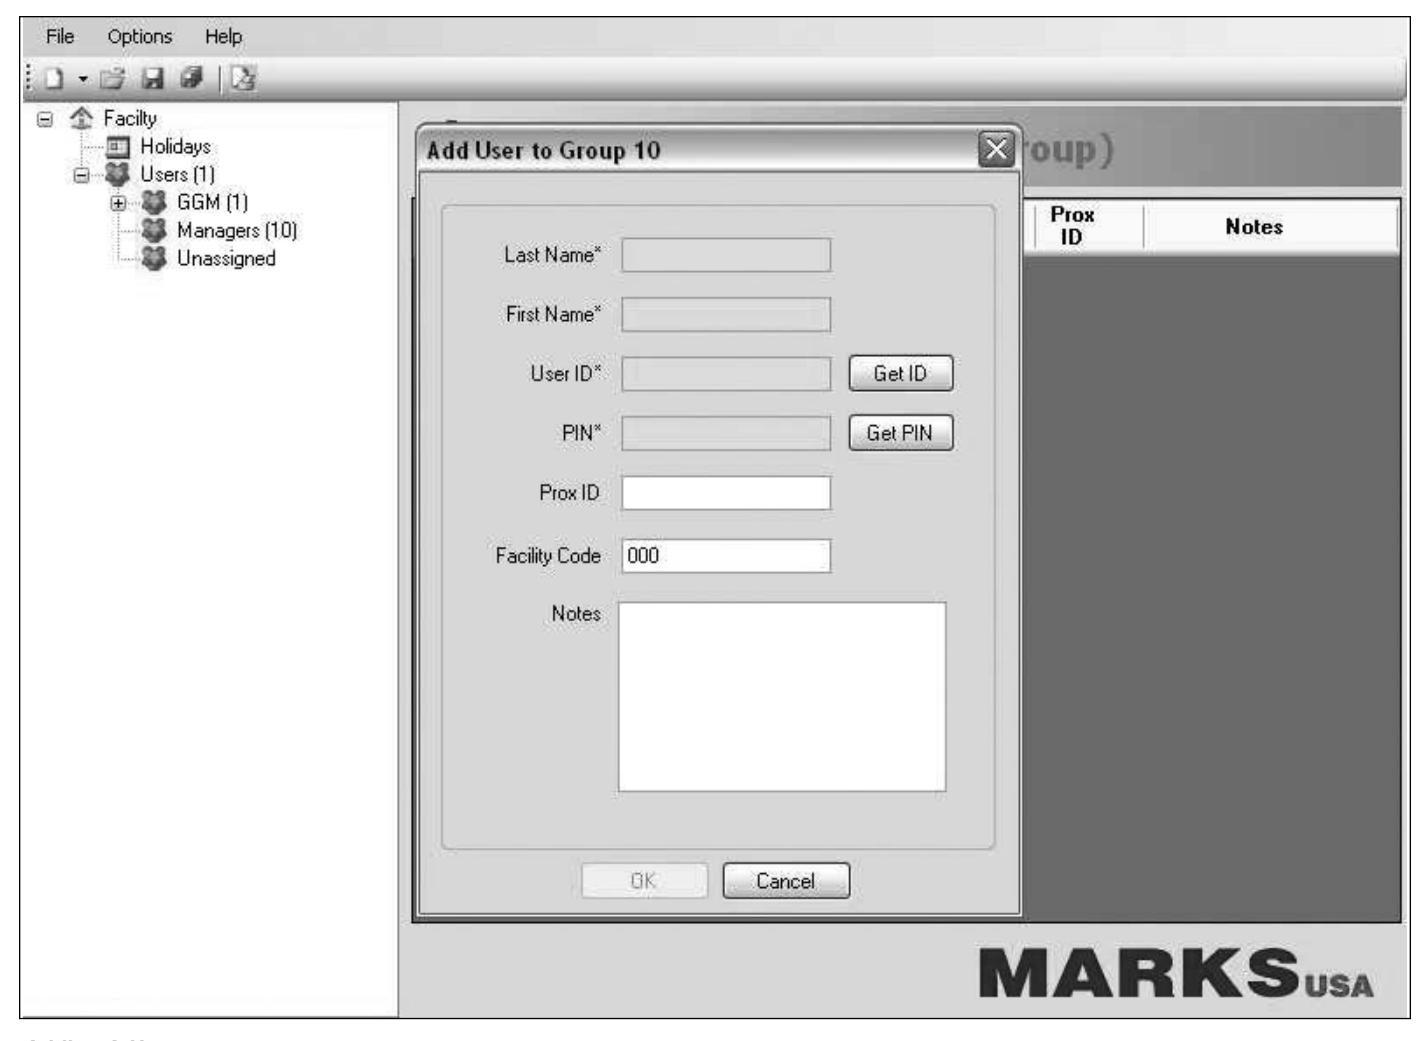
Adding A User:
- Right click on the group that the user will de designated to.
- Select "Add User".
- Fill in the required fields.
- The UID and PIN fields can be filled manually or auto filled by clicking the "Get UID" / "Get PIN" buttons.
-
Prox ID
- See Prox section.
-
Optional fields
- Facility Code.
- Notes.
NOTE: User information can be added to the facility by importing a user file (see Importing Users on page 16).
Editing A User:
- Right click on the user to be edited.
- Select "Edit User".
- Make desired changes to user information.
- Click "OK" when finished to update user.
Random UID/PIN:
The UID or PIN of user can be quickly changed using this feature.
- Right click the desired user.
- Select "Random UID" or "Random PIN" from the drop down menu.
-
The user's information will be immediately changed.
- Edit the user information to make further changes.
User Maintenance (cont'd)
Removing A User From A Group:
- Right click on user to be removed.
- Select "Remove from group".
- User will be moved to the "Unassigned" group.
To Change User's Group Association:
- Expand the group that the user currently resides in.
- Left click and hold on the user whose group is to be changed.
- Drag that user into the name of the new group and release the button.
-
The user is removed from one group to the other.
- The user's access rights will assume those of the new group.
- The user will be bound by any schedules affecting the new group.
Deleting A User:
- Right click user to be deleted.
- Select "Delete User".
- User is removed from the facility.
Zones
Creating zones in which locks will reside and schedule will be applied.
Zones may contain multiple locks. Locks that have the same configuration can be grouped into the same zone. However, Prox locks can not share a zone with regular locks because of configuration conflicts.
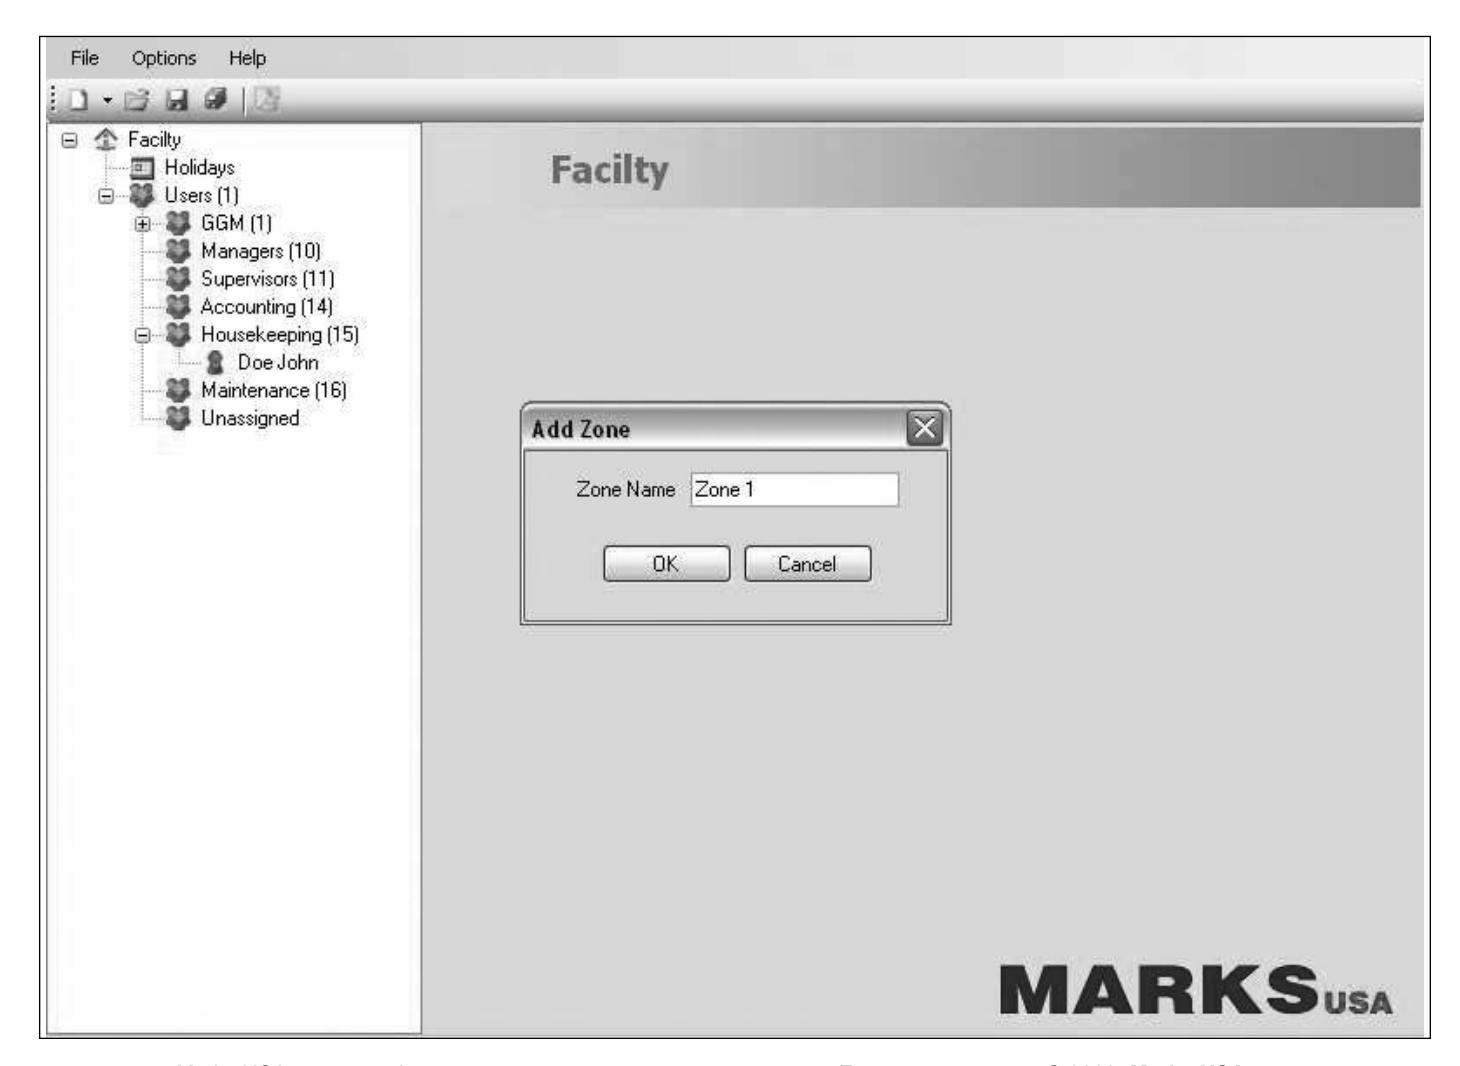
Zones (cont'd)
Adding A Zone (see picture on previous page):
- Right click on the facility name and select "New Zone".
- Enter the name of the zone and click "OK".
- The new zone will appear on the menu with its locks and schedules directories.
Renaming A Zone (see picture on previous page):
- Right click on zone to be renamed.
- Select "Rename Zone".
- Edit zone name and click "OK" to update zone.
Deleting A Zone (see picture on previous page) :
- Right click on zone to be deleted.
- Select "Delete Zone".
- Zone is removed from system.
Adding Lock(s) To A Zone
Locks must be added to the zone in order to generate upload information.
- Expand zone to which lock will be added
- Right click on "Locks"
- Select "Add Lock"
-
Fill in the required lock information
- Lock ID
- Lock Location
- * All other fields are optional
- Click "OK" to add the lock to the zone
Adding Users To A Zone
Users can be added to a zone individually or as part of a group. Likewise, users can be removed individually or as part of a group. Adding User/Group To A Zone:
- Left click and drag the user or group from the main used list into the name of the intended zone.
- The user or group can be seen by expanding the zone to which they were assigned.
Zone Configuration
Highlight a zone name on the menu. the configuration options will appear on the right side of the screen. These settings will apply to the locks and users assigned to that particular zone.
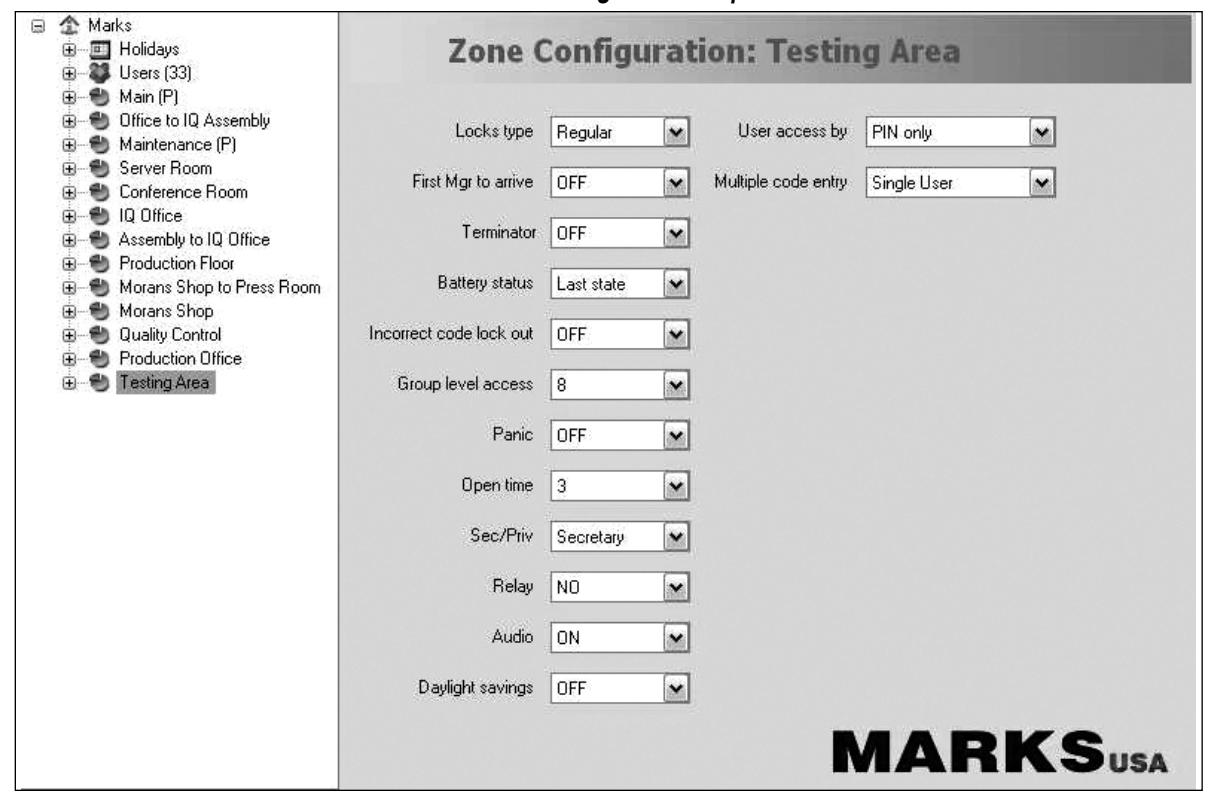
ZONE CONFIGURATION SETTINGS
Lock Type:
- Regular Access by entering code via keypad.
- Prox Access by entering code and/or presenting Prox card.
First Manager To Arrive:
• This will delay set schedules until a manager enters his/her code. Users in groups 10-99 will not have access until a manager's code is entered. Groups 1-4 are manager groups.
Terminator:
• Enables and disables the use of the (*) key after the access code to gain entry. With terminator off, the (#) must be pressed before the UID and PIN in order to enter program mode.
Battery State (default "last state"):
• Selects which state the lock will fail in when the batteries have been depleted. Fail safe or secure.
Incorrect code lockout (default "on"):
-
On temporary lockout after three invalid code entries.
- 1st offense 30 second lockout.
- 2nd offense and thereafter 40 second lockout.
Group Access Level (default "99"):
• Determines highest group access level for that zone.
Panic (default "off"):
• Enable or disable the 911 function (see programming manual).
Open Time (default "3"):
• Sets the amount of time that the lock will allow egress after a valid code is entered. Range: 1-9 seconds.
Secretary/Privacy (default "Secretary"):
• Toggles between Secretary function and Privacy function.
Relay (default "Normally open"):
• Toggles between Normally Open and Normally Closed.
Audio (default "on"):
• Turn keypad audio on and off.
Daylight Savings (default "on"):
- Turn DST on or off.
- With DST off, the time must be set manually (Function 12 in programming guide) or be updated by upload module.
User Access By (default "UID and PIN"):
- Selects method of access.
- Users can gain access by entering their UID and their PIN .
- Users can gain access by entering the PIN only.
- In a Prox system the PIN is replaced by a card or fob.
Multiple Code Entry (default "Single User"):
- Single User Access gained by entering one valid user code.
- Two Users Access gained only after two valid user codes are entered.
- User and Manager Access gained after a valid user code and a manager's code are entered.
- Two Users and Manager Access gained after two valid user codes and one manager's code are entered. Managers are those users in groups 1-4
PROX
The Marks PROX Series allows the use of a Prox card/fob in place of the user's PIN .
• Each user will still be assigned a UID and PIN regardless of having a card/fob assigned.
The card/fob can be used in conjunction with the UID a or by itself to gain access.
• Any user not having a card/fob assigned to them will gain access by entering their UID and PIN or PIN only.
A Prox ID can be assigned to new or existing users by two methods.
- Manual entry of Prox ID and Facility code.
- Using pcProx device to auto fill the information.
ASSIGNING PROX
Assigning Prox ID To A New User:
- Right click the group in which the user will be added.
- Select "Add User".
- Fill required fields.
-
Enter the Prox ID.
- This is the 5 digit number on the card/fob.
-
Enter the Facility code.
- This information is found on the package containing the cards/fobs.
- Click "OK" to add user to the system.
Assigning Prox ID To An Existing User:
- Right click on user to be updated.
- Select "Edit User".
- Enter Prox ID and Facility code.
- Click "OK" to update the user information.
FACILITY CODE
Each box of cards/fobs is labeled with a facility code. The facility code adds another level of security to the system that guards against the duplication of Prox ID's. Each Prox ID must be associated with the proper facility code to ensure the proper function of the cards/fobs assigned.
USING pcPROX
If the pcProx device is not connected via the USB port on the PC it should be connected at this time. A red light on the device indicates that it is powered up and ready to be used.
- Click "Options" and select "pcProx".
- This message will appear:
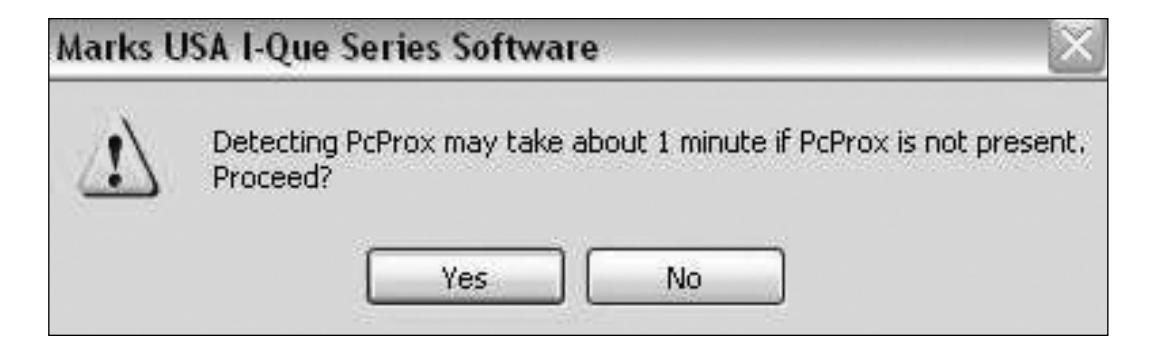
USING pcPROX (cont'd)
• Click "Yes" and this message will appear:
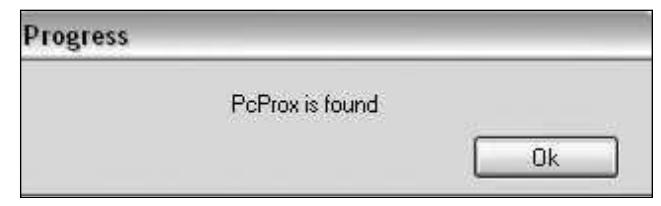
• Click "OK".
The device is ready to read a card/fob.
To Assign A Prox ID To A New Or Existing User Using pcProx:
- Open an "Add User" window or right click a user to be modified and select "Edit User".
- Present the desired card/fob to the pcProx.
-
The device will beep, the light will turn green, and the Prox information will be auto-filled.
- Prox ID
- Facility Code
- Click "OK" to update the user information.
SCHEDULES
Schedules will affect users in groups 10-99 only.
There are four different types of schedules:
- Basic Schedule applies to all users (in groups 10-99) and allows access by code/card/fob for a determined time frame.
- Passage Schedule applies to all users and allows egress for a determined frame of time.
- Group Schedule applies to a particular group (10-99), allowing that group access by code/card/fob for a determined frame of time.
- User Schedule applies to a single user (in groups 10-99), allowing the user access for a determined frame of time.
Rules:
Group or User schedules can not exist with a Basic schedule in a particular zone.
Passage schedules override Basic/Group/User schedules for a determined period of time.
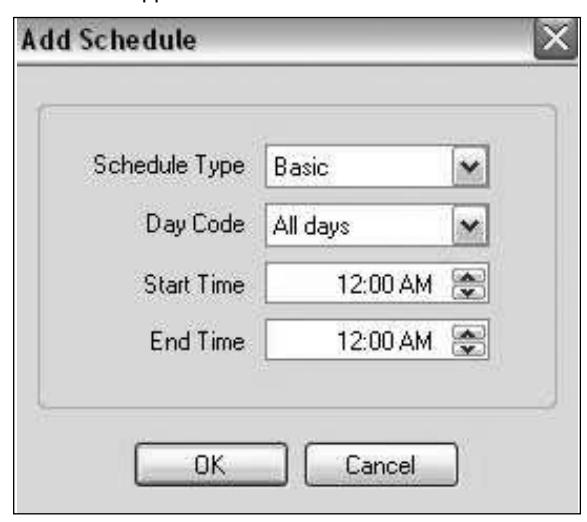
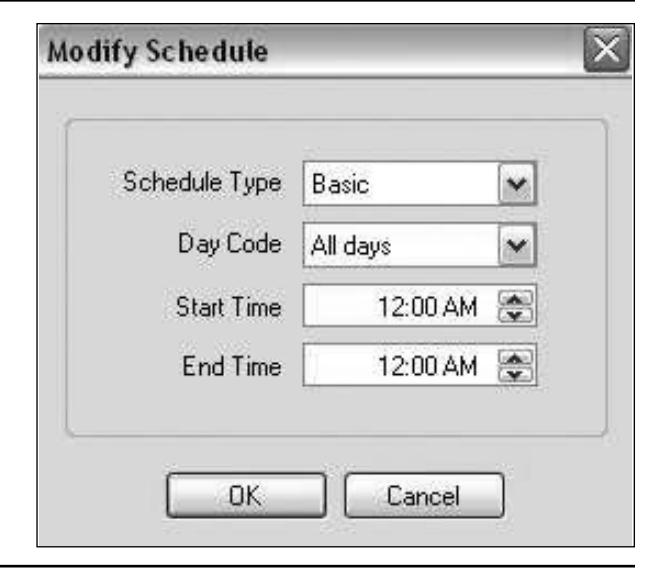
Adding A Basic Or Passage Schedule:
- Expand the zone to which the schedule will be applied.
- Highlight "Schedules" within that zone.
- Right click the space under the title "All Schedules" and select "Add Schedule".
-
Select the desired schedule type from the drop down list.
- Basic or Passage
- Select the day code and time that the schedule will apply to
- Click "OK" to apply the schedule to the zone and it will appear on the "All Schedules" list.
SCHEDULES (cont'd)
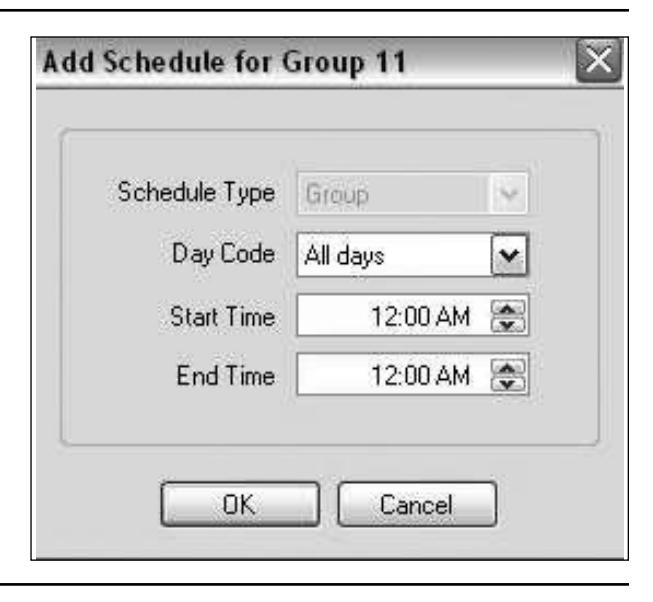
Adding Group Schedule:
- Right click the group to which the schedule will be applied (groups 10-99 can be scheduled).
- Select "Add Schedule".
- Select the day code, start time, and end time for the schedule.
- Click "OK" to apply the schedule to the group and it will appear on the "All Schedules" list.
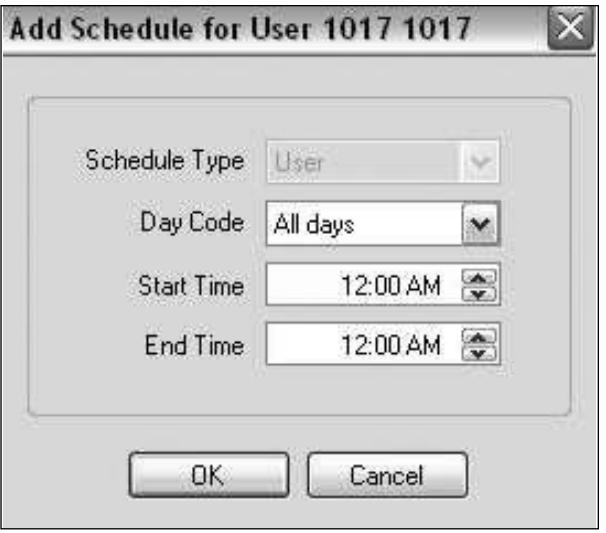
Adding User Schedule:
- Right click the user to which the schedule will be applied.
- Select "Add Schedule".
- Select the day code, start time, and end time for the schedule.
- Click "OK" to apply the schedule to the user and it will appear on the "All Schedules" list.
Editing A Schedule:
- Right click the schedule to be edited.
- Select "Edit Schedule".
- Make desired changes to schedule information.
- Click "OK" to update the schedule information.
Deleting A Schedule:
- Right click the schedule to be deleted.
- Select "Remove Schedule".
- The schedule is removed from the system.
TEMPORARY USER SCHEDULE
A User can be given temporary access to a zone. The user must be added to the zone as a single user, not as part of a group, in order for this option to be available.
Creating Temporary User Schedule:
- Add User to the zone (see adding users).
- Highlight the user to view the user's schedules.
- At the bottom of the screen there will be a check box and date range.

- Check the box to give this user temporary status.
- Select the date range of the user's temporary access.
- The User now has temporary access for the date range selected.
NOTE: Temporary user schedules will reoccur and need to be maintained annually or deleted.
Saving And Backing Up:
- Click "x" to exit program.
- If prompted to save click "Yes".
-
Select the memory stick as the directory in which the facility will be saved.
- The Facility must reside on the drive in order to generate the upload information.
- The name of the file must be "default.xml". Rename it if needed.
- Click "Save" and this message will appear.
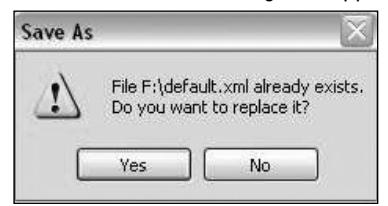
• Click "Yes" to overwrite the existing file.
To Create A Back Up (After saving the facility):
-
Open the U3 drive directory.
- Select "Explore Drive" from the U3 launchpad.
-
Save the "default.xml" file to another location as a back up.
- Copy/Paste or right click then drag/drop file into the back up location.
- File can be saved on the hard drive or another memory stick.
REMOVING THE MEMORY STICK
After saving the facility, the drive can be removed from the computer.
To Remove The Memory Stick:
-
Close the software by clicking the "x" in the upper right hand corner of the window.
- If prompted to save the facility, save the facility .
- Click the U3 icon in the tray and click the eject button.
- Wait for the "Safe to Remove" message to appear.
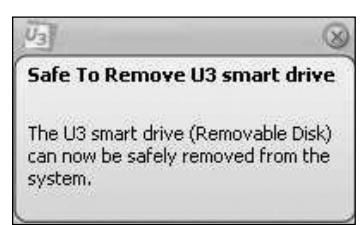
- Remove the drive from the computer.
- Insert the drive into the i-Dat making sure that it properly engages the USB port in the module.
i-DAT MODULE
- Make sure the battery (one 9volt alkaline) has been installed into the i-Dat.
-
Turn on the i-Dat by pressing the button above the MARKS logo.
- This can be done before or after the memory stick is inserted.
- The main screen will appear displaying: "MARKS USA i-Dat", the firmware version, the time and the date.
-
Press the button to display the main menu.
- Off
- Audit Trail
- Upload to Lock
- Set Clock
NOTE: The time and date must be set before attempting an upload or download.
To Set The Time And Date:
-
Rotate the button, move arrow next to the "Set Clock" option and press the button.
- The time and date will appear.
- Time is displayed in 24 hour format.
- Rotate the button to change the value.
- Press the button to advance to the next value.
- Set the time and date accordingly.
- Press the button after the year is set to return to the main screen.
To Upload To The Lockset:
- Select "Upload to Lock" and press the button.
- i-Dat will take a moment to initialize the drive.
-
When ready the display will read:
- Activate Function 14.
-
Activate Function 14:
- With i-Dat in position under the keypad (shown right).
- At the keypad enter the following: GGM # 14*.
-
The i-Dat will display:
- Uploading...
- Record Counter.
- Lock will display a green LED during upload and beep when upload is complete.
- i-Dat will display the amount of records uploaded.
- Press star key to finish.
To Download From The Lockset:
- Select "Audit Trail" and press the button.
- i-Dat will take a moment to initialize the drive.
-
When ready the display will read:
- Activate Function 15.
-
Activate Function 15:
- With i-Dat in position under the keypad (shown right).
- At the keypad enter the following: GGM # 15* Number of Events*.
-
The i-Dat will display:
- Lock ID
- Battery info
- Lock serial number
- Lock will display a green LED during download and beep when download is complete.
- i-Dat will display the amount of events downloaded.
- Press star key to finish.
i-DAT POSITIONING

AUDIT TRAIL
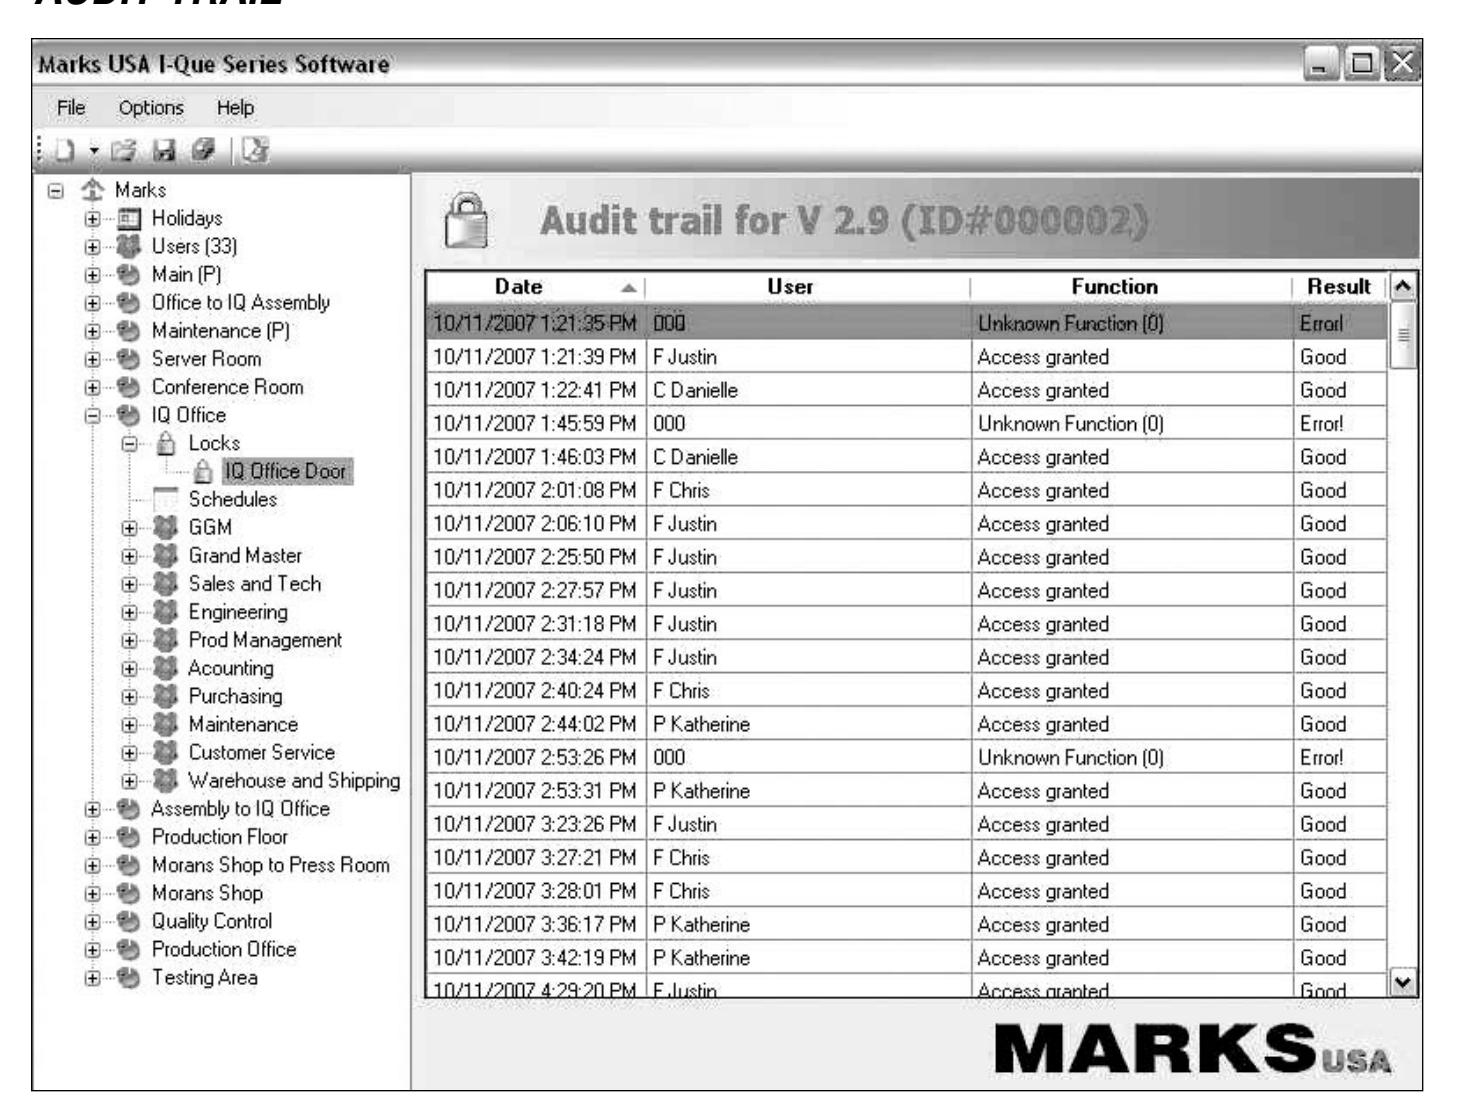
View Audit Trail:
• Highlight the lock from which the audit trail was downloaded.
Audit Trail Will Display:
- Date/time of event.
- Name of User.
- Function performed.
- Result.
The Data Can Be Sorted According To Any Of The Four Criteria By Clicking The Title Of The Column:
- Click once for ascending order.
- Click again for descending order.
PRINT OR SAVE TO FILE
User lists and audit trails can be sent to a printer or they can be saved to a text file on the memory stick. NOTE: All of the data contained on the list being viewed will be printed or saved when this feature is activated. This feature does not allow for the printing or saving of partial lists.
Print:
-
Select data to be printed:
- Highlight users for a complete user list.
- Highlight a group name for a list of users in that group.
- Highlight a lock for an audit trail.
- Click the "Print" button.
- Select "Print".
- All data on the user list or audit trail is sent to the default printer.
Save To File:
-
Select data to be saved:
- Highlight users for a complete user list.
- Highlight a group name for a list of users in that group.
- Highlight a lock for an audit trail.
- Click the "Print" button.
- Select "Save to File".
- All data on the user list or audit trail is sent to the memory stick as a text file.
To View A Saved File:
- Click U3 icon.
- Select "Explore Drive" from launchpad.
-
Open text file by double clicking or right click file for options.
-
File can be opened with:
- Notepad.
- WordPad.
- MS Office Word.
-
Font may have to be changed to view properly in Notepad.
- Courier New is recommended.
-
File can be opened with:
NOTE: It is recommended that any user list or audit trail not be left on the USB drive unless the drive is protected by the optional U3 Security Password. For security purposes these files should be moved to a secure location on the computer, deleted, or the U3 password should be enabled.
IMPORTING USERS
User information can be imported into the software from a file. The file must be in "Comma Separated Values" format and can be created using MS Excel.
Creating a .CSV file (a blank .CSV file can be found on the USB drive):
- Open MS Excel.
- Title the columns as follows:
| Fname | Lname | Facility code | ProxID | UserID | PIN | Group |
|---|
-
All information, except Prox and Facility code, is required.
- User names must consist of only alphanumeric characters.
- No special characters ( . , : ; ' ! & / ) or spaces.
- If there is no Prox or Facility code information these columns will be left blank except for the titles.
- After all the user information is entered select "File" then "Save As".
- Name the file and select "CSV (comma delimited)(*.CSV)" as the " save as" type.
- Make sure the file is being saved to a location in which it can be easily found.
- Click "Save".
IMPORTING USERS (cont'd)
To Import The User File (This can be done after the GGM user is added to the facility) :
- Select "File" then "Import Users File".
- Locate the file with the user information.
- Click "Open".
A box will appear with the import results.
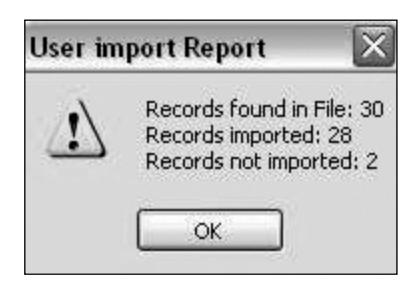
UID's already in the system will not be imported to prevent duplication. Only one user is allowed in Group 1 which is the GGM. Other users listed in Group 1 will not be imported. User names with special characters will not be imported.
U3 SECURITY PASSWORD
This password provides an added measure of security. When enabled, the data on the memory stick can not be accessed without the password. This includes accessing the data via i-Dat module.
Enter U3 Password:
- Click U3 icon to open launchpad.
-
Select "Enable Security".
- Type password.
- Retype password.
- Select Hint
- Click "OK" to enable security.
- Close U3 launchpad.
- Password will be needed the next time the memory stick is accessed.
Disable U3 Password:
- Click U3 icon to open launchpad.
- Select "Disable Security".
- Enter U3 password.
- Click "OK" to disable security.
GLOSSARY
Access Control:
The control of people's entrance and exit of a protected are utilizing hardware systems specialized to control and monitor the movement into, out of, the protected area.
Audit Trail:
A historical record sequentially accounting for all activities with an access control system. Such a record allows reconstruction and analysis of events during a given time period.
Prox Card:
A card that when presented to the card reader antenna and used in place of a PIN . The card may be used in " PIN Only" mode or in conjunction with the UID , depending on the lock configuration.
Facility Code:
A code in the card format used to partition data.
Fail Safe:
Unlocks when a power failure occurs.
Fail Secure:
Locks when a power failure occurs.
Prox Fob:
An alternative to the Prox card that is designed to attach to the user's keychain.
GGM:
(Great Grand Master) First code added to the facility. Has the highest level of access.
i-Dat:
A handheld device from Marks USA specifically manufactured for exclusive use of uploading and downloading the i-Que series lockset.
Lock ID:
Unique 6 digit number entered during initialization, defining the specific lock. This number is used by the i-Dat to identify each lock when uploading or downloading.
pcProx:
A USB device that reads cards/fobs; allows them to be assigned to users.
PIN:
(Personal Identification Number) A combination of numbers and/or letters, increasing the number of code possibilities.
Prox ID:
Card/fob number that is associated with the user.
Terminator:
The " * " key acts as the terminator which functions similar to the "Enter" key on a standard computer keyboard. It is also pressed after a code is entered to gain access.
UID:
(User Identification Number) A unique number assigned to each User. The UID has a length of 3 to 4 digits. The I.D. number will be displayed in the audit trail showing that User's history of events.
Unassigned:
A user not belonging to any particular group.
User:
Person who is assigned a UID and a PIN /card/fob. Their access to the facility is determined by group designation and schedules.
Zone:
A Subdivision of the facility where locks with similar configuration settings and user access can be managed.
| NOTES | |
|---|---|
| NOTES | |
|---|---|
| NOTES | |
|---|---|
For more information on additional product lines, templates and manuals, visit our website @ www.marksusa.com
| Distributed by: | ||
For i-Que Tech Support Call:
Toll Free: 800 • 526 • 0233
In N.Y.: 631 • 225 • 5400
Fax: 631 • 225 • 6136
LIVE TECH SUPPORT 8am to 8pm EST Mon - Fri
Email: techsupport@marksusa.com
