Marks USA 1PD Hospital Push-Pull Cylindrical Instructions with Template
Open the original PDF document
View PDF

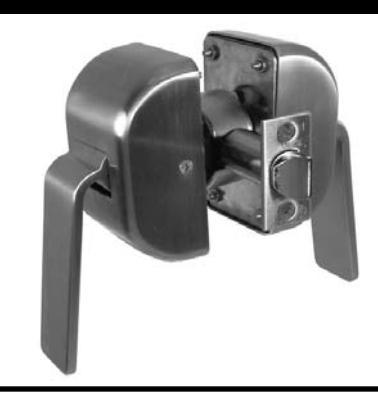
1PD Push/Pull Cylindrical Cartridge Lockset Installation Instructions®
1 DOOR PREPARATION
1. Prepare door according to engineering template supplied.
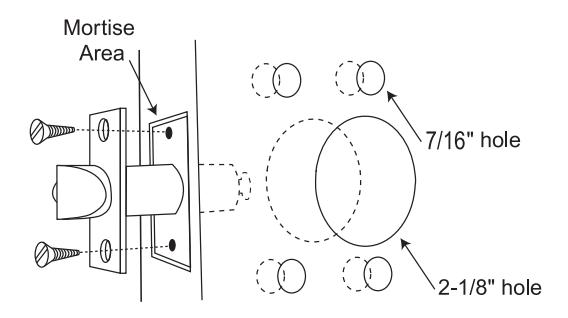
2. Insert latch and fasten with two screws.
NOTE: It is important that both 1" and 2-1/8" holes be on the same horizontal center line.
2 INSTALL STRIKE
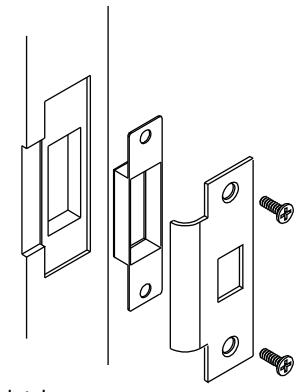
- 1. Align strike with latch.
- 2. Trace strike outline on door jamb.
- 3. Mortise jamb and install strike and dust box.
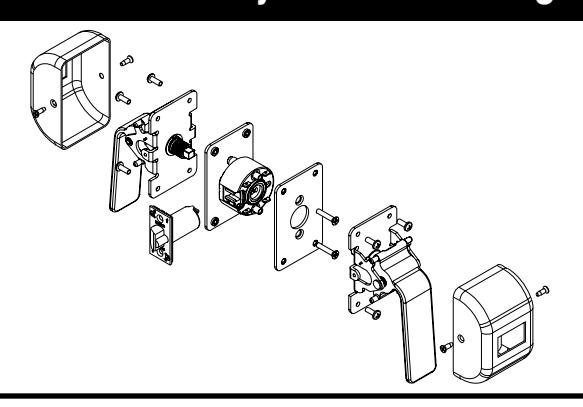
3 CYLINDRICAL CARTRIDGE AND LATCH ENGAGEMENT

- Push outside mounting plate assembly with cartridge through 2-1/8" diameter hole from outside of door. Make sure that retractor is properly engaged with latch as shown above.
- 2. Install inside mounting plate and secure with two thru-bolt mounting screws.
- 3. Align cam in push/pull assemblies for maximum spindle rotation when in contact with handle finger. With proper orientation, attach push/pull assemblies to mounting plate already on door and secure with four screws. Make sure that spindle is engaged with cartridge.
- 4. Check handles for proper operation before closing door.
4 COVER PLATE ASSEMBLY
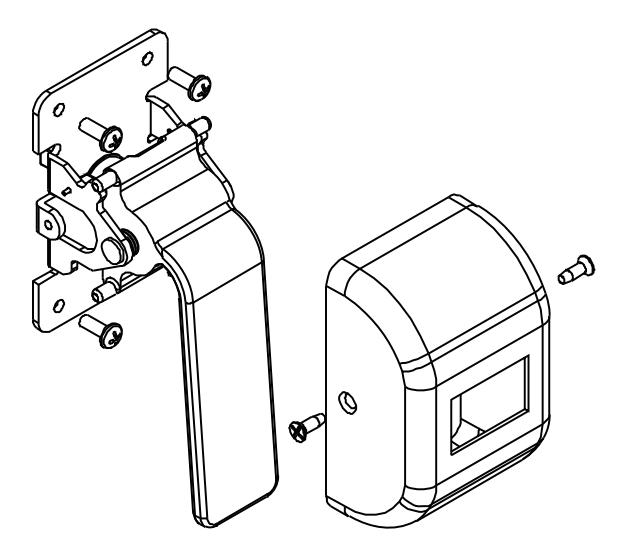
Assemble cover plates on inside and outside push/pull assemblies. Secure with two screws.

1PD Push/Pull Cylindrical Cartridge Lockset Installation Instructions©
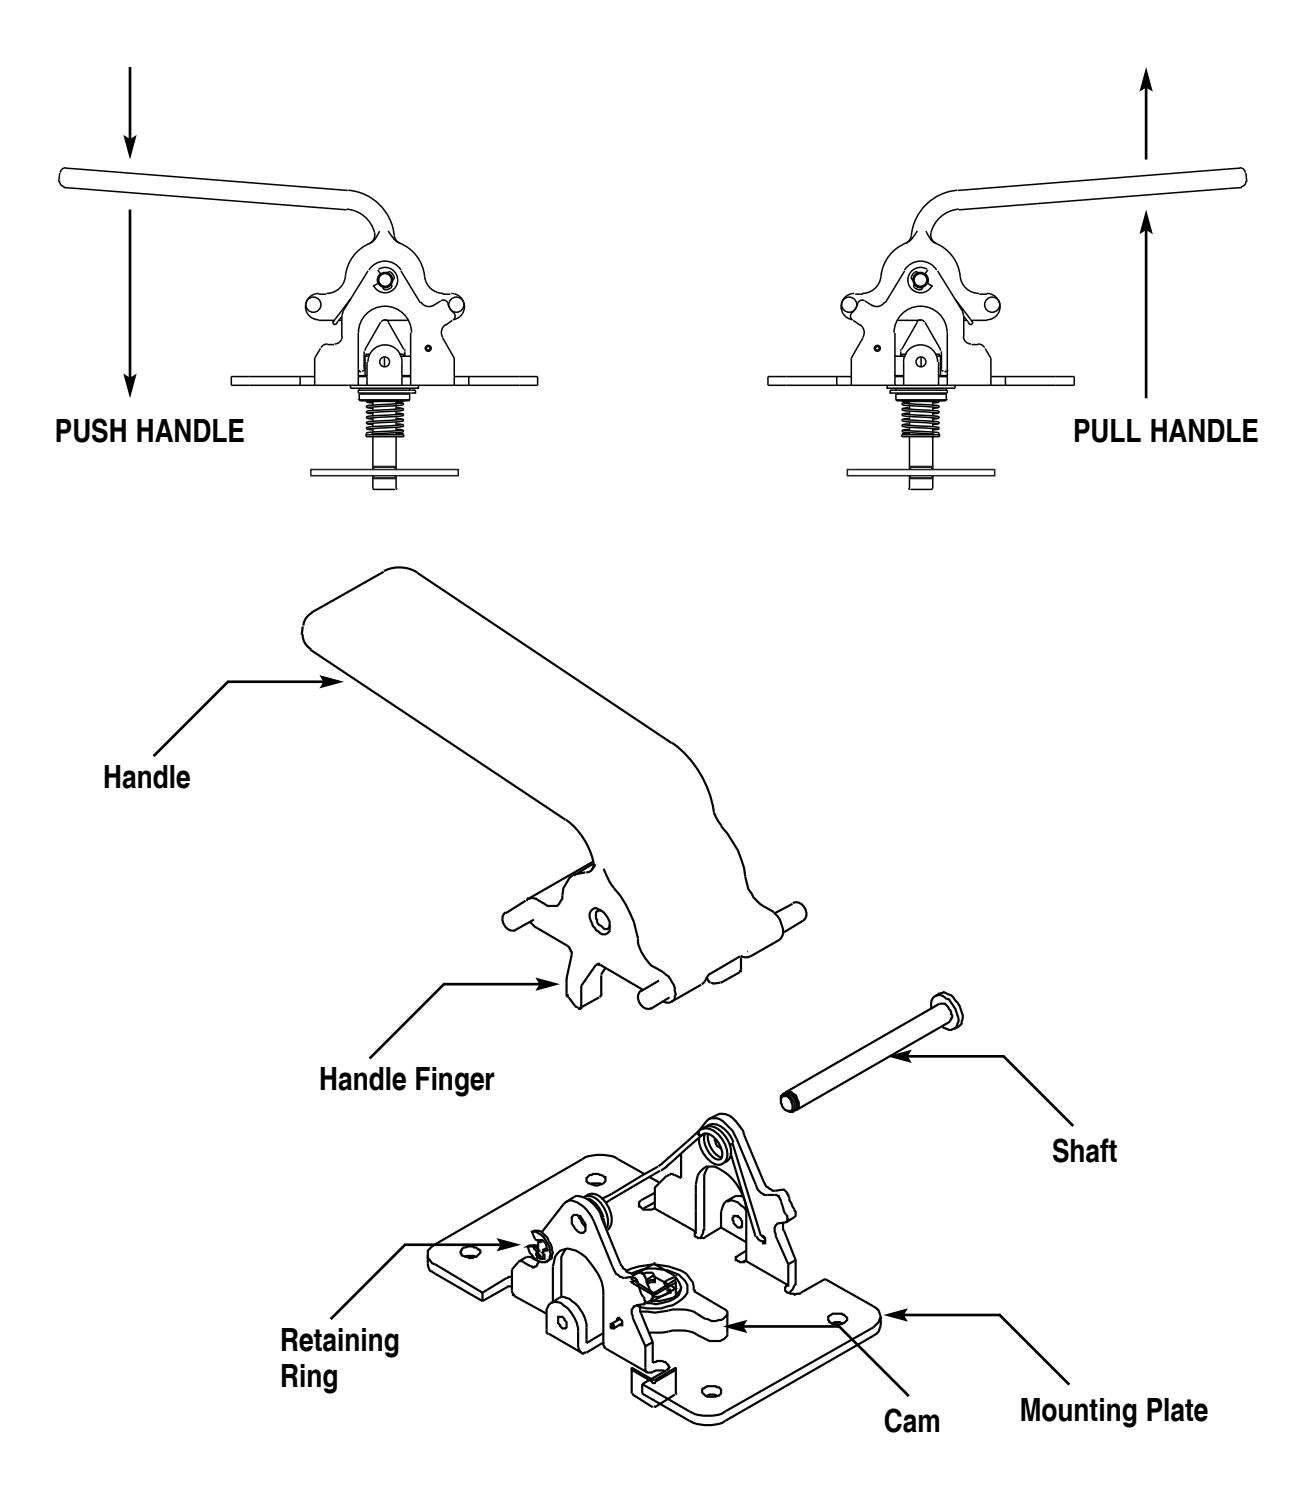
HOW TO CONVERT HANDLES FROM PUSH TO PULL:
- 1. Remove retaining ring.
- 2. Remove shaft.
- 3. Remove handle and rotate 180°. BEFORE REASSEMBLY: DO NOT REMOVE SPRING FROM MOUNTING PLATE.
- 4. Rotate cam with spindle assembly 180° before placing handle back into mounting plate.
- 5. Align all holes including spring and insert shaft back and secure with retaining ring.
BE SURE TO CHECK EACH HANDLE FOR PROPER OPERATION BEFORE INSTALLING ON DOOR.