Marks USA 130 Defender Series Deadbolt Installation Instructions
Open the original PDF document
View PDF

130 Series Tubular Deadbolt Installation Instructions©
Conventional deadbolt cylinders are normally shipped with a No.2 tailpiece.
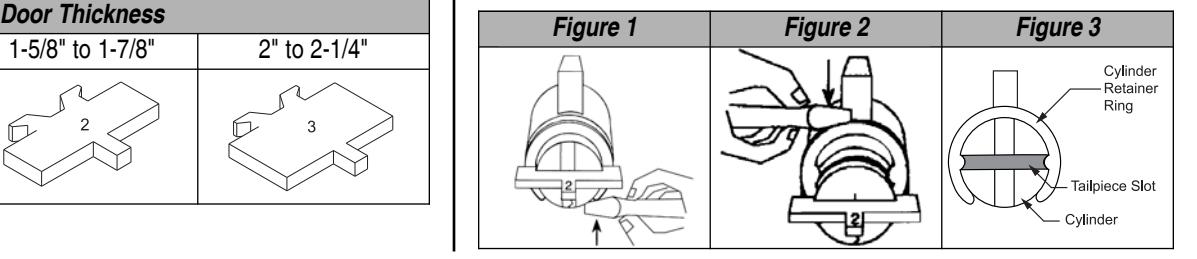
No. 2 tailpiece is included for 1-3/8" to 1-1/2" doors.
No. 3 tailpiece is available upon request. Order S1355 tailpiece screw pack.
| 1-3/8" to 1-1/2" | 1-5/8" to 1-7/8" | 2" to 2-1/4" |
|---|---|---|
- 1. Remove key from cylinder.
- 2. Remove cylinder retainer ring.
- 3. Exchange tailpiece.
- 4. Replace cylinder retainer ring.
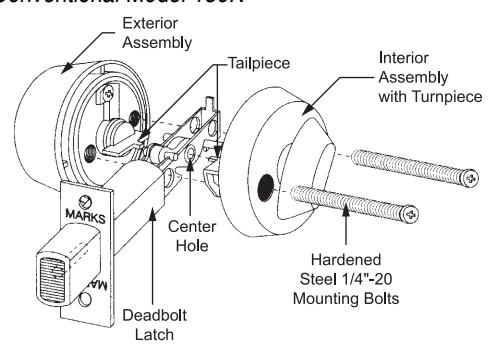
130X Turnpiece Only Model
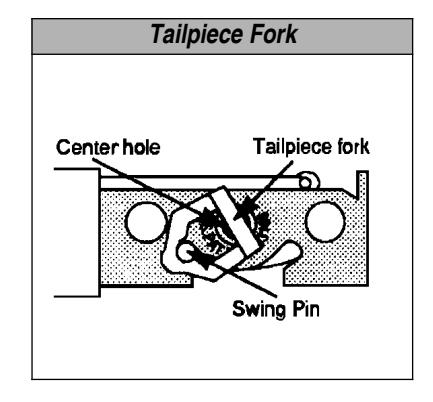
- 1. Insert interior turnpiece assembly so tailpiece fork captives swing pin. Be sure tailpiece inserts into center hole of latch assembly.
- 2. Insert mounting bolts and fasten to outside mounting plate.
130 Series Tubular Deadbolt Installation Instructions©
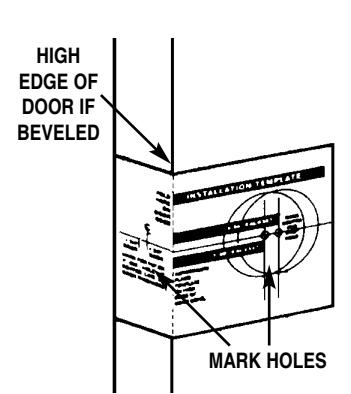
Preparing The Door:
- 1. Mark the door at the desired height.
- 2. Using the template, mark centers of 2-1/8" and 1"diameter holes.
- 3. Drill 2-1/8" dia. hole through both sides of the door.
- 4. Drill a 1" hole on the door edge through to the first hole. Holes must be perpendicular.

1" HOLE
1. Insert deadbolt latch into hole in door edge.

- 3. Mortise the faceplate area with a chisel so the faceplate is flush with the door edge.
- 4. Reinsert the latch and fasten with two screws.
Install The Latch Install The Strike
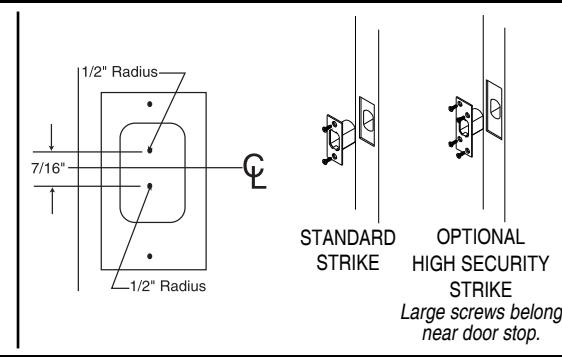
- 1. Mark the door jamb on the same centerline as the deadbolt latch.
- 2. Mortise a hole as shown for the dustbox, 1-1/8" deep.
- 3. Trace the strike and mortise so the strike is flush with the jamb.
- 4. Insert strike and dustbox. Drill 1/8" holes and fasten strike with screws.
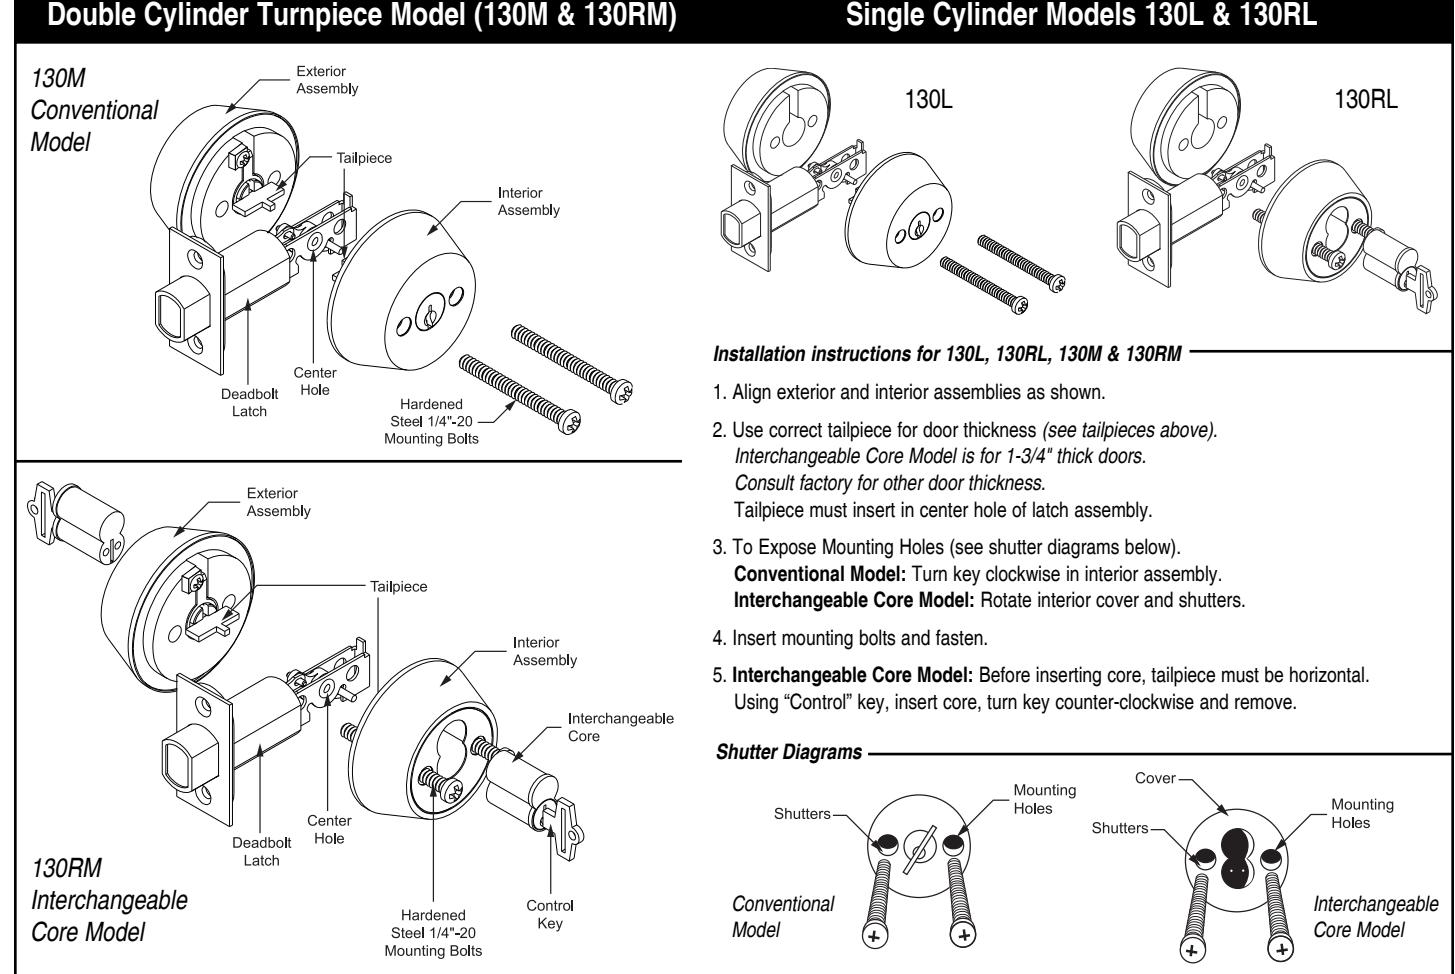
Cylinder X Turnpiece Model (130K & 130RK)
Conventional Model 130K
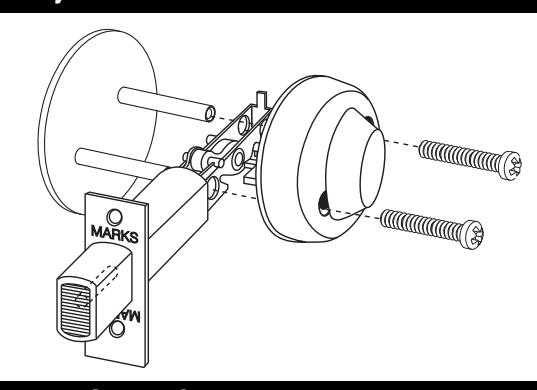
- 1. Align exterior and interior assemblies as shown.
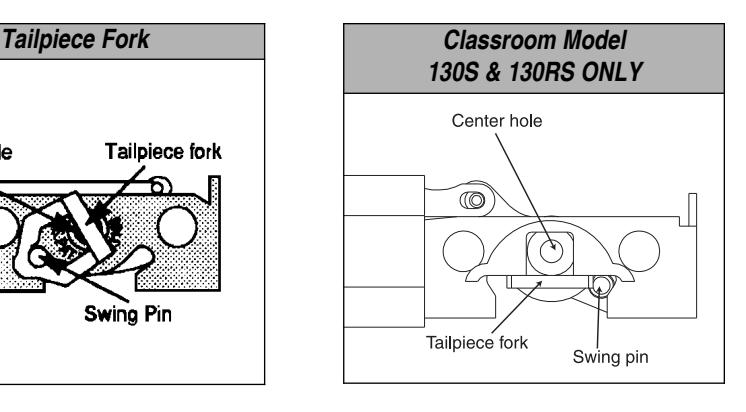
- 2. Use correct tailpiece for door thickness (see "tailpieces" on reverse side). Interchangeable Core Model is for 1-3/4" thick doors. Consult factory for other door thickness. Install interior turnpiece assembly so tailpiece fork inserts into center hole of latch assembly and captivates Swing Pin as shown in the diagrams below.
- 3. Insert mounting bolts and fasten.
- 4. Interchangeable Core Model:
Before inserting core, tailpiece must be horizontal. Using "Control" key, insert core, turn key counter-clockwise and remove.
Interchangeable Core Model 130RK