Major HIT-40AR8 Retro Fit Template Instructions
Open the original PDF document
View PDF

1825 VIA BURTON ANAHEIM CA 92806
714-772-5202 / FAX 714-772-2302 EMAIL: MAIL@MAJORMFG.COM WEB: WWW.MAJORMFG.COM
INSTRUCTIONS FOR HIT-40AR8 RETRO FIT TEMPLATE TO INSTALL AR STYLE 4560,61, 65, 68 & 69 LEVER HANDLE AND 4590 & 4591 PADDLE HANDLE
WHEN USING POWER TOOLS ALWAYS WEAR EYE AND EAR PROTECTION!!
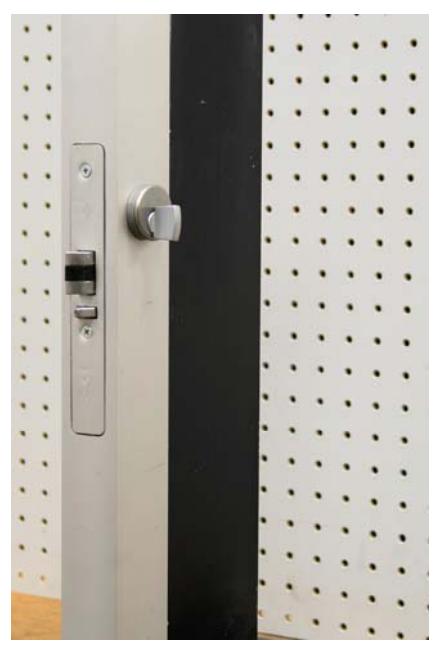
Dead latch lock with inside thumb turn cylinder.
We will replace the thumb turn with a lever handle.
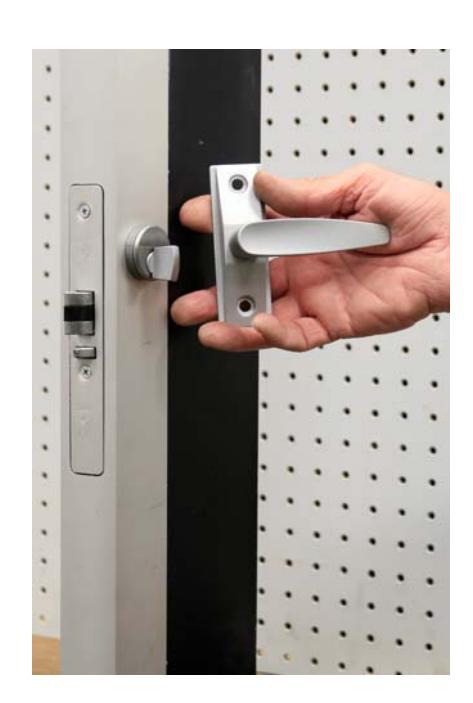
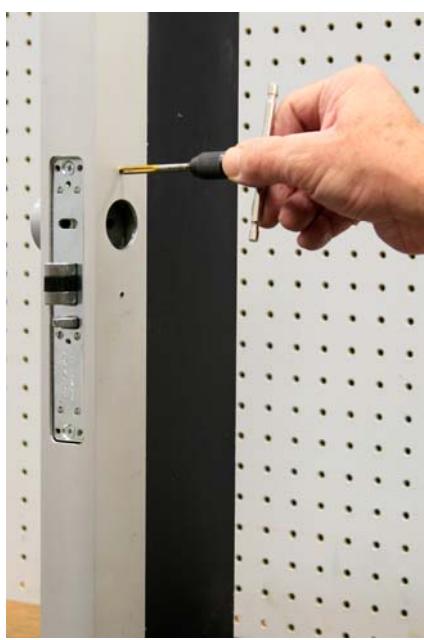
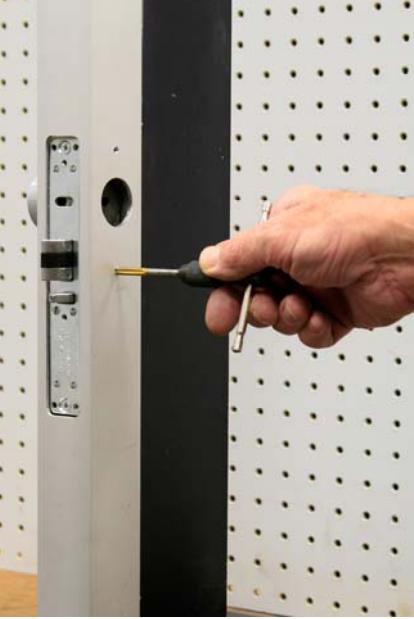
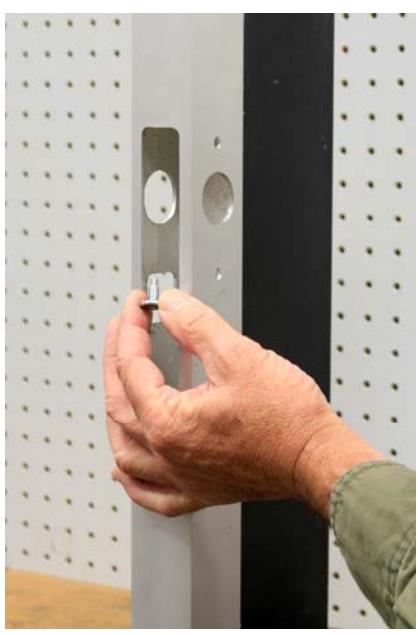
Remove the faceplate and inside thumb turn. Shown is the supplied HIT-22 guide that will align the drill guide.
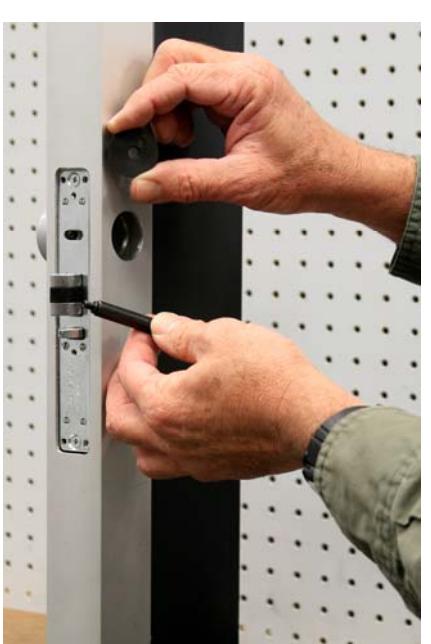
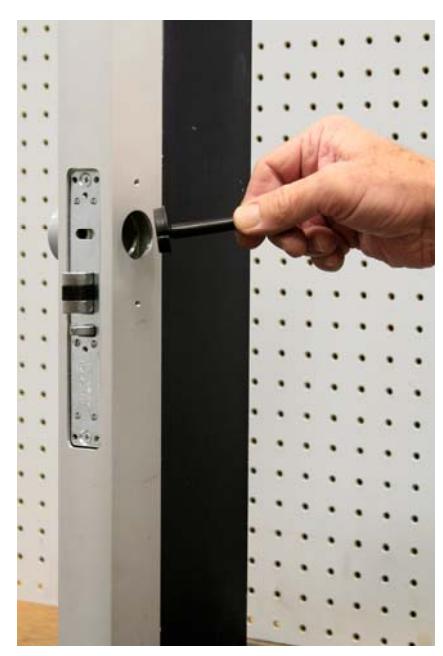
Using the Hit-22 handle, install in the inside cylinder hole and tighten the cylinder set screw.

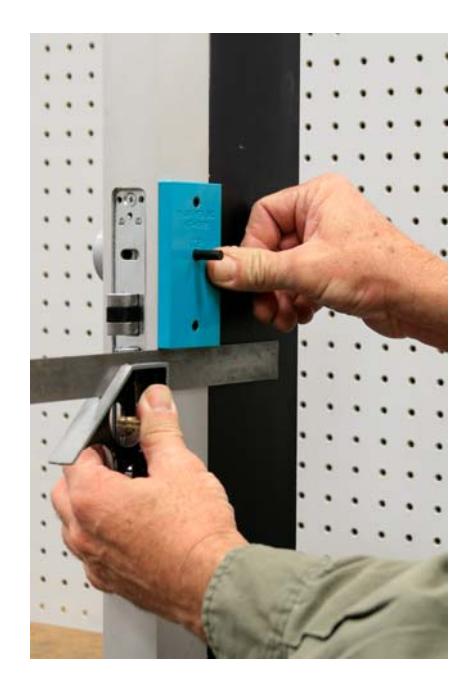
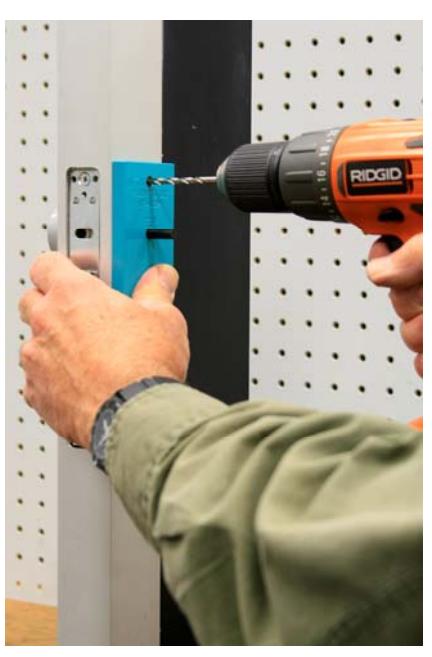
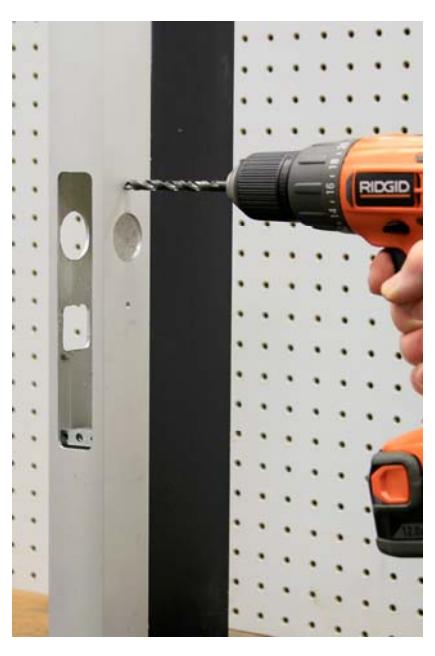
Put the 1/4" dowel pin in the HIT-22 guide and slide the HIT-40AR8 drill guide over the top. Square to the door with a combination square.
Hold firmly to the door and drill the top hole with a #21 drill. When drilling this hole use caution when drilling through the door to avoid damage to the mounting bracket inside.

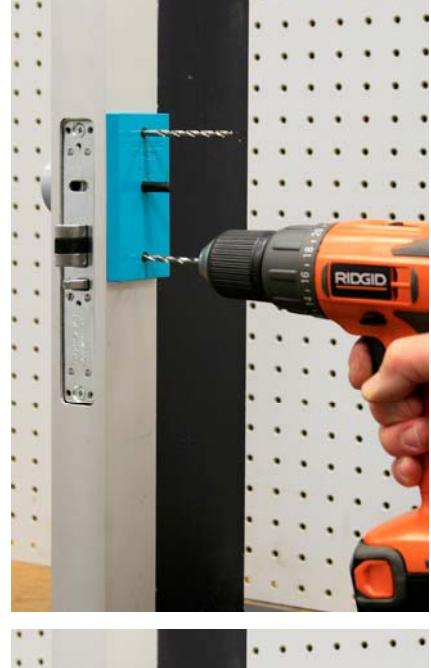
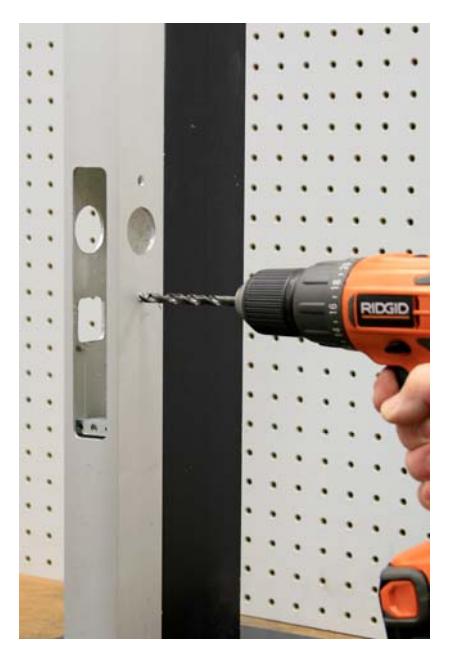
Take a second #21 drill bit and put the reverse end of the bit in the drilled hole. This will keep the guide in alignment when drilling the second hole.
Drill the bottom hole.
If installing a 4590 series paddle handle go to page 4 for the rest of the install. If installing a 4560 series lever handle continue below.
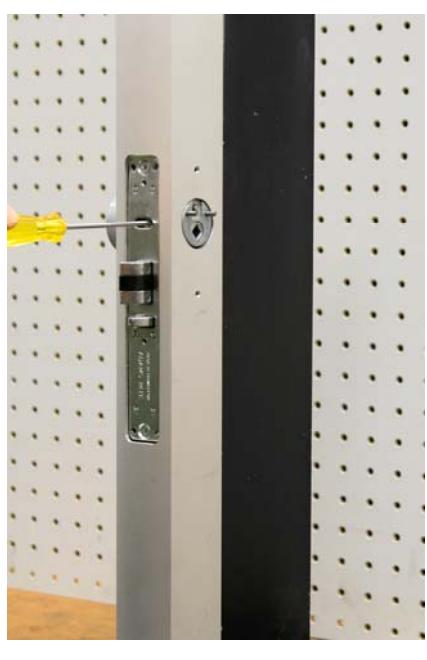
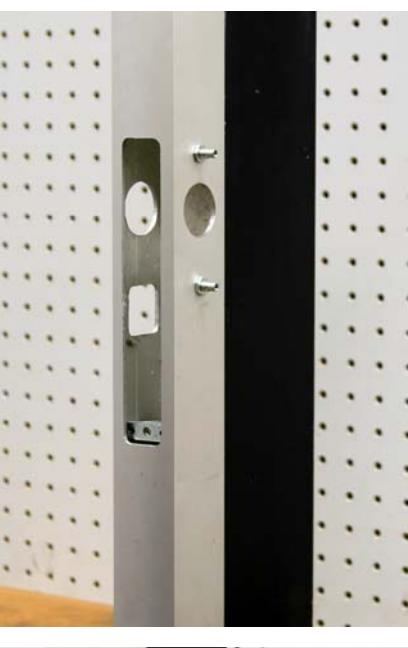
Remove drill guide and tap both holes with a 10-32 tap.

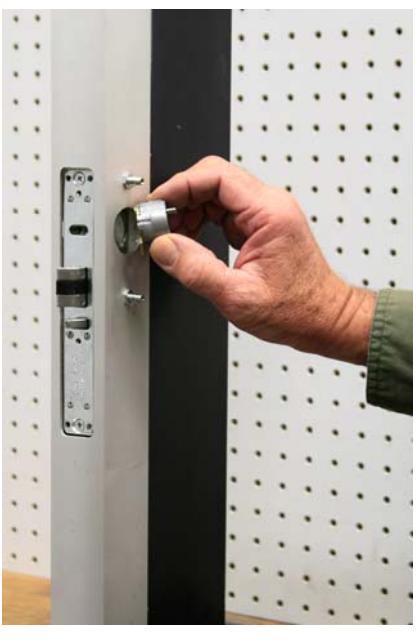
the right. Install in the cylinder hole and tighten the cylinder set screw.
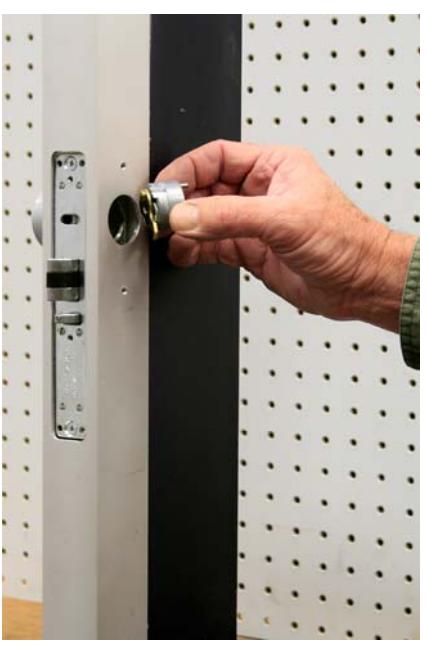
Cam is installed and cylinder set screw is being tightened.
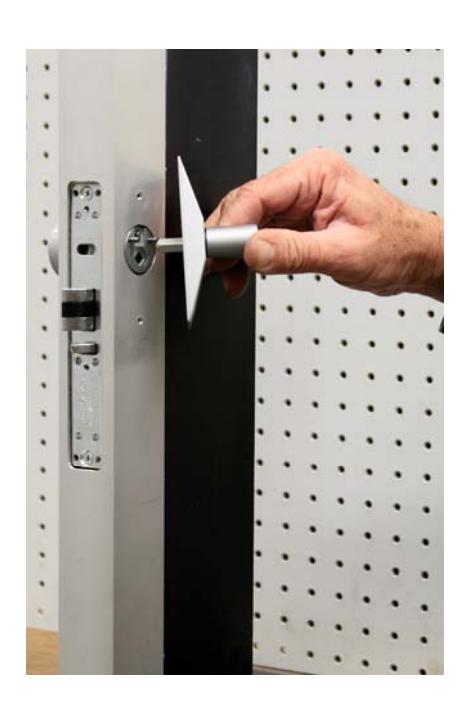
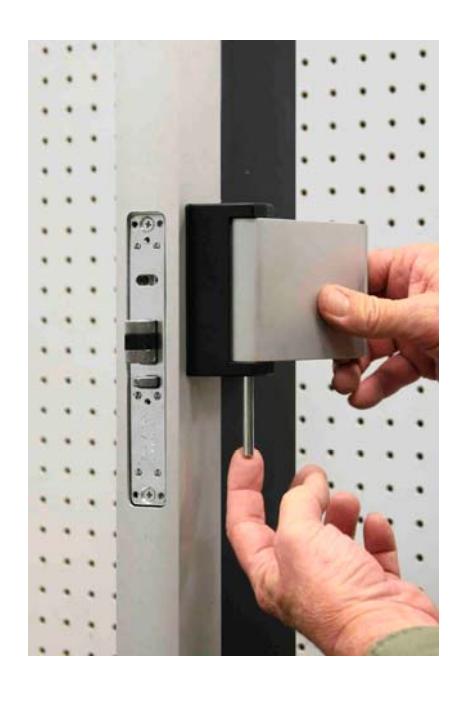
The lever handle can now be installed in the cam driver.
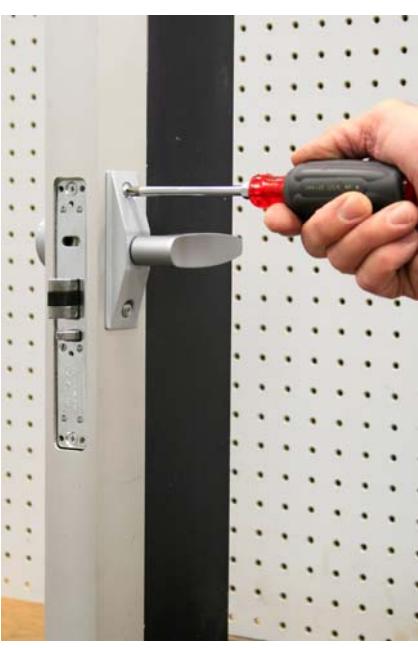
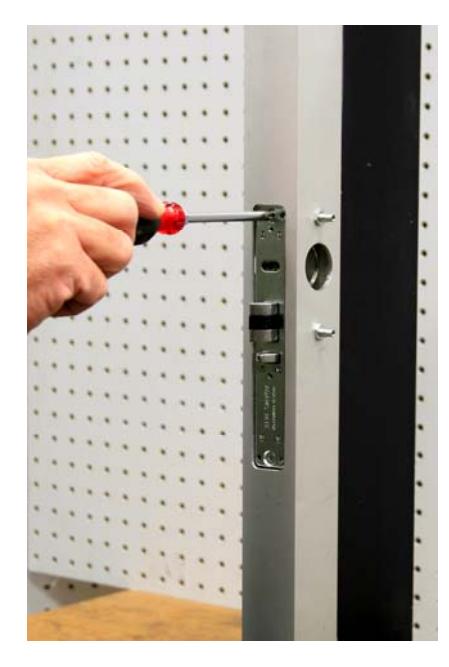
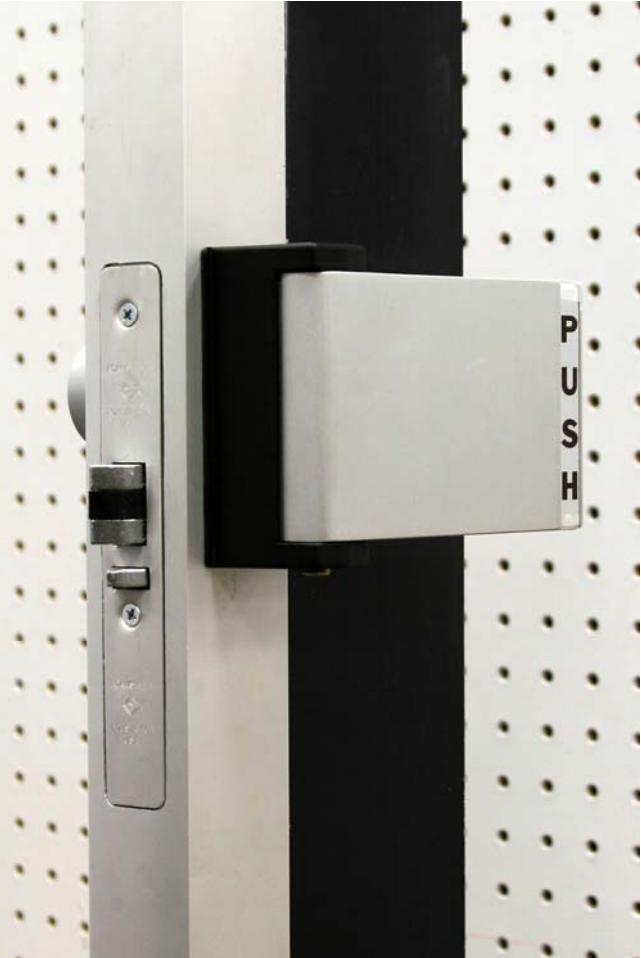
Install mounting screws both top and bottom and install the lock faceplate.
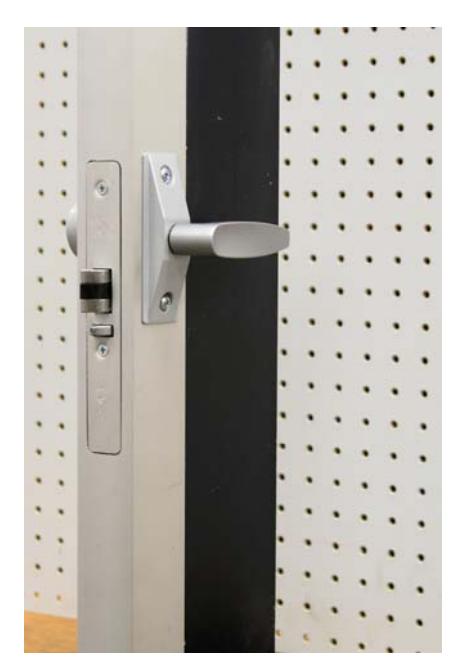
Installation is now complete.
That's all there is to it!
Remove the lock from the door and enlarge the two holes to 17/64" with the use of a twist drill.
Install the two binder posts and secure with the 1/4-28 hex nuts.
Reinstall lock and 4580 cam disc. The cam disc is secured with the cylinder set screw.
Page 4 Copyright 2008 Major Manufacturing, Inc.

Install paddle handle with fasteners top and bottom. Add push paddle with hinge pin and finally lock face plate.
Completed installation.
That's all there is to it!
Visit our web site at www.majormfg.com for more information or router recommendations, template guides and other templates to make your installations easier and faster. While there sign up for our newsletter and we will email new product information directly to you.