Major HIT-32AR8 Drill Guide for Aluminum Frame Doors Instructions
Open the original PDF document
View PDF

INSTRUCTIONS FOR USE WITH HIT-32AR8
DRILL GUIDE FOR ADAMS RITE 8800 SERIES PACIC HARDWARE ON ALUMINUM FRAME DOORS
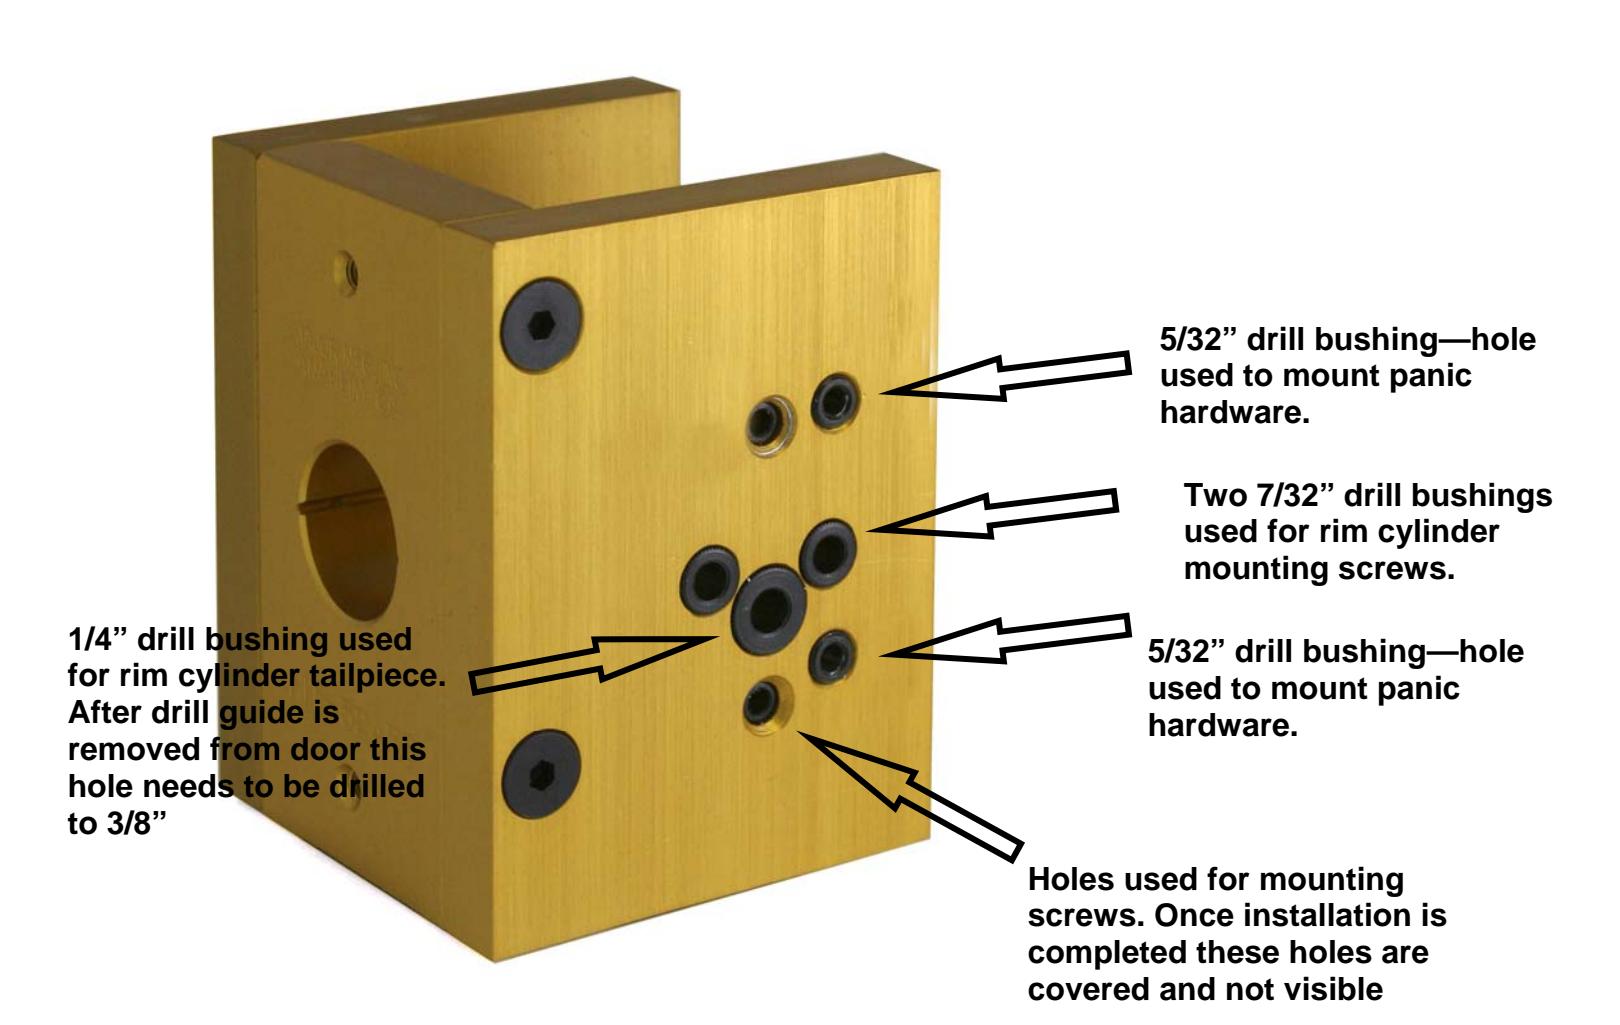
Inside view of HIT-32AR8 drill guide. Drill bushings and their uses described below. Be sure to wear safety glasses when drilling holes.
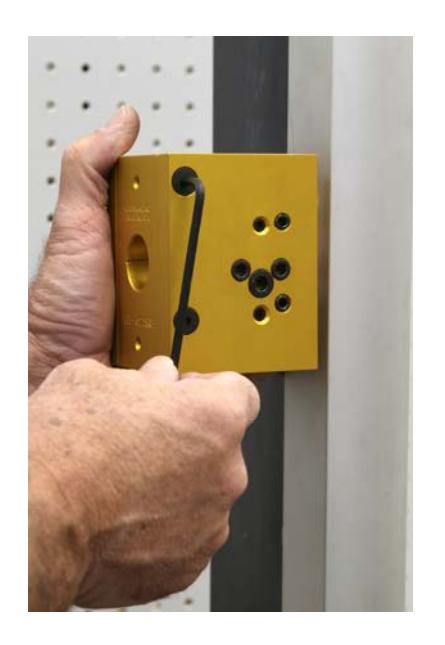
The HIT-32AR drill guide is reversible for both right and left hand doors. The side plates are counter sunk on both sides, just mount the plates on the side needed.
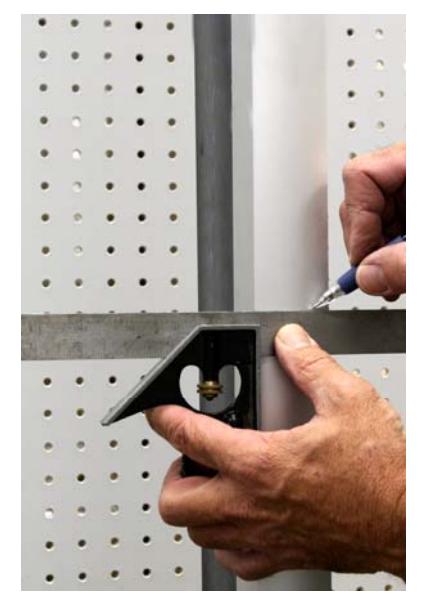
To start the installation, decide the height the panic bar is to be mounted. With a combination square draw a pencil line across the door edge at the determined height.
Using the window in the front plate of the drill guide, align the pencil mark with the center line on the guide.
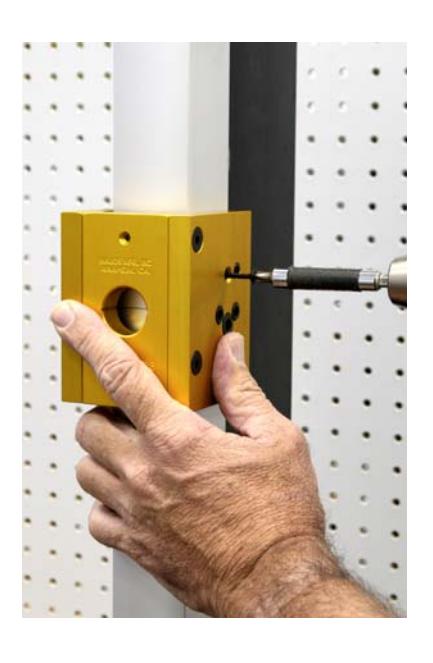
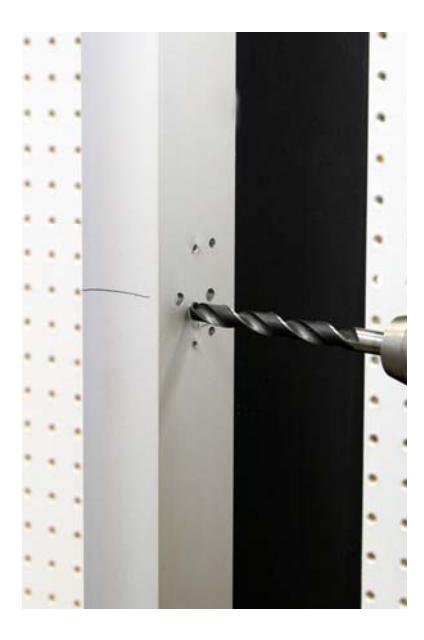
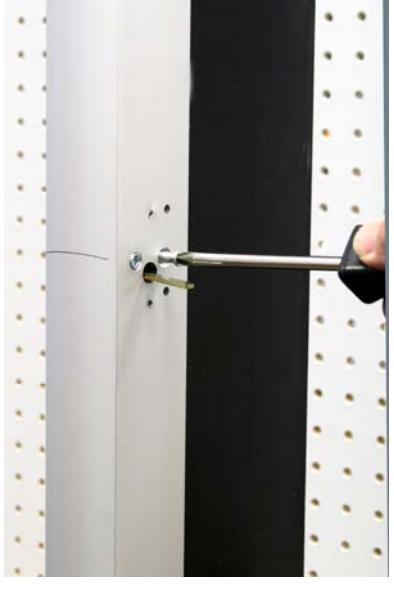
Use the drill screws that were supplied with the guide and attach one screw at the top and one at the bottom using an electric drill. Make sure the two Phillips screws on the inside of the guide make contact with the door edge and the inside plate is flat against the door.
NOTE: A drill with a clutch drive is a big help, you do not want to snap a screw in the door.
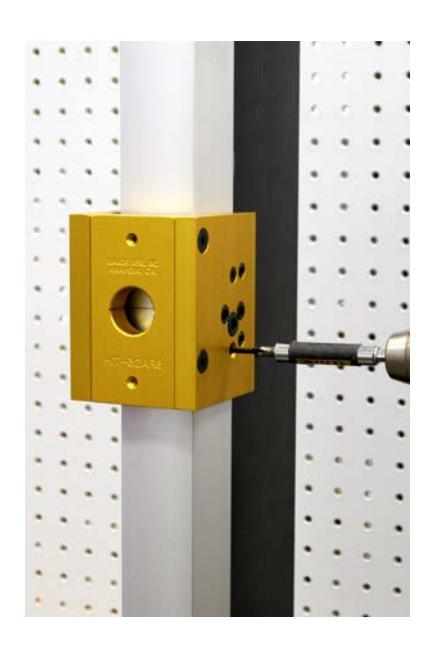
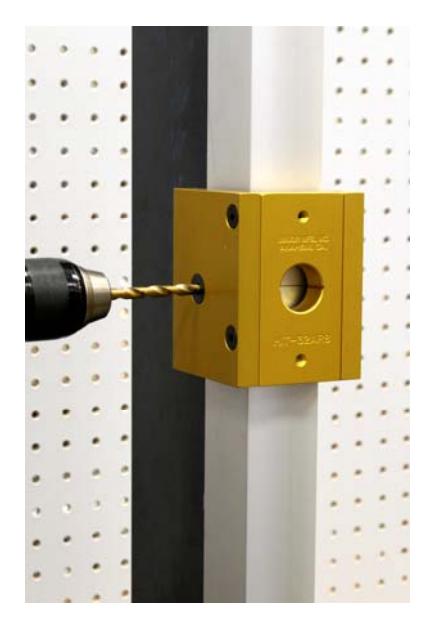
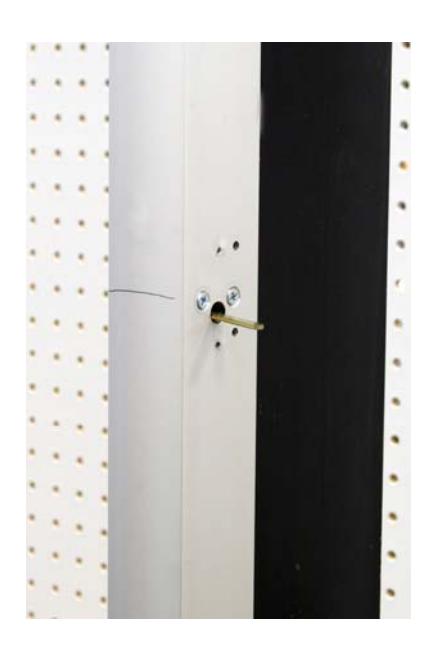
Use a 5/32" drill bit to drill top and bottom mounting holes. These holes are used to mount the panic bar with self threading screws supplied by Adams Rite.
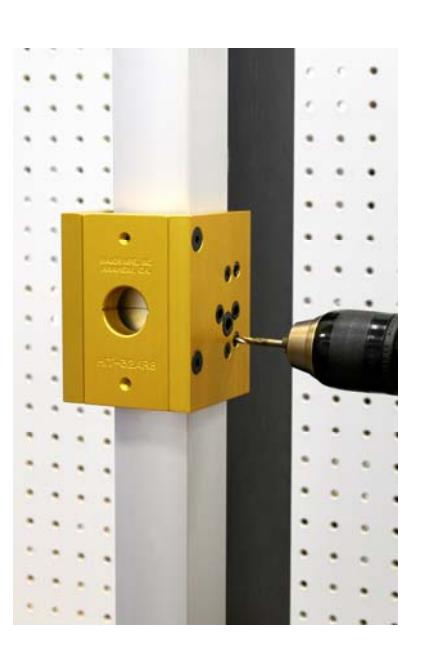
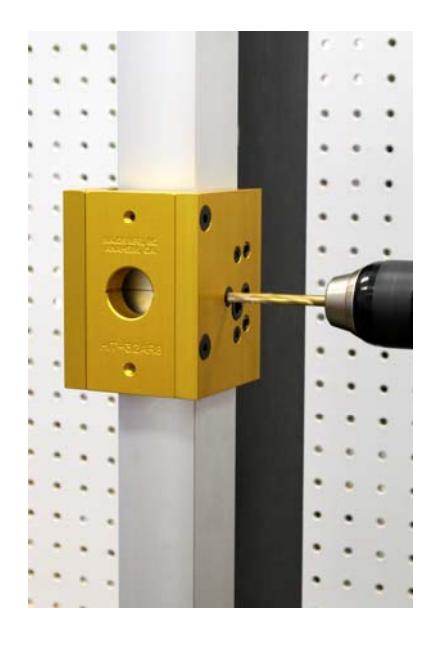
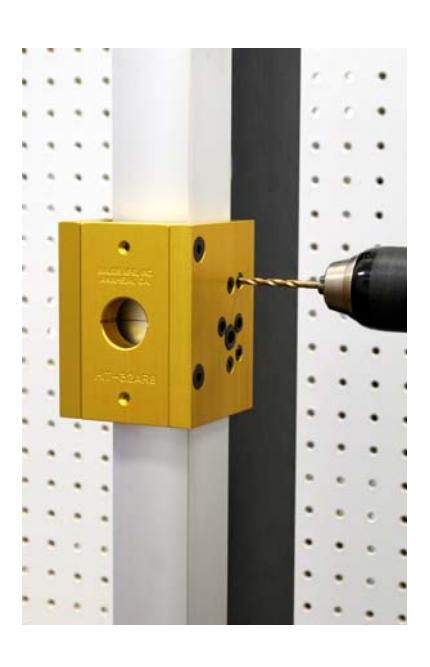
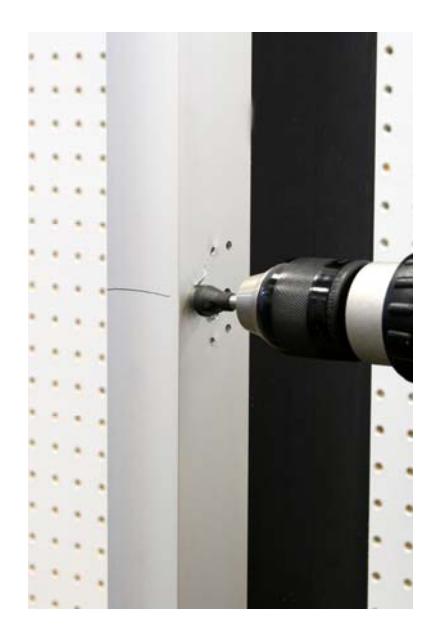
Change to a 7/32" bit and drill the right and left hand rim cylinder screw holes.
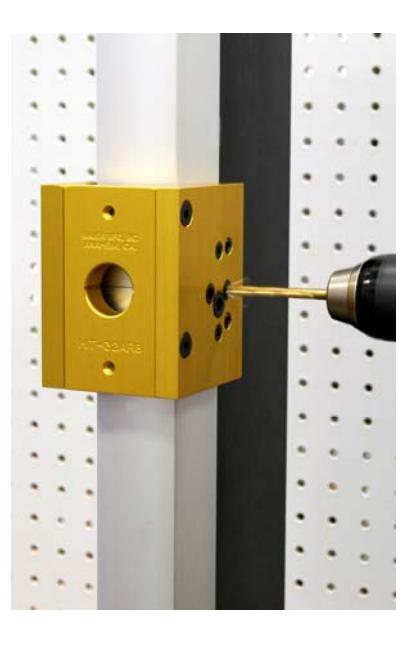
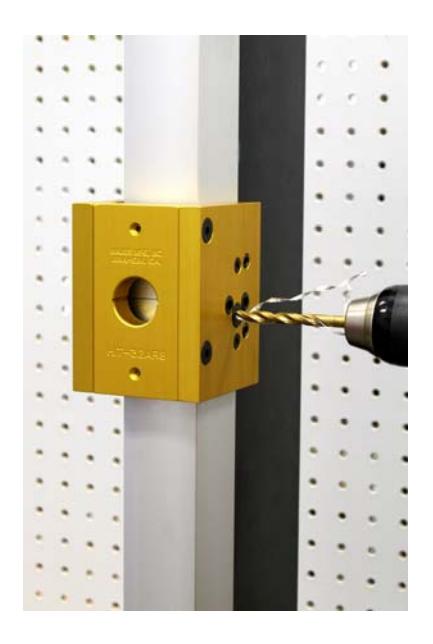
Change to a 1/4" bit and drill the hole for the rim cylinder tailpiece.
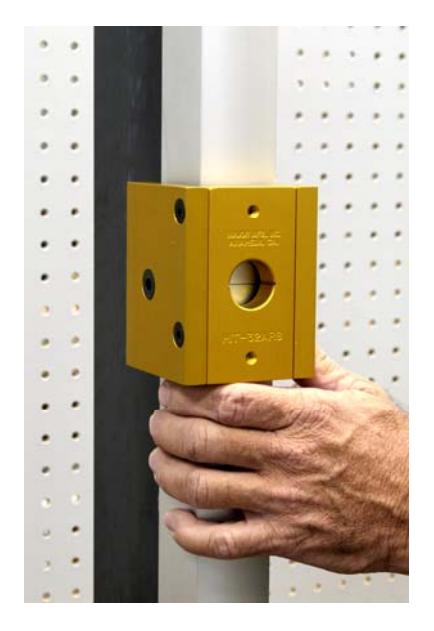
Leave the 1/4" bit in and drill the pilot hole for the outside rim cylinder. Once all holes have been drilled with the drill guide, remove from door.
Drill the inside 1/4" rim cylinder to 3/8".
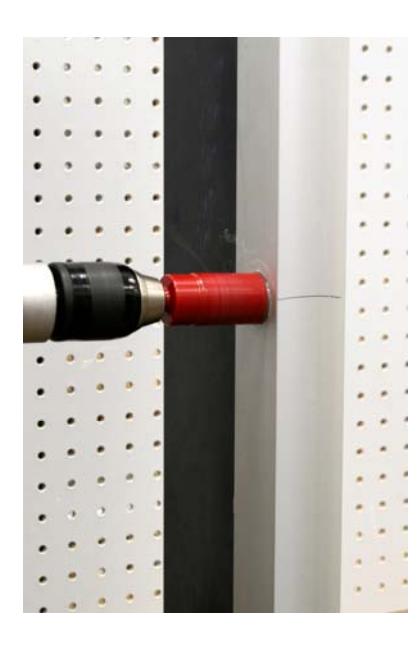
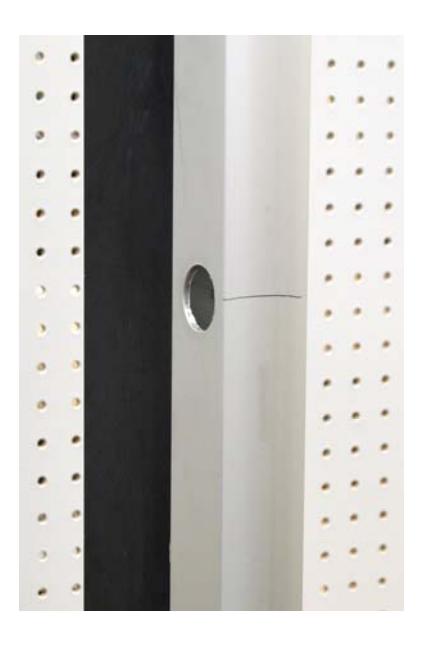
Using a 1-3/16" hole saw, redrill the outside 1/4" pilot hole. Completed hole shown on the right.
Change to a countersink and countersink the two rim cylinder screw holes per Adams Rite installation directions.
Install rim cylinder.
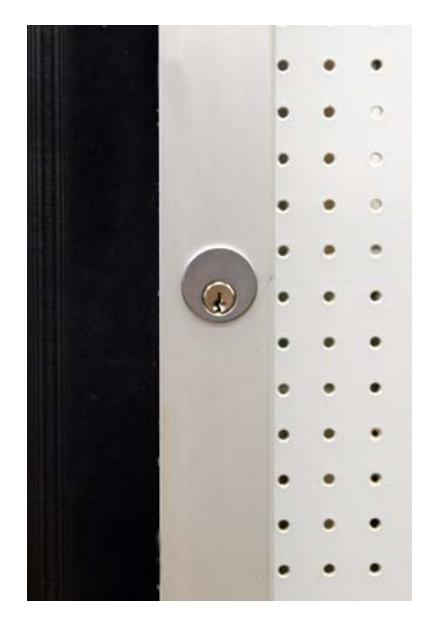
Rim cylinder installation completed.
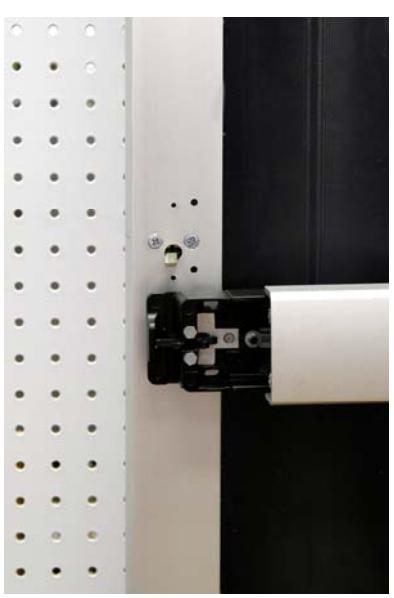
Finish installing panic hardware and strike per Adams Rite directions. There are two 5/32" holes required on the opposite side of the panic bar. Simply level bar to the door and drill through the holes in the bracket for alignment and install mounting screws.
Visit our web site at www.majormfg.com to see our complete line of tools and accessories. While there, sign up for our newsletter and we will email new product information to you.