Major HIT-30L-125 Template for Adams Rit 2190 Lock Instructions
Open the original PDF document
View PDF

1825 VIA BURTON ANAHEIM CA 92806
714-772-5202 / FAX 714-772-2302 EMAIL: MAIL@MAJORMFG.COM WEB: WWW.MAJORMFG.COM
INSTRUCTIONS FOR HIT-30L-125 TEMPLATE FOR ADAMS RITE 2190 LOCK
WHEN USING POWER TOOLS ALWAYS WEAR EYE AND EAR PROTECTION!!
THINK SAFETY!!
WHEN USING POWER TOOLS ALWAYS WEAR EYE PROTECTION!!
Before attempting any installation know how to safely use the power tools involved. Be sure all bits and cutters are sharp and in good condition and all power tools and extension cords are in good working order and properly grounded. AND MOST IMPORTANTLY, BE SURE TO WEAR, EYE AND EAR PROTECTION.
Copyright 2011—Major Manufacturing
Drill Bit Types
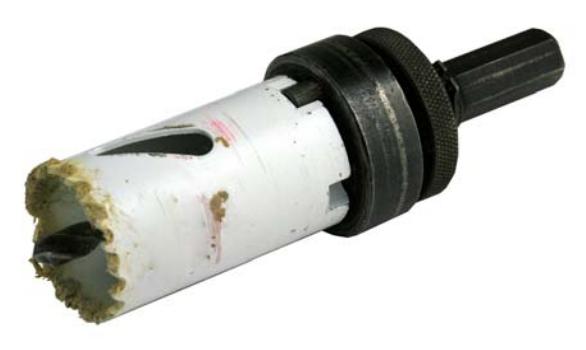
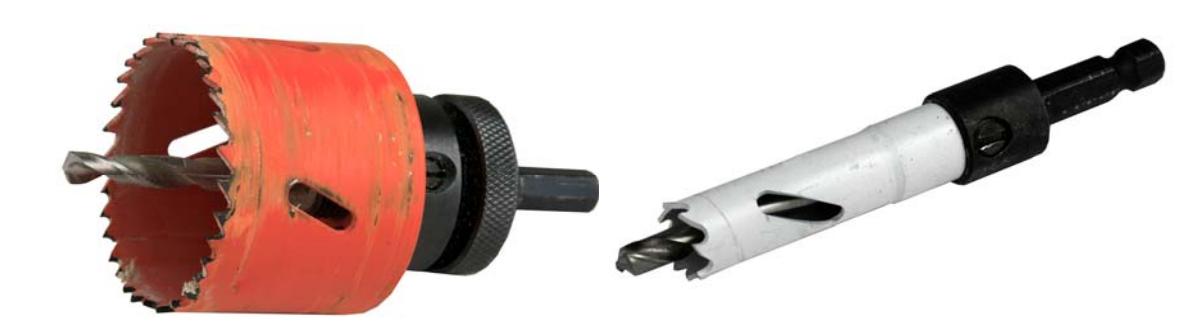
All hole saws are not created equal. A cheap hole saw from a home improvement center or one that has been dropped can be out of round and will not fit the drill bushings in our templates.

Shown above is a standard twist drill bit. They can be used on both wood or steel doors. Be sure to back out the bit when drilling to clear chips.
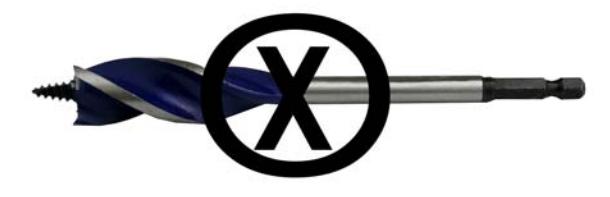
Shown above is a tri-flute drill bit. Do not attempt to use this in a drill guide. The lack of bearing surface will cause the bit to jam.

speed and back the bit out to clear chips. Do not use on a steel door.
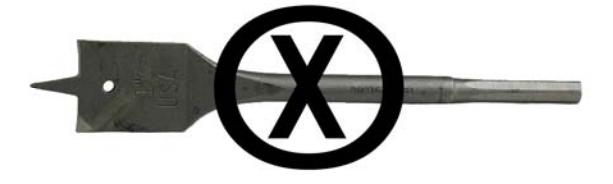
Shown above is a spade or paddle type bit. Do not attempt to use this in any drill guide. There is no bearing surface and you will jam the bit.
Copyright 2011—Major Manufacturing
PAGE 2
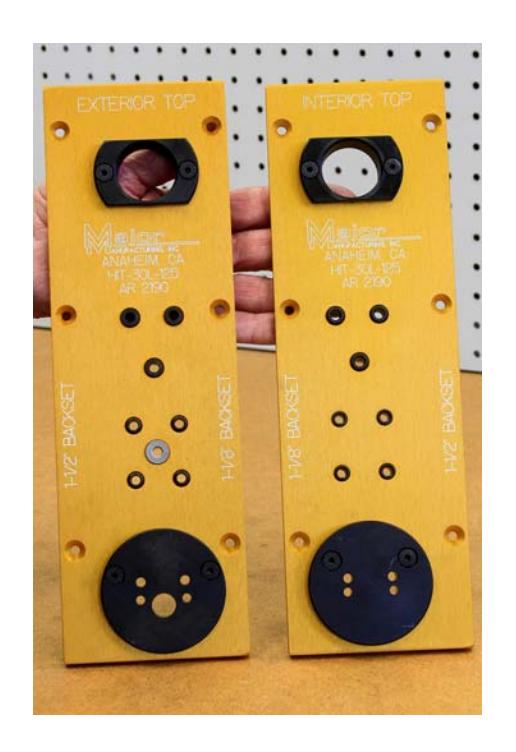
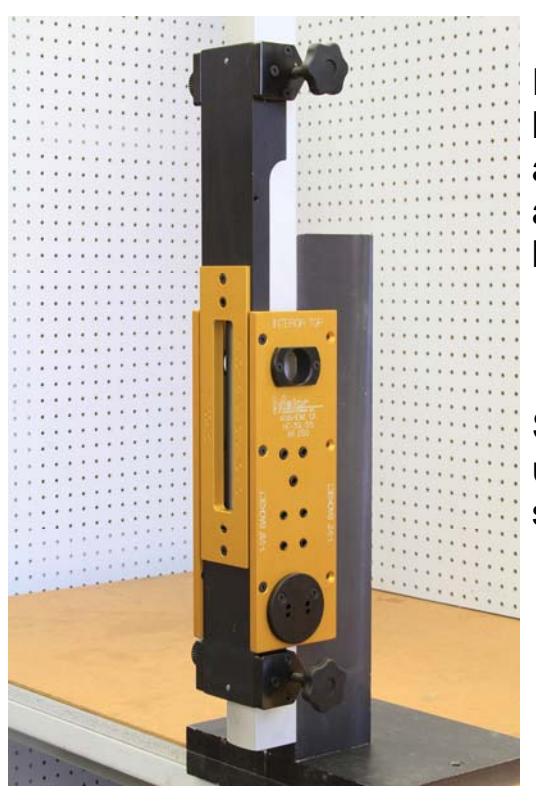
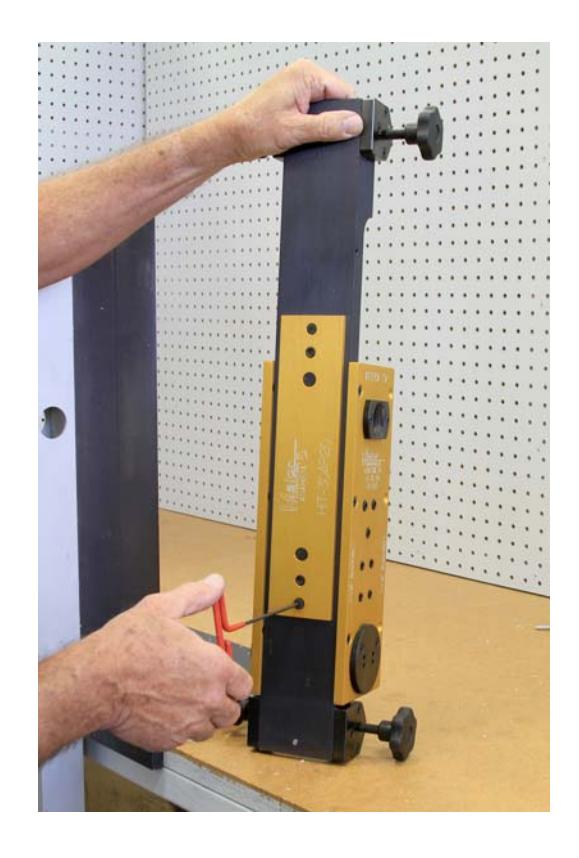
There are two templates in the HIT-30L-125 template set. One is an outside template and the other for the inside. Both templates will prep either a 1-1/8" or 1-1/2" template. Reversible for RH or LH doors.
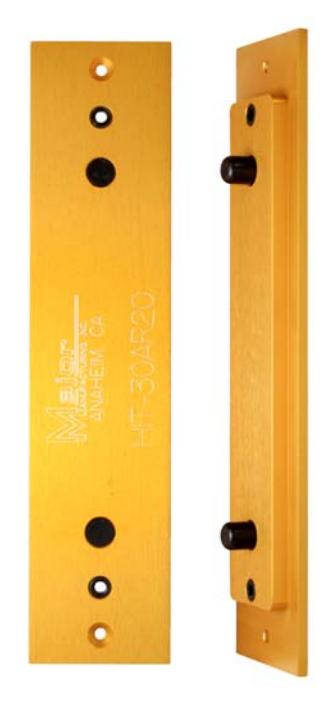
HIT-30AR20 alignment guide. Used to align the HIT -30L with template to an existing lock cut out.
This fixture is not part of the HIT-30L-125 template set. It needs to be ordered separately.
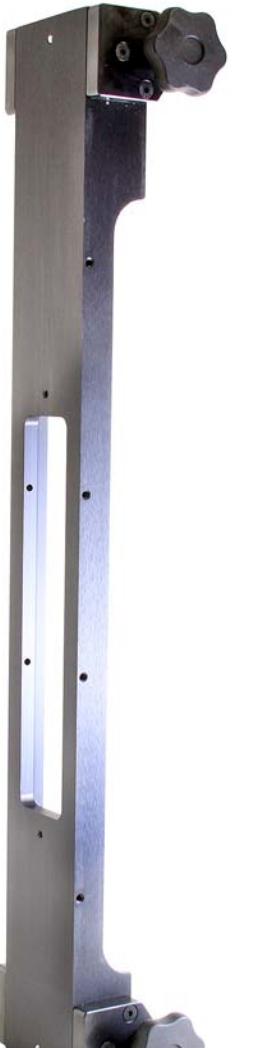
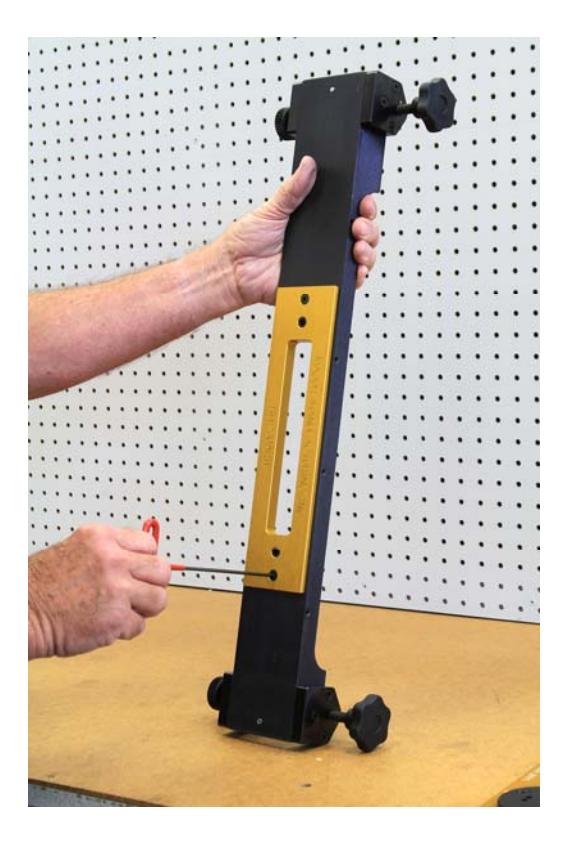
The templates for the Adams Rite 2190 are too long for the standard HIT-30 clamp system and will require the longer HIT -30L. The HIT -30L will hold any HIT-30 template. This clamp is not part of the HIT-30L-125 template set. It needs to be ordered separately.
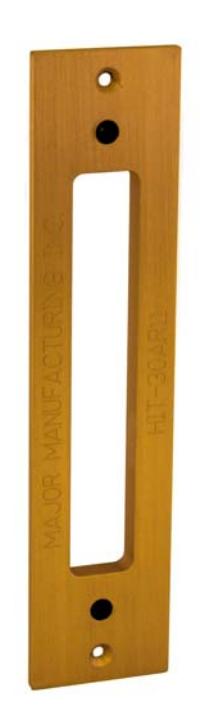
HIT-30AR11 Router template used to route the lock faceplate. Needed for use on a new install with no existing lock prep. This fixture is not part of the HIT-30L-125 template set. It needs to be ordered separately.
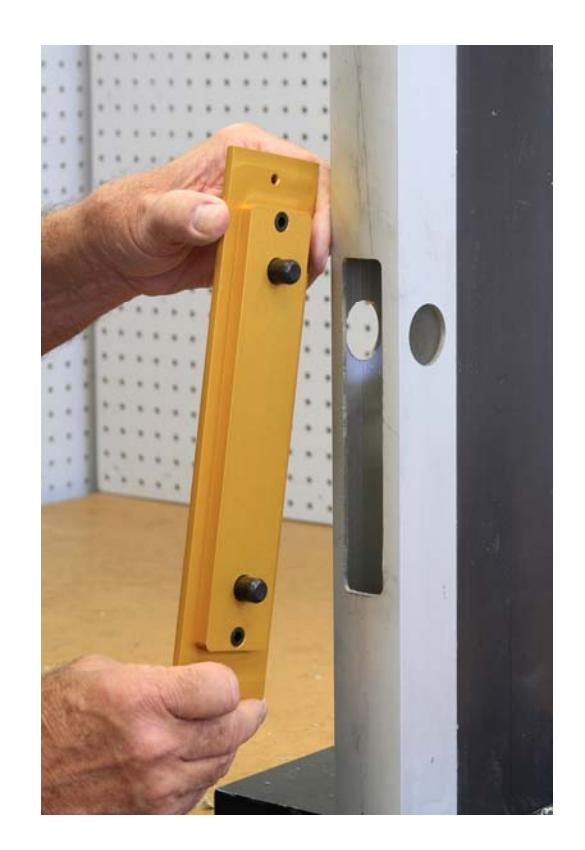
If this installation is new, a faceplate will need to be cut in the door, attach a HIT-30AR11 to the clamp. (LH picture) If you are retrofitting an existing door prep, attach a HIT-30AR20 alignment guide to the clamp. (RH picture)
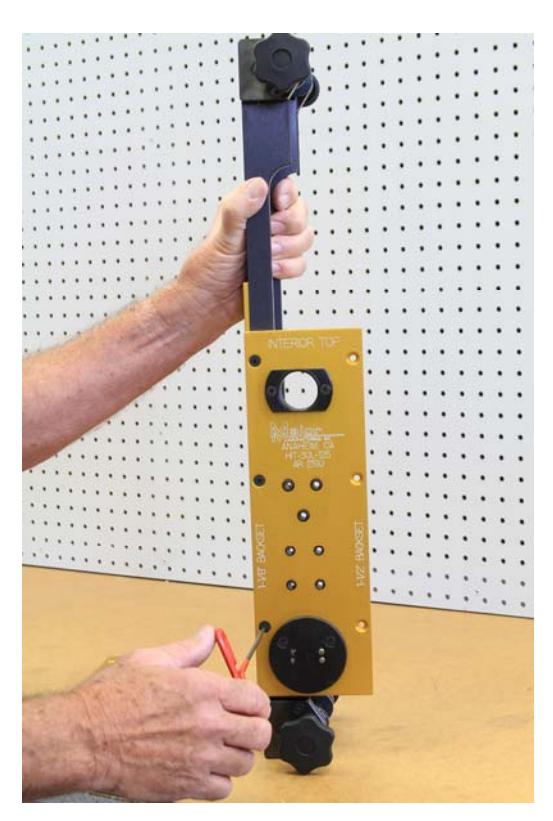
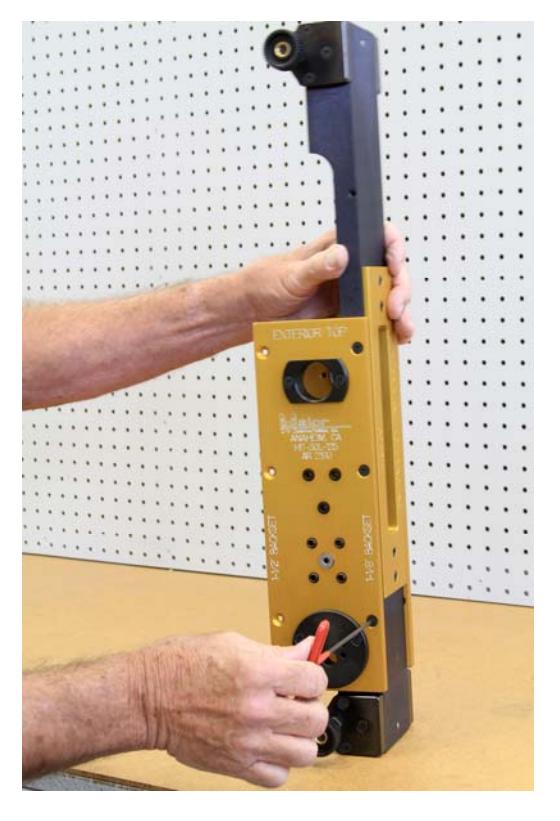
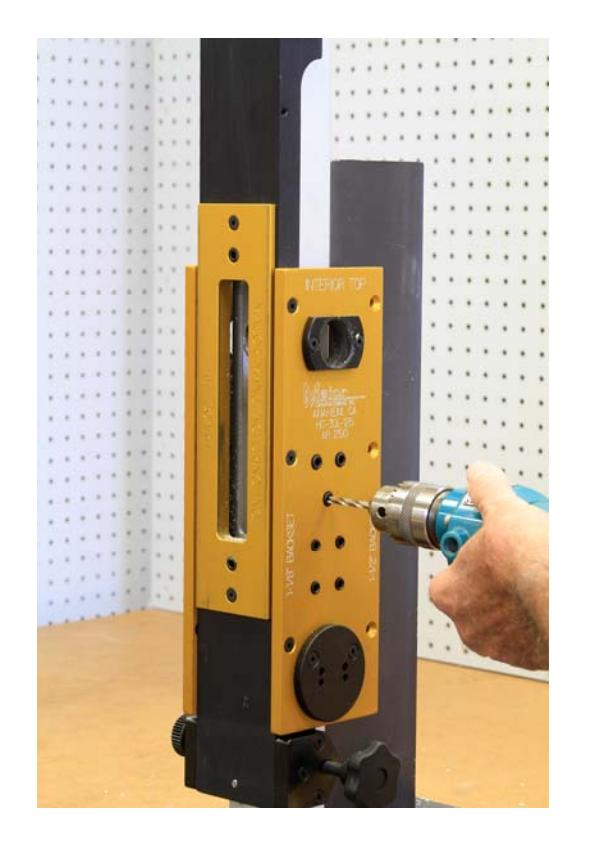
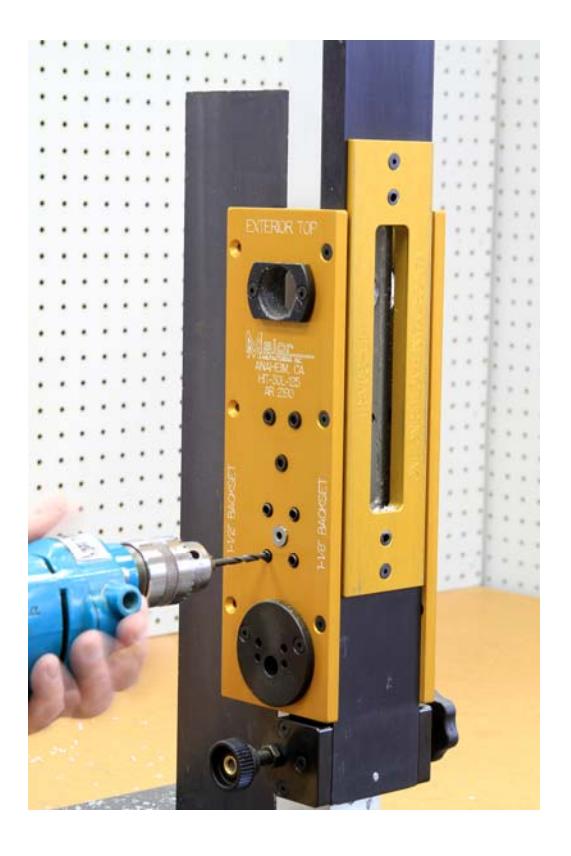
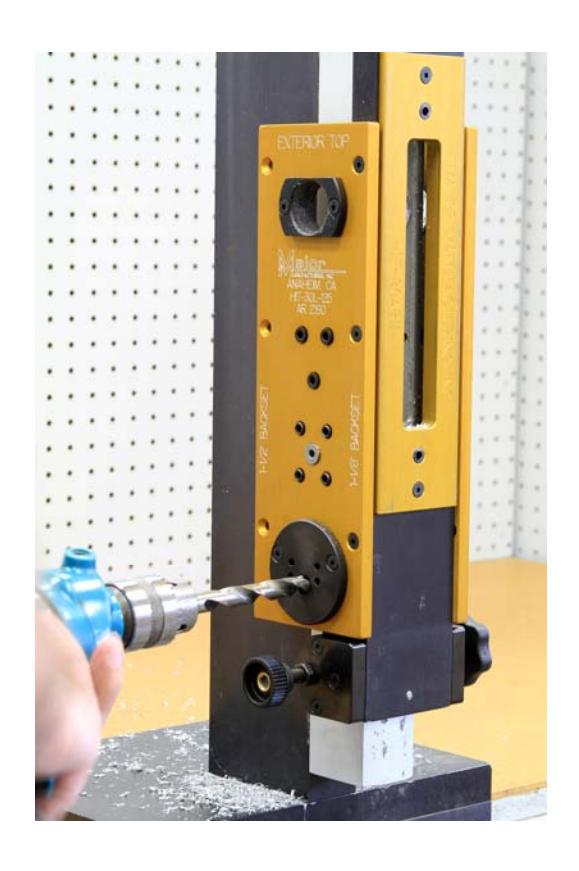
The templates are marked exterior top and interior top make sure they are attached correctly to the clamp. There are mounting holes on both the right and left hand side. One is for 1-1/8" and the other 1-1/2" backset. The screws go through the backset that is required.
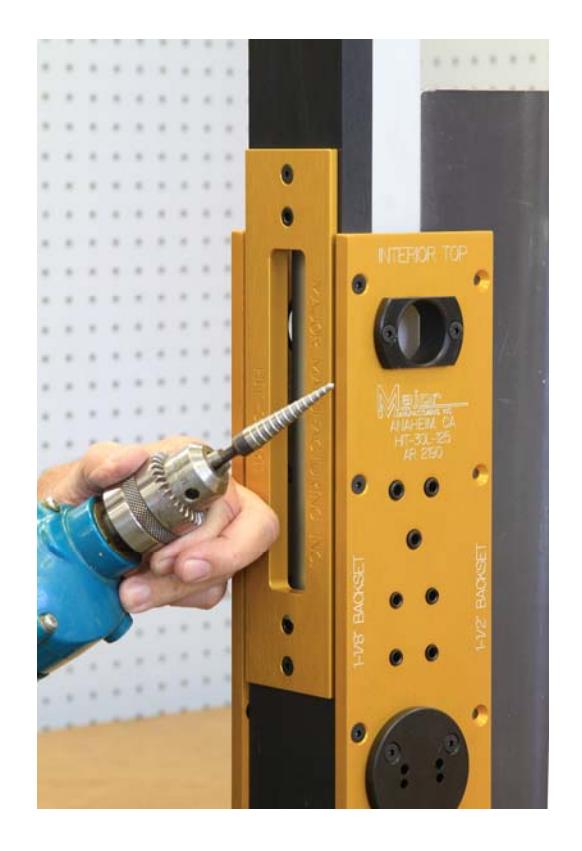
For a new install, locate the template at the desired height and drill a starting hole for the router.

Shown is a step bit used to drill the starting hole.
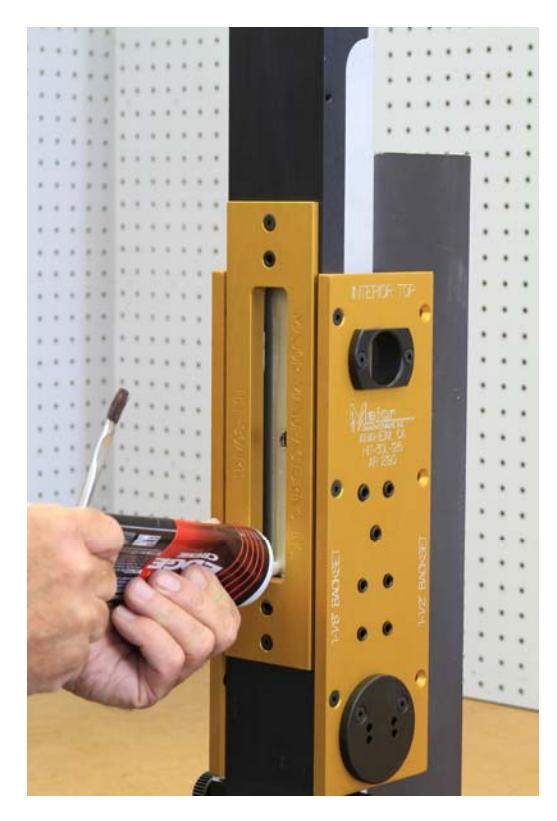
Lube the area to be routed, we use a product called Edge Cream by LPS.
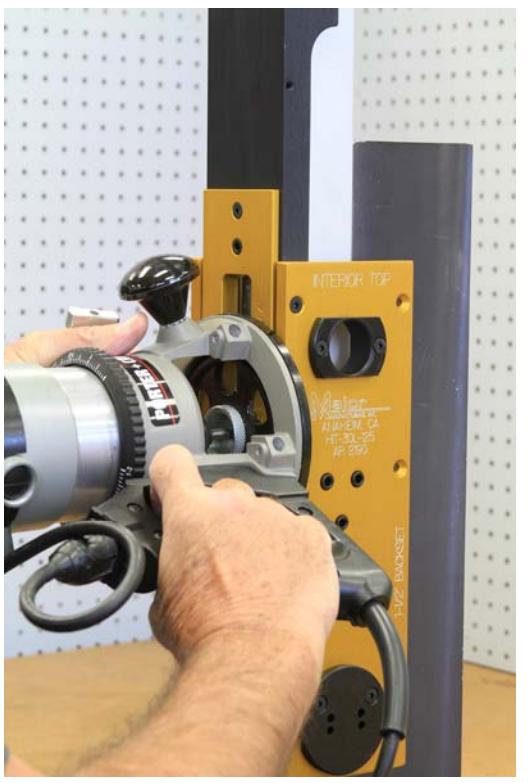
Cut out the faceplate. Be sure to cut in a clockwise direction.
PAGE 3 Copyright 2011—Major Manufacturing

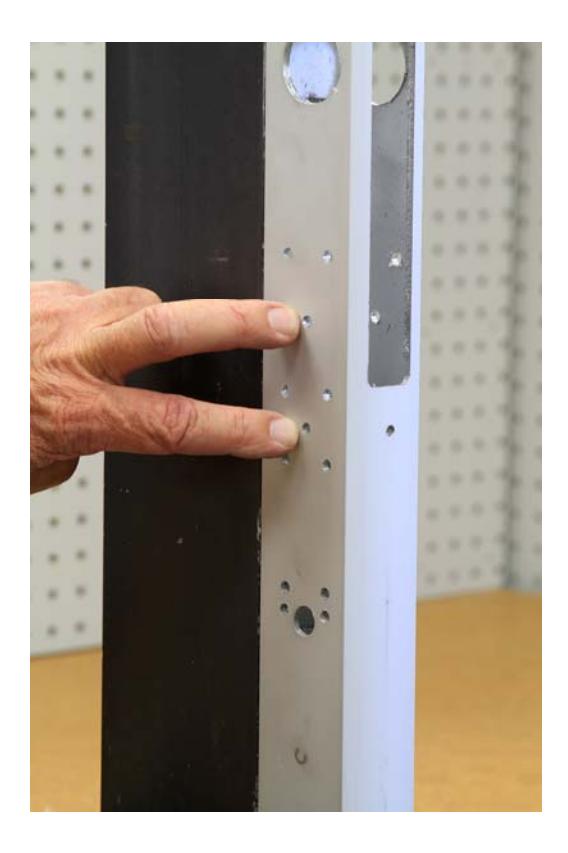
Don't forget to drill the holes for mounting brackets. The holes in the template are spaced to fit our LMB-03, LMB-033 or LMB-034. We prefer the bracket to mounting bridges for this installation.
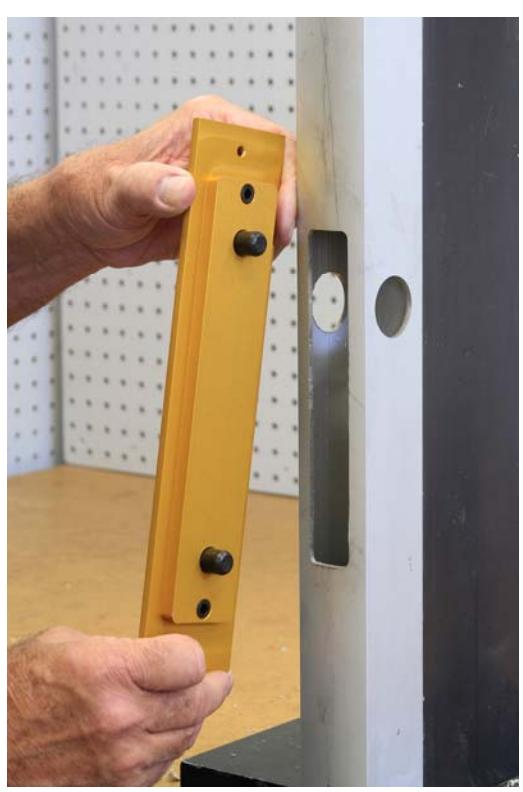
If retrofitting, install the HIT-30AR20 to the clamp and align it in the existing faceplate cutout.


Once the faceplate has been cut out it is time to start drilling the function holes. Starting at the top, drill the inside and outside holes with a 1-1/4" hole saw. If retrofitting, drill these holes to clean up any misalignment.
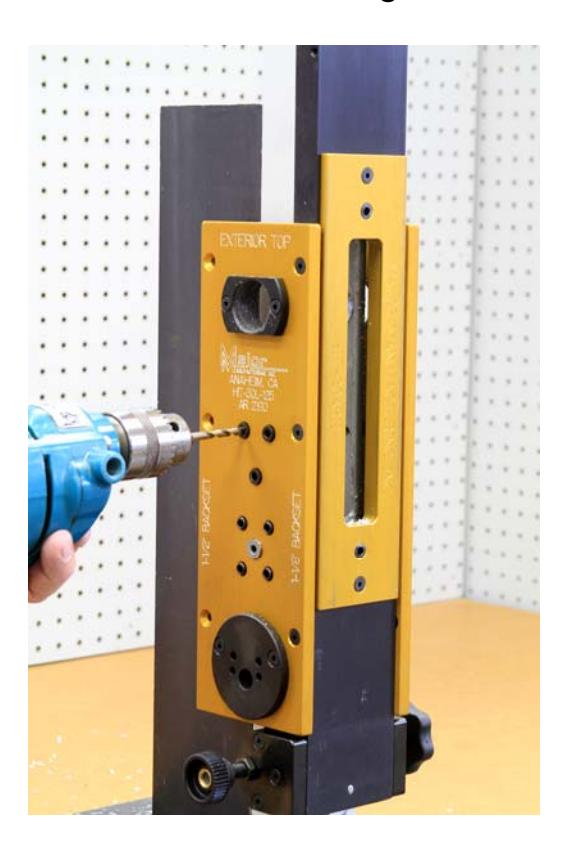
There are three holes inside and outside to drill next. The factory template calls for a .196 diameter drill bit. Our drill guides will accept a 13/64" twist drill, a lot easier to find in the field. The bottom holes shown being drilled on the right is a pilot hole that will be drilled later.

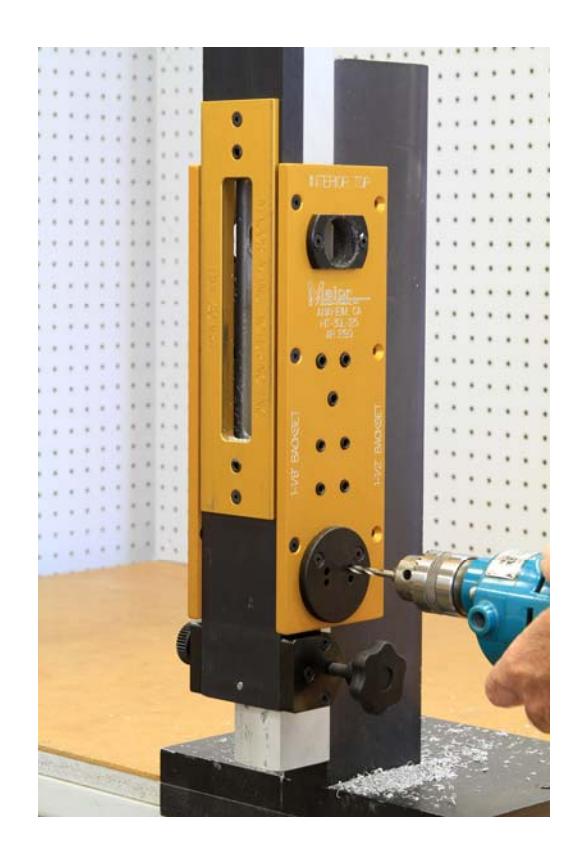
With the 13/64" drill bit still in the drill, drill the two top holes on the large drill guide at the bottom of the template
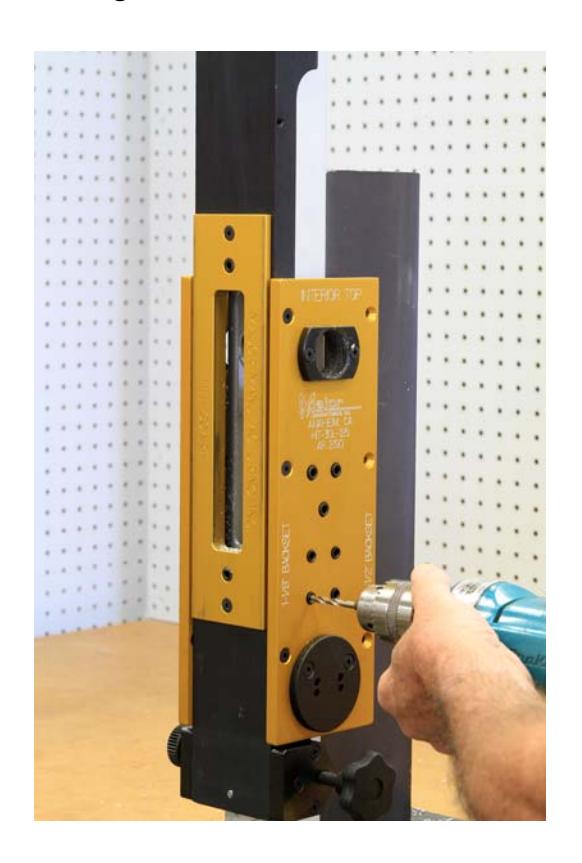
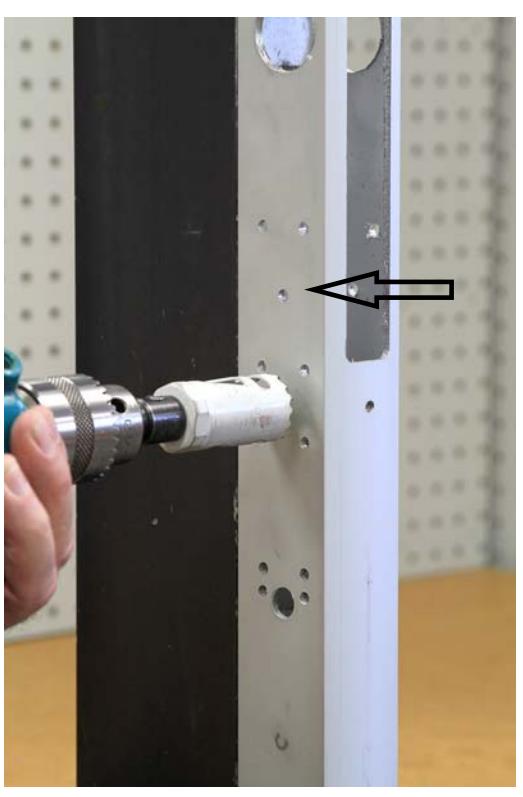
Change to a 3/16" and drill the remaining 6 holes on the inside template. Four are on the template and two are on the large drill guide.

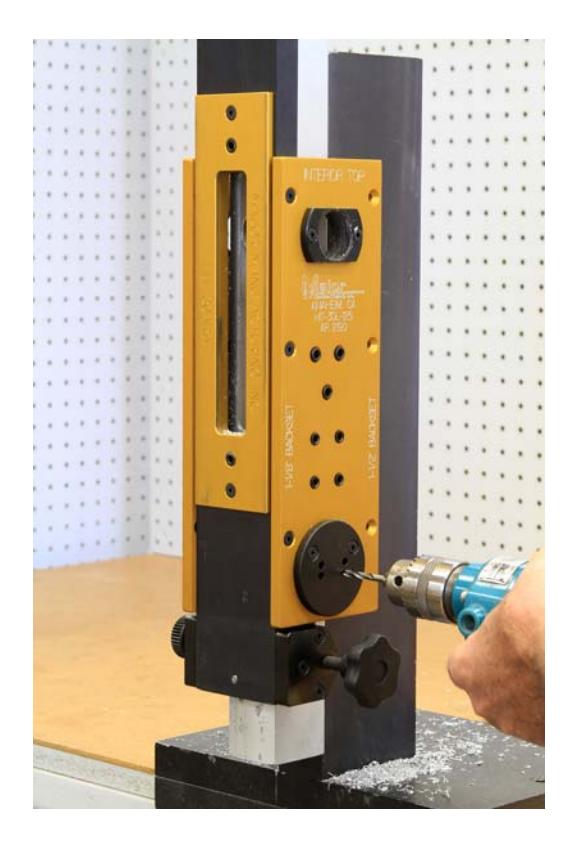
With the same 3/16" bit in the drill, drill the remaining holes on the exterior template. There are five holes on the template and two on the large drill bushing. Two holes on this side are pilot holes and will be drilled out after the clamp and template are removed from the door.
There is one last hole to drill. With a 1/2" twist drill, drill the bottom hole in the large drill bushing. This is on the exterior template.
After a check to make sure all holes are drilled and none have been missed, remove the clamp and template from the door.
On the exterior template two holes need to be enlarged to 1-1/8" with the use of a hole saw. One hole is located in the center of the door, below the two horizontal holes. The second hole is centered between the bottom five holes.

Use a 1-1/8" hole saw and drill the two exterior holes as shown.
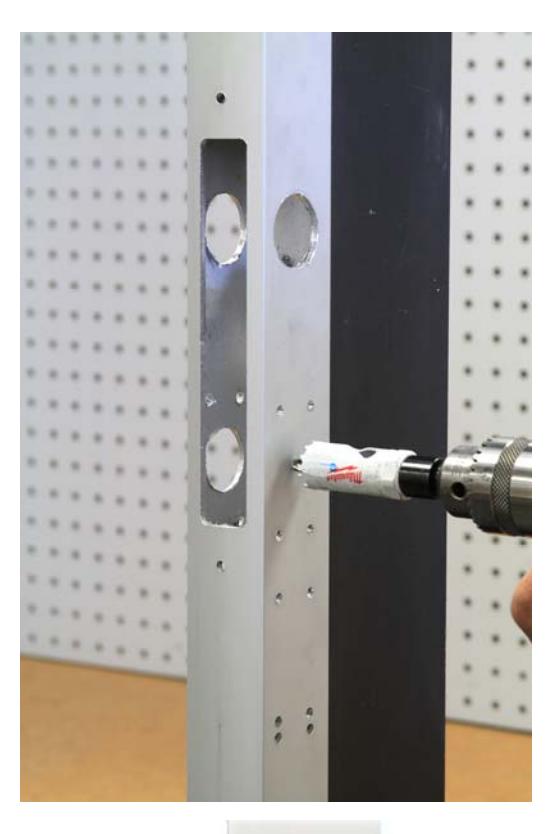
One last hole to enlarge is on the interior of the door. Change to a 7/8" hole saw and drill the pilot hole located under the two horizontal holes as shown.


Here is the completed door prep. Make sure all holes have been de-burred and install lock per manufactures directions.