LCN 5030 Series Installation Instructions 106924
Open the original PDF document
View PDF

14126
5030 Series

Installation Instructions
CAUTION
Improper installation or regulation may result in personal injury or property damage. Follow all instructions carefully. For questions contact LCN Closers: 1-877-671-7011
1 Installation
1a Closer Handing
Make sure hand of closer and door correspond. Hand of closer is stamped on mounting plate. Hand of closer can not be changed.
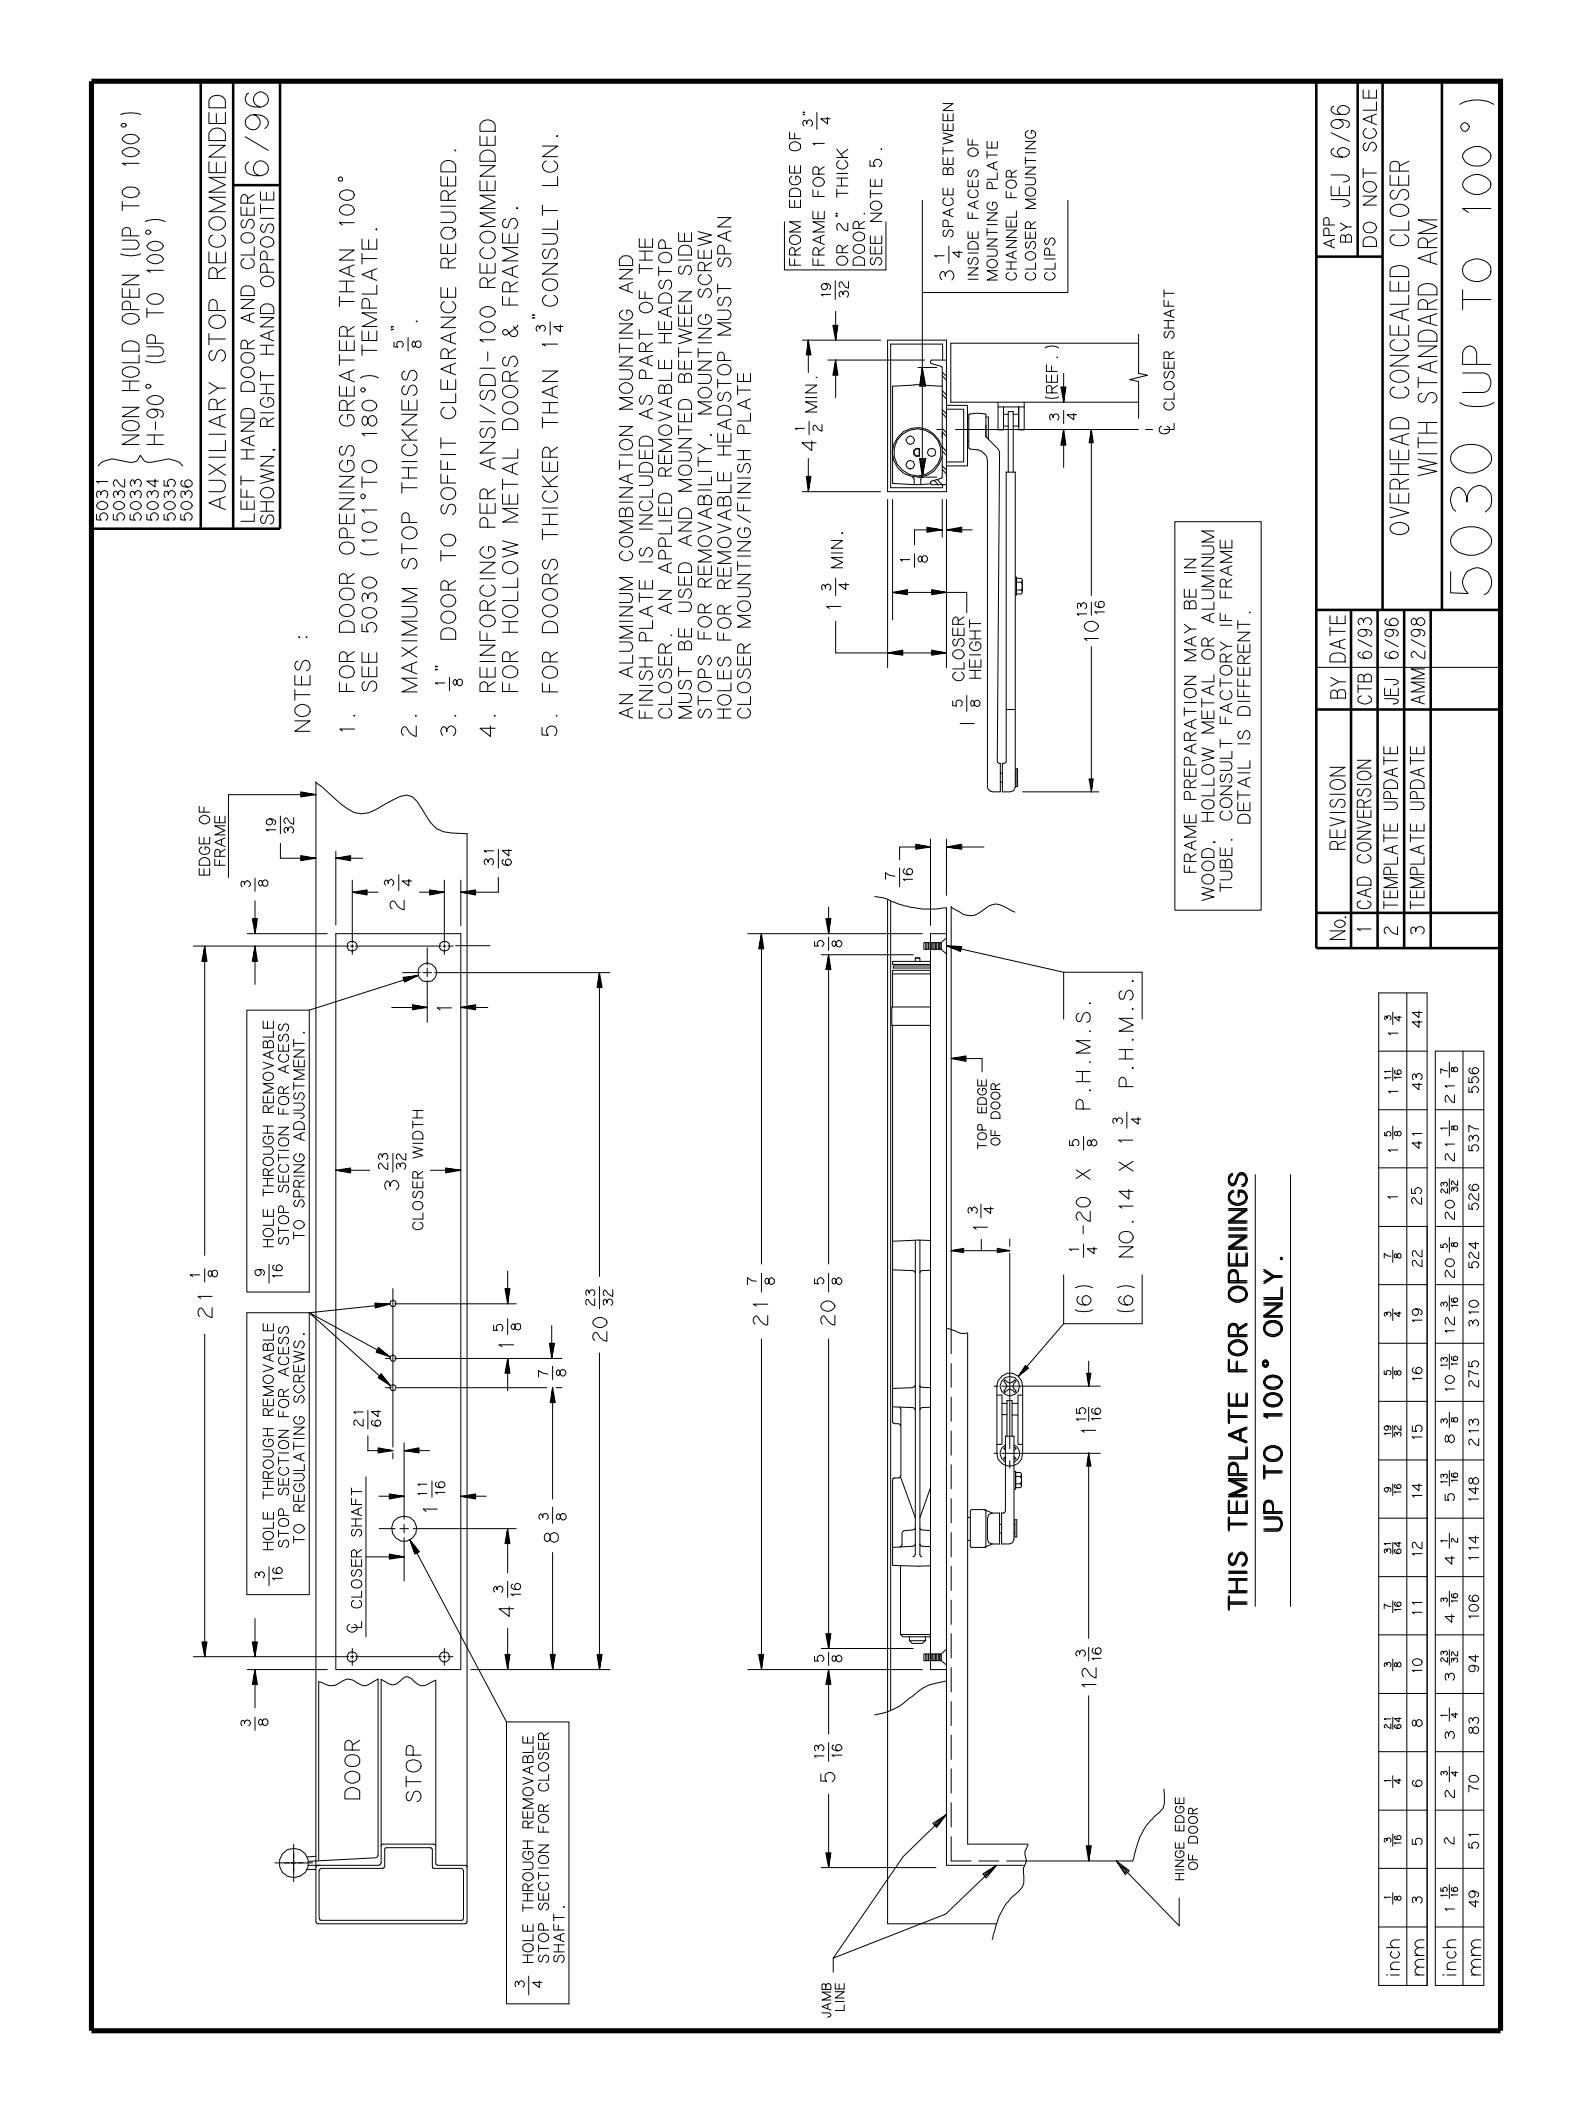
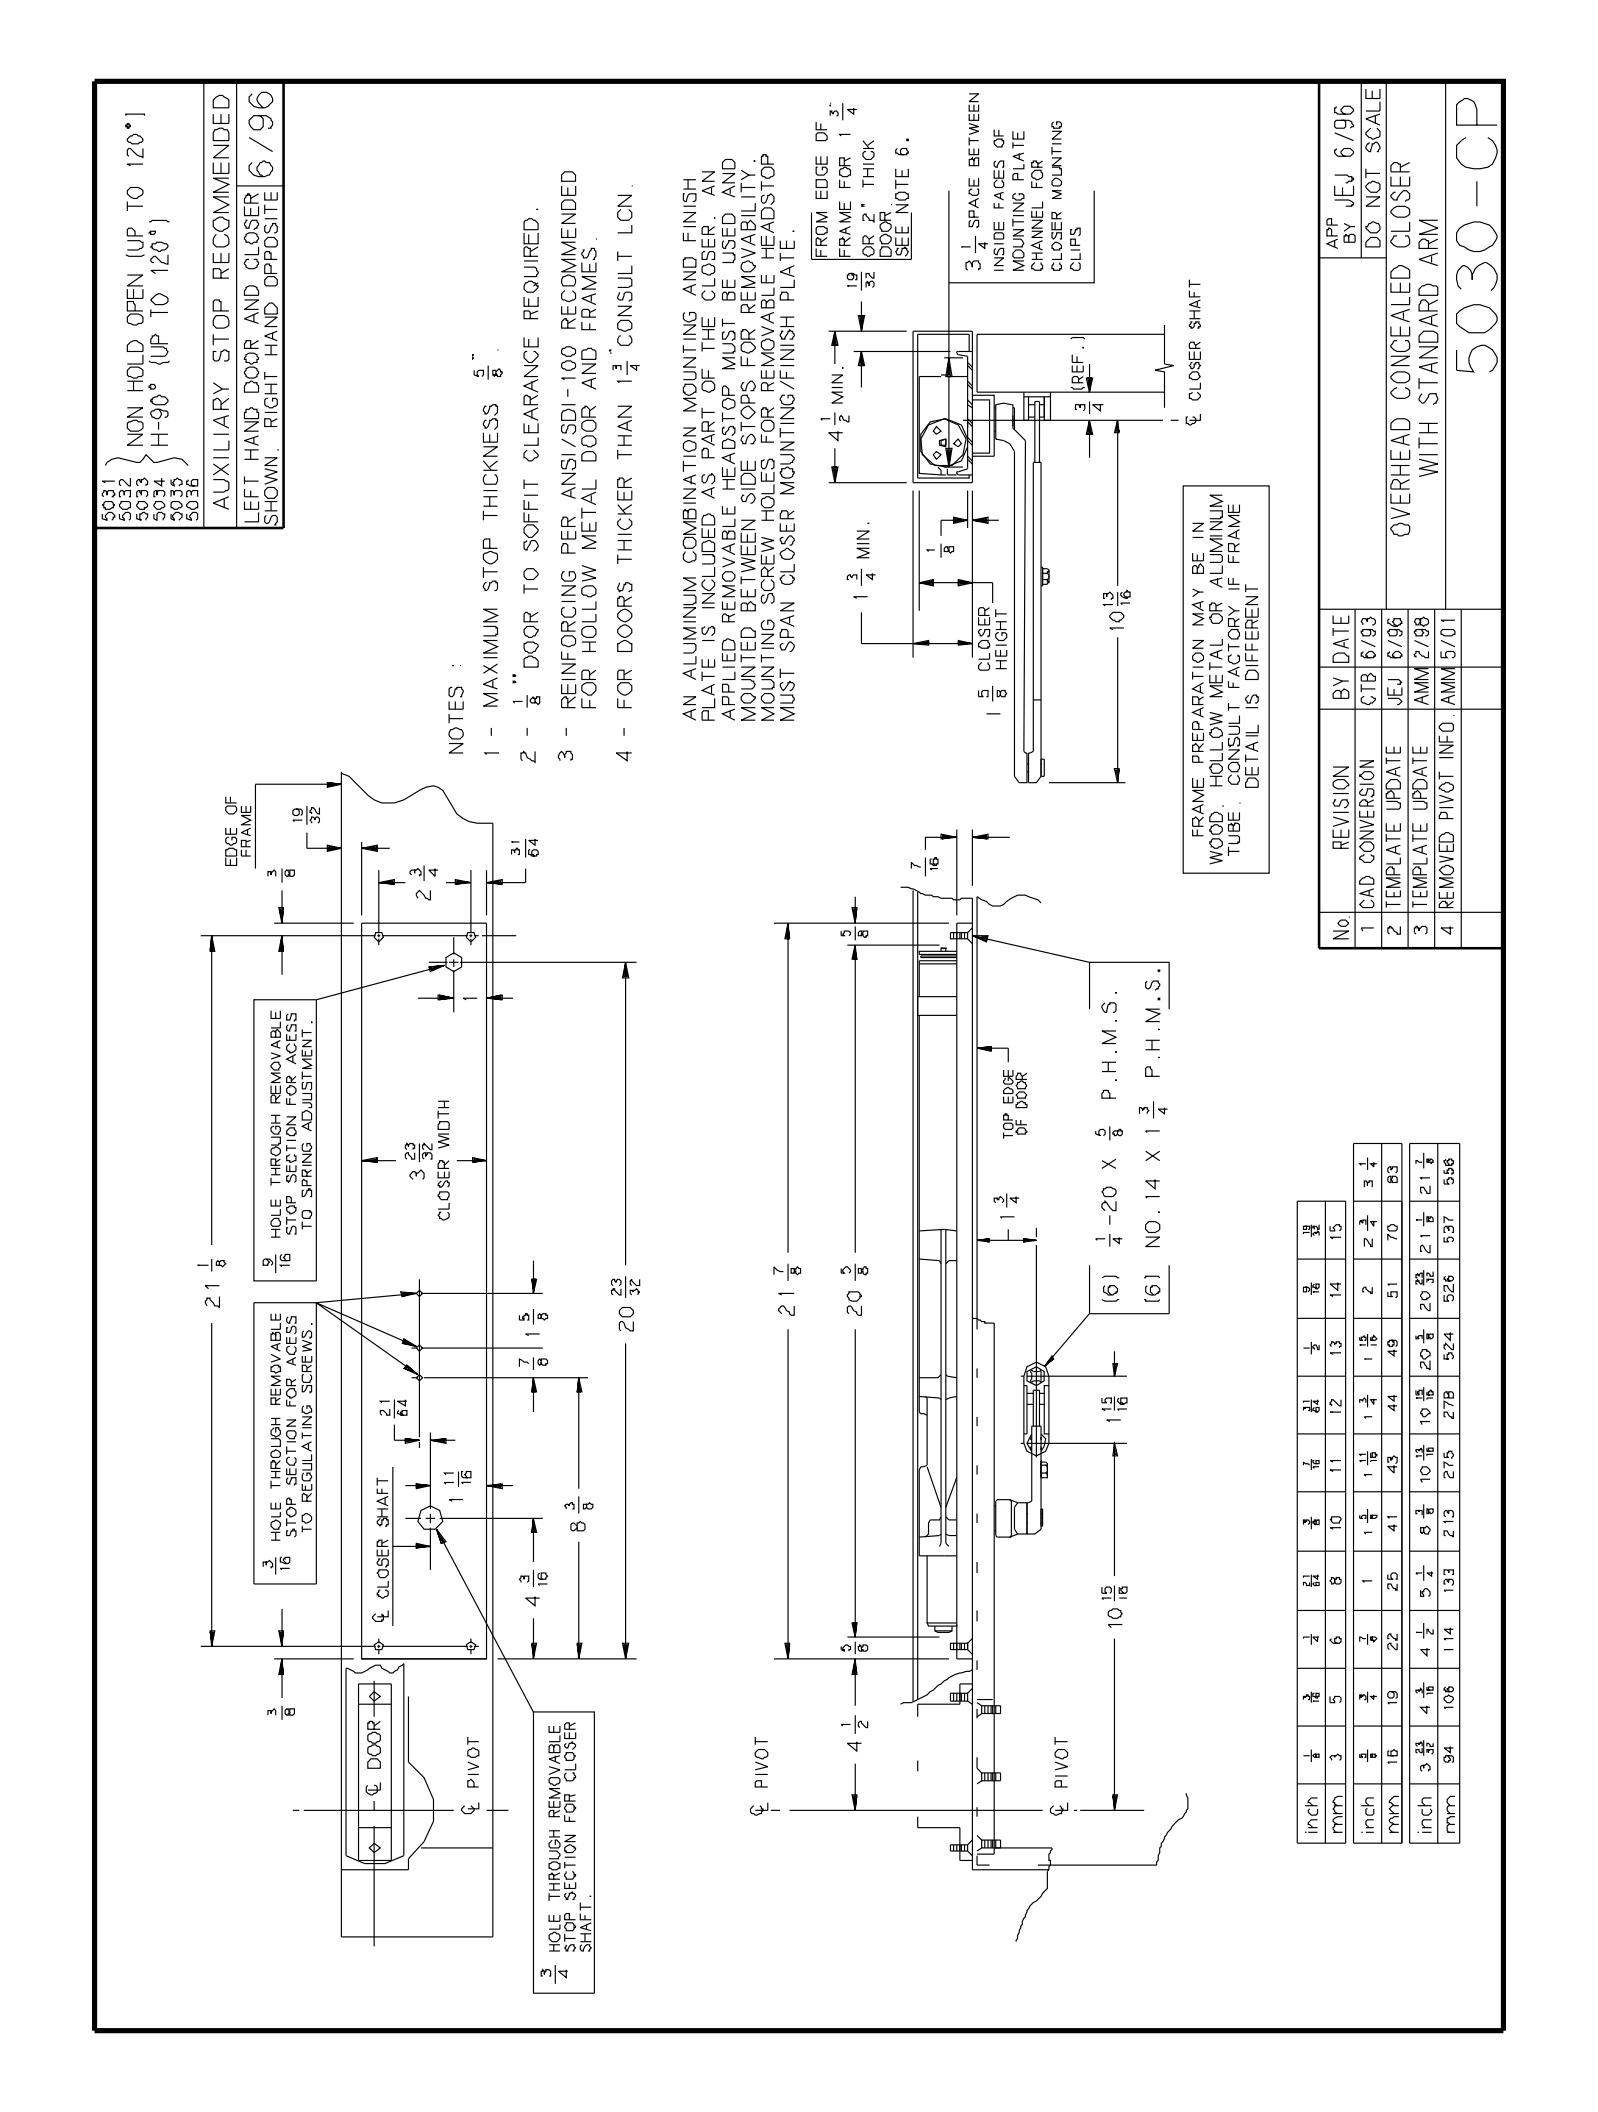
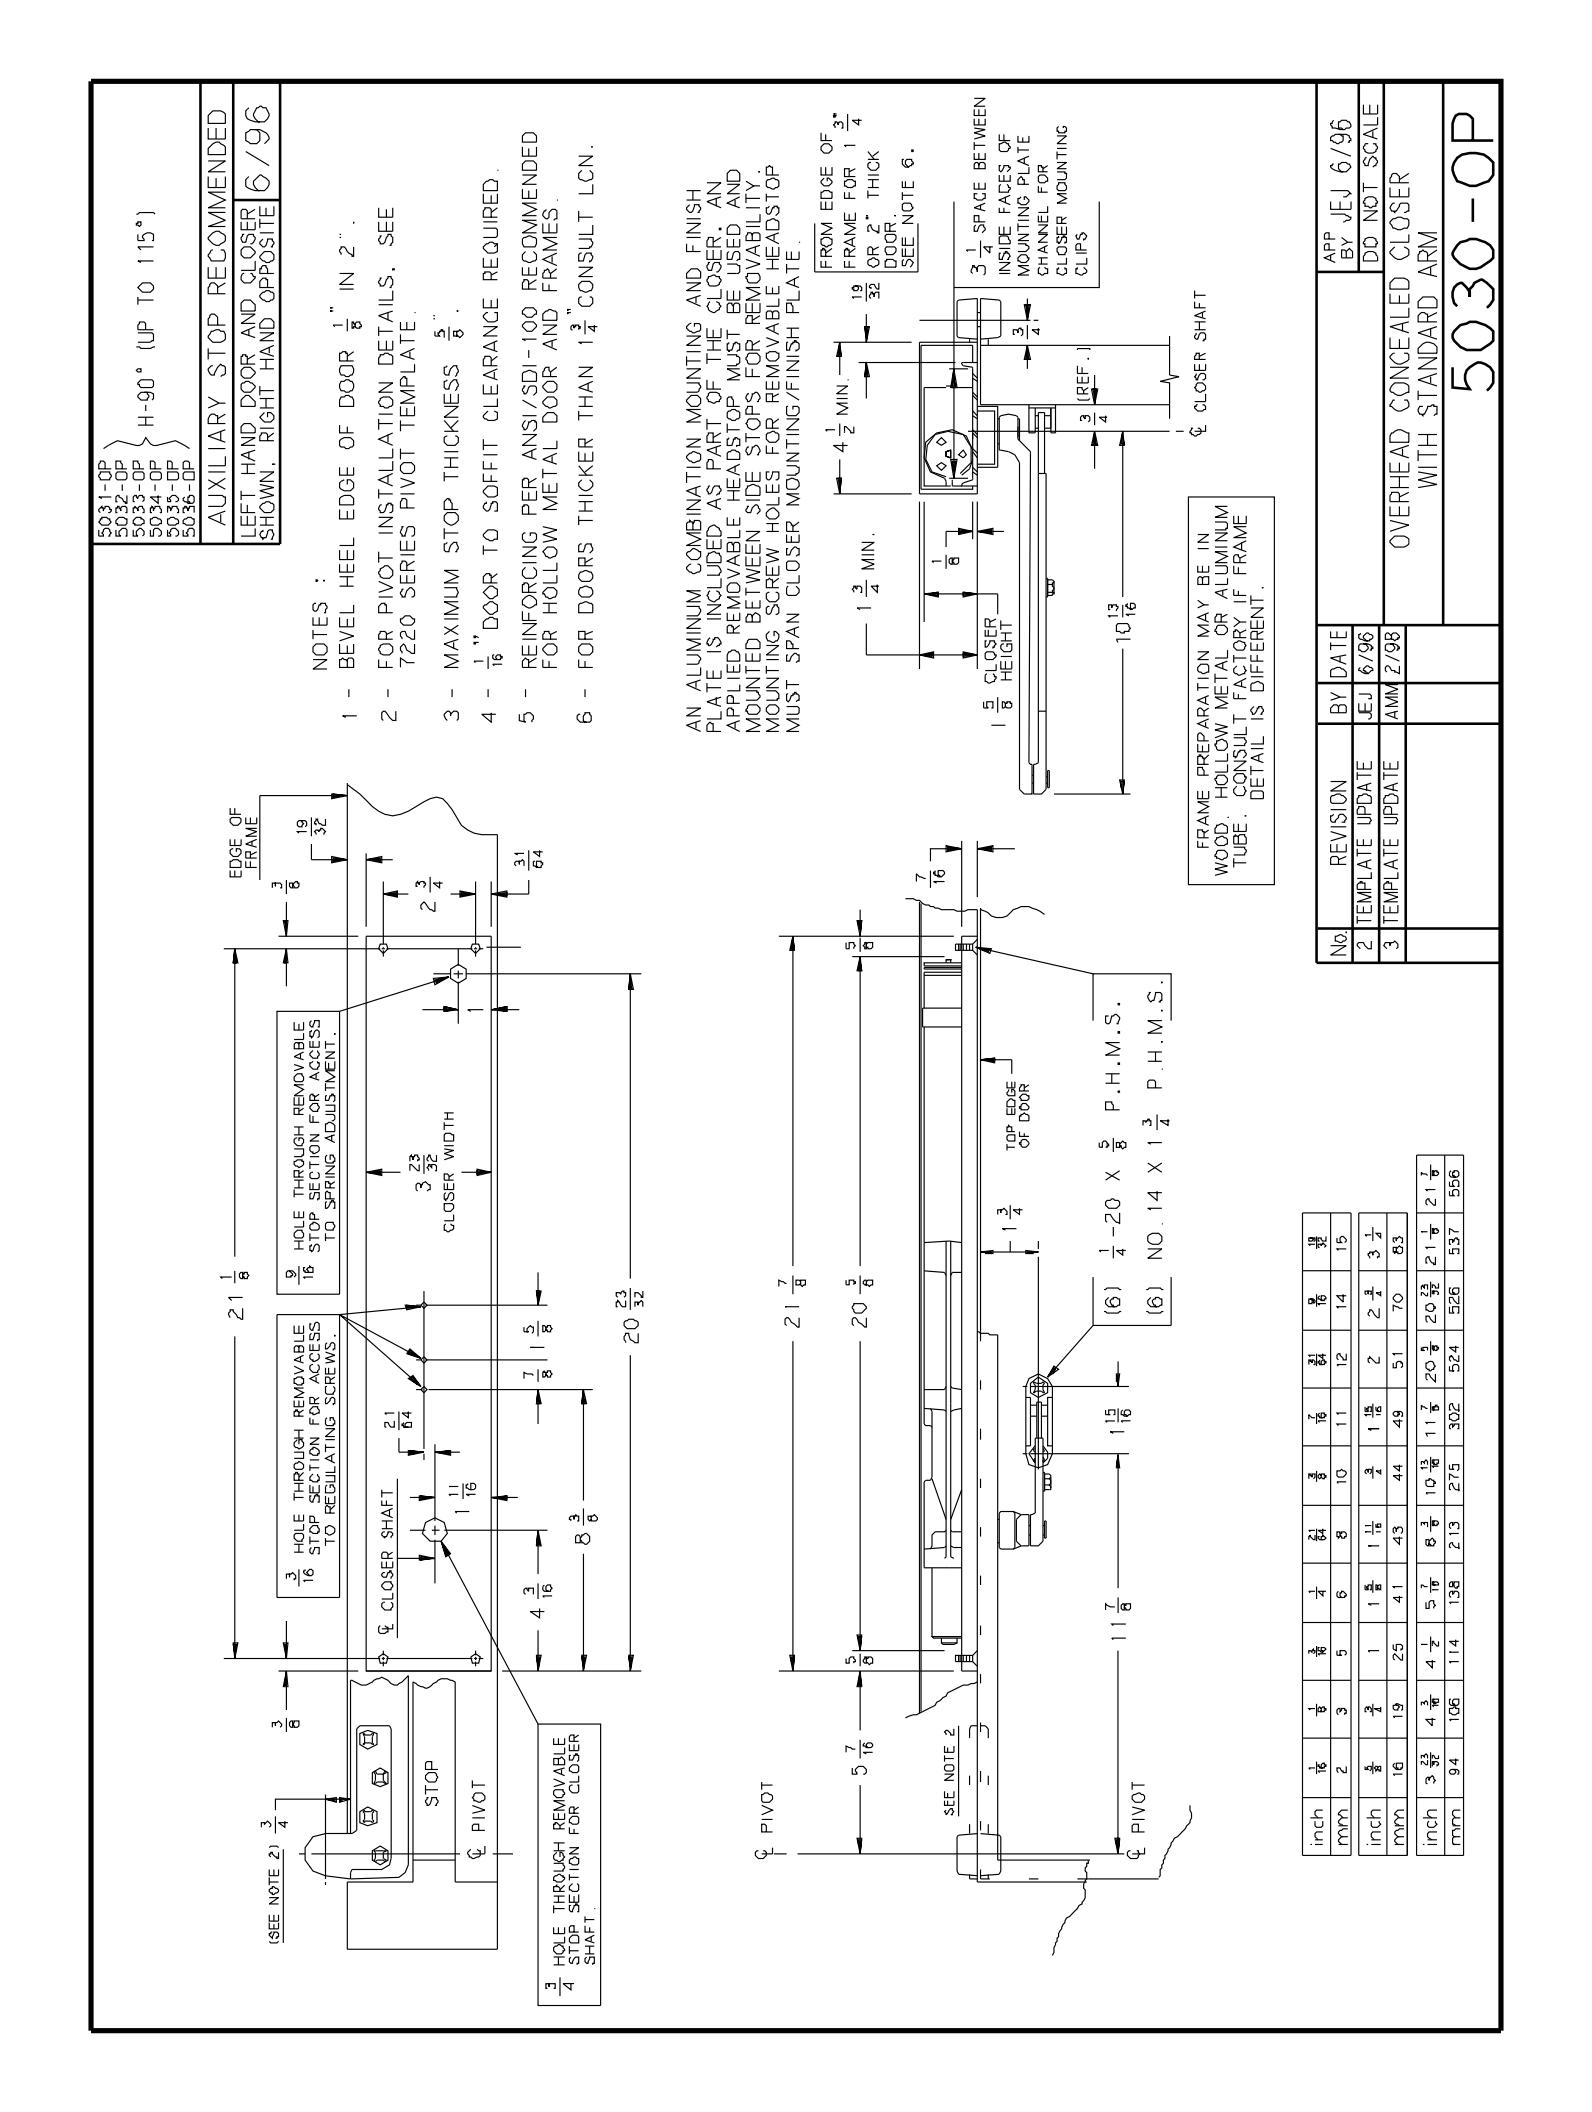
1b Door and Frame Preparation
Determine if door is to be hung on hinges, offset pivots to center pivots. If frame is not prepared for closer, prepare to dimensions shown on proper template. Note: On butt hinge applications, closer can be templated for 100° or 180° of opening.
1c Install Closer onto Door
Install closer in prepared frame with fasteners provided. Be sure mounting plate is flush with soffit. Install head stop.
1d Install Door and Closer onto Frame
Hang door. Be sure there is no bind or friction. Place main arm on shaft and push up into position. Insert arm screw and tighten securely. Close door and install shoe. Open door slightly and insert rod in forearm. Close door. Starting with main arm at right angle to door, move arm toward latch until holes in rod and tube line up. Insert and tighten screw.
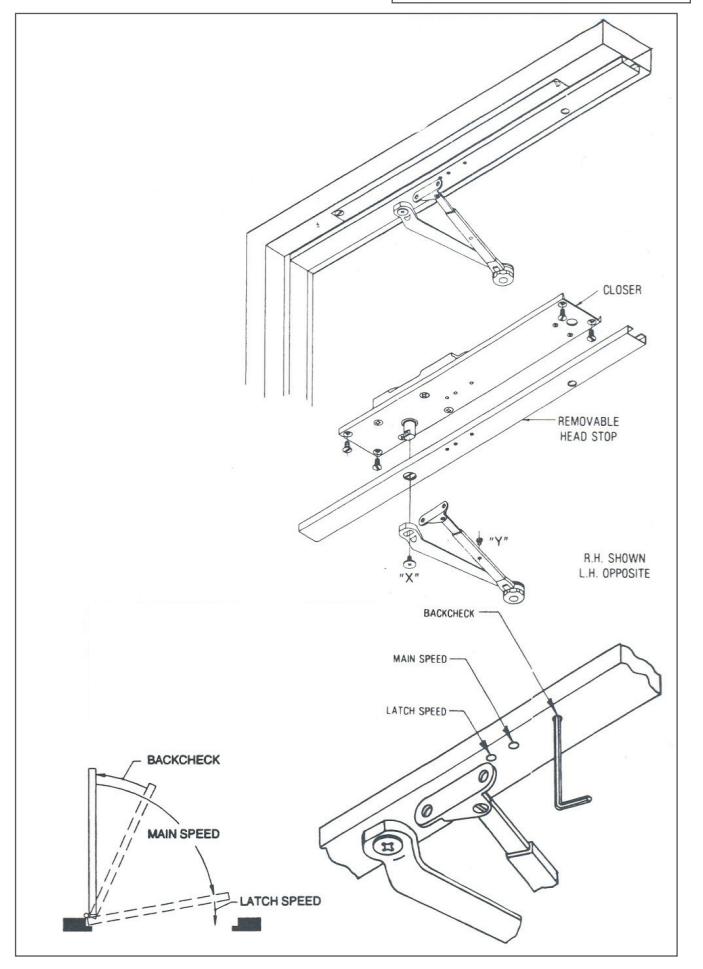
2 Regulation and Backcheck
Door closer regulation is preset at the factory. Adjust as follows only if necessary: A "normal" closing time from a 90° open position is 5 to 7 seconds, evenly divided between main speed and latch speed (see figure below). Use a 3/32" hex wrench to adjust regulating screws. To slow main speed of door, turn middle regulating screw clockwise. To slow latch speed, turn regulating screw closet to hinge clockwise.
BACKCHECK: To increase backcheck intensity, turn regulating screw screw closest to the latch clockwise.
DO NOT USE ABRUPT BACKCHECK. DO NOT USE DOOR CLOSER AS A DOOR STOP.
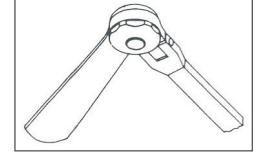
3 Adjusting the Arm
To adjust 90° hold-open arm (up to 100° opening). The hold open features is at the elbow. Arm is preset to hold door open at approximately 90°. To change setting, loosen adjusting nut, open door to desired hold open position, tighten adjusting nut.
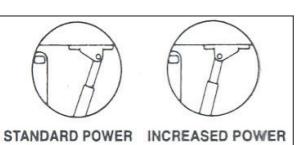
4 Closing Power
Adjust CLOSING POWER only if more power is needed. Closer is shipped with minimum closing power pre-set. To increase CLOSING POWER turn spring adjusting screw clockwise. Maximum adjustment 36 turns.

To adjust for additional closing power at latch. (Regular & 90° H.O. only)
- 1. Remove screw "Y" (step 1d) and separate rod from tube.
- 2. Remove shoe screws and turn shoe over.
- 3. Reassemble arm.

© Allegion 2015 Printed in U.S.A. 14126 Rev. 06/15-g

| Additional Notes: | Revision | n History | Revision Description: | ||||||||
|---|---|---|---|---|---|---|---|---|---|---|---|
| 1. None | F | G | Н | J | К | L | G > Revised artwork | ||||
| 043228 | |||||||||||
| Material | Material White Paper | Edited By | Approved By | EC Number | Release Date | ||||||
| J. Ellis | M. Roberts | 06-10-15 | |||||||||
| Notes 1. printed two sides 2. printed black | Title | ||||||||||
| 5030 Series Instruction Sheet | |||||||||||
| 3. tolerar | 3. tolerance ± .13 4. printed in country may vary 5. drawings not to scale |
Creation Date
05-10-10 |
Number Revis | Revision | |||||||
| 14126 | G | ||||||||||
| J. didwiii |
Created By
N/A |
Activity
3899 Hancock Expwy |
|||||||||
| Software: InDesign CS6 | Security, CO 80911 | © Allegion 2015 | |||||||||