Isonas Pure Access and Entrust Datacard TruCredential
Open the original PDF document
View PDF

How to Integrate ISONAS Pure Access and Entrust Datacard TruCredential
ISONAS and Entrust Datacard have built an integration allowing the transfer of users from Pure Access to TruCredential for badge printing purposes. The integration allows for Pure Access to be the single point of management for user information while supporting badge printing through TruCredential.
Software Requirements
-
1. Pure Access Cloud or Pure Access Manager License
- a. **Please Note: If using Pure Access Manager and TruCredential these must be hosted on Windows server 2012R2 in separate virtualized environments or on separate physical servers.
-
2. TruCredential-ISONAS Integration License (Express, Plus, Professional, Enterprise).
- a. **Please Note: if purchased from ISONAS or ISONAS partner, all licenses include the ISONAS integration license.
To configure TruCredential with Pure Access ensure you are running the latest version(s) of both software with a minimum of TruCredential v7.6 and Pure Access Manager v2.11.1 with API v1.0.
Configuration Steps
- 1. First set up and register your Pure Access system, connect all doors, add users and credentials and schedules. (this guide assumes Pure Access is fully set up).
- 2. On the Pure Access side, establish your API token and password. This acts as your username and password equivalent to allow for TruCredential and Pure Access to communicate securely.
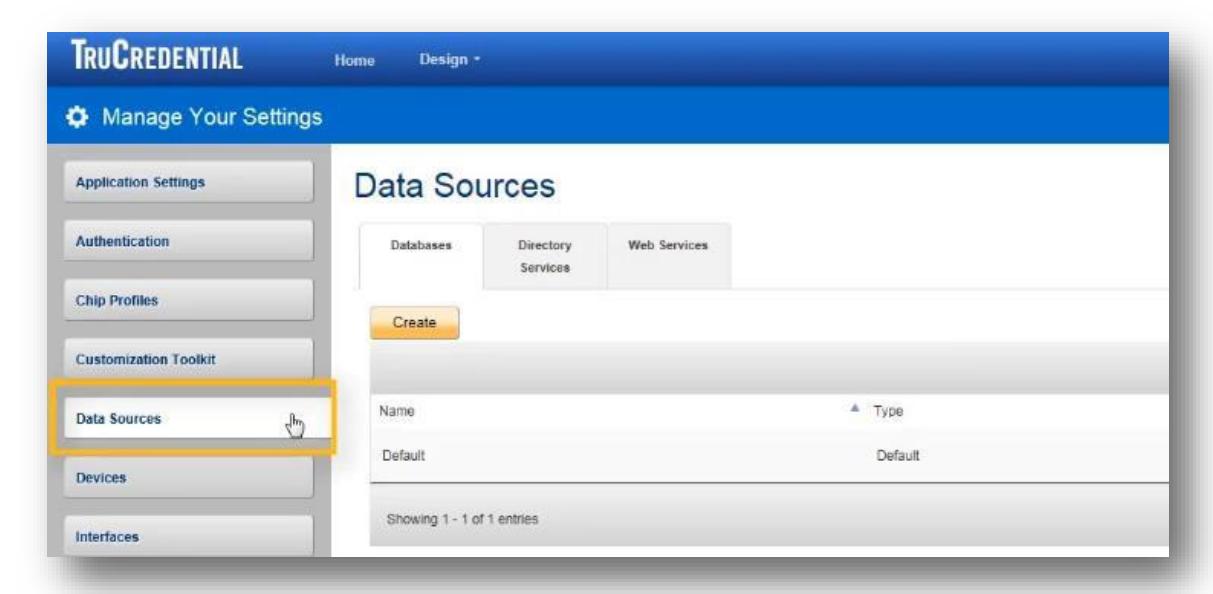
Managing API Tokens in Pure Access
You can manage your API tokens by logging in to your tenant in Pure Access and navigating to the settings page, then to the API Tokens page from the top navigation bar.


To assign a token, select the + API Token button

You can assign both a name and an optional expiration date for your new token. In the case of a Datacard integration, name the token TruCredential or Datacard. By default, all new tokens will only provide read only access. You can create a token with both read a write access by unchecking the "Read Only" checkbox. Read-Only have sufficient permissions for this integration.
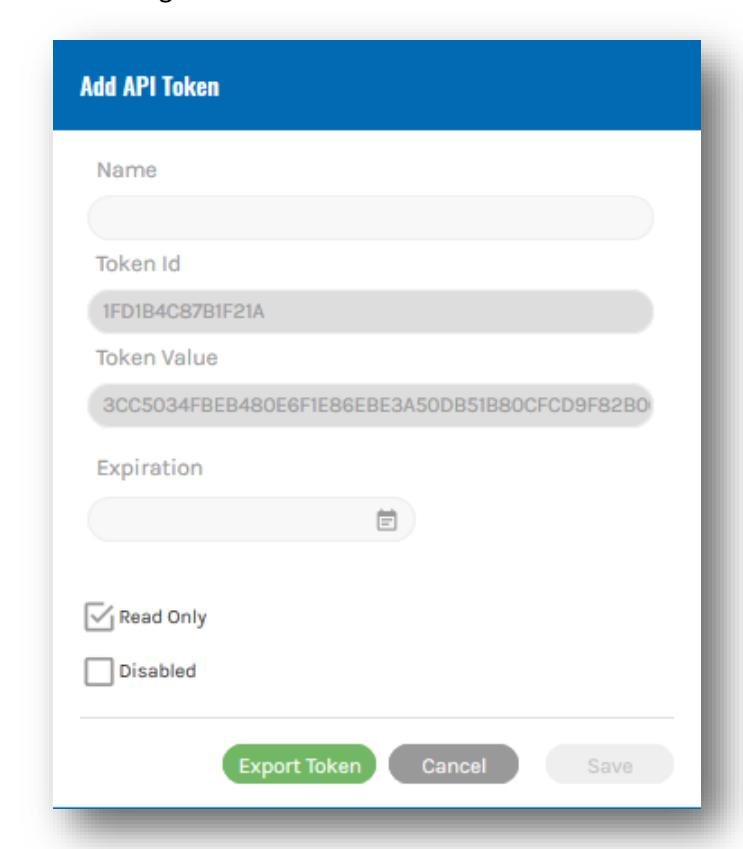
You must export a token before saving it as the Token ID and Token Value are NOT stored in Pure Access for security reasons. The export button will generate a .csv file with all of the necessary information about the token.
The token ID and Token value will need to be be added to the Data Source Configuration – Web Service in TruCredential to authenticate your tenant.
Everything is now set up in Pure Access. Next you'll want to launch the TruCredential Application.
Configuring the ISONAS Web Service in TruCredential Software Version 7.4
If you are familiar with TruCredential, you will configure the ISONAS web service as a data source and edit the workflow and field connection of an existing credential to use the ISONAS web service as the data source. Here is a video link on the set up and configuration should you prefer to follow that.
1. Choose Settings from the main page.


2. Select Data Sources
3. Then select Web Services


4. To create a new Web Service with Pure Access, select the Create button. The Data Source Configuration- Web Service box will appear. From here the set up should be:
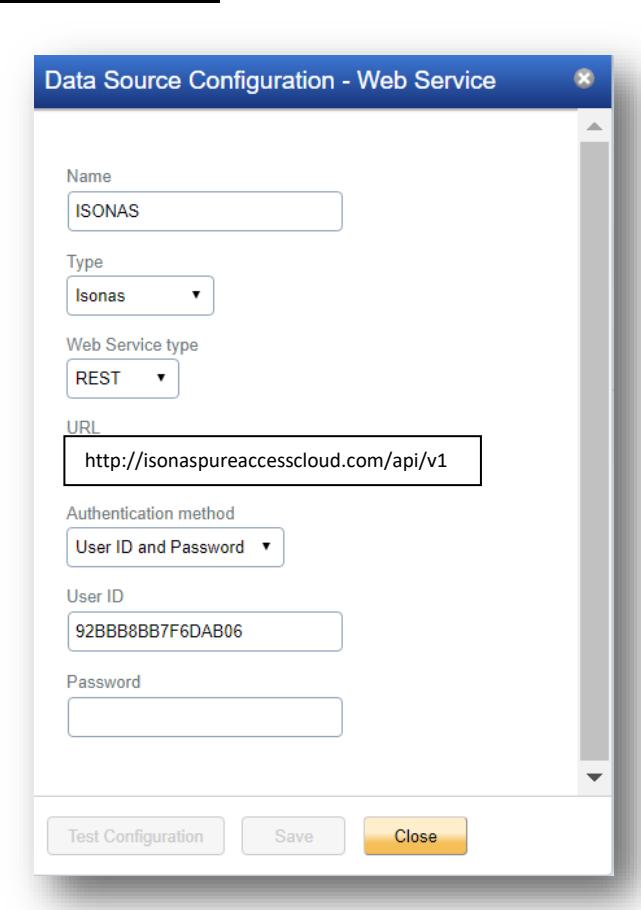
Pure Access Cloud Settings
a. Name: ISONAS b. Type : ISONAS
c. Web Service type: REST
d. URL : http://isonaspureaccesscloud.com/api/ v1 e. Authentication method: User ID and Password
f. User ID: This is the API Token ID you established above
g. Password: This is the API Token Value you exported from Pure Access above.
Pure Access Manager Settings
a. Name: ISONAS b. Type : ISONAS
c. Web Service type: REST
d. URL: http://yourmachineip:3050/api/v1
e. Username: Pure Access Manager username (see admin text file on PAMinstall)
f. Password: Default PA Manager password or whatever you changed thisto
Example of Pure Access Cloud Configuration:

Configuring Field Connections
1. After setting up ISONAS as a data source, you'll need to enable it for the specific workflow you would like to use. Navigate to the workflow page by clicking Design Workflows, then click the "edit" icon on the right side of the screen for the workflow(s) you would like to integrate with Pure Access. If your workflow is already connected to a different data source, be sure to disconnect it from the Design Field Connections page.

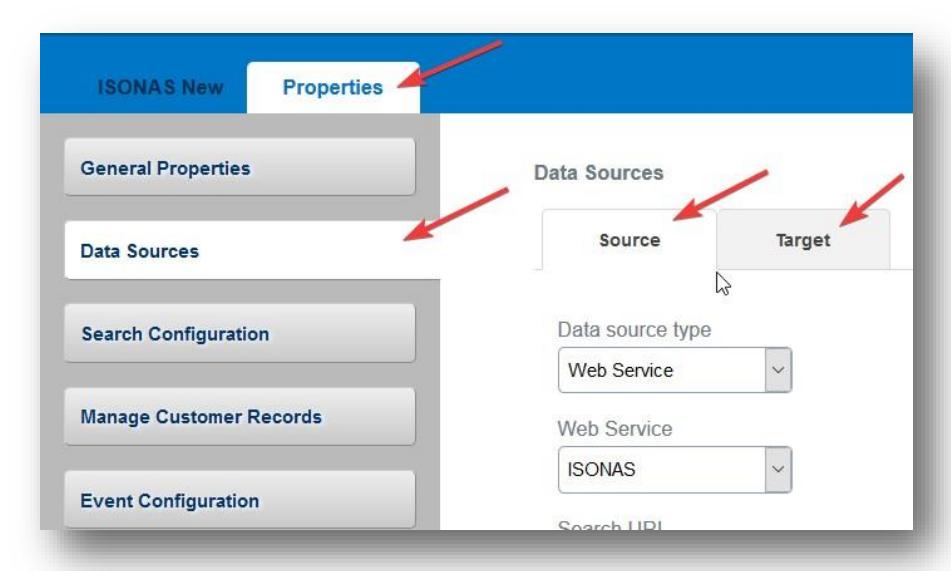
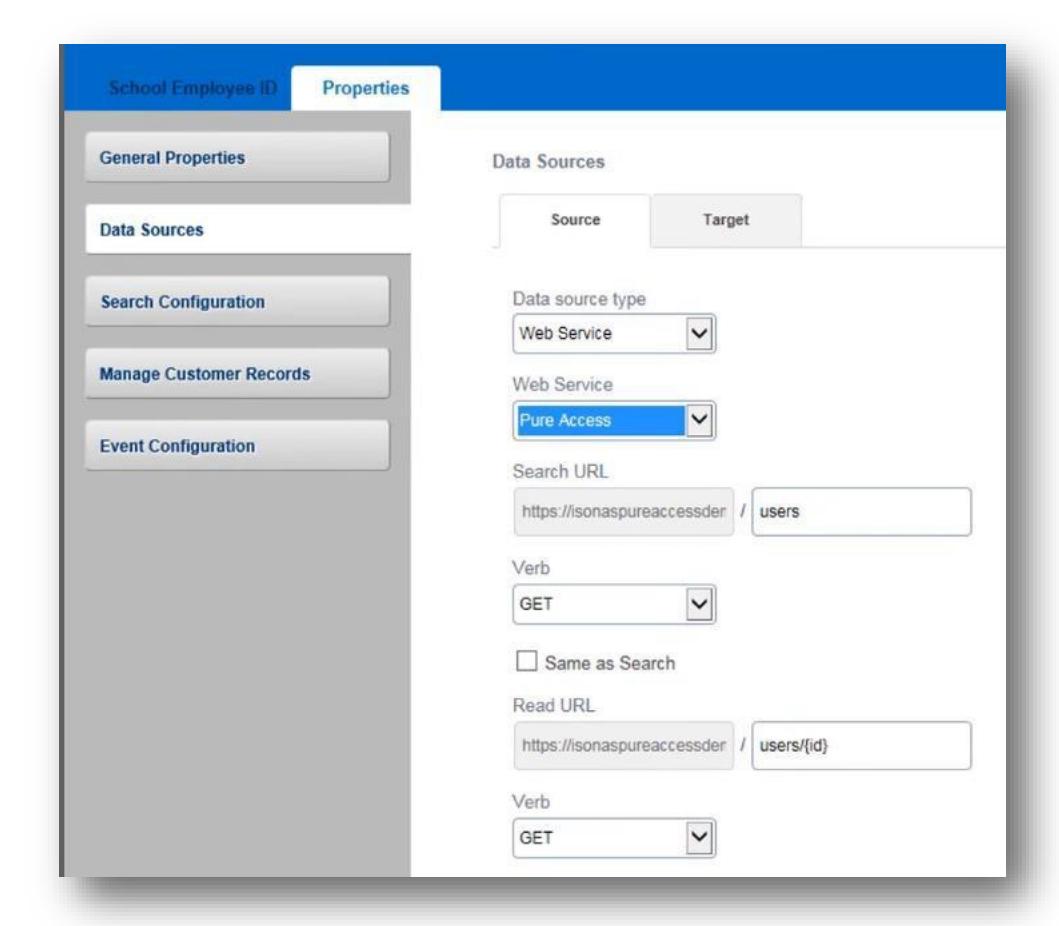
2. At the top of the screen, select "Properties" then "Data Sources"
-
3. Here, we can enable ISONAS as the data source for this workflow using the followingsettings:
- a. Data Source: Web Service
- b. Web Service: ISONAS (or whatever name you chose in the "Data Source Configuration" portion of this guide
TruCredential will then automatically complete the remaining information needed to create a connection.
4. Next select the Target tab. For the connection with Pure Access we want our Target to be the same as our source so we will leave 'Same as Source' selected. Then save your changes.

Data Source Configuration Example:
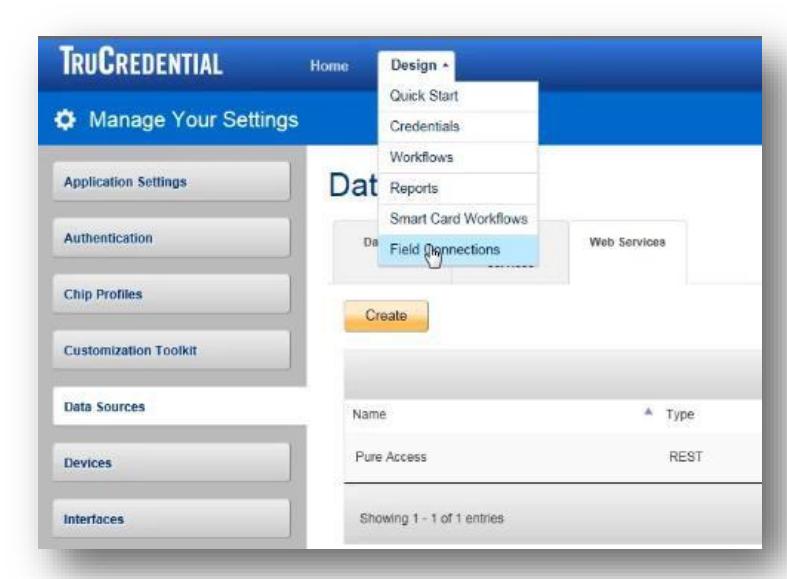
5. Finally, you need to configure the correct field connections between ISONAS and TruCredenial. Click on "Design" then "Field Connections."

6. Add a new field,select the Add button and then type the name of the field you want to map. Be sure to type the name exactly as it appears below – these identifiers are case-sensitive.
• First Name: firstName • Last Name: lastName
• Image: image
• Notification Email: notificationEmail
• Middle Initial: mi • Area ID: areaId
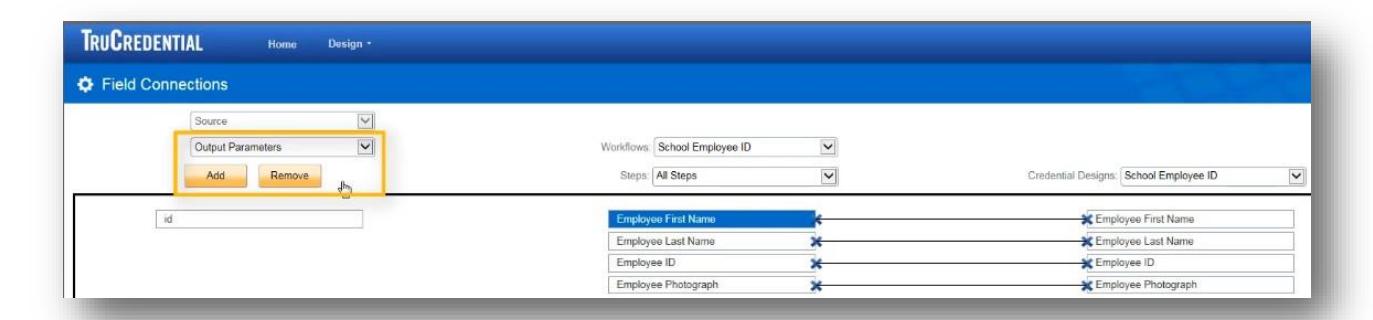
7. Once you have added all the fields you want to map, pair them to the named field in your workflow. See mapping below.
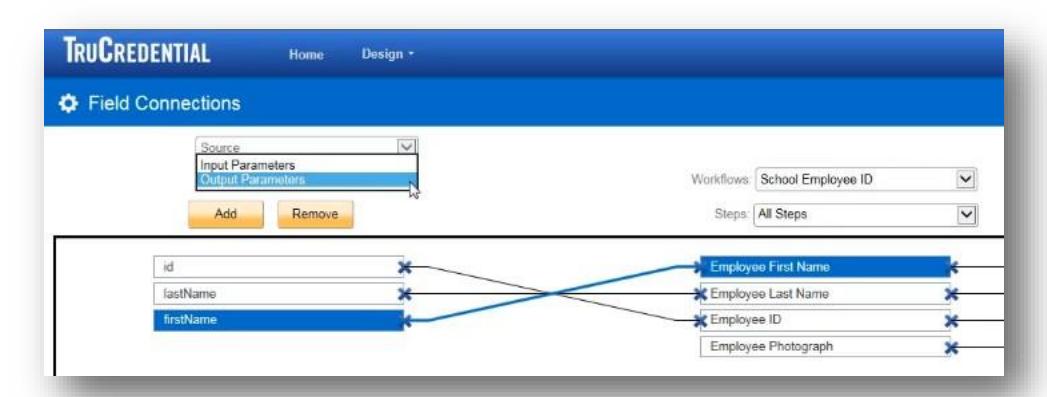
- 8. Once you have selected the output parameters, then choose Input Parameters from the same drop down. Add the same fields and map them to the Workflow fields.
- 9. The configuration of the ISONAS\TruCredential integration is now complete. Make sure to save your changes before navigating away from the page.

Additional Resources
TruCredential How To Video Library
TruCredential ISONAS Integration – Configuring the ISONAS Web Service in TruCredential 7.4
How to Install Datacard's TruCredential and Pure Access Manager on the Same Server