Isonas Network Quick Start Guide
Open the original PDF document
View PDF

PURE IP™ READER CONTROLLER QUICK NETWORK CONNECTION INSTRUCTIONS MODELS: RC-04 ALL MODELS
**Before starting please confirm the following items**
- Download the latest ISONAS Configuration Tool from www.isonas.com and go to Quick Links in the upper right hand corner.
- The RC-04 functions best when configured to use DHCP (factory default). Please check with your Network Administrator to ensure DHCP is available and if possible use DHCP reservations.
Questions? Scan our QR code or visit www.isonas.com/support/installFAQ

- The default for the RC-04 is DHCP and Client Mode set to isonaspureaccesscloud.com if this is the configuration needed no further changes to the device are needed!
- When connecting Pure IP™ devices to Pure Access™ Cloud ensure that port 55533 is open outbound to ensure the Pure IP™ device can connect
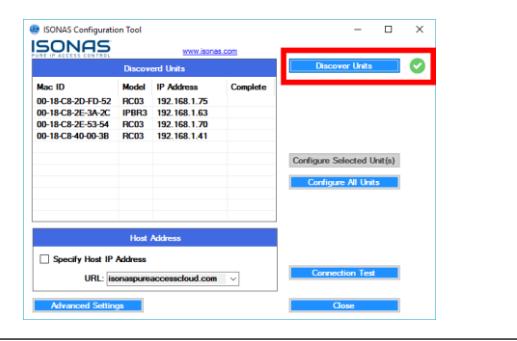
Step 1
Run the Configuration Tool and click on the button
Step 2
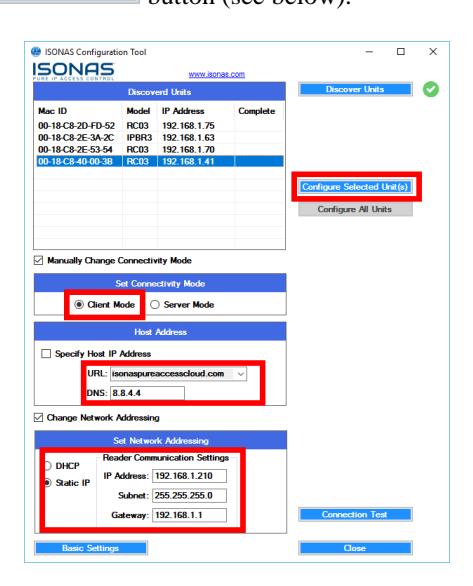
To assign static addresses to the devices click on the button. This will expand the window and offer more options (see below).
- 1. Type in the IP address, Subnet and Gateway in the appropriate field. Note that static addresses can only be assigned one unit at a time.
- 2. Ensure the unit is set in Client Mode, the correct URL is set (or Host IP for Pure Access) and a valid DNS address is present. The default is 8.8.4.4 which is free Google DNS.
- 3. Highlight the unit to be configured and click on the button (see below).
Step 3
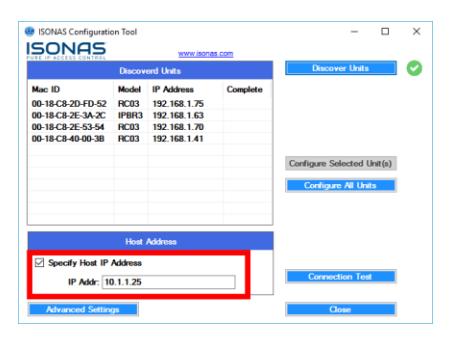
When using Pure Access™ Manager the address of the Host will change. Where it says place a check mark in the box and enter the IP of the Host (see below).
Step 4
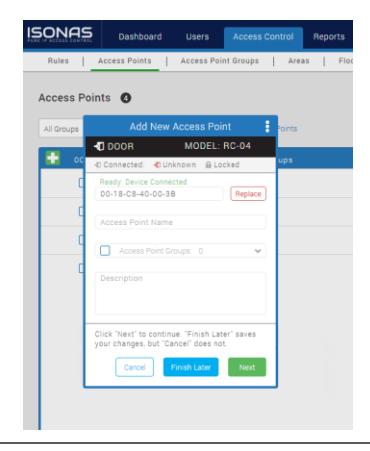
Add the device to Pure Access™ using the steps below. If you experience issues please scan the QR Code above for additional resources or see the network insert for best practices.
- 1. Log into your Pure Access™ instance via a web browser
- 2. Click on the tab at the top and then click on the tab below that.
- 3. Click on the icon to add the RC-04 to the system.
- 4. Type in the MAC address of the RC-04 and either tab to the next field or left click in the Access Point Name field. The device should now show above the MAC address field.
- 5. Enter in the Access Point Name and continue on with the configuration wizard.