Instructions for Using Microprox Proximity Tags with Low Profile PK & PA Access Control Products
Open the original PDF document
View PDFInstructions for Using MicroProx® Proximity Tags with Low Profile PK and PA Access Control Products

The MicroProx Tag is supplied with a self-adhesive backing which allows it to be securely attached to any smooth non-metallic item. This item then becomes an HID proximity credential similar in operation and function to an HID proximity card or fob.
When the MicroProx Tag is applied to an access control card, follow the suggested placement locations shown below. If the card is used in a swipe type reader, sufficient clearance for swipe operation must be allowed. Adequate clearance should be checked before applying Tag.
Note: The MicroProx Tag is not for use on cards that use full insertion or tractor feed readers.
MicroProx Placement
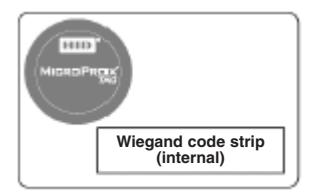

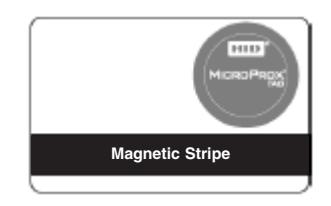
Wiegand Swipe Card Contact Smart Chip Magnetic Swipe Card
Tag dimensions are 1.285" diameter x 0.070" thick (32.6mm x 1.8mm)
Note: Each Tag has a unique Identification Number marked on the peel-off paper backing. Record this number in a safe location before removing the backing.
Attaching Tag to Item:
- 1. Item must be non-metallic for Tag to operate properly. Metal shields the sensor, making the Tag inoperative.
- 2. Surface must be dry, clean and oil/grease free.
- 3. Remove paper backing and carefully place Tag where desired on item.
- 4. Caution: Tag is difficult to reposition or remove once attached.
- 5. Press firmly around edges of Tag to bond adhesive.
For additional information, please contact the SARGENT Electrical Technical Group at 800.810.WIRE (9473).

Programming Instructions:
Programming the Low Profile lock controller to use a MicroProx Tag is done in the same manner as programming a standard proximity card or fob. This can be done using the SofLink Plus software or by "Presentation" to the keypad of the Low Profile lock.
Programming via SofLink Plus Software (PK or PA):
- 1. Select the "User Data" option in the SofLink Plus application software.
- 2. In the "User Directory" tab, select "Add" and enter the user's first and last name.
- 3. Double click on the "added" user which will bring up the "User Data" screen.
- 4. Enter the specific user information such as user #, type, keypad code (if applicable) and active status.
- 5. Enter the Identification Number from backing of the MicroProx Tag in the "Card/FOB" section.
- 6. If applicable, assign any time zones appropriate to this user.
- 7. Click on "Apply" and "OK" to save the settings.
- 8. Download settings to lock controller as described in Users Manual.
For more detailed information, refer to the SofLink Plus Users Manual, Sections 3.4 and 4.1.
Programming via "Presentation" at the lock (PK only):
To enter Tag only:
|
1.
99 # Master Code * |
Yellow
LED Blinks |
|---|---|
|
2.
50 # 1 # (User Number 04-500) # |
Yellow
LED Blinks |
|
3.
* |
Yellow
LED Blinks Quickly |
|
4.
* |
Yellow
LED Blinks Slowly |
|
5.
Present the MicroProx Tag to the Proximity Reader |
Beep
/ Yellow LED Blinks |
|
6.
* |
Yellow
LED Blinks Slowly |
|
7.
* |
Yellow
LED Goes Out |
To enter a Keypad User Code with Tag:
|
1.
99 # Master Code * |
Yellow
LED Blinks |
|---|---|
|
2.
50 # 1 # (User Number 04-500) # |
Yellow
LED Blinks |
|
3.
User Code (1-6 Digits) * |
Yellow
LED Blinks Quickly |
|
4.
User Code (1-6 Digits) * |
Yellow
LED Blinks Slowly |
|
5.
Present the MicroProx Tag to the Proximity Reader |
Beep
/ Yellow LED Blinks |
|
6.
* |
Yellow
LED Blinks Slowly |
|
7.
* |
Yellow
LED Goes Out |
For more detailed information, refer to the PK Programming section of the Low Profile Installation Instruction Manual.