Installation Instructions for 115,24-115,26,115 Hospital Latch (for 1-3by4in to 2-1by4in Thick Doors)
Open the original PDF document
View PDFInstallation Instructions

115 Hospital Latch
Specialty Hardware
Attention Installer
Please read these intructions carefully to prevent missing important steps.
Note
- Improper installation may result in damage to lock and void factory warranty.
- Other product brand names may be trademarks or registered trademarks of their respective owners and are mentioned for reference only.
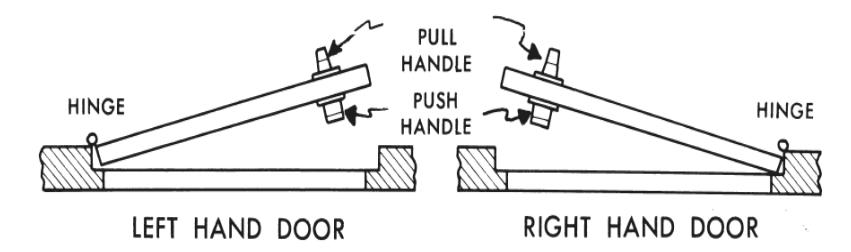
- Handle units are factory assembled for either right or left hand doors. Be sure to use correct hand to match door application.

This product can expose you to lead which is known to the state of California to cause cancer and birth defects or other reproductive harm. For more information go to www.P65warnings.ca.gov.
The ASSA ABLOY Group is the global leader in access solutions. Every day we help people feel safe, secure and experience a more open world.
1 Installation
- Prepare door according to template.
- Place latch case in door with bolt bevel facing the direction of door closing. Screw front into place.
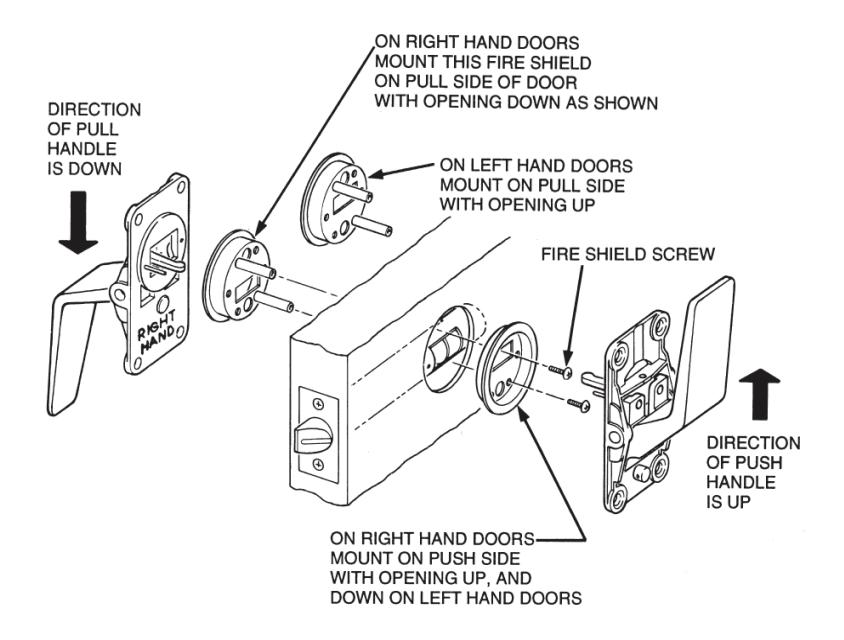
- Mount fire shields to door, using two 4-40 screws provided. Use two 3/8" x 1" long screws for 1-3/4" doors. Use two 7/8" x 1" long screws for 2-1/4" doors.
- Position handle units so that location pin and cam arm enter into corresponding holes in latch case and fire shields.
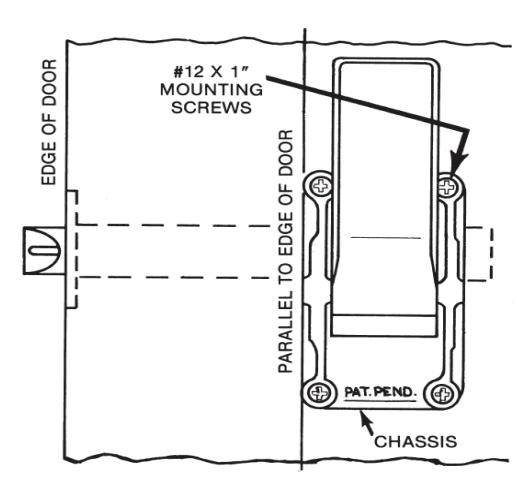
- Line up edge of chassis parallel to edge of door, using a level.
- Mark location of mounting screws. Use a 1/8" (maximum) pilot drill before applying four #12 X 1" flat phillips head mount screws. Repeat procedure for opposite handle unit.
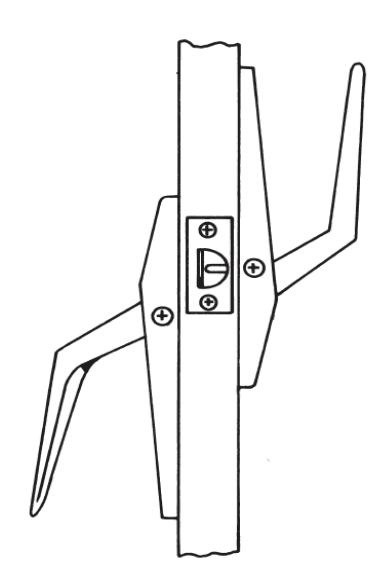
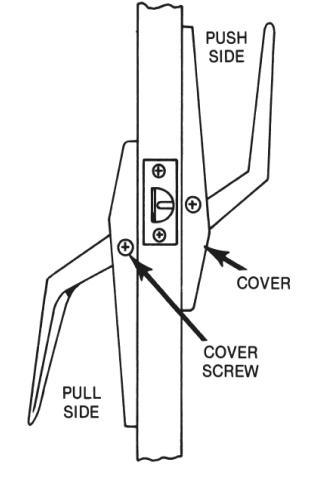
- Apply covers and fasten to chassis with the two screws per cover provided. Tighten screws evenly on each side of cover so that handle does not touch side of hole.
SARGENT Manufacturing Company 100 Sargent Drive New Haven, CT 06511 USA 800-727-5477 www.sargentlock.com